It’s the weekend, and you’ve been looking forward to a movie night all week. You’ve got your snacks ready, and you’re about to start streaming your favorite show on Kodi. But just as you hit play, the Kodi app freezes, crashes, or simply refuses to load.
Frustration sets in as you realize that your Kodi app not working. This scenario is all too common for Kodi users, and it can be a real buzzkill when all you want to do is relax and enjoy some quality entertainment.
Kodi, an open-source media player, is renowned for its flexibility and the vast array of add-ons that allow users to stream virtually anything. However, it’s not without its issues.
Whether it’s Kodi crashing, buffering, or add-ons not loading, these problems can disrupt your viewing experience. But don’t worry—most of these issues can be fixed with a bit of troubleshooting.
In this comprehensive guide, we will delve into the common reasons why your Kodi app not working and provide you with step-by-step solutions to fix these problems.
From clearing cache and updating the app to reinstalling Kodi and using reliable add-ons, we’ve got all the bases covered. We’ll also explore preventive measures to keep Kodi running smoothly and suggest alternatives if Kodi continues to give you trouble. By the end of this article, you’ll have all the tools you need to get your Kodi app back on track and enjoy uninterrupted streaming.
Why Kodi App Not Working
Before we jump into the fixes, it’s essential to understand the underlying reasons why Kodi App working. Knowing the root cause of the problem will help you apply the right solution. Here are some of the most common reasons why Kodi may stop working:
1. Using a VPN
A Virtual Private Network (VPN) can be incredibly helpful for Kodi users, especially if you’re facing issues with streaming or accessing certain content. Here’s how a VPN might fix Kodi problems:
Bypass Geo-restrictions: Some add-ons or content may be restricted in your region. A VPN allows you to bypass these restrictions, giving you access to the content you want. Improve Streaming Speed: Sometimes, internet service providers (ISPs) throttle streaming speeds, causing Kodi to buffer. A VPN can hide your online activity, preventing throttling and improving your streaming experience. Enhance Security: A VPN encrypts your internet connection, safeguarding your data from hackers or prying eyes. This is particularly important when using third-party add-ons.
To use a VPN with Kodi, simply choose a reliable VPN service, install it on your device, and connect to a server. After that, launch Kodi and check if the issues have been resolved.
1. Kodi Crashing
One of the most common issues Kodi users face is the app crashing. There are several reasons why this might happen. Running an outdated version of Kodi can lead to crashes.
As it may not be compatible with newer add-ons or your device’s operating system. Corrupted files within the Kodi app, often caused by incomplete downloads, interrupted updates, or conflicts between add-ons.
Also trigger crashes. Additionally, if you’re using an add-on that’s incompatible with your version of Kodi, it can cause the app to malfunction. Lastly, an overloaded cache, filled with temporary files that accumulate over time, can slow down Kodi and result in crashes.
2. Kodi Buffering
Buffering is another common issue that can ruin your streaming experience. It happens when the video playback pauses frequently to load more data. Here are some reasons why Kodi might be buffering:
Another common issue Kodi users encounter is buffering during streaming. This often happens due to a slow or unstable internet connection, which makes it difficult for Kodi to stream high-quality videos smoothly.
An overloaded cache can also be a culprit; when Kodi’s cache is full, it doesn’t have enough space to store the data needed to keep the video playing without interruptions.
Additionally, incorrect settings in Kodi might not be optimized for your specific internet connection or device, leading to unnecessary buffering. Tweaking these settings can often help reduce or eliminate the problem.
Kodi Add-ons Not Loading
Add-ons are the heart of Kodi, enabling users to stream a vast array of content. However, when add-ons refuse to load, it can be incredibly frustrating. Here are some reasons why add-ons Kodi app not working:
Outdated Add-ons If an add-on hasn’t been updated in a while, it might not be compatible with the latest version of Kodi, leading to malfunctions or the add-on not loading at all.
Repositories are the sources from which you install add-ons, and if a repository is broken or taken offline, the add-ons you installed from it may stop Kodi app Not working.
Internet Issues An unstable internet connection can also cause problems, as Kodi may struggle to load add-ons that require an active connection.
Other Issues
While the issues mentioned above are the most common, there are other problems that can cause Kodi app not working. These include:
- Device Compatibility: Some devices might not be fully compatible with Kodi, leading to performance issues or crashes.
- Lack of Storage: If your device is running low on storage, Kodi might not have enough space to operate correctly.
- Conflicting Apps: Other apps running in the background can sometimes conflict with Kodi, causing it to behave erratically.
How To Fix Kodi App Not Working
Now that we’ve identified the common reasons why your Kodi app not working, let’s dive into the solutions. This step-by-step troubleshooting guide will walk you through the process of fixing Kodi problems, ensuring your app runs smoothly and efficiently.
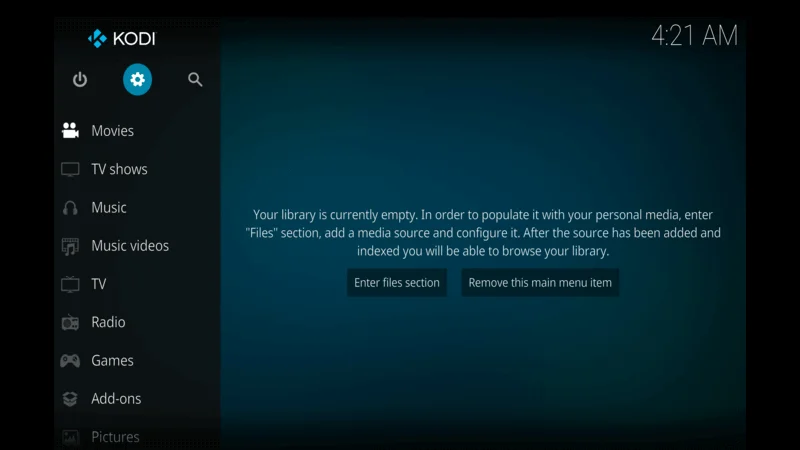
Over time, your Kodi app can accumulate a lot of cache and data, which might slow it down or cause it to crash. Clearing the cache and data can often solve these issues. Here’s how to do it:
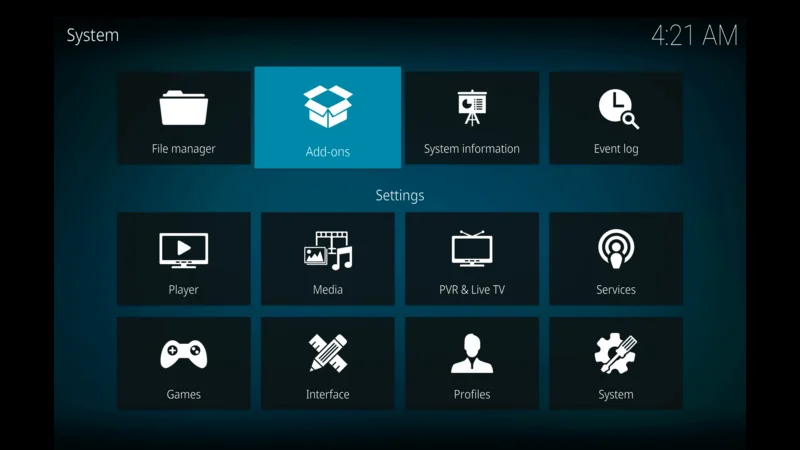
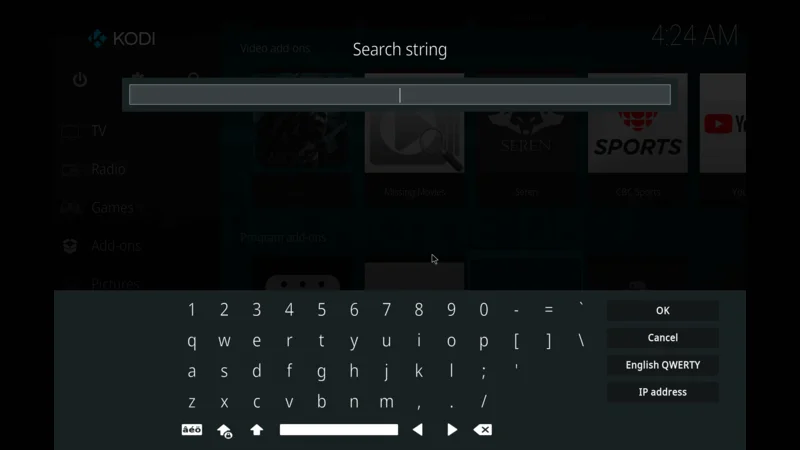
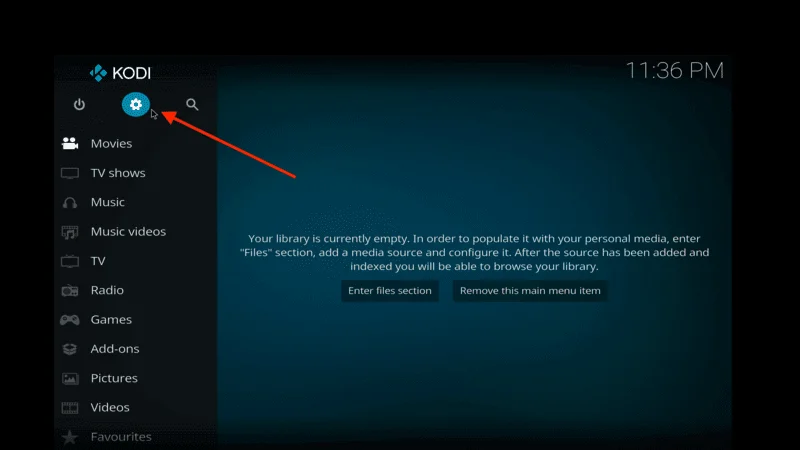
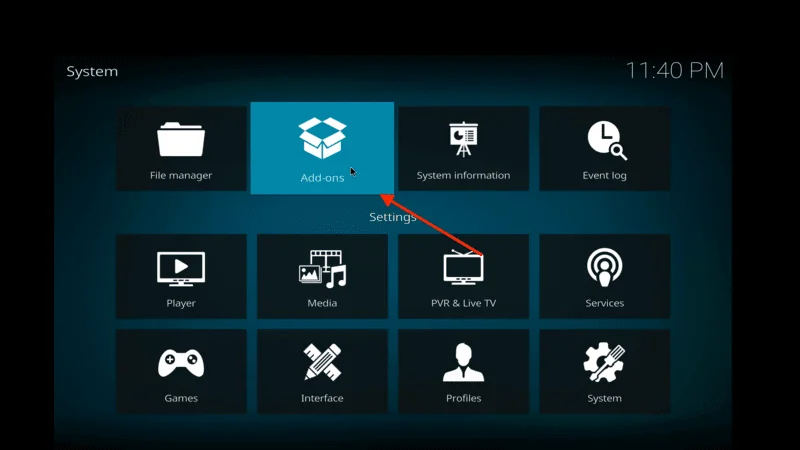
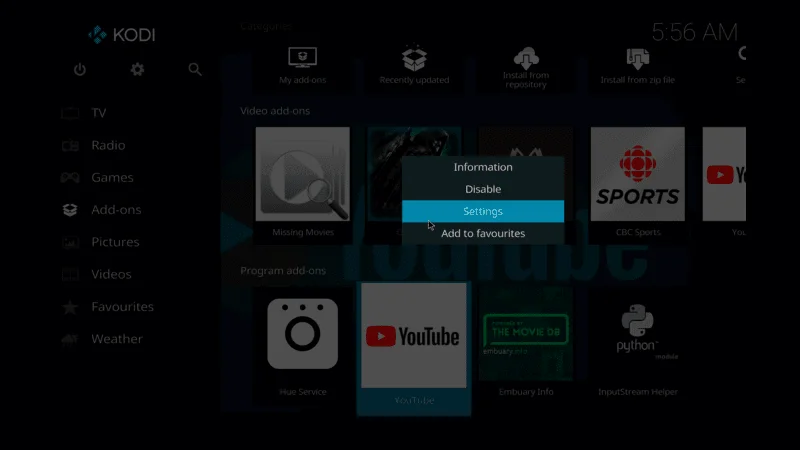
Launch the Kodi app on your device, navigate to the settings menu, usually represented by a Add ons.
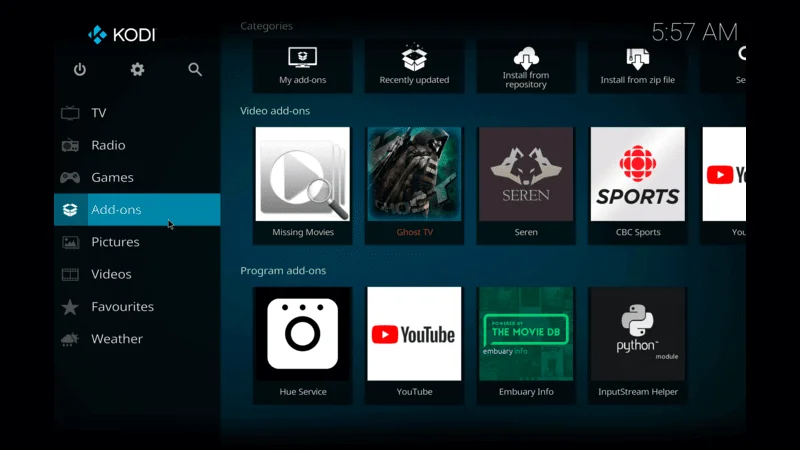
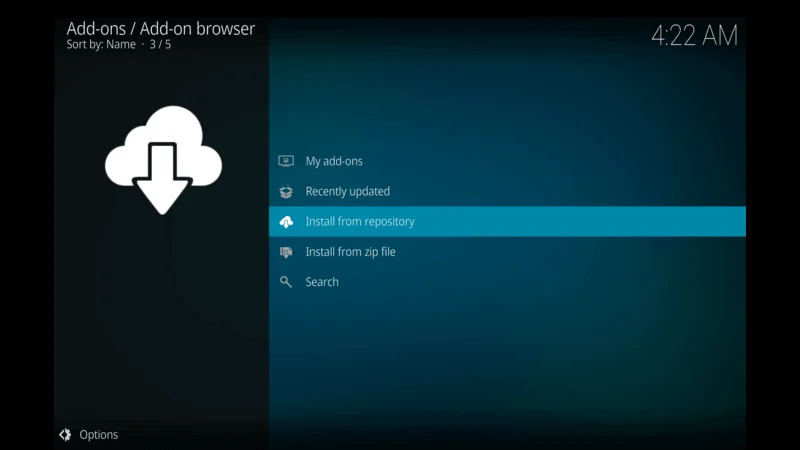
From the Addons menu, find and select ‘Build.
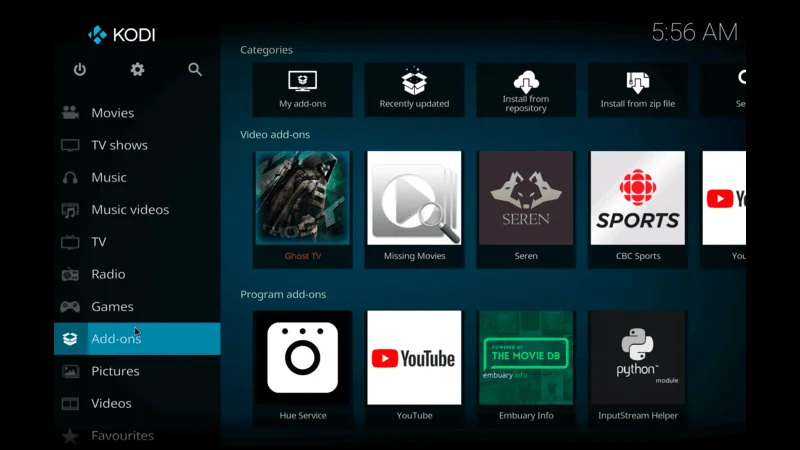
Find Kodi in the list of Built, select it, and then choose the option to clear cache and data.
By following these steps, you can reset Kodi without losing your settings or add-ons. This simple fix can solve many common issues, making it a go-to solution when Kodi app not working.
2. Update Kodi to the Latest Version
Keeping Kodi updated is crucial for smooth performance. An outdated version of Kodi can cause compatibility issues with add-ons, lead to crashes, or result in poor performance. Here’s why updating Kodi is so important:
- New Features: Updates often include new features that enhance the user experience.
- Bug Fixes: Updates address bugs and glitches that may be causing your Kodi app not working properly.
- Security: Updated versions have improved security features that protect your device and data.
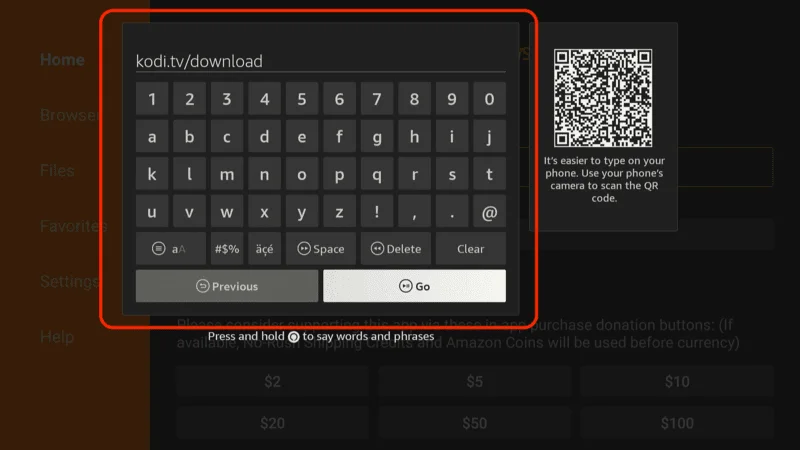
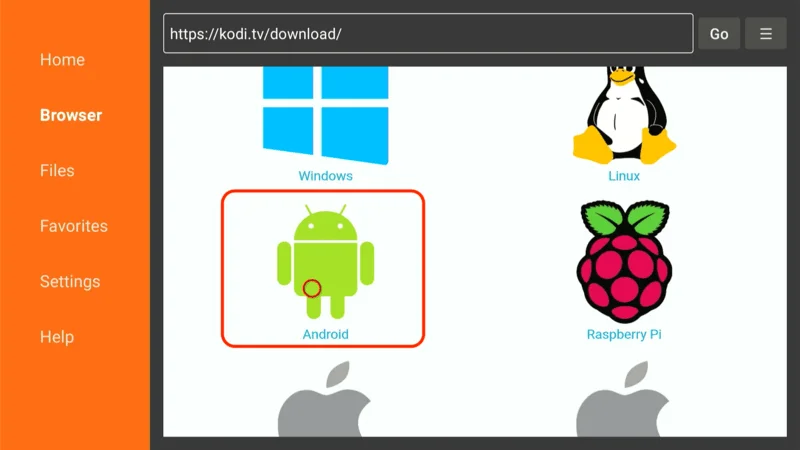
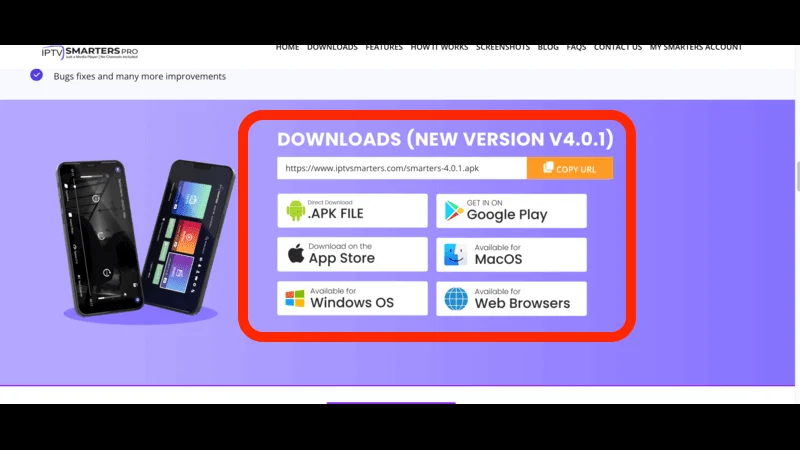
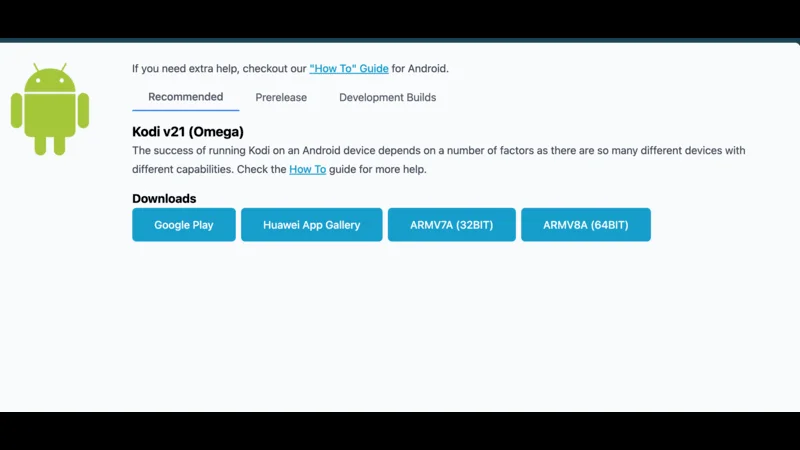
Go to the official Kodi website and download the latest version compatible with your device.
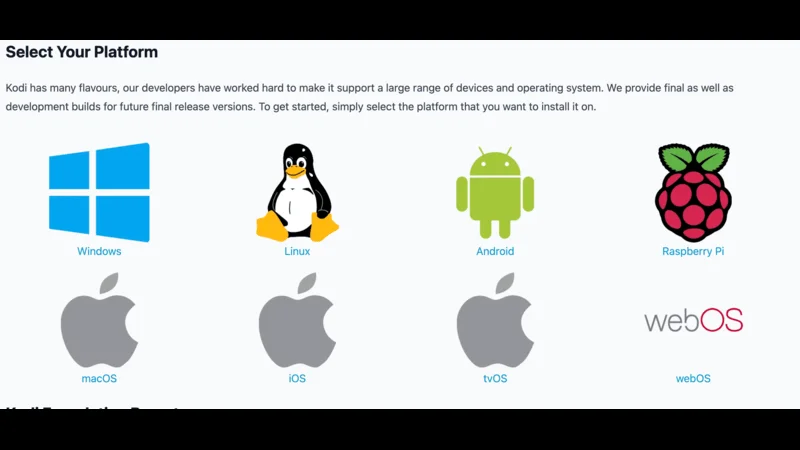
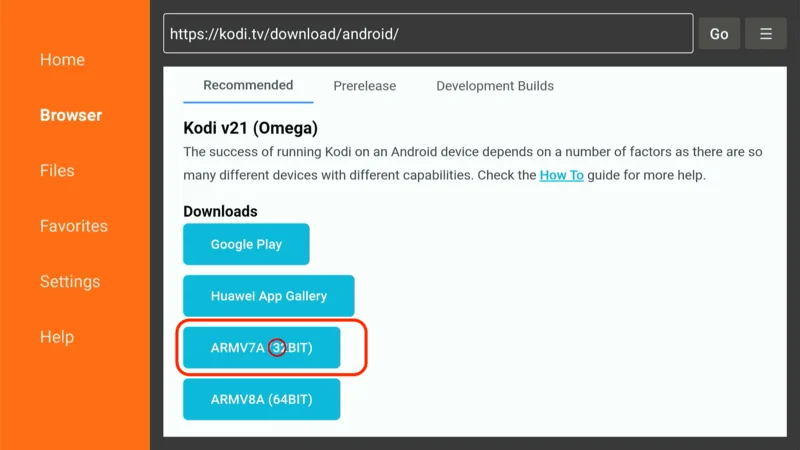
Now select File that your system support
After the update is complete, restart Kodi to apply the changes.
Updating Kodi can resolve a multitude of issues, ensuring your app runs at its best.
4. Check Internet Connection
A stable internet connection is essential for Kodi to function properly. Issues like buffering, slow loading times, or add-ons Kodi app not working can often be traced back to poor connectivity. Here’s a quick checklist to ensure your internet connection isn’t the culprit:
Run a speed test to check your internet connection. Kodi requires a decent speed for streaming without interruptions.

Restart Router: Sometimes, simply restarting your router can fix connectivity issues.
Check Wi-Fi Signal: Ensure your device is within range of the Wi-Fi signal. Weak signals can cause Kodi app not working to buffer or not work at all.
Use Ethernet: For the most stable connection, consider using an Ethernet cable instead of Wi-Fi.
By ensuring a strong and stable internet connection, you can prevent many of the issues that cause Kodi not working.
5. Adjust Kodi Settings
Kodi’s default settings might not always be optimized for your device or internet connection. Adjusting these settings can help reduce buffering, improve streaming quality, and fix other performance issues. Here’s how you can tweak Kodi’s settings:
You can increase the size of Kodi’s video cache to reduce buffering. This involves editing the advancedsettings.xml file to allocate more memory for caching.
If you’re experiencing buffering, try lowering the video quality in Kodi’s settings. This will reduce the amount of data needed to stream the content, which can help if you have a slow internet connection.
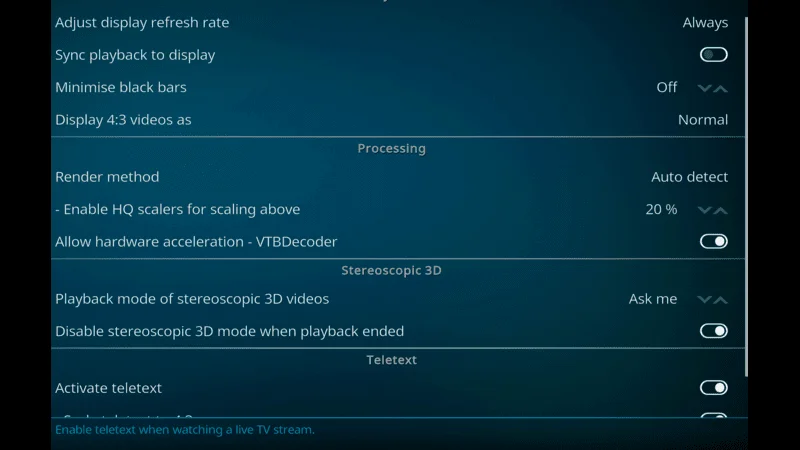
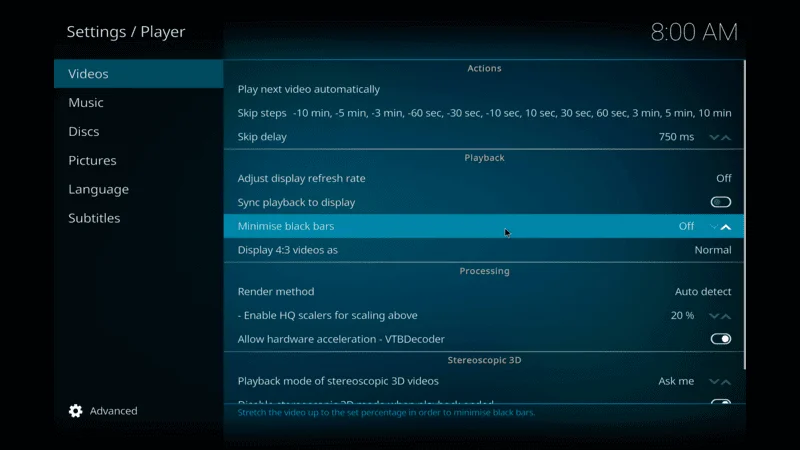
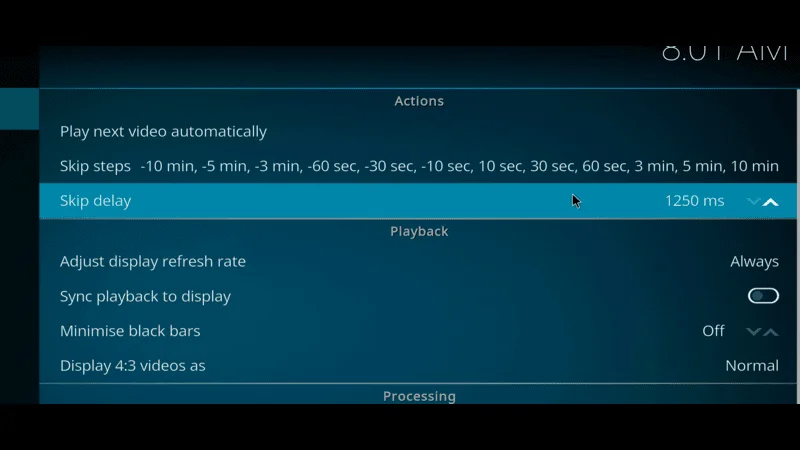
Depending on your device, enabling hardware acceleration can improve video playback. This option can be found in the video settings under Player.
By fine-tuning Kodi’s settings, you can optimize the app’s performance and fix issues related to playback and buffering.
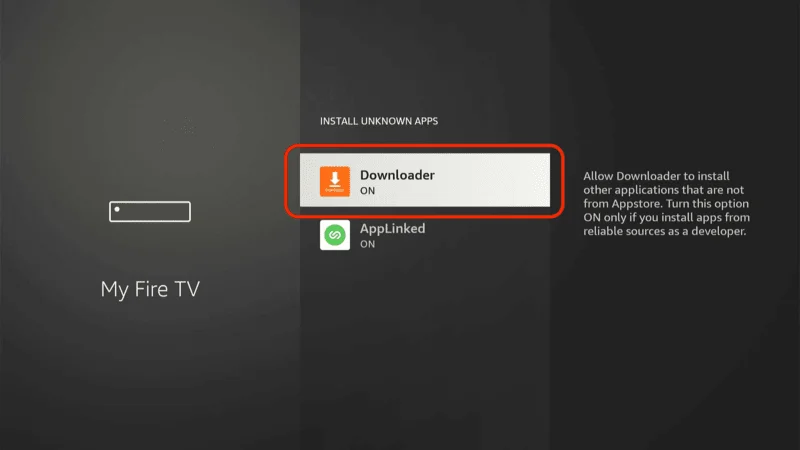
6. Reinstall Kodi App
Sometimes, the best way to fix Kodi problems is to start fresh. Reinstalling the Kodi app can clear up corrupted files or conflicting settings that might be causing issues. Here’s how to reinstall Kodi without losing your data:
Before uninstalling, make sure to back up your Kodi data. You can use a backup add-on or manually save your files.
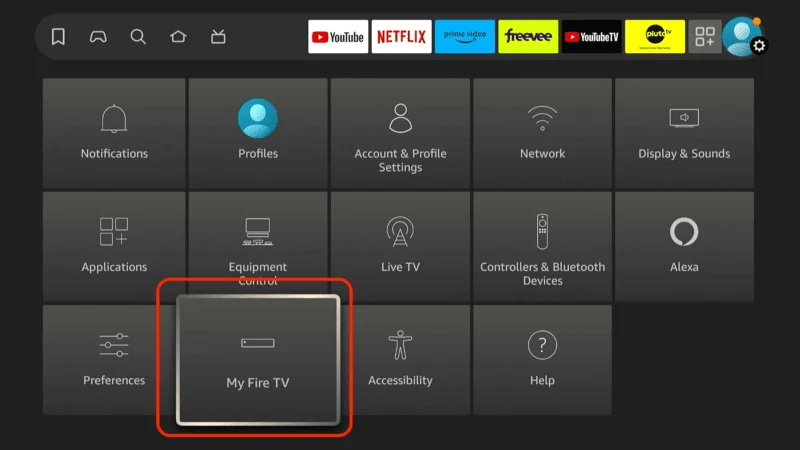
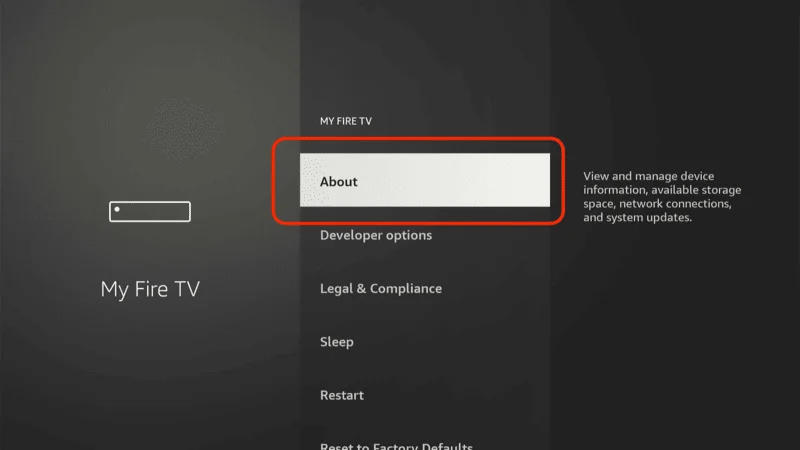
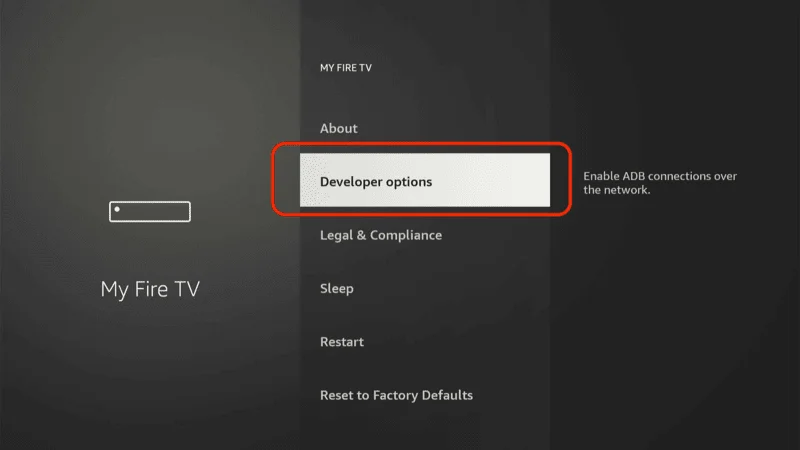
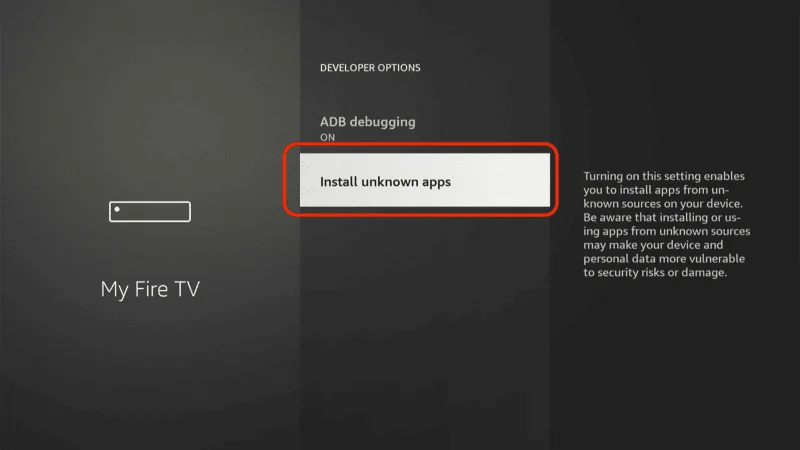
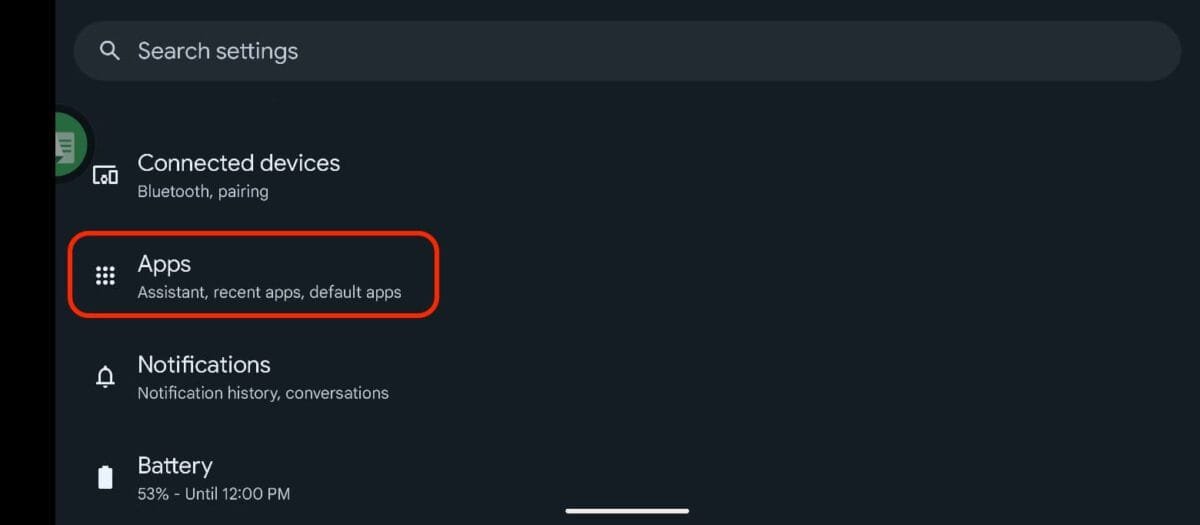
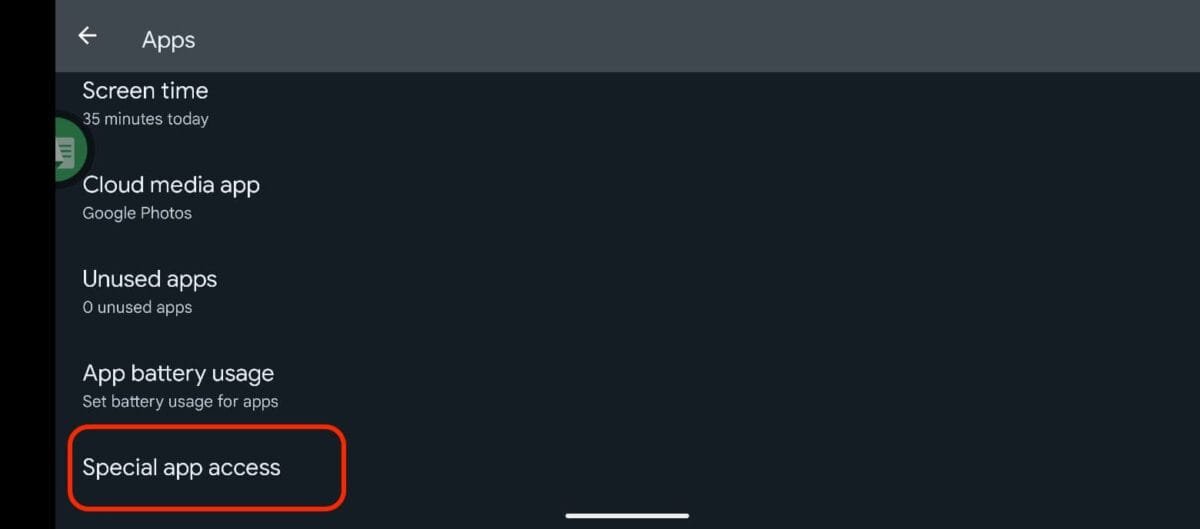
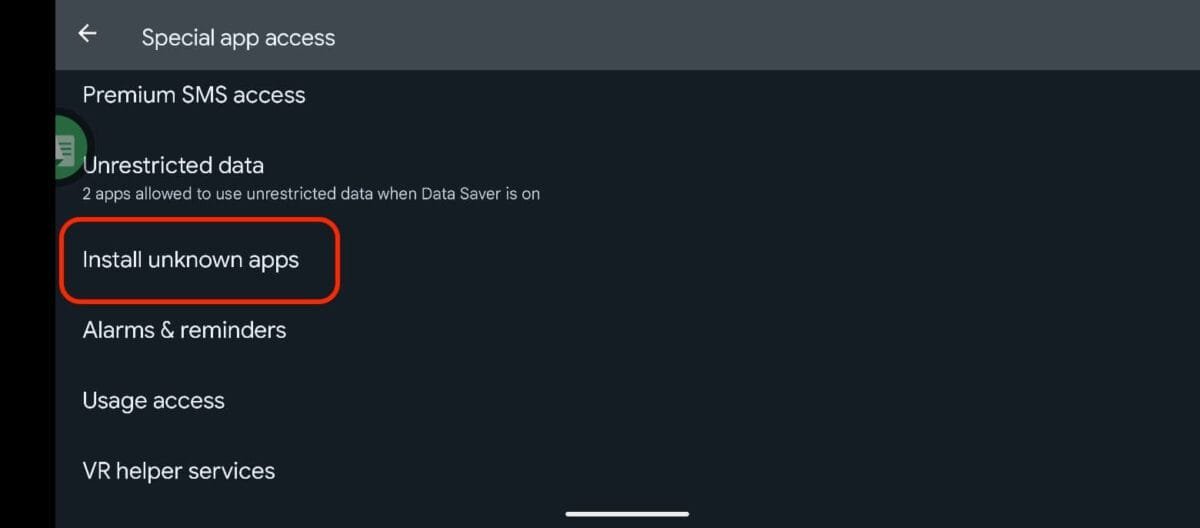
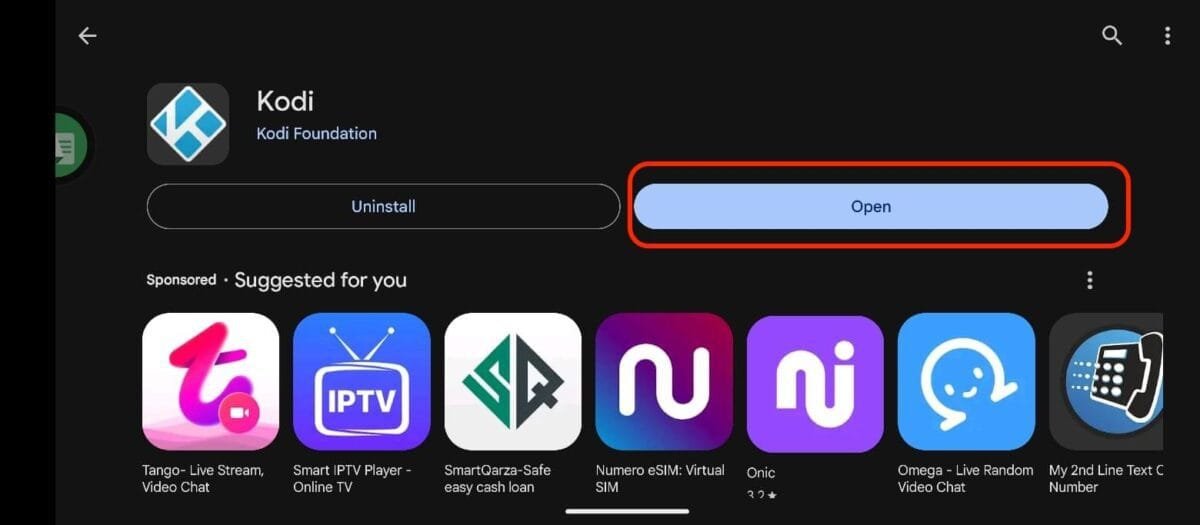
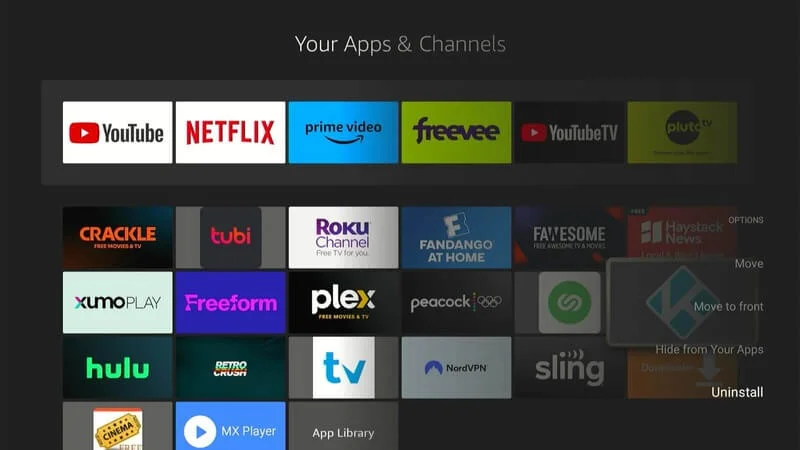
Go to your device’s application settings, find Kodi, and uninstall it.
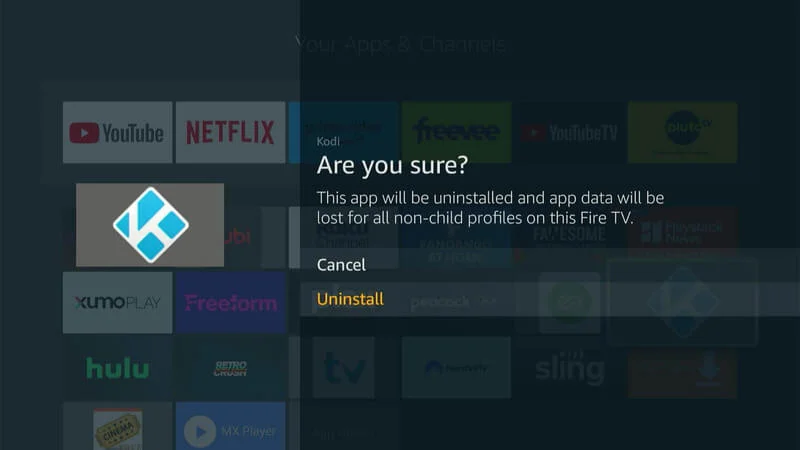
Confrim to uninstall Kodi on your Device.
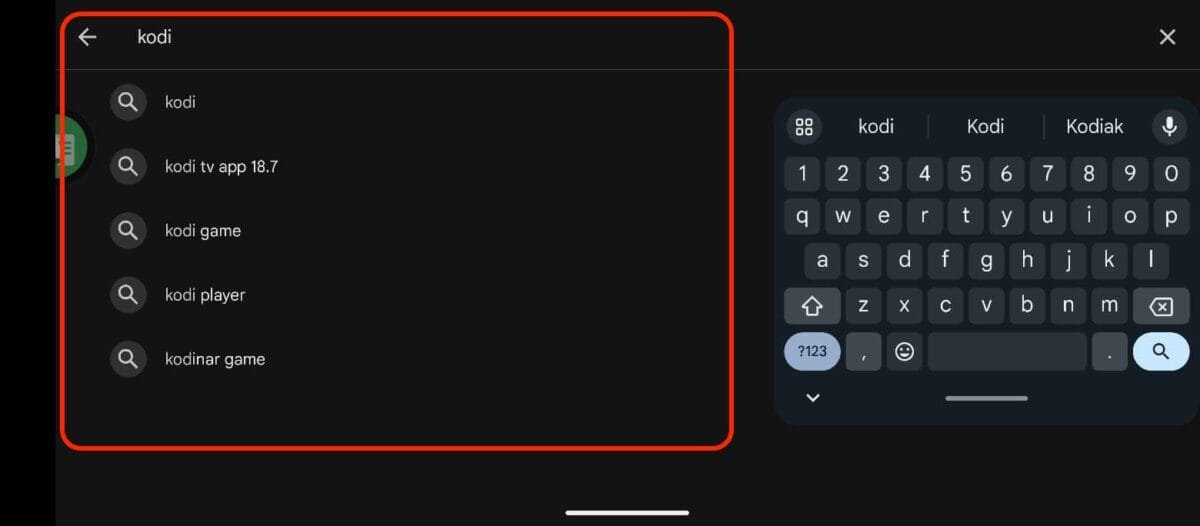
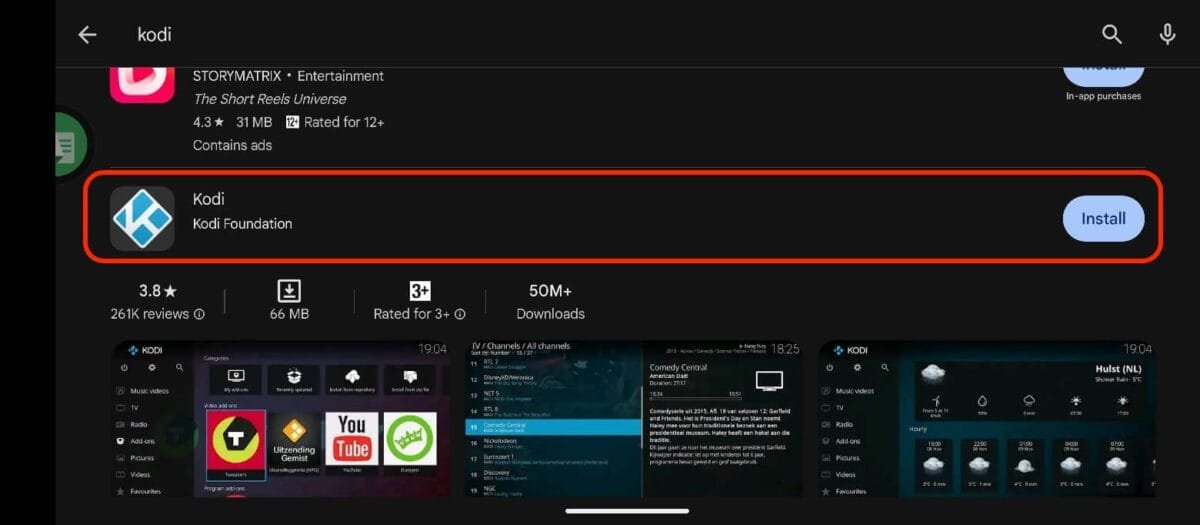
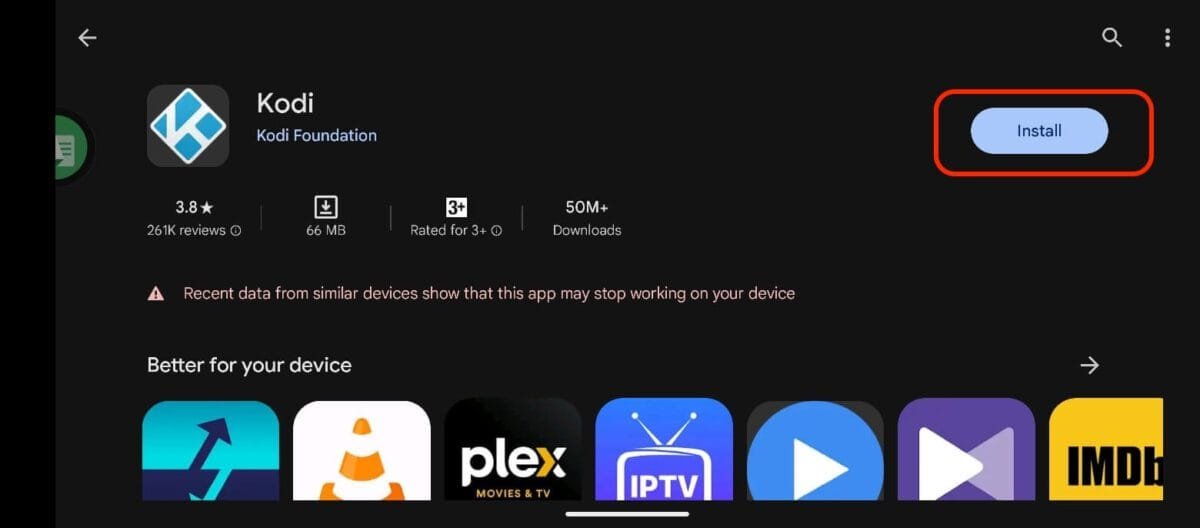
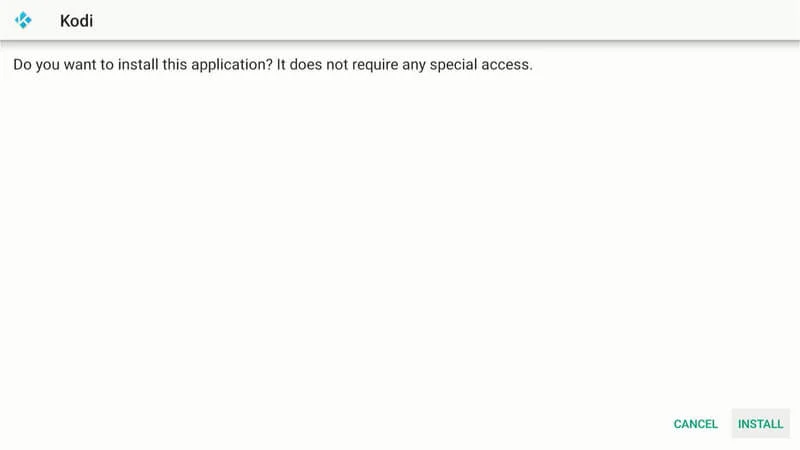
Visit the official Kodi website, download the latest version, and install it on your device.

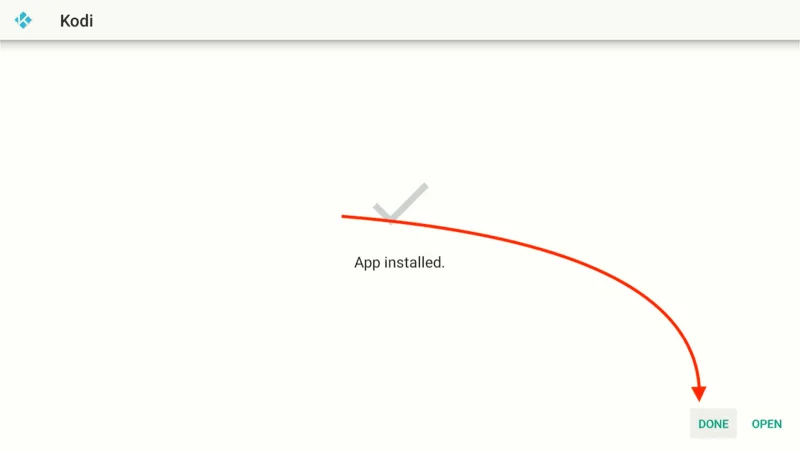
Once the file downloaded click on install button to install kodi on your device
Once reinstalled, restore your backup data to get Kodi back to where it was before.
Reinstalling Kodi can resolve a range of issues, from crashes to unresponsive add-ons, ensuring your app is working like new.
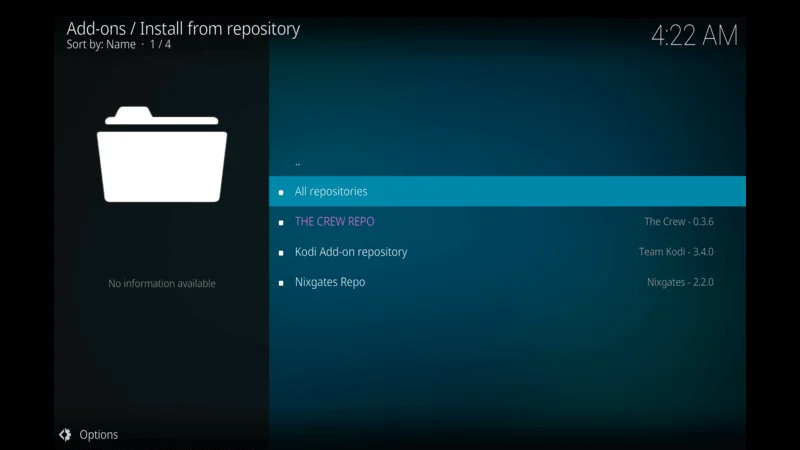
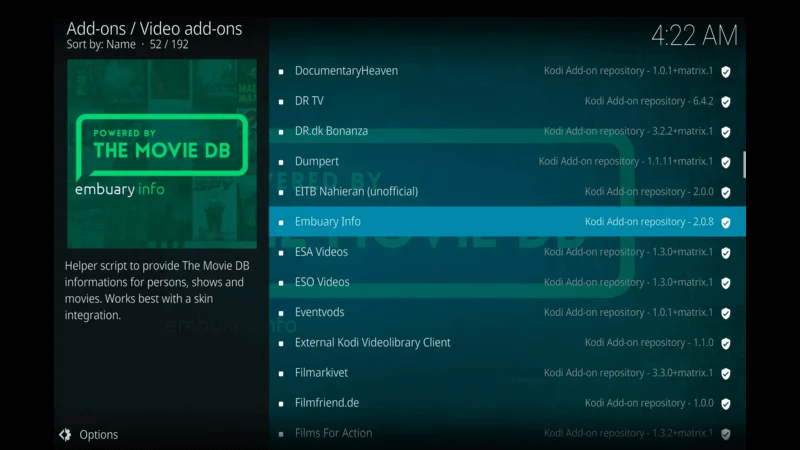
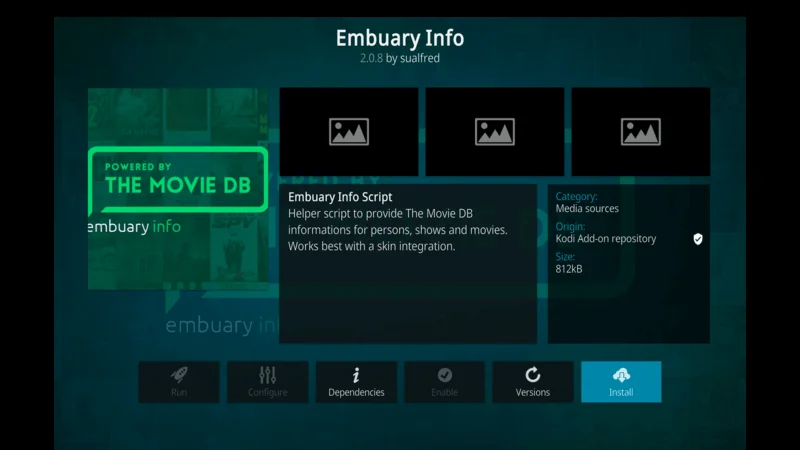
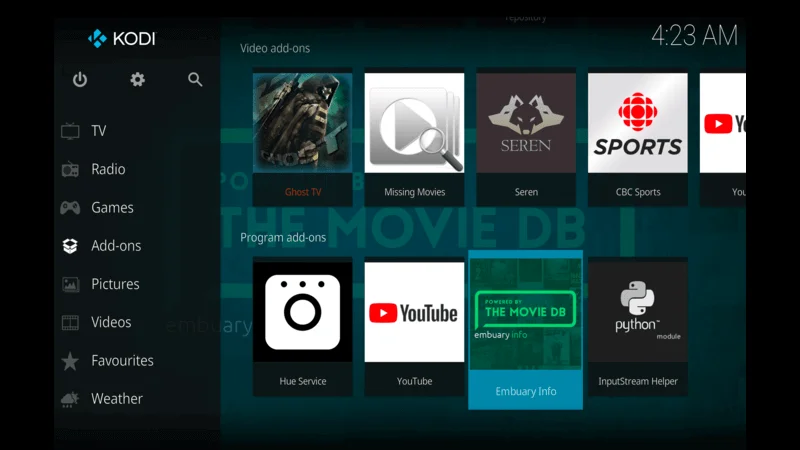
7. Install Kodi Add-ons Properly
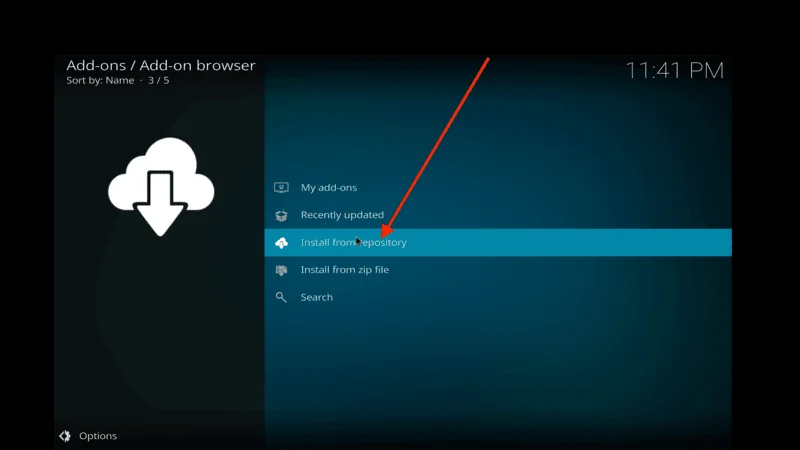
Add-ons are what make Kodi so versatile, but they can also cause problems if not installed correctly. To avoid issues with Kodi add-ons Kodi app not working, follow these steps:
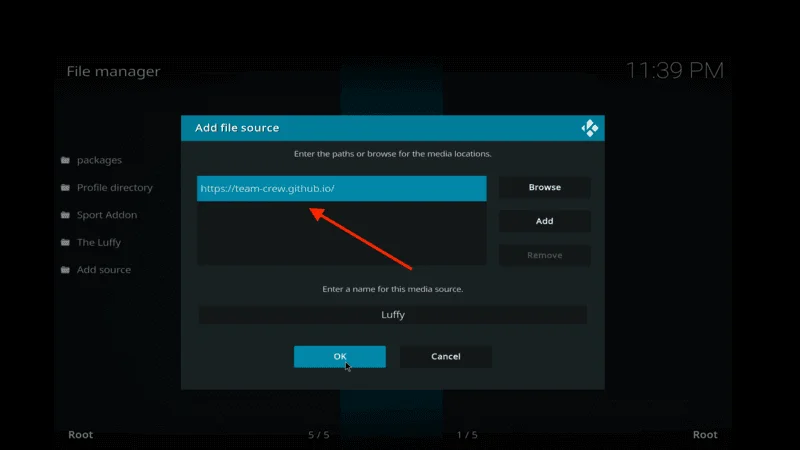
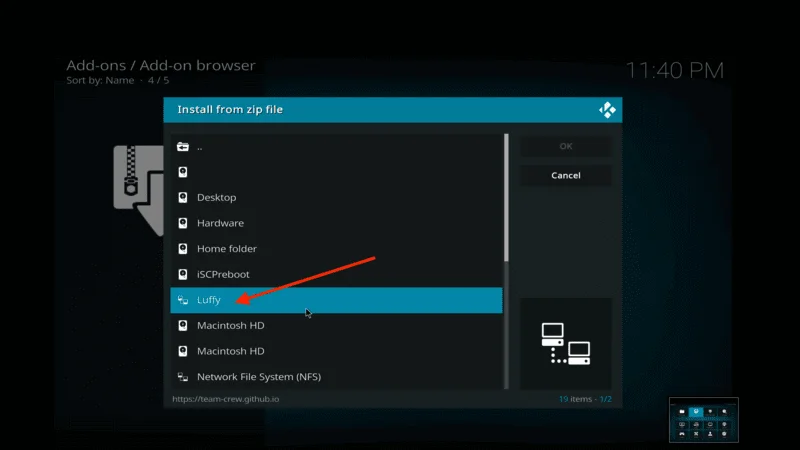
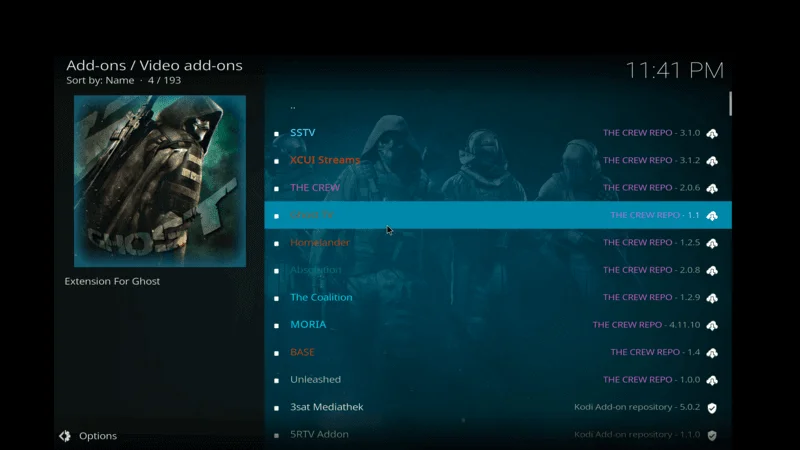
Use Trusted Repositories: Always install add-ons from reputable repositories. This reduces the risk of installing malicious or outdated add-ons that could harm your system.
Check for Updates: Regularly check for updates to your add-ons to ensure they are compatible with your version of Kodi.
Avoid Installing Too Many Add-ons: Installing too many add-ons can slow down Kodi and cause conflicts between them. Only install the ones you use regularly.
Properly managing your add-ons can prevent many issues, ensuring that Kodi works smoothly and efficiently.
Advanced Fixing On Kodi
If you’ve tried the basic troubleshooting steps and your Kodi app not working, it’s time to explore some advanced solutions. These methods are more in-depth and might require a bit more technical knowledge, but they can be highly effective in fixing persistent Kodi problems.
1. Check for Incompatible Add-ons
Incompatible add-ons can cause a range of issues, from crashes to slow performance. Here’s how to identify and remove problematic add-ons:
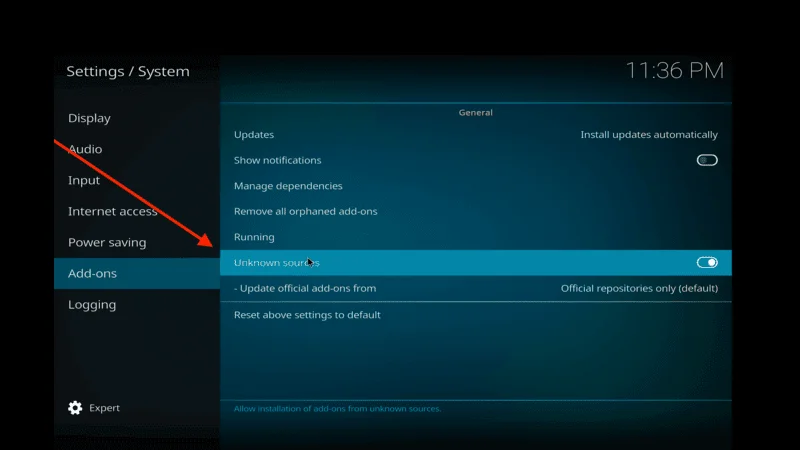
- Enable Debug Logging: Debug logging in Kodi can help you identify which add-ons are causing problems. You can enable it in the settings under ‘System’ > ‘Logging.’
- Review Log Files: Once logging is enabled, you can view the log files to see if any add-ons are throwing errors or causing crashes.
- Remove Problematic Add-ons: If you identify an incompatible add-on, uninstall it immediately to prevent further issues.
By removing incompatible add-ons, you can ensure that Kodi runs smoothly without unnecessary interruptions.
2. Reconfigure Your Network Settings
If you’re experiencing persistent connectivity issues with Kodi, it might be worth reconfiguring your network settings. Here’s how to optimize your network for Kodi:
- Change DNS Settings: Sometimes, your ISP’s default DNS settings can cause slowdowns or block access to certain content. Switching to a faster and more reliable DNS service like Google DNS or OpenDNS can improve your connection.
- Enable QoS: Quality of Service (QoS) settings on your router can prioritize Kodi traffic, ensuring that your streaming experience isn’t interrupted by other devices on the network.
- Adjust Router Settings: Ensure your router’s firmware is up-to-date and consider using advanced features like port forwarding to optimize Kodi’s performance.
By fine-tuning your network settings, you can reduce buffering, improve streaming quality, and fix connectivity issues with Kodi.
Tips to Running Kodi Smoothly
While troubleshooting and fixing Kodi problems is essential, it’s equally important to take preventive measures to avoid issues in the first place. Here are some tips to keep Kodi running smoothly:
Regular Updates and Maintenance
Keeping Kodi and its add-ons updated is essential for maintaining optimal performance. Here’s why regular updates and maintenance are so important:
Security: Updates frequently include security patches that protect your device from vulnerabilities and potential threats. Compatibility Regular updates ensure that Kodi and its add-ons remain compatible with each other, minimizing the risk of crashes or errors. Performance: Updates can enhance Kodi’s performance, making it faster, more stable, and efficient.
By staying on top of updates and maintenance, you can prevent many issues that cause Kodi app not working.
Use Reliable Add-ons
The quality of the add-ons you use can have a significant impact on Kodi’s performance. Here’s why using reliable add-ons is essential:
Some third-party add-ons can contain malware or spyware that may harm your device. To avoid this risk, stick to reputable repositories and trusted add-ons.
Reliable add-ons are more likely to be regularly updated and compatible with the latest version of Kodi, reducing the risk of errors or crashes. Better Performance: Trusted add-ons are often better optimized, leading to faster loading times and smoother playback.
Before adding a new add-on, do some research to verify it’s reputable and well-supported. Stick to Official Repositories: Whenever possible, use add-ons from Kodi’s official repository or other trusted sources.
Uninstall any add-ons you no longer use to free up resources and reduce the risk of conflicts.
Optimize Device Performance
The device you’re using to run Kodi can also impact its performance. Here are some tips to optimize your device for Kodi:
- Free Up Storage: Ensure your device has enough free storage space for Kodi to operate smoothly. Delete unnecessary files or apps to free up space.
- Close Background Apps: Running too many apps in the background can slow down your device and impact Kodi’s performance. Close unnecessary apps before launching Kodi.
- Check for Overheating: Overheating can cause your device to slow down or crash. Ensure your device is well-ventilated and not overheating.
By optimizing your device, you can improve Kodi’s performance and reduce the risk of crashes or other issues.
When All Else Fails: Consider Alternatives
Sometimes, despite all your efforts, Kodi might still not work as expected. In such cases, it might be worth considering alternatives to Kodi that can offer similar features with potentially fewer issues. Here are a few options to explore:
Plex
Plex is a highly popular media server and player system designed to stream your media content seamlessly across multiple devices. Its user-friendly interface and extensive community support make it a strong alternative if you’re having trouble with Kodi.
Plex boasts a range of impressive features, including live TV, DVR capabilities, and compatibility with a diverse array of devices. Whether you’re using smart TVs, streaming devices, or mobile platforms, Plex offers broad compatibility to fit your needs.
The user experience with Plex is renowned for its smooth and intuitive interface, allowing you to effortlessly organize and access your media library. With its robust functionality and ease of use, Plex stands out as a reliable choice for those seeking a dependable media streaming solution.
Emby
Emby is a versatile media server platform that shares similarities with Plex, offering an efficient way to manage your media library and stream content across various devices.
It supports features such as live TV and DVR, along with a range of plugins to enhance your streaming experience, making it a robust alternative for those seeking functionality similar to Kodi.
Emby is praised for its clean and user-friendly interface, which ensures smooth performance and easy navigation. Additionally, Emby benefits from a strong community and comprehensive support system, providing valuable resources and assistance should you run into any issues. Here
With its well-rounded features and reliable support, Emby stands out as a dependable option for media streaming enthusiasts.
Stremio
Stremio is a straightforward media center application designed to provide access to a wide range of streaming services, including movies, TV shows, and live TV.
Much like Kodi, Stremio allows you to install add-ons to expand its functionality, making it a solid alternative for those seeking a user-friendly and efficient platform.
Stremio stands out for its intuitive interface, which simplifies the process of finding and streaming content, ensuring a hassle-free experience. While its add-on system may not be as extensive as Kodi’s, Stremio still offers a variety of add-ons to enhance your streaming capabilities.
Exploring these alternatives can be particularly useful if Kodi continues to pose issues. Each of these platforms provides robust features that might better align with your streaming needs.
Frequently Asked Questions (FAQs)
Navigating issues with Kodi can be challenging, especially if you’re unfamiliar with common troubleshooting steps. To help you resolve common problems and better understand how to optimize your Kodi experience, we’ve compiled a list of frequently asked questions.
Whether you’re dealing with crashes, buffering issues, or add-on problems, these FAQs provide clear, concise answers to common concerns. Here’s what you need to know to get Kodi back on track and running smoothly.
Q: Why is my Kodi app crashing?
A: Kodi crashing can be due to several factors. Common reasons include using an outdated version of Kodi app not working be compatible with newer add-ons or your device’s operating system. Corrupted files within Kodi, often from incomplete downloads or interrupted updates, can also cause crashes. Additionally, incompatible add-ons or an overloaded cache might contribute to the problem. To fix this, try updating Kodi, clearing the cache, and removing or updating problematic add-ons.
Q: How can I fix buffering issues on Kodi?
A: Buffering issues are often caused by a slow or unstable internet connection. Ensure your internet speed is adequate for high-quality streaming. An overloaded cache can also lead to buffering, so clear Kodi’s cache. Additionally, check Kodi’s settings to ensure they are optimized for your connection and device. If buffering persists, consider upgrading your internet plan or using a VPN to avoid throttling by your ISP.
Q: What should I do if add-ons are not working?
A: If Kodi app not working, it might be due to outdated add-ons or broken repositories. Ensure that your add-ons are up-to-date and that the repositories they came from are functioning. Unstable internet connections can also affect add-on performance. To resolve these issues, update your add-ons, verify repository status, and ensure a stable internet connection.
Q: How do I clear Kodi’s cache and data?
A: To clear Kodi’s cache and data:
- Open Kodi and go to the Settings menu.
- Select System Settings, then choose Add-ons.
- Click on Manage Dependencies.
- Locate and select Cache, then choose Clear Cache.
- Repeat for any other data that needs clearing.
Clearing the cache helps improve Kodi’s performance by removing outdated temporary files.
Q: How can I update Kodi to the latest version?
A: To update Kodi:
- Visit Kodi’s official website and download the latest version compatible with your device.
- Install the update by following the on-screen instructions. On devices like Android TV boxes, you might update through the app store or settings menu.
Regular updates keep Kodi’s features and add-ons functioning properly.
Q: Why is my internet connection affecting Kodi?
A: An unstable or slow internet connection can lead to buffering and streaming issues with Kodi. Ensure your internet speed meets the requirements for streaming content. Check your network settings or use a VPN to enhance performance and bypass ISP throttling.
Q: What are some advanced solutions if Kodi still isn’t working?
A: If basic troubleshooting doesn’t help, try advanced solutions such as:
- Reinstalling Kodi to start fresh without losing your data.
- Checking for and removing incompatible add-ons using debug logging.
- Using a VPN to bypass geo-restrictions and prevent ISP throttling.
Q: How can I ensure that my Kodi setup remains smooth and problem-free?
A: To keep Kodi running smoothly:
- Regularly update Kodi and its add-ons to ensure compatibility and security.
- Use reliable add-ons from reputable sources to avoid compatibility issues and performance problems.
- Maintain your device by freeing up storage, closing unnecessary background apps, and preventing overheating.
Q: Are there alternatives to Kodi if I continue to have problems?
A: If Kodi continues to give you trouble, consider trying alternative media streaming platforms such as Plex, Emby, or Stremio. Each of these platforms offers robust features and might better meet your needs if Kodi isn’t working for you.
Q: How do I get support if I encounter issues with Kodi or its add-ons?
A: For additional support:
- Visit Kodi’s official forums and community pages for troubleshooting tips.
- Consult add-on developers for specific add-on issues.
- Explore online resources and tutorials for step-by-step guides on common problems.
Conclusion
Dealing with a Kodi app not working can be frustrating, but with the right approach, most problems can be resolved. We’ve walked through common reasons why Kodi might fail, provided a detailed troubleshooting guide, and discussed advanced solutions for more persistent issues. Additionally, we’ve shared preventive measures to help you avoid problems in the future and offered alternatives if Kodi simply won’t cooperate.
By following these steps, you can get your Kodi app back on track and enjoy a seamless streaming experience. And if all else fails, there are plenty of alternatives out there to explore.
So, the next time your Kodi app stops working, don’t panic. With this guide in hand, you’ll be able to troubleshoot the issue, apply the right fixes, and get back to watching your favorite content in no time.