Welcome to Kodi-Expert, In today’s comprehensive guide, we’ll be showing you how to install the Kodi Fork Omega. This powerful fork of Kodi brings enhanced features and customization options, making it a popular choice for many users.
Whether you’re using a FireStick, an Android device, a MacBook running macOS, or any other Android-based device, these instructions are tailored to work seamlessly across all platforms. Follow along to unlock the full potential of your streaming setup with Kodi Fork Omega.
But before we dive into the installation process, let’s start with a brief introduction to Kodi Fork Omega.
What are Kodi Forks?
A Fork is like a copy or clone of the original version of an app, in this case, Kodi. What’s cool about a Fork is that it lets you have multiple versions of Kodi installed on the same device without interfering with each other.
There are a few good reasons you might want to have more than one version of Kodi:
- Sticking with What Works: Maybe you love a particular Kodi version because it works perfectly with your favorite Build or addon.
- Trying Something New: Or, you might want to check out a new ‘stable’ version of Kodi without messing up your current setup.
With a Kodi Fork, you can run it separately from the Kodi you already have. You can still install all the addons and Builds you want, just like you’re used to. Plus, some Kodi Forks even come with popular Builds or addons preinstalled, so you’re ready to go right out of the box.
⚠️ Attention, Kodi Users!
Kodi Addons and builds offer unlimited streaming content, but they could also get you into trouble if you’re caught streaming free movies, TV shows, or sports. Currently, your IP 2400:adc3:12c:e600:bcd3:880f:e0ab:5a62 is visible to everyone. Kodi users are strongly advised to always connect to a VPN while streaming online. Kodi VPN hides your identity plus bypasses government surveillance, geo-blocked content, and ISP throttling (which also helps in buffer-free streaming).
I personally use NordVPN, which is the fastest and most secure VPN. It is easy to install on Amazon FireStick and any other device. You get 3 months free and save 49% on its annual plans. Also, it comes with a 30-day money-back guarantee. If you are not satisfied, you can always ask for a refund.
Is Kodi Fork Legal to Use?
Yes, Kodi Forks are perfectly legal to install and use. However, the tricky part comes with the addons and Builds you might add afterward. It’s tough to verify whether these unofficial (or third-party) addons and Builds are distributing content legally. If they aren’t, you could end up streaming copyrighted content without permission, which could lead to legal trouble.

To protect yourself, it’s a good idea to use a VPN when you’re dealing with unofficial addons and Builds. A VPN can help keep your streaming activities private and secure, so you can enjoy your content with peace of mind.
How to install Kodi Forks with in (10 Seconds)
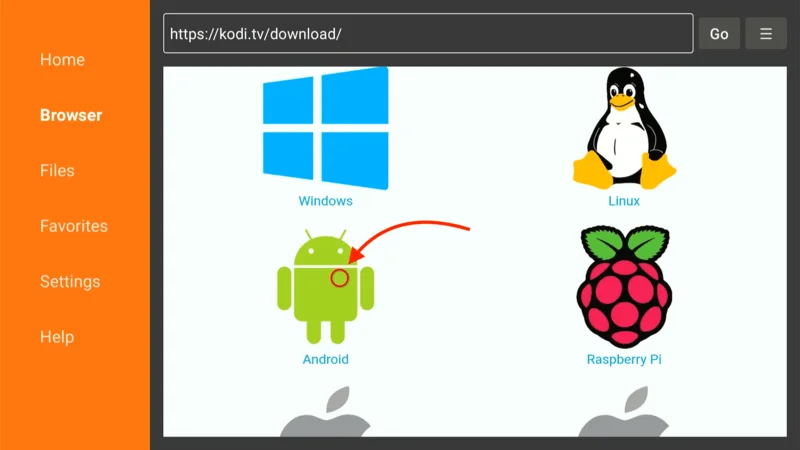
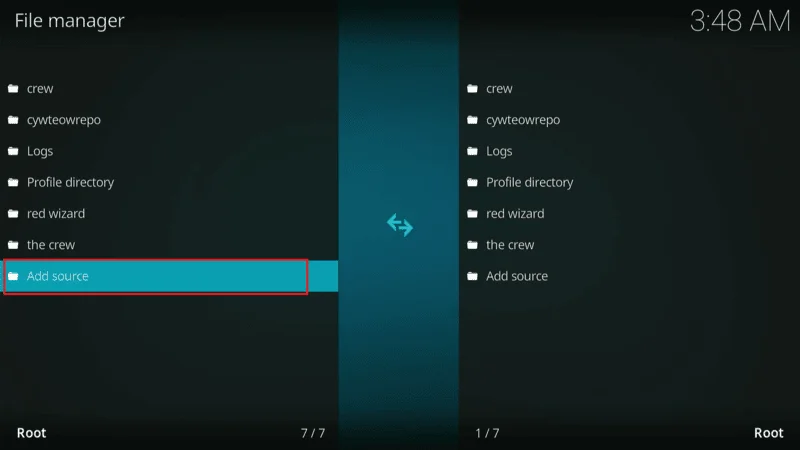
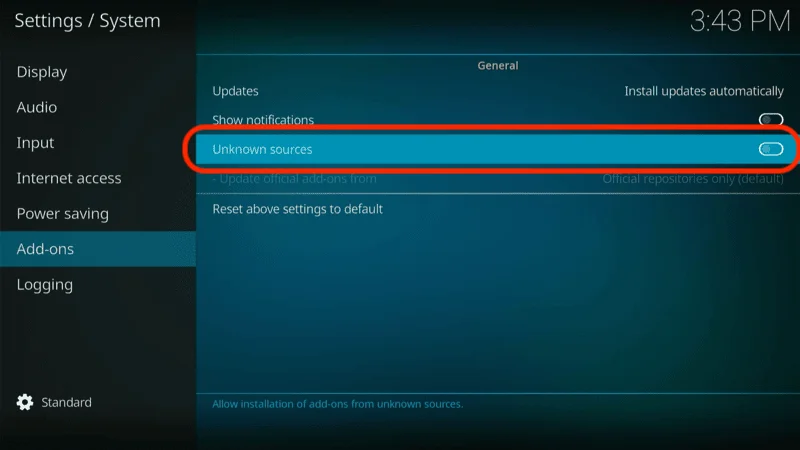
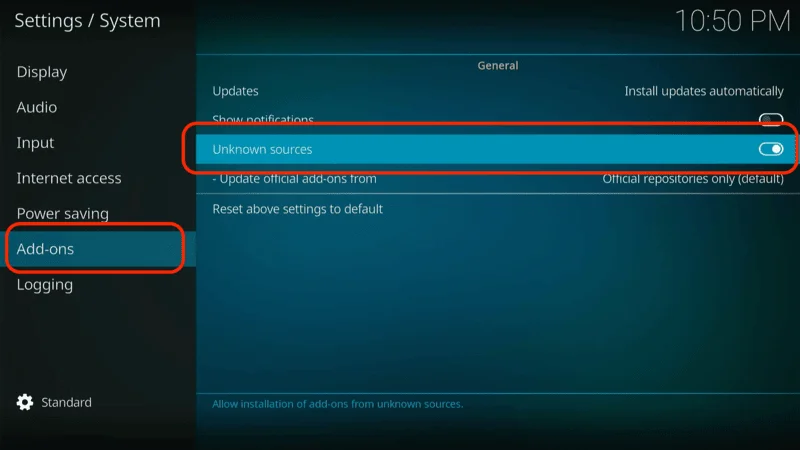
Kodi Forks aren’t available in your typical app stores, but you can still get them by sideloading. To do this, your device needs to be set up to install apps from unknown sources. Once that’s done, you can easily download and install Kodi Forks from my Downloads page.
Legal Disclaimer: This tutorial is intended solely for educational purposes. KodiExpert.org does not own, host, operate, resell, or distribute any streaming apps, addons, websites, IPTV services, or similar platforms. The content on this page may include some unverified services, and we cannot confirm whether they possess the necessary legal licenses to distribute the content they offer.
KodiExpert.org does not verify the legality of each app or service in every region. It is your responsibility to conduct your own due diligence if you choose to use any unverified apps or services. Please ensure that you only stream content that is legally available in the public domain. The end-user is solely responsible for any media accessed.
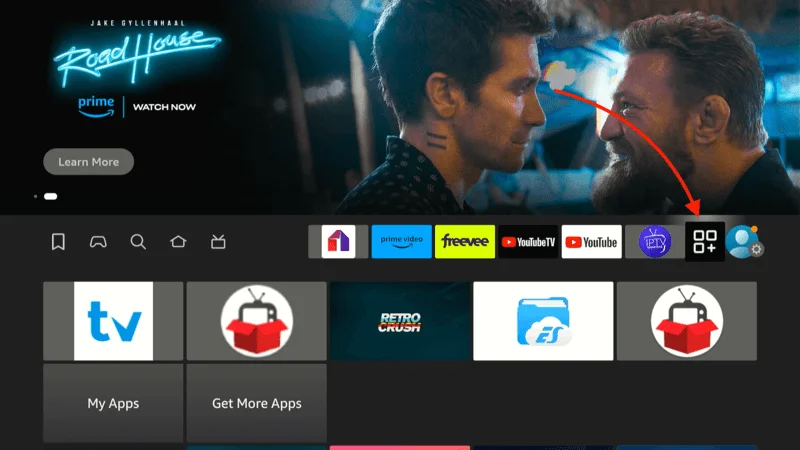
If you’re using a FireStick, I’ve broken this guide into two parts to make it easier for you to follow along.
Note: If you’re not using an Amazon FireStick, you’ll need to install the Downloader app on your device first. Once you’ve got the Downloader app, just open it and enter the URL I’ll show you below.
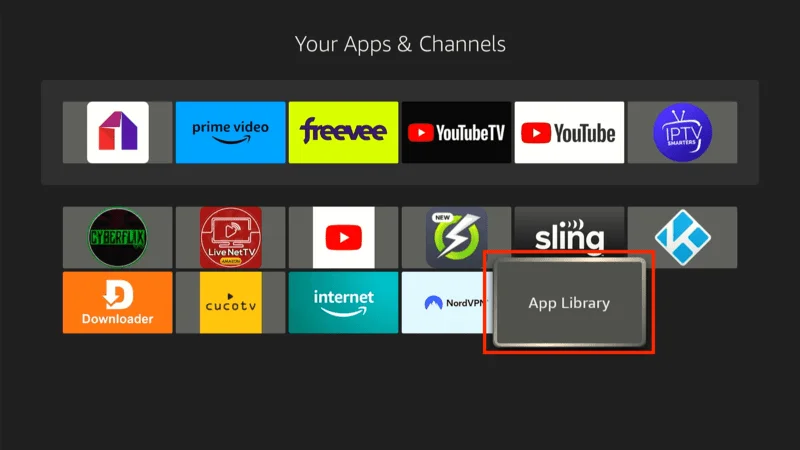
Part 1: How to install Downloader app on Firestick
Follow the below guide Install Kodi Fork on your Device.
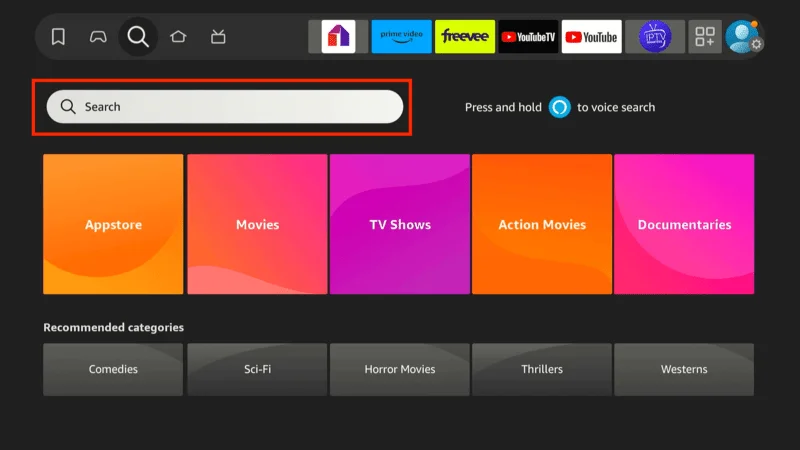
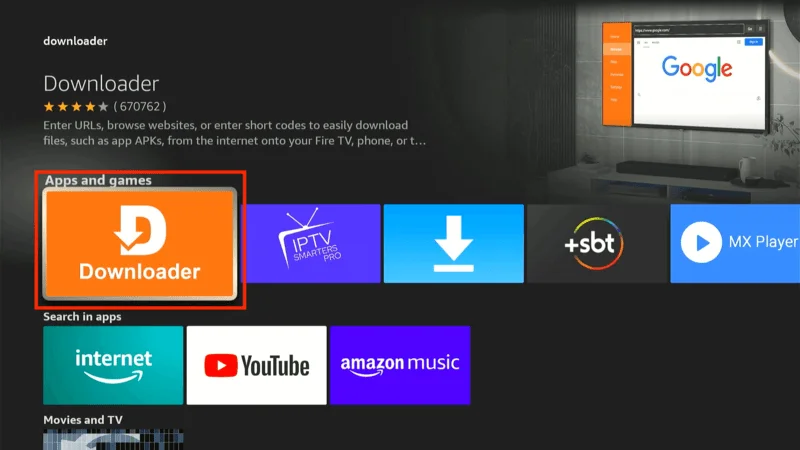
Go to the Find option on the menu and select the Search button.

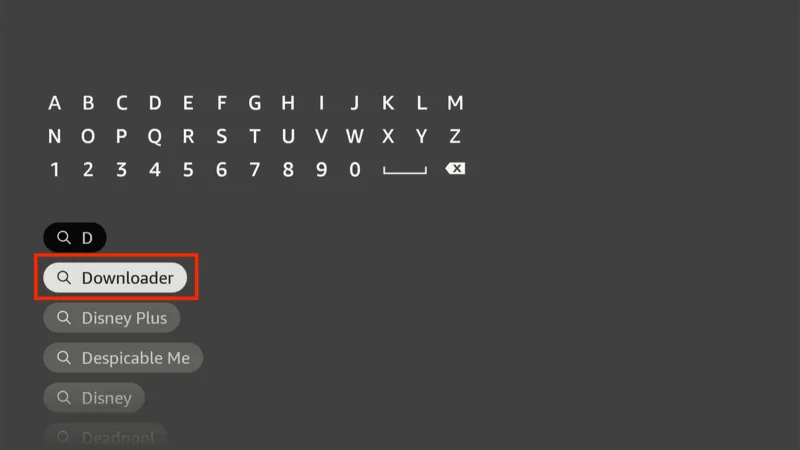
Type “Downloader” using the on-screen keyboard.

From the search results, select the Downloader app,
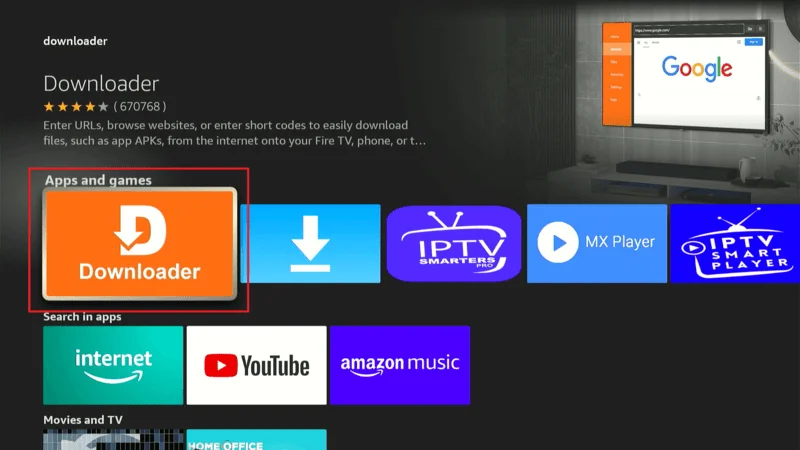
Click on “Download” or “Get” to install the app.
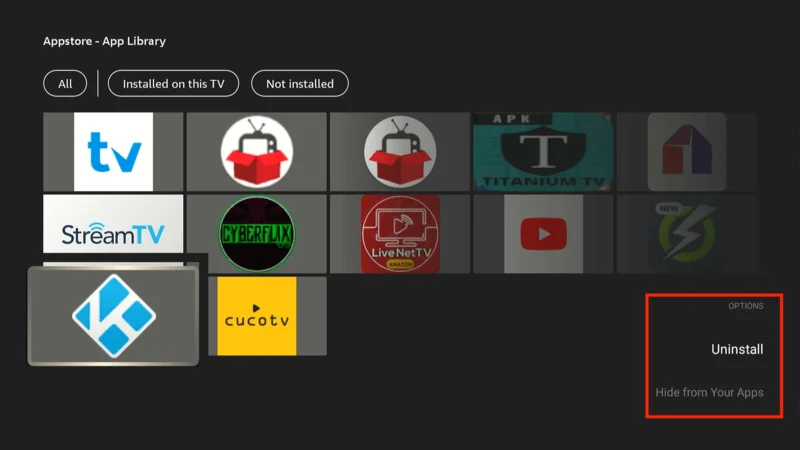
Note: Once the downloader app install don’t Open it there is one setting on Firestick we need to change it

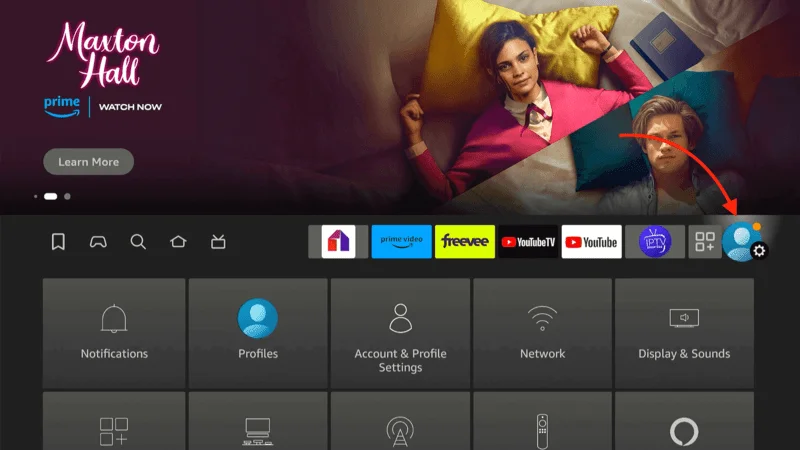
On the Firestick Home Screen Navigate to the Settings (gear icon) on the far right.

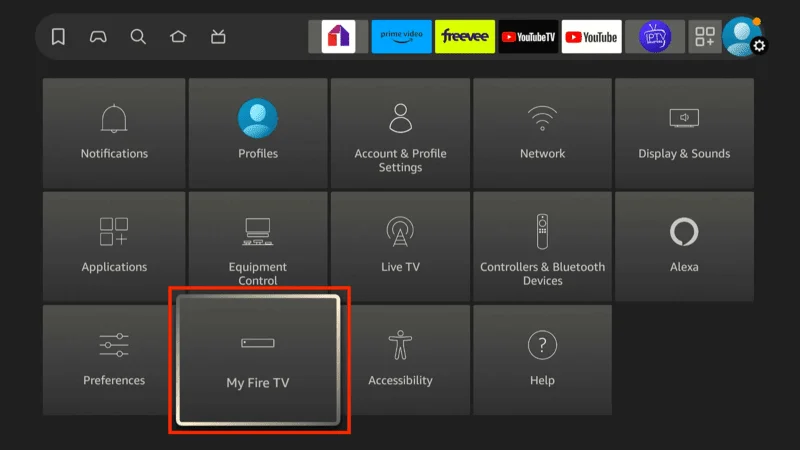
Scroll and select My Fire TV or Device & Software (depending on your Firestick version).

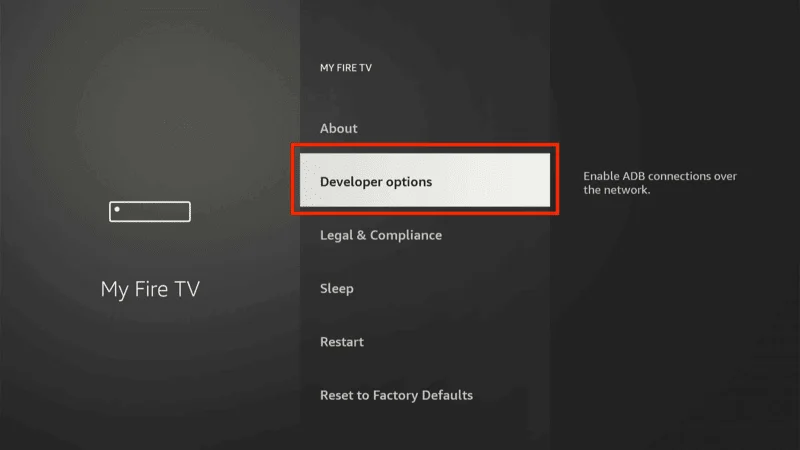
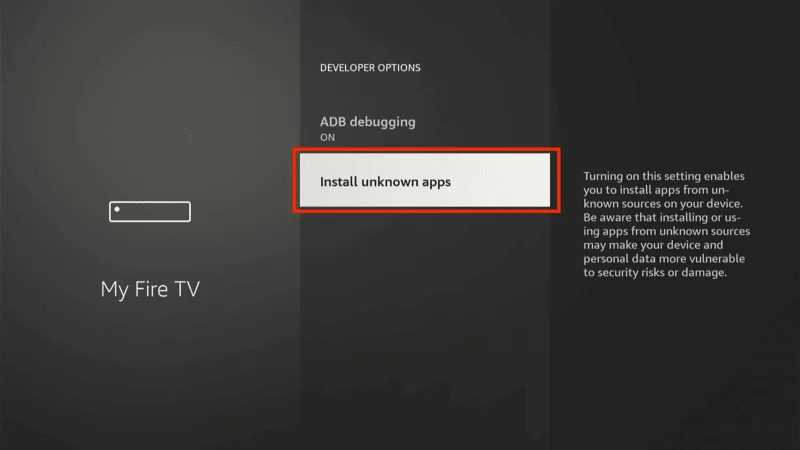
Choose Developer Options,
[su_note note_color=”#E2F2FF” text_color=”#000000″]Note: If you don’t see the “Developer Options,” follow these steps: Go to About > Once inside, click on your Firestick’s name (e.g., Fire TV Stick, Firestick 4K, Firestick 4K Max) eight times. This action will enable the Developer Options on your device.[/su_note]

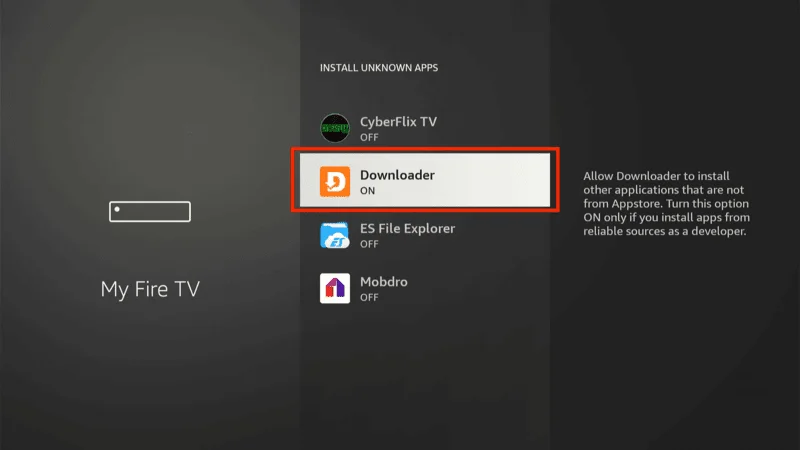
Then select Install Unknown Apps.

Find the Downloader app in the list and toggle it to ON. This allows the Downloader app to install apps from sources outside the Amazon Appstore.

Part 2: Installing the Kodi Fork on Firestick Device.
In this part, I’ll guide you through the process of installing Kodi Forks on your FireStick. If you’re not using a FireStick, no worries! Just type the URL I’ll provide into your browser’s search bar, and the Kodi Fork will start downloading.
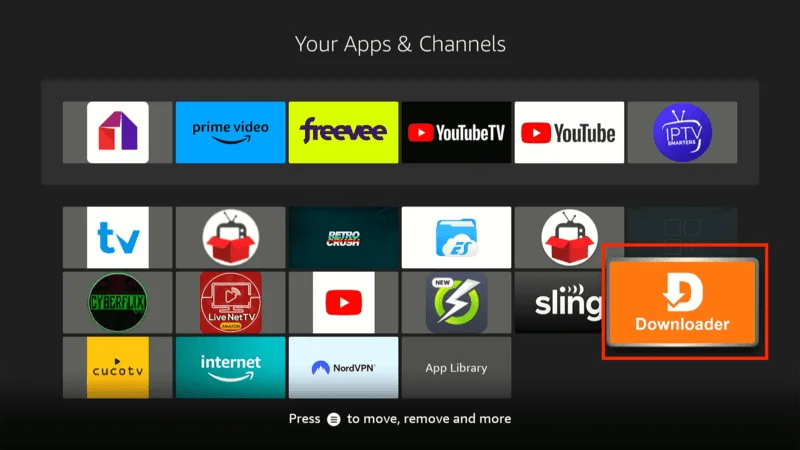
Launch the downloader app Firestick, Fire TV home screen > move the apps > select the downloader app > press remote select button to launch it.

First time opening the downloader app it will ask you to Allow someone permission click Allow button.

Now move the Search bar

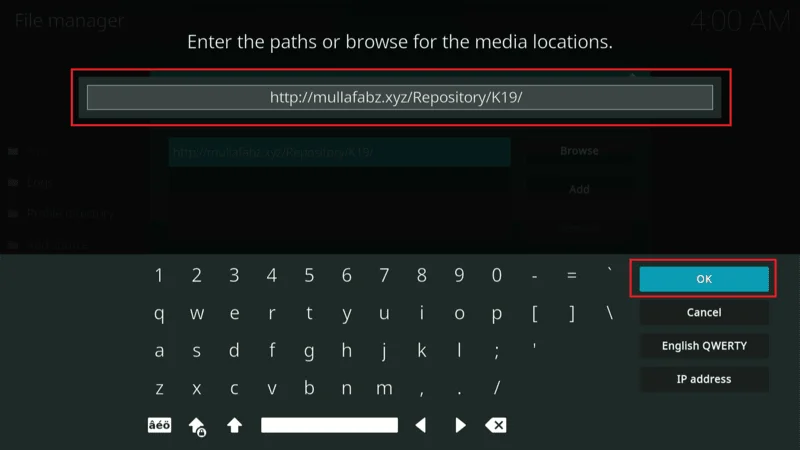
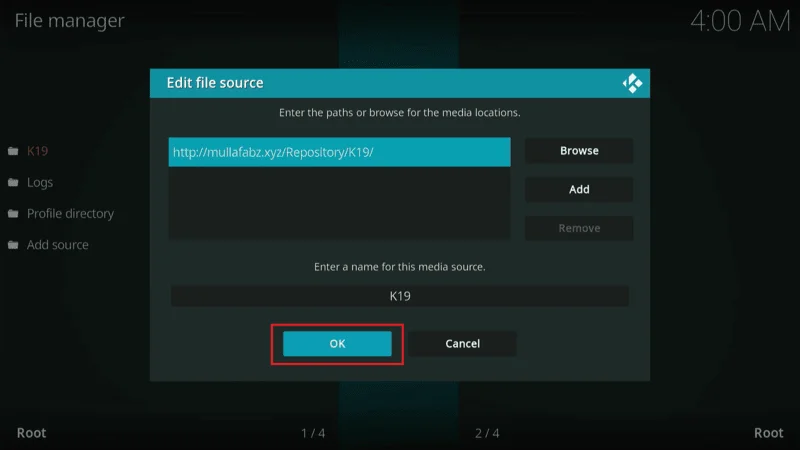
Here Type URL: kodiexpert.org/fork.apk

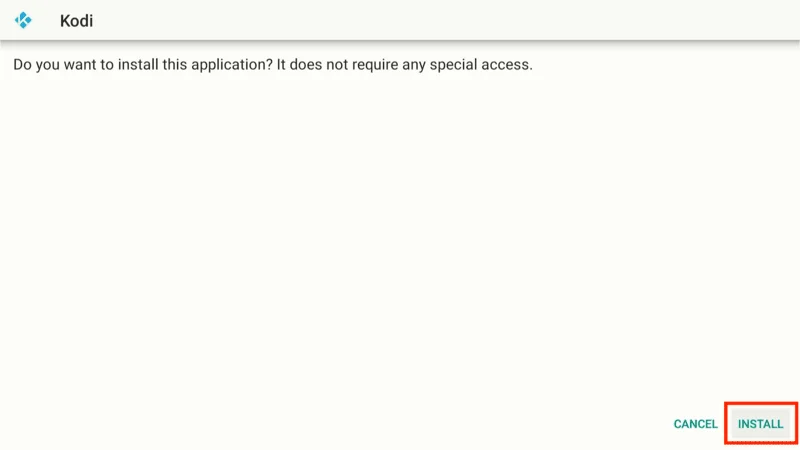
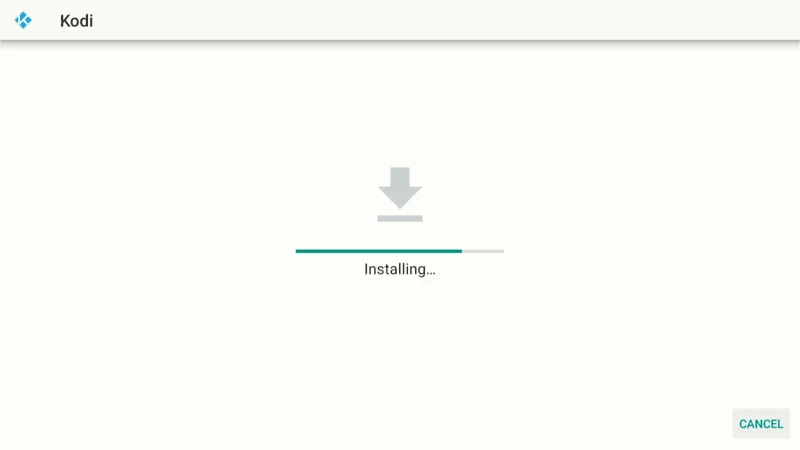
Wait until the Kodi Fork Downloaded on Firestick, Once the downloading complete click on install button

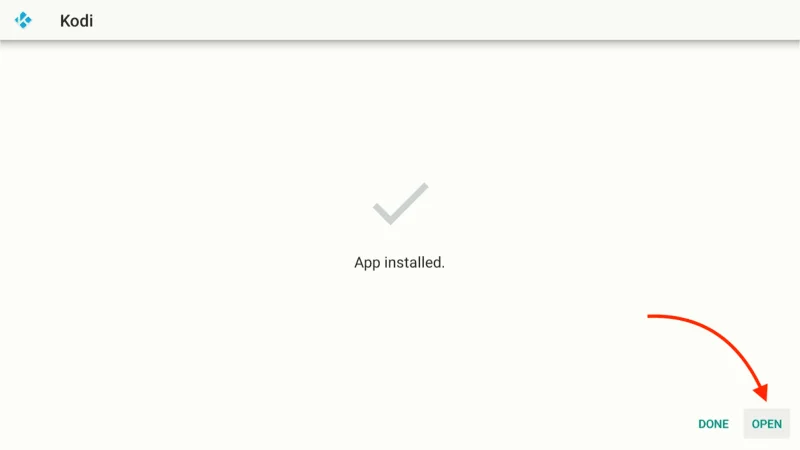
wait the installions complete then click on Done and delete the backup File

thats it Now you have installed the kodi Fork on your Device.
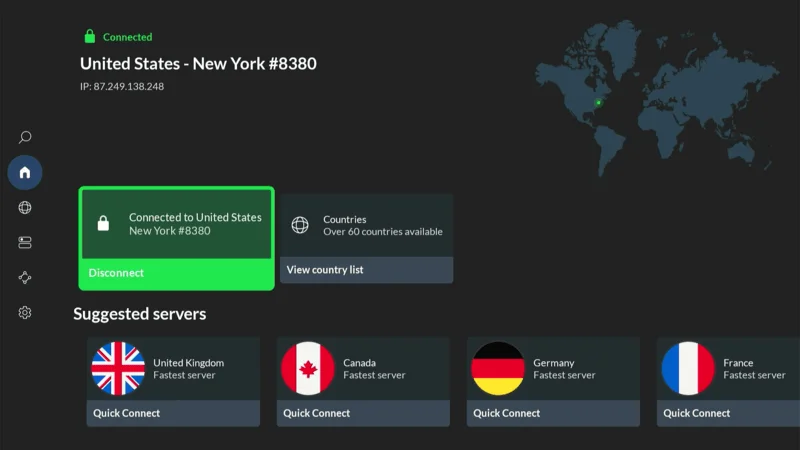
Before you start streaming with Kodi Addons or Builds, it’s crucial to understand that your online activity isn’t as private as you might think. Your Internet Service Provider (ISP) and government authorities can see what you’re streaming. This could lead to legal trouble if you’re accessing copyrighted content, such as movies, TV shows, live TV, or sports, without proper authorization.
But there’s an easy way to protect your privacy and keep your streaming habits hidden using a reliable VPN. A VPN will mask your real IP address (which is currently 2400:adc3:12c:e600:70cc:3c05:496d) and help you avoid any prying eyes.
I recommend NordVPN because of its speed, security, and compatibility with various streaming apps and devices. It also allows you to bypass any restrictions or monitoring from your ISP and government.
Important: We do not support or promote copyright infringement. However, it’s not always clear whether the content you’re streaming is from a legitimate source. To protect your privacy and keep your streaming activities anonymous, follow these three simple steps to set up a VPN before using Kodi:
Step 1: Subscribe to NordVPN using this link. It comes with a 30-day money-back guarantee, so you can try it risk-free. If, for any reason, you’re not satisfied within the first 30 days (which is unlikely), you can request a full refund.

Step 2: Download and install the NordVPN app on your streaming device by clicking here. If you’re using a FireStick, detailed installation instructions begin at Step 4 below.

Step 3: Once the app is installed, simply click the Power icon to connect to a VPN server. That’s it! Your connection is now secure with one of the fastest and most reliable VPNs available for Kodi.

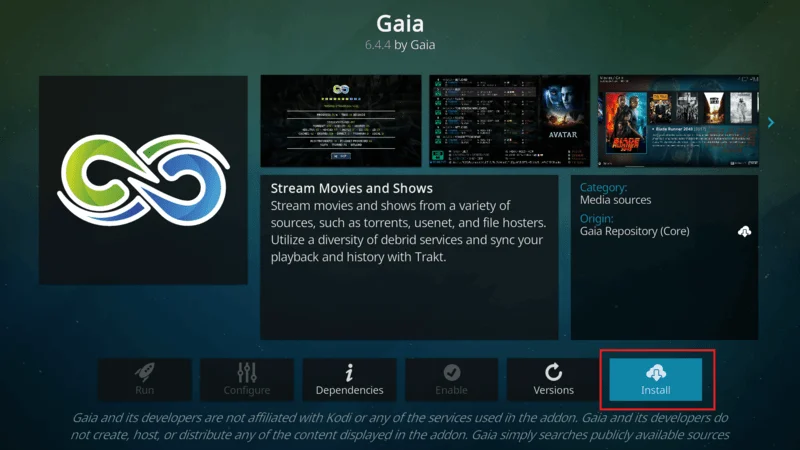
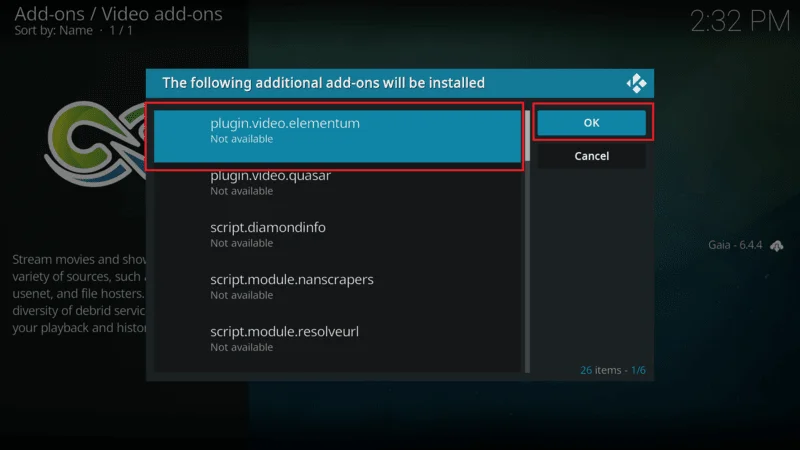
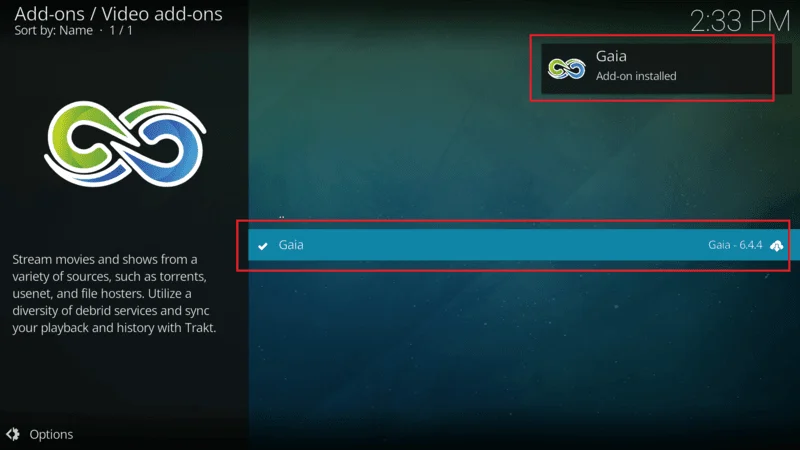
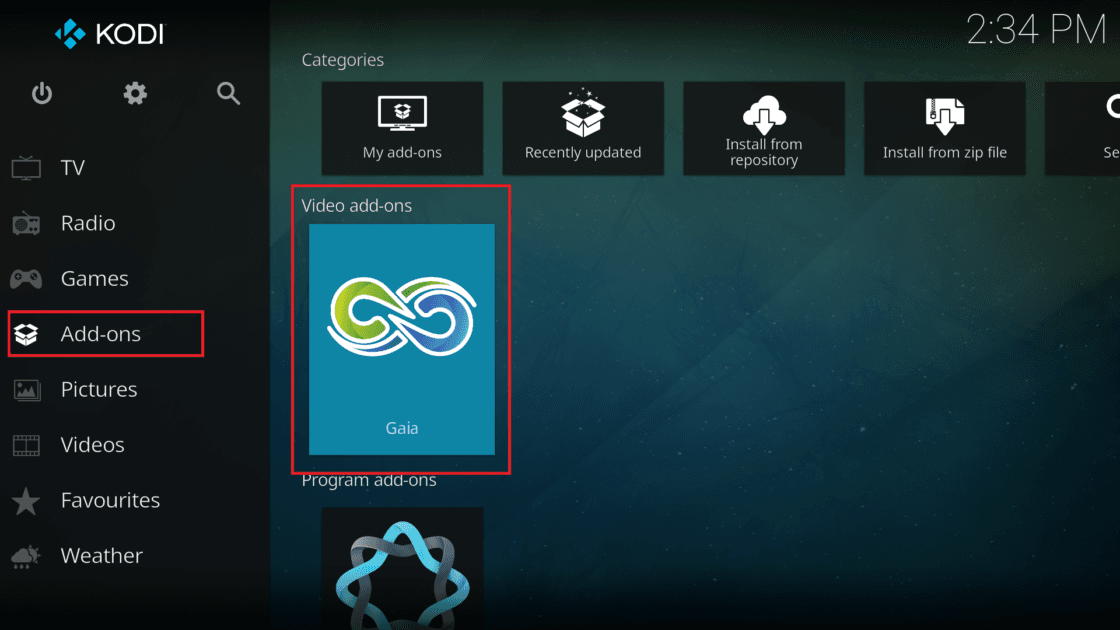
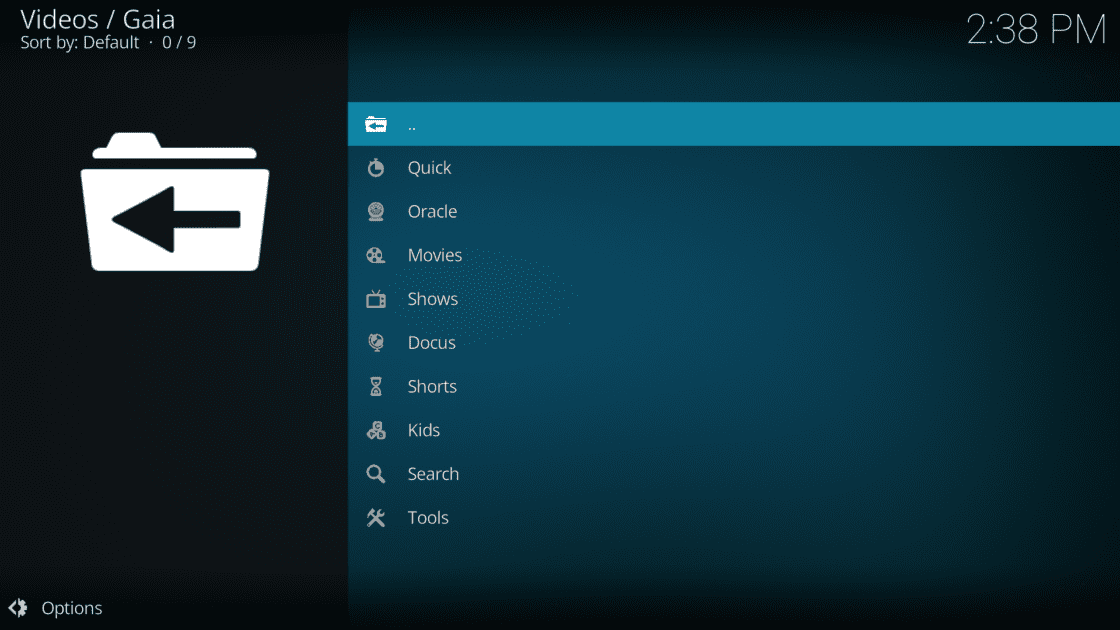
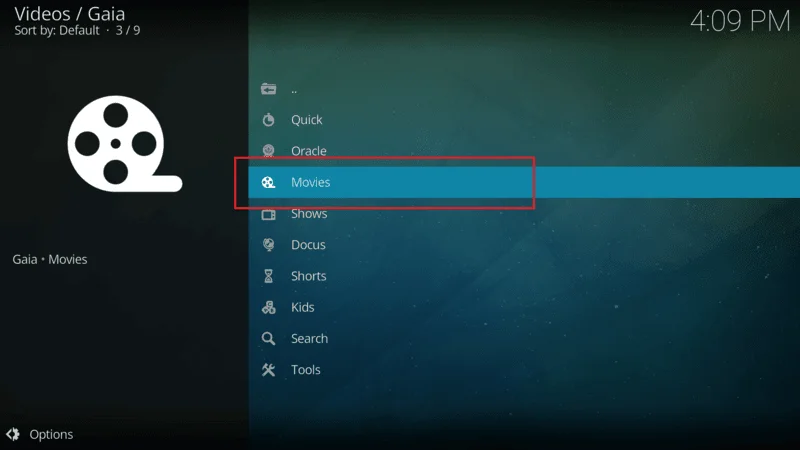
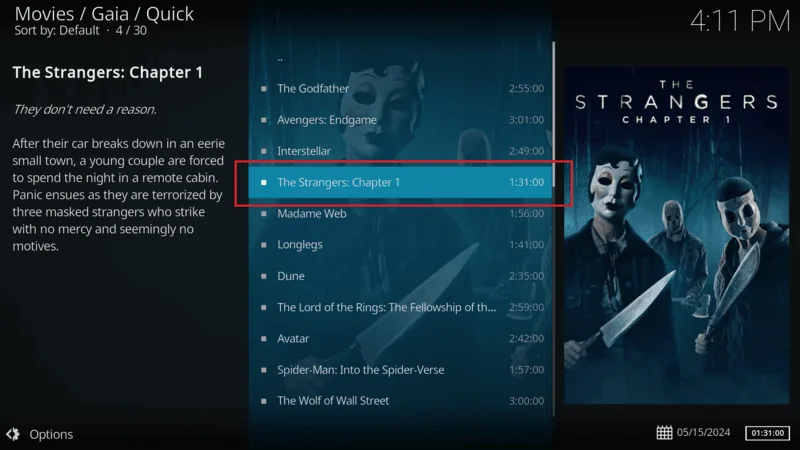
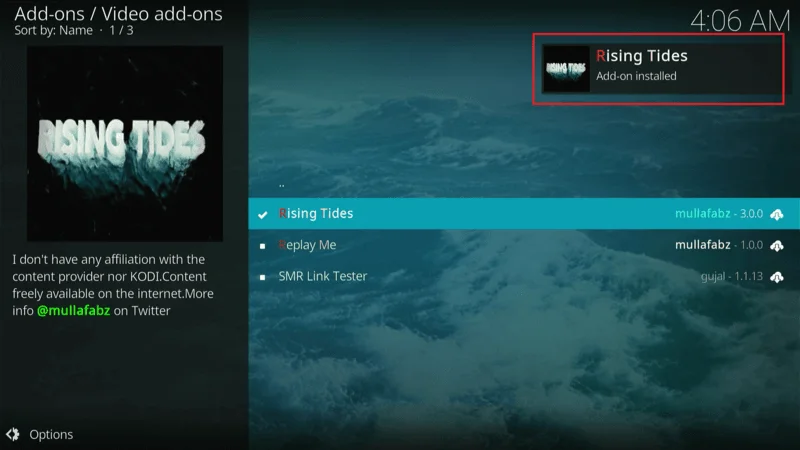
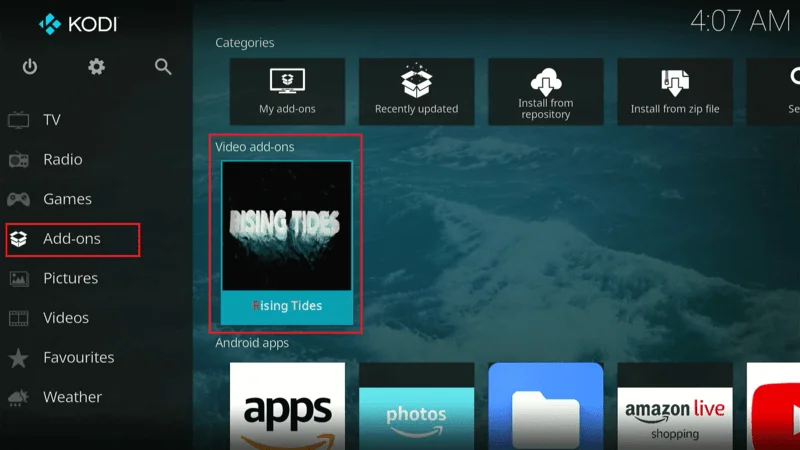
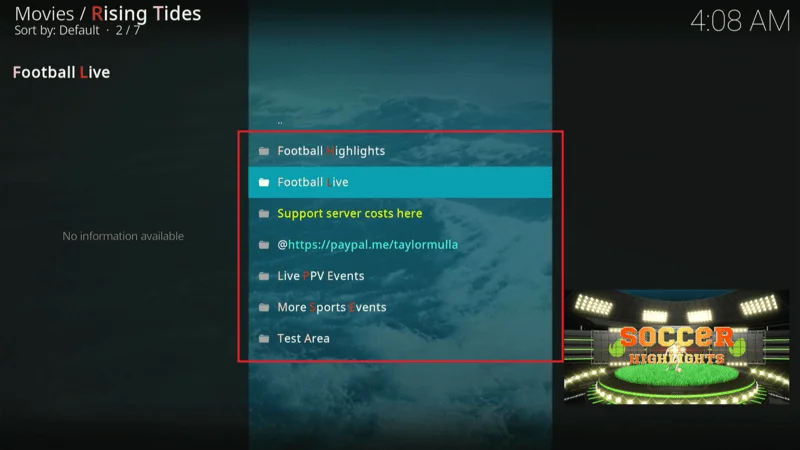
How to Use Kodi Fork on Any Device
If the Kodi Fork you installed comes with a preinstalled Build, app, or other features, you’ll notice that each Fork offers something different when you open Kodi. You can simply follow the on-screen prompts to complete the installation of the Build.
Now, let’s explore what’s included in this particular Fork that we’ve just installed.
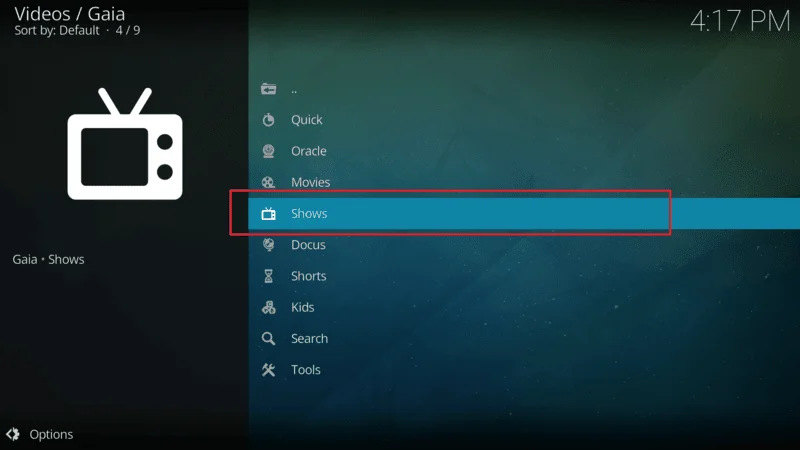
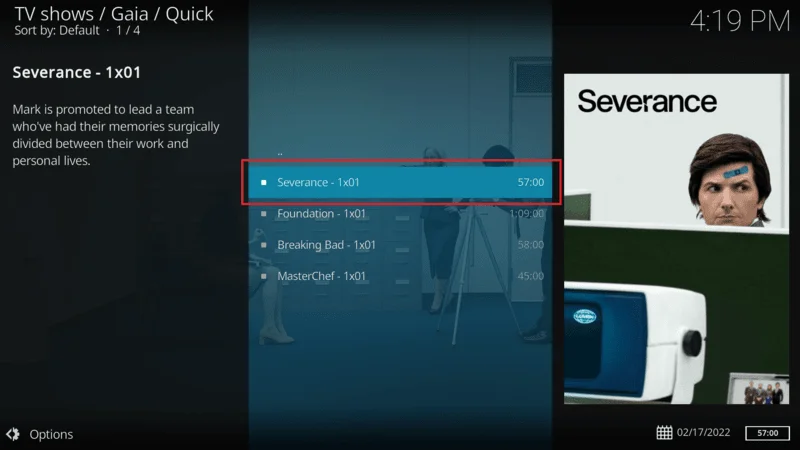
Launch the app on your device. If you’re using a FireStick, go to the Apps section and select the Fork that we’ve just installed.

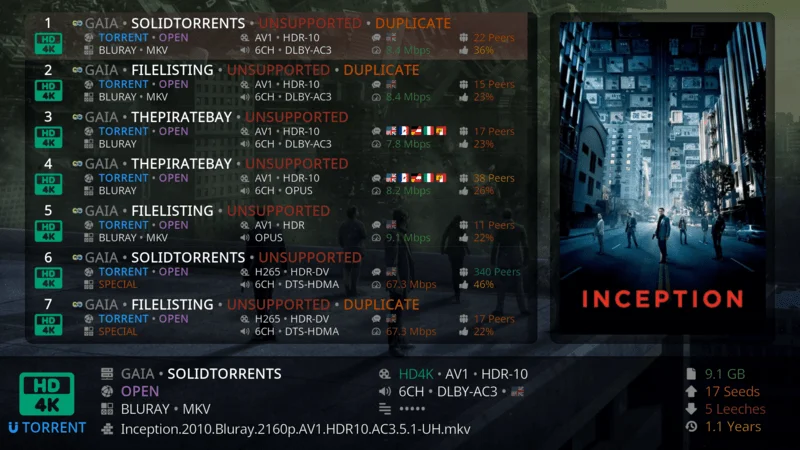
Once the app opens, you’ll notice that the interface is similar to Kodi. However, when you navigate to the Addons section, you’ll find a variety of apps perfectly suited for watching movies, TV shows, and live TV channels.

There are plenty of apps available, giving you access to all your favorite content in one place.
How to Connect Kodi Fork Wih Real Debrid
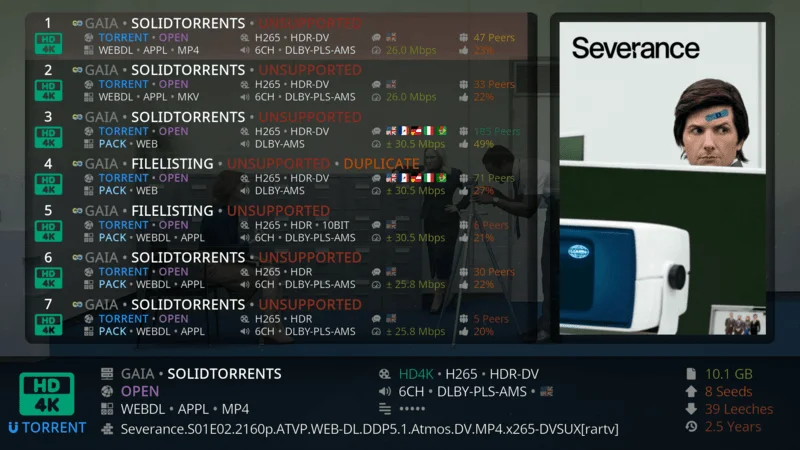
Real Debrid is a premium service that enhances your streaming experience by providing high-quality, fast-loading links. If you’re using a Kodi Fork, you can easily integrate Real Debrid to access a wider range of streaming sources with better performance.
In section guide, we’ll walk you through the steps to connect your Kodi Fork with Real Debrid, ensuring you get the most out of your streaming setup.
Follow these steps carefully to set up Real-Debrid on your Kodi Fork:
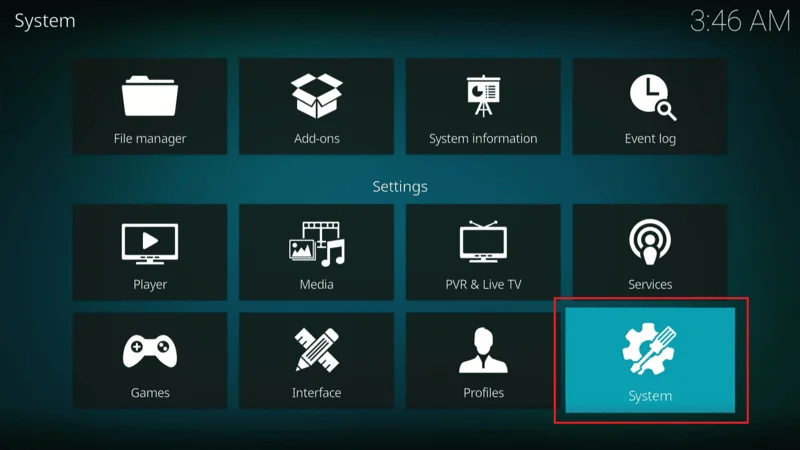
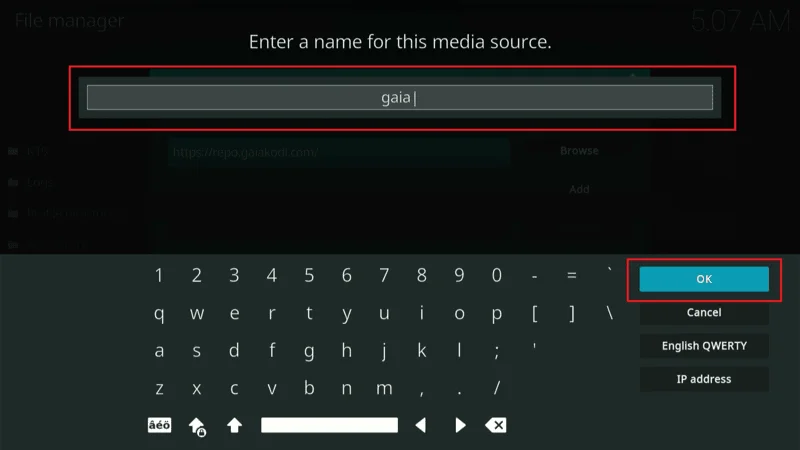
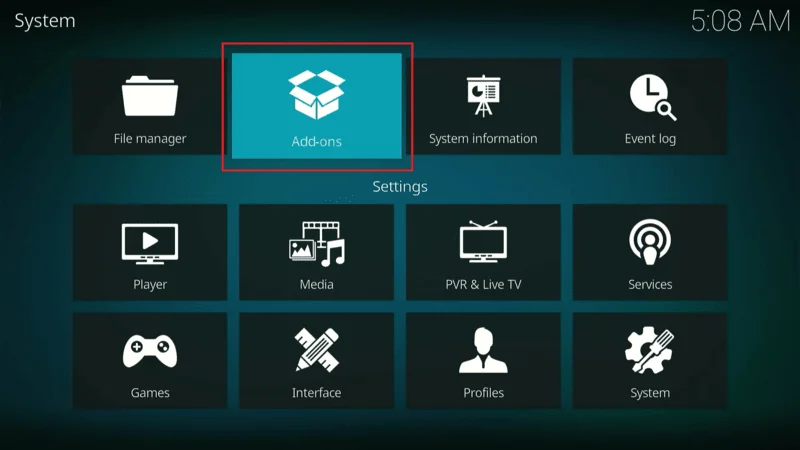
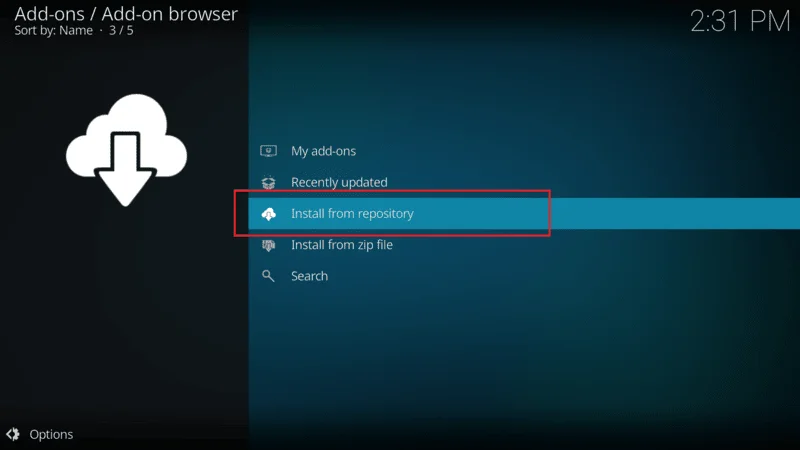
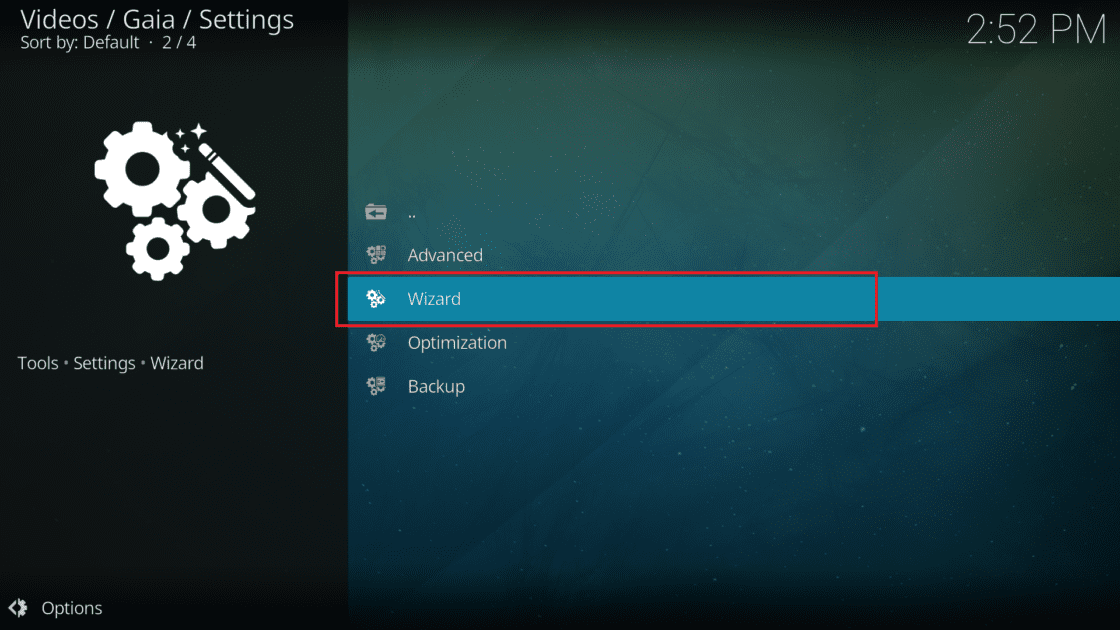
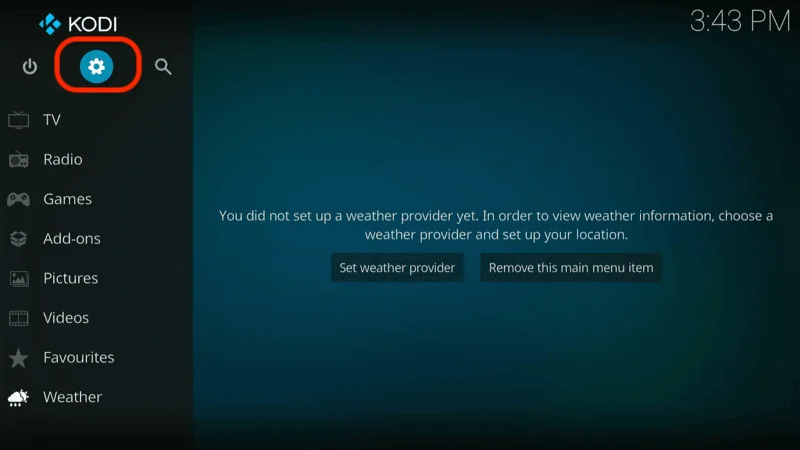
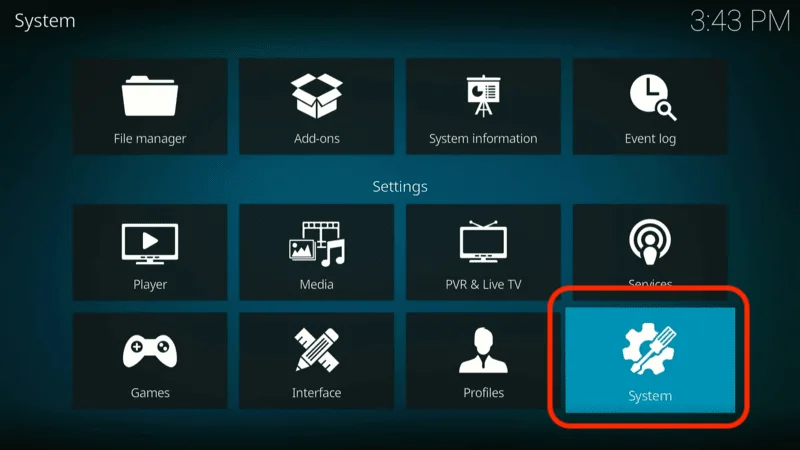
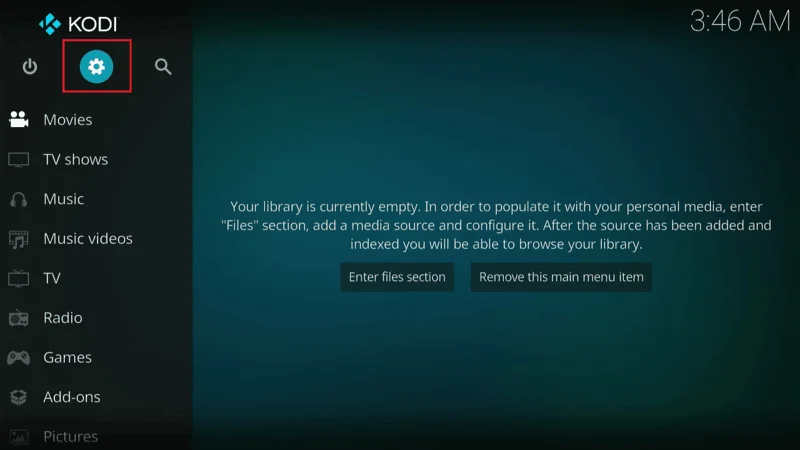
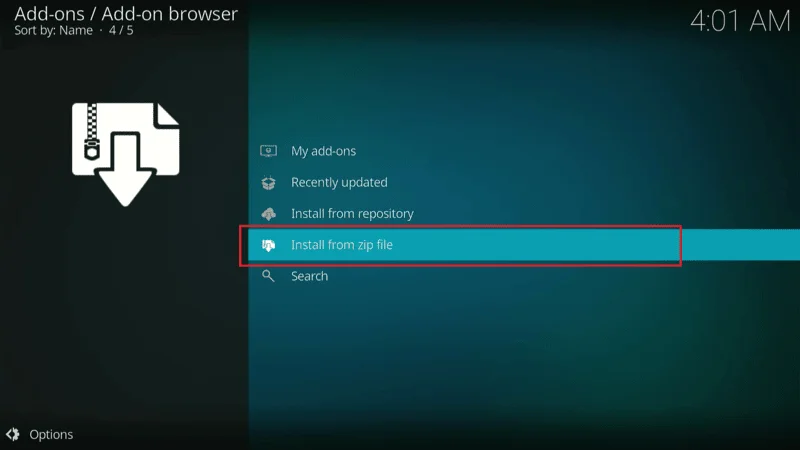
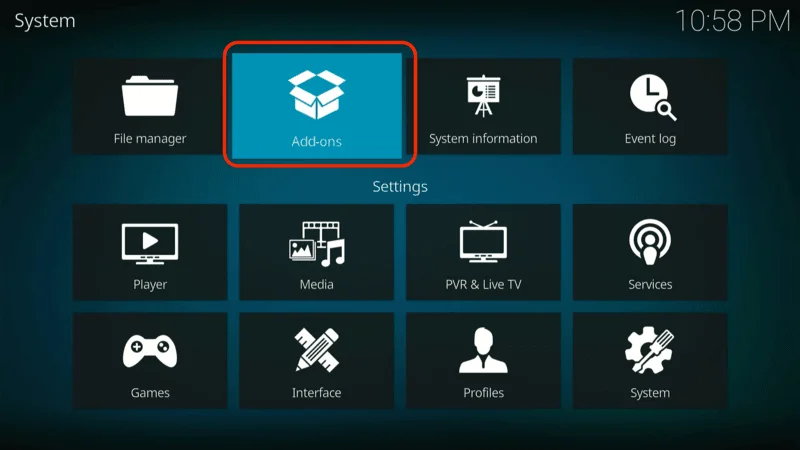
Start by launching Kodi on your device and navigating to Settings (the cog icon at the top left).
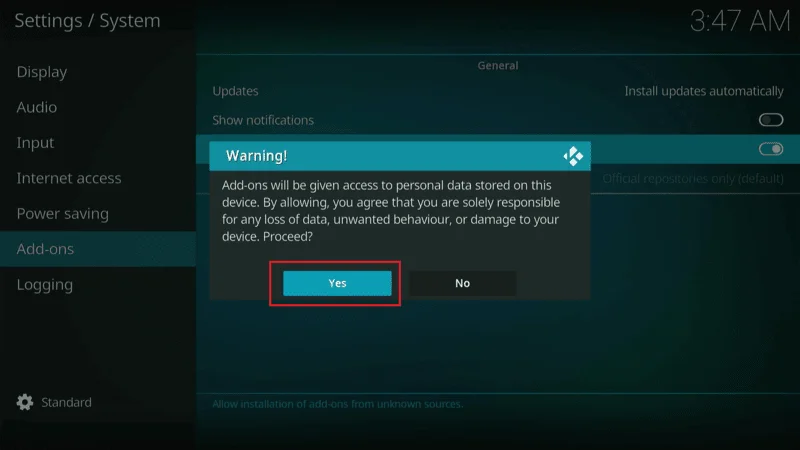
 Click on System.

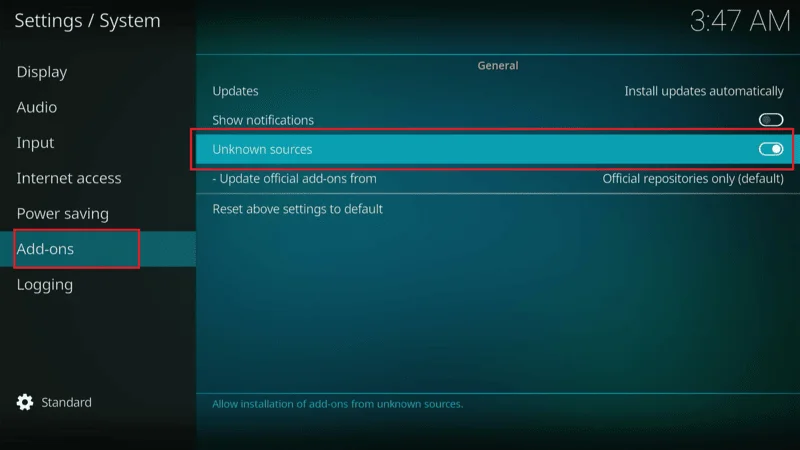
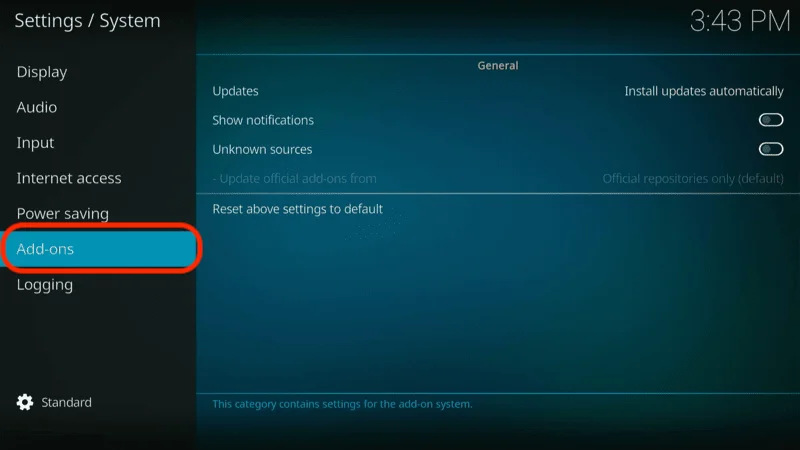
At the bottom left, next to the cog icon, keep clicking until you see Advanced mode if it’s not already selected.

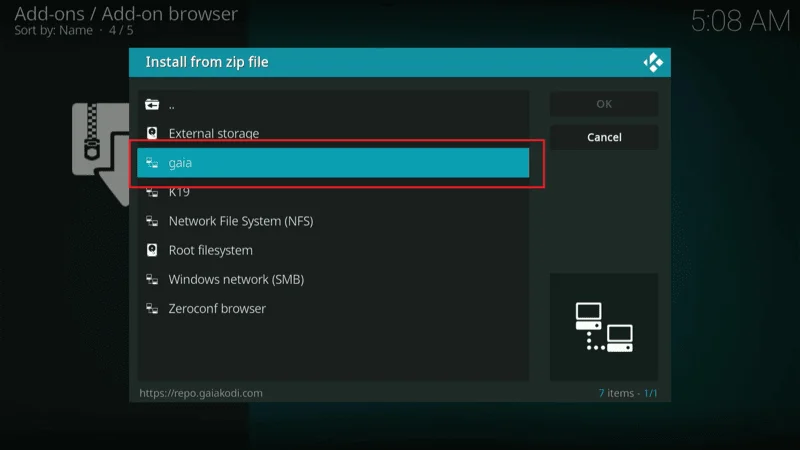
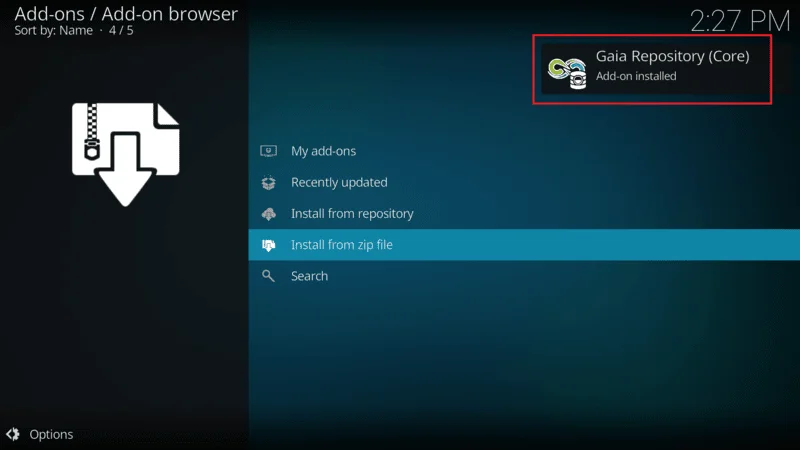
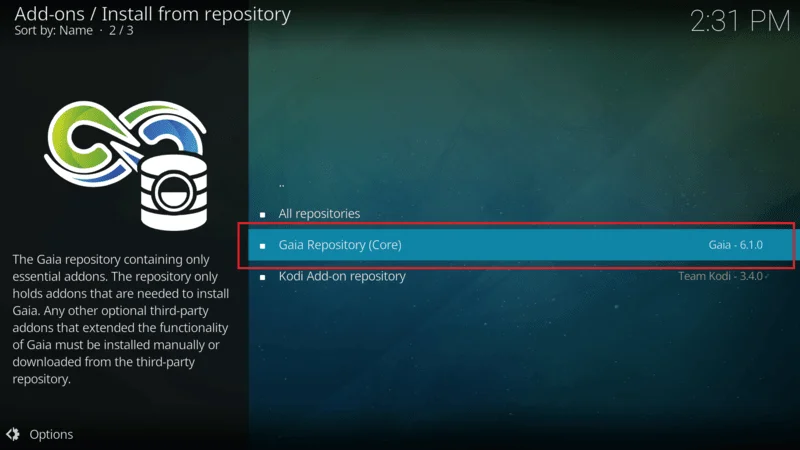
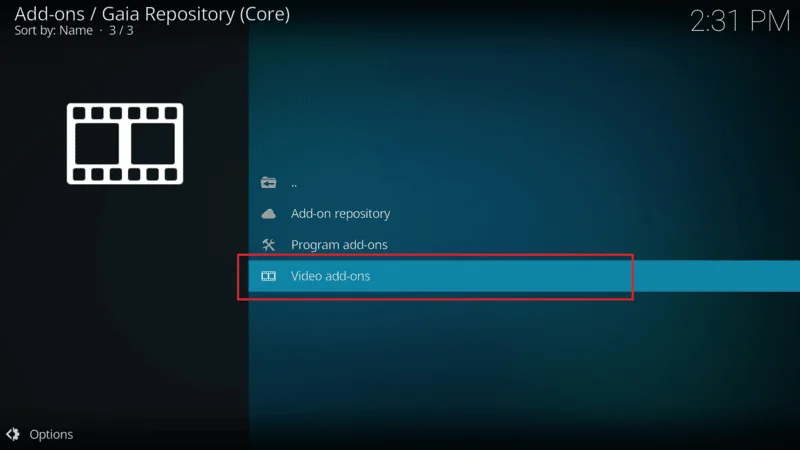
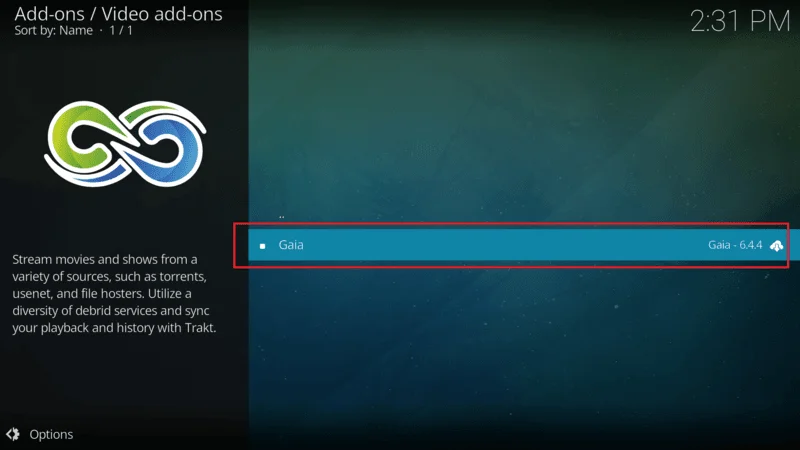
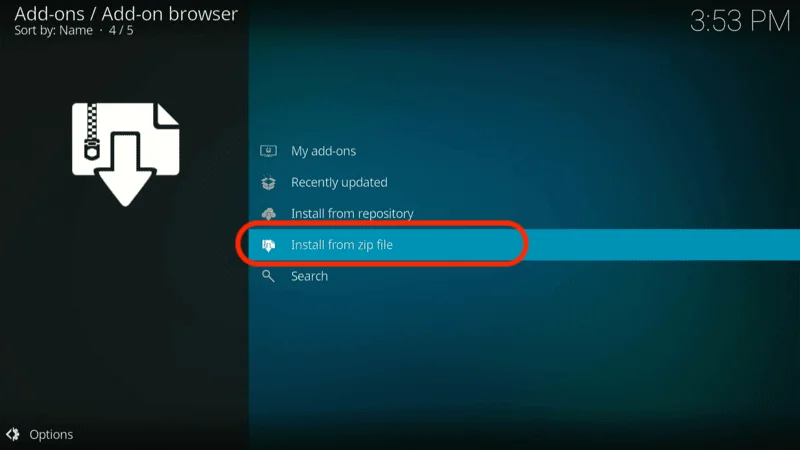
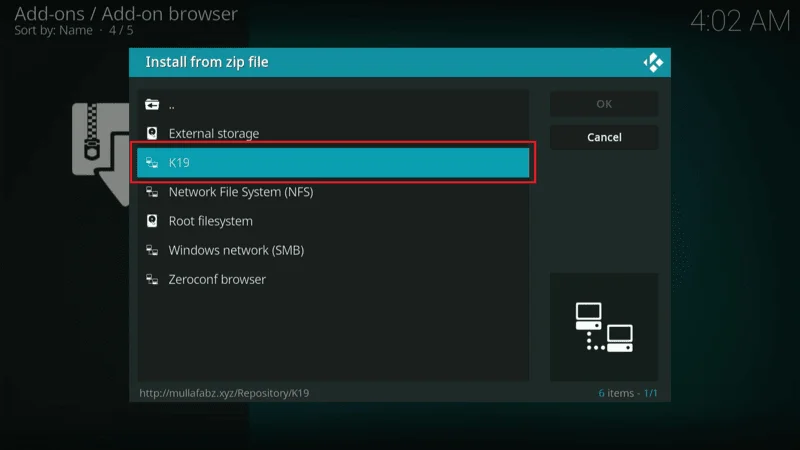
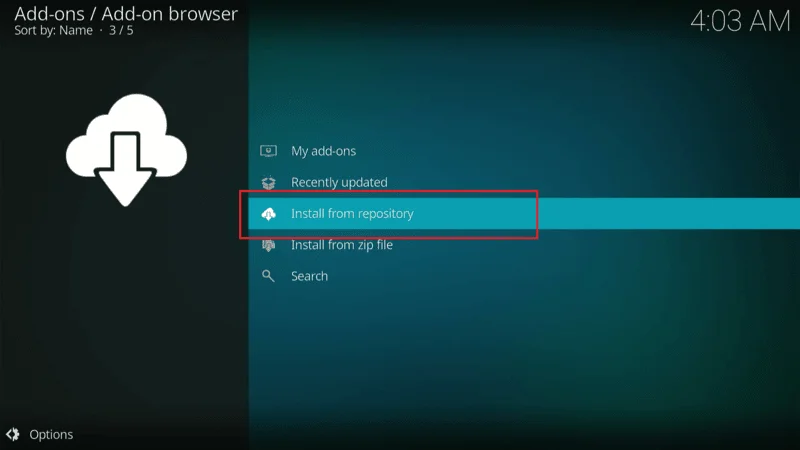
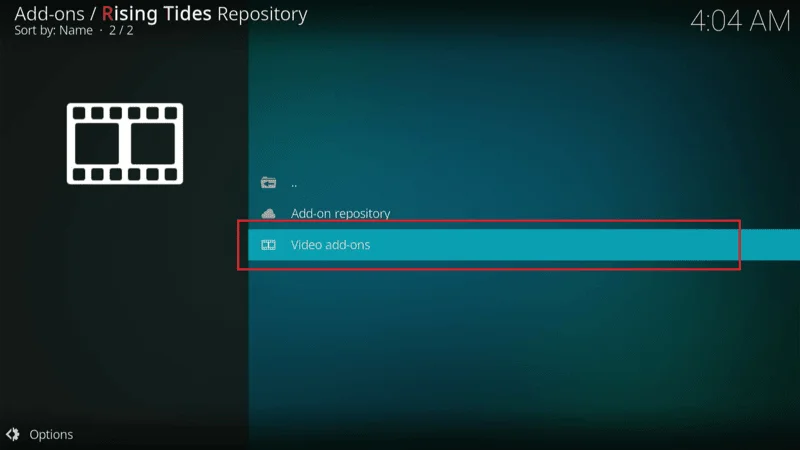
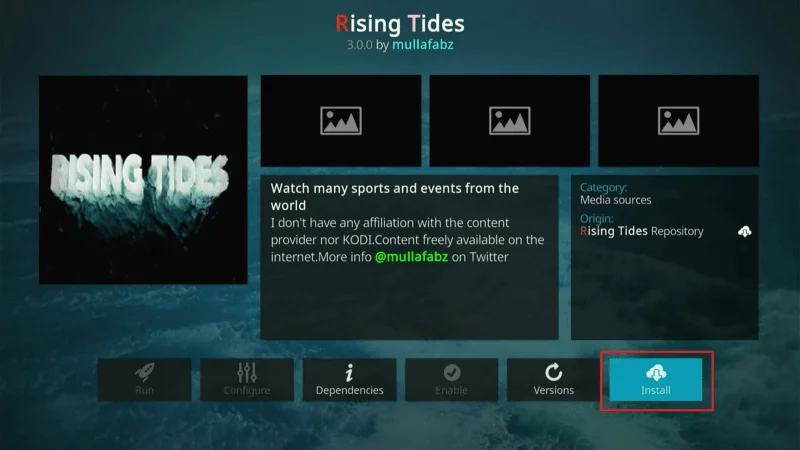
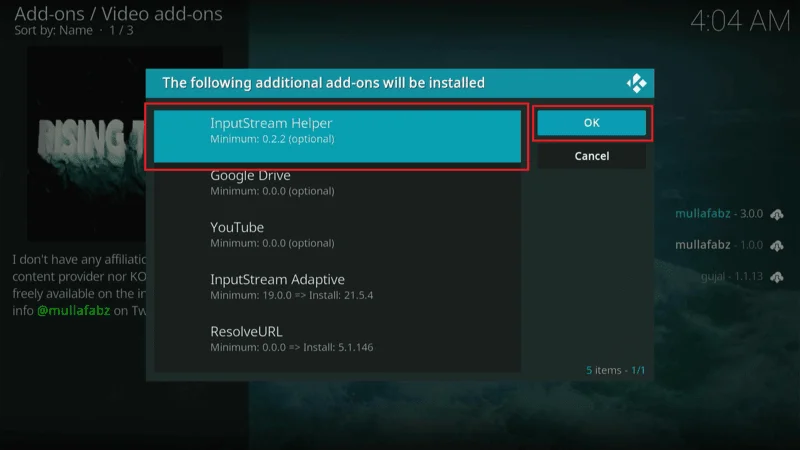
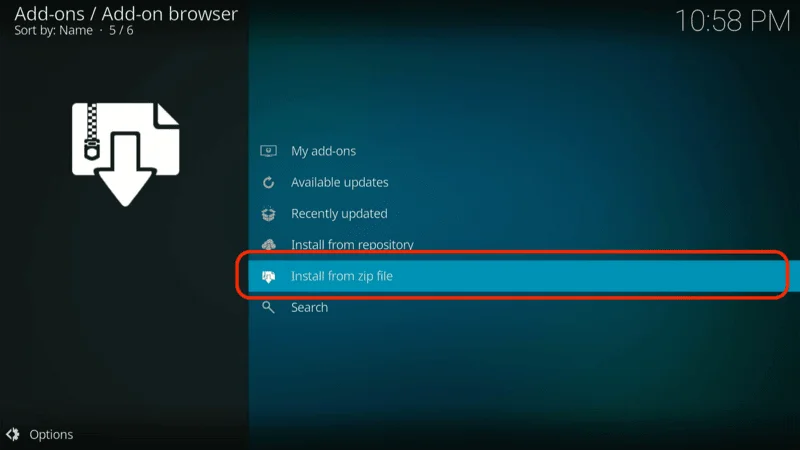
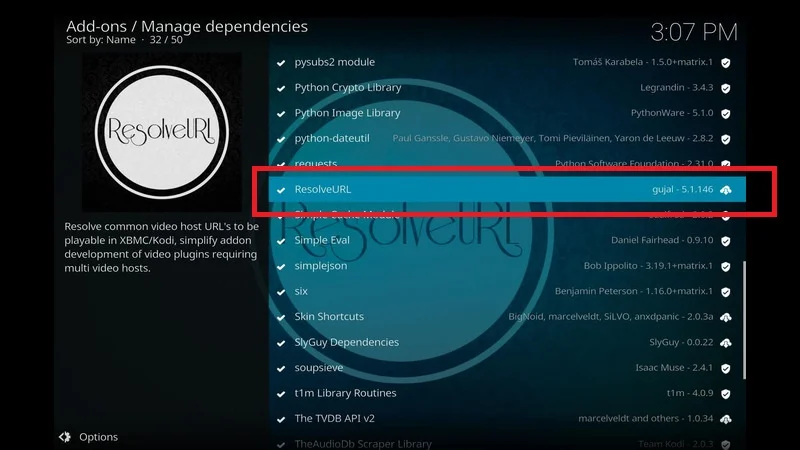
On the left sidebar, select Add-ons. Then, on the right side, choose Manage Dependencies.
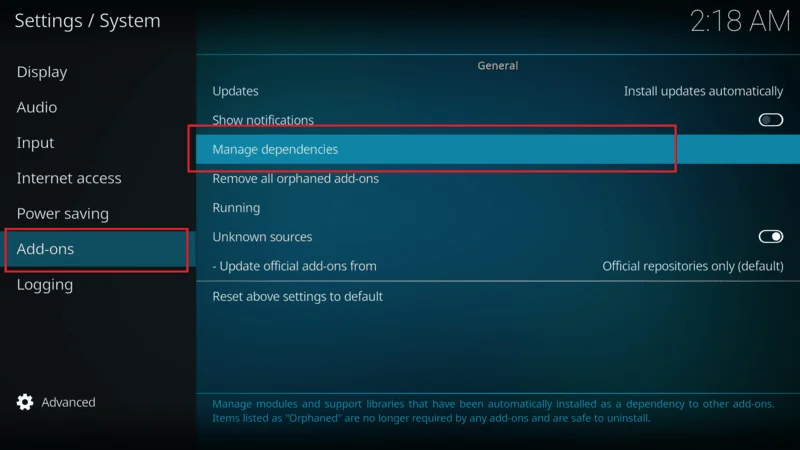
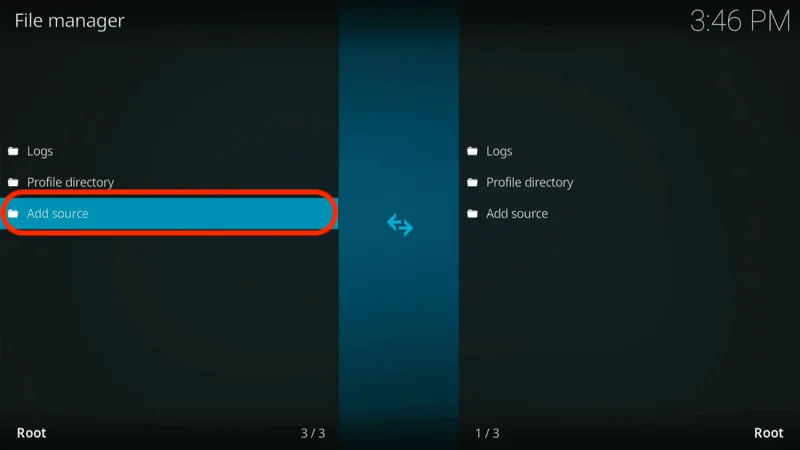
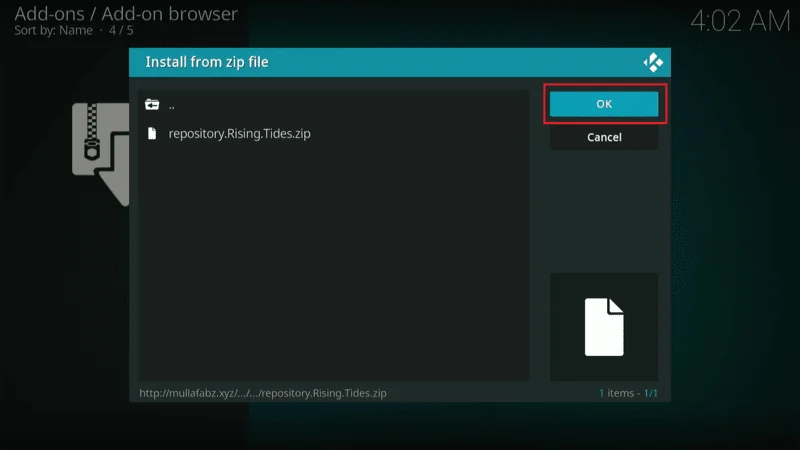
Scroll down to the bottom and select ResolveURL.
Note: ResolveURL might not appear if you haven’t installed any add-ons yet.
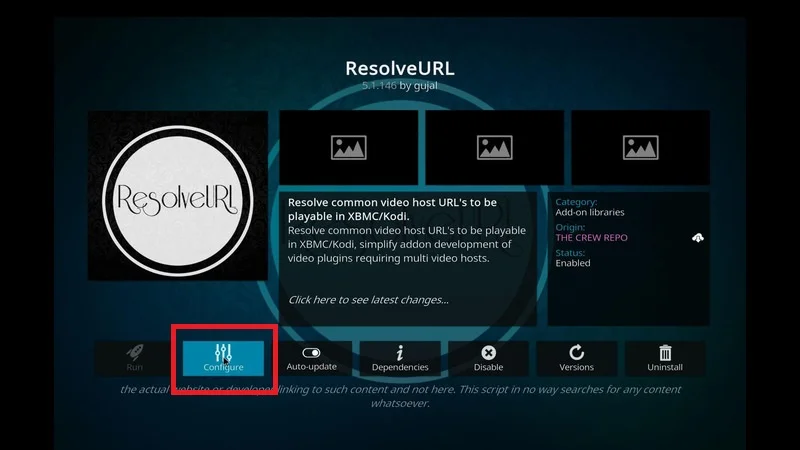
Click Configure on the next screen.
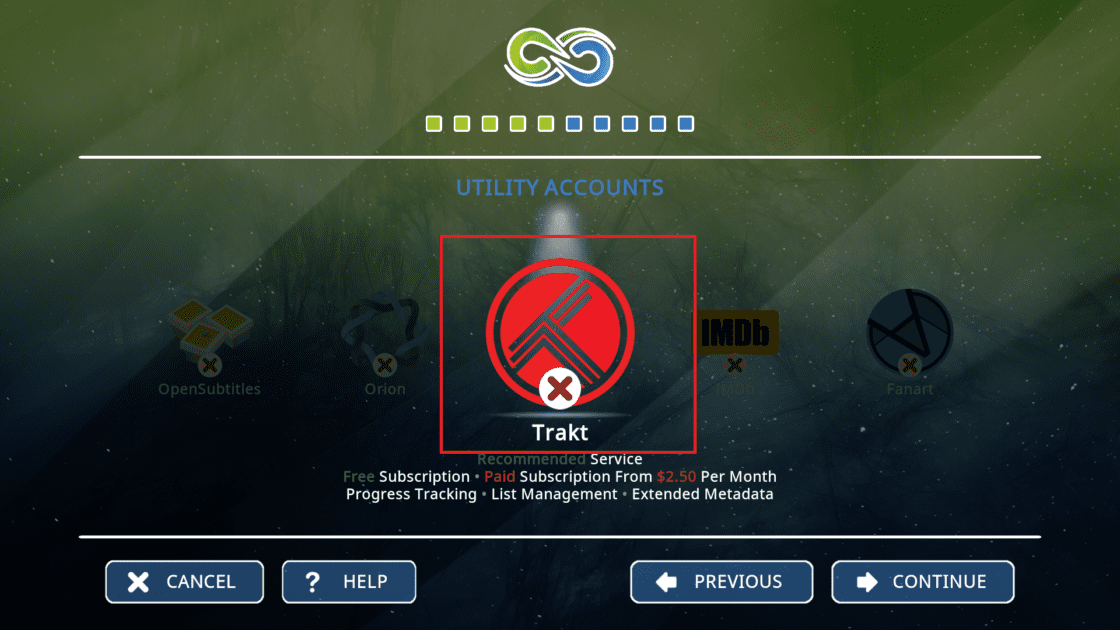
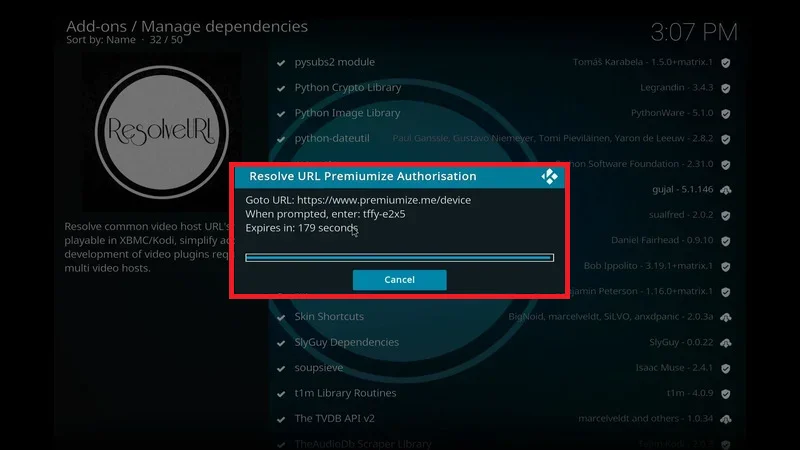
In the pop-up window, select Universal Resolvers 2.

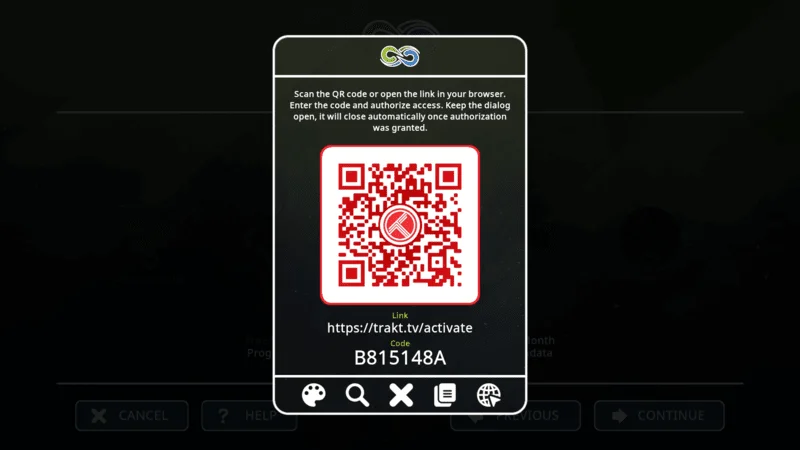
Under the Real-Debrid section, click (Re)Authorize My Account.
- A code will appear on your screen. Go to real-debrid.com/device and enter the code manually.
- Make sure you’re logged into the Real-Debrid account you created earlier.
- Remember, the code is NOT case-sensitive.
On the authorization page, enter the code shown on Kodi and click Continue.
Note: Enter your Real-Debrid credentials to log in. If you’re already logged in, you can skip this step.
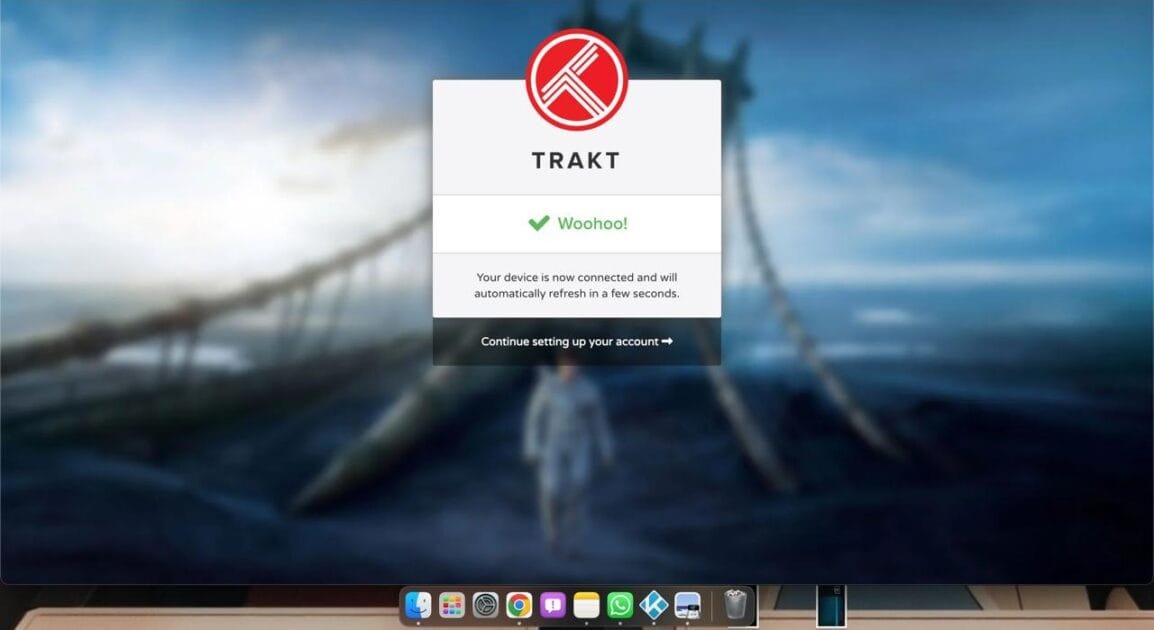
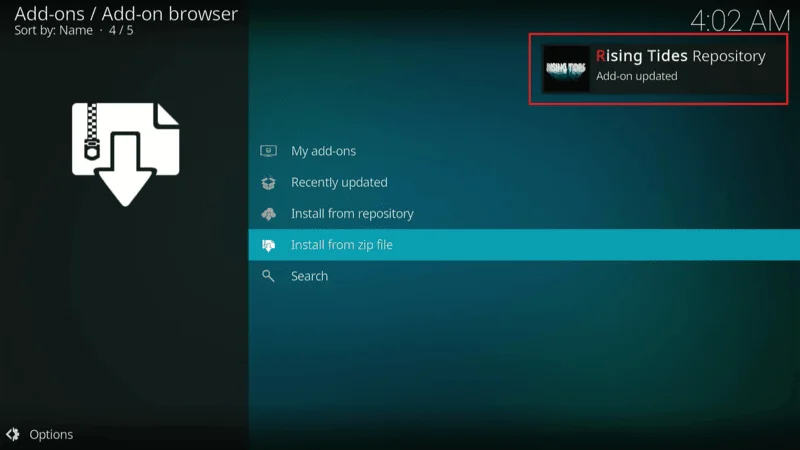
You’ll see a notification on Kodi (top right) saying ResolveURL Real-Debrid Resolver Authorized.
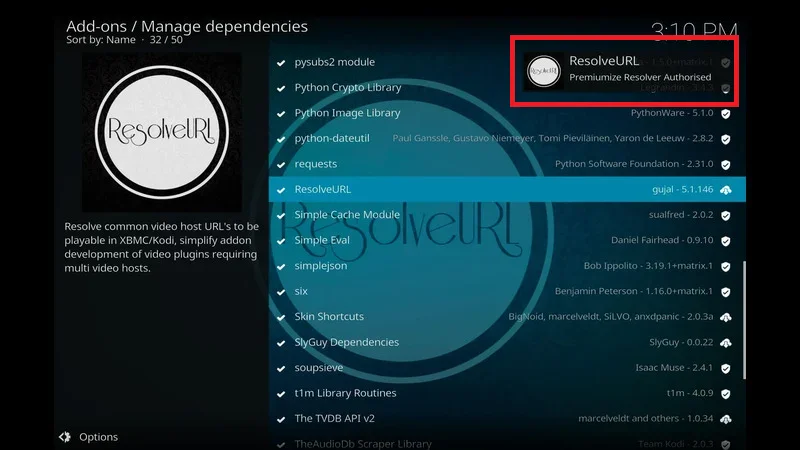
Congratulations! You’ve successfully added Real-Debrid to your Kodi Fork. Now you can enjoy a better streaming experience with high-quality links. If you encounter any issues, feel free to comment below for help.
Troubleshooting Common Issues with Kodi Forks
Even with a well-installed Kodi Fork, you might encounter some issues. Here’s how to troubleshoot common problems you may face:
1. Fork Not Launching or Crashing
Problem: The Kodi Fork isn’t launching, or it crashes immediately after opening.
Solution:
- Sometimes, a simple restart can resolve the issue.
- Go to your device’s settings, find the app, and clear the cache. This can often fix launch issues.
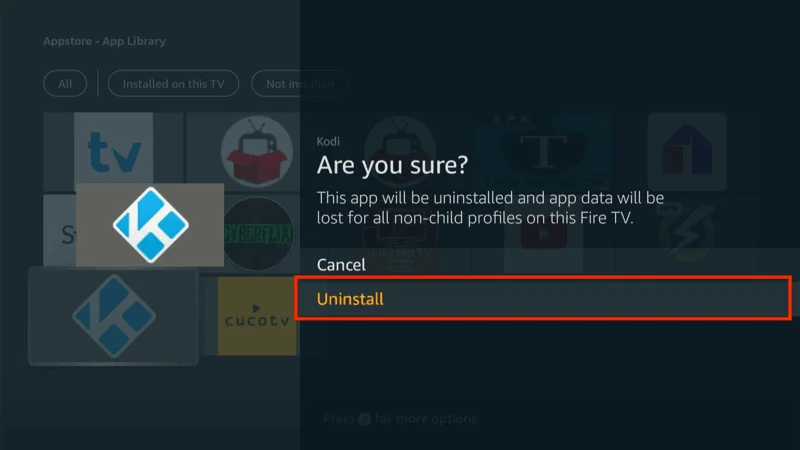
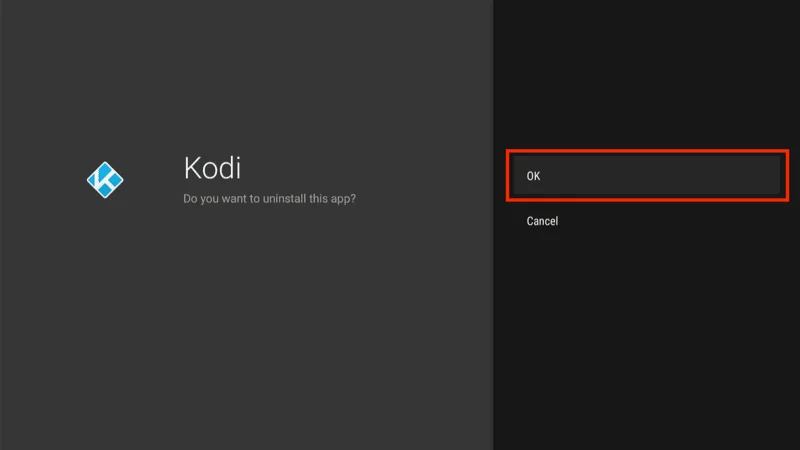
- If the problem persists, consider uninstalling and then reinstalling the Kodi Fork.
2. Addons Not Working or Missing
Problem: Addons aren’t functioning properly, or some are missing.
Solution:
- Ensure that all your addons are up to date. Check for updates within the Kodi Fork.
- A weak or unstable connection can cause addons to malfunction. Make sure your internet is working properly.
- If an addon isn’t working, try uninstalling and reinstalling it.
3. Buffering During Streaming
Problem: Streaming content buffers frequently, making it difficult to watch.
Solution:
- Lower the video quality in the addon’s settings to reduce buffering.
- If your ISP is throttling your connection, using a VPN like NordVPN can help bypass these restrictions.
- Ensure your internet connection is fast enough to support streaming.
4. Fork Not Recognizing External Storage
Problem: The Kodi Fork isn’t recognizing external storage devices.
Solution:
- Ensure your external storage is compatible with your device and properly formatted.
- Disconnect and reconnect the external storage, then restart your device.
- Make sure the Kodi Fork has the necessary permissions to access external storage.
5. Video/Audio Sync Issues
Problem: The video and audio are out of sync while streaming.
Solution:
- Within the playback settings, adjust the audio delay until it syncs with the video.
- The issue might be with the stream source. Try another source or addon.
- Make sure your Kodi Fork is up to date with the latest version.
6. Difficulty Navigating with the Remote
Problem: The standard FireStick remote or other remotes aren’t navigating properly within the Kodi Fork.
Solution:
- Install and use the Mouse Toggle app to improve navigation within the Fork.
- Ensure your remote is properly paired and functioning with your device.
- If possible, try using a different remote or a wireless keyboard/mouse combo for better control.
Frequently Asked Questions (FAQs)
Kodi Forks are customized versions of the original Kodi software, offering additional features or a different interface.
They allow users to run multiple instances of Kodi on the same device, each with its own setup and add-ons. Below are some common questions and answers to help you better understand Kodi Forks.
Q: What is a Kodi Fork?
A: A Kodi Fork is a replica or modified version of the original Kodi software. It allows you to run multiple instances of Kodi on the same device, each with its own unique setup, add-ons, and Builds.
Q: Why would I use a Kodi Fork instead of the original Kodi?
A: You might use a Kodi Fork to try out new features, maintain an older version of Kodi for compatibility with certain add-ons, or run multiple setups on the same device without affecting your main Kodi installation.
Q: Are Kodi Forks legal to use?
A: Yes, Kodi Forks are legal to use. However, the legality of what you stream through the Fork depends on the add-ons and content sources you use. Always ensure you are accessing legal content.
Q: How do I install a Kodi Fork?
A: Kodi Forks aren’t available in standard app stores, so you’ll need to sideload them onto your device. This typically involves downloading the Fork’s APK file and enabling installation from unknown sources on your device.
Q: Can I run multiple Kodi Forks on the same device?
A: Yes, you can run multiple Kodi Forks on the same device. Each Fork operates independently, allowing you to have different setups for different needs.
Q: Will installing a Kodi Fork affect my existing Kodi setup?
A: No, installing a Kodi Fork won’t affect your existing Kodi setup. Forks run separately, so you can keep your main Kodi installation intact while experimenting with different Forks.
Q: Do Kodi Forks come with pre-installed add-ons or Builds?
A: Some Kodi Forks come with pre-installed add-ons or Builds, while others are blank slates for you to customize. Always check the Fork’s details before installation to know what’s included.
Q: Can I install the same add-ons on a Kodi Fork as I do on the original Kodi?
A: Yes, you can install the same add-ons on a Kodi Fork as you would on the original Kodi. Forks support all the same add-ons, Builds, and repositories.
Q: What should I do if my Kodi Fork isn’t working properly?
A: If your Kodi Fork isn’t working properly, try restarting your device, clearing the Fork’s cache, or reinstalling the Fork. If the problem persists, check online forums for support or consider using a different Fork.
Q: Is it safe to use a Kodi Fork?
A: Kodi Forks are generally safe to use, but it’s important to download them from trusted sources. As with any third-party software, there’s a risk of malware, so always ensure you’re getting the Fork from a reputable site.
Final Words
Kodi Forks offer a flexible and powerful way to customize your streaming experience, allowing you to run multiple versions of Kodi on the same device without compromising your main setup.
Whether you’re looking to try out new features, maintain an older version for compatibility, or explore pre-installed Builds and add-ons, Kodi Forks provide the perfect solution.
As with any software, it’s important to ensure you’re downloading Kodi Forks from trusted sources and using them responsibly. By following the tips and guidelines provided in this guide, you can make the most of your Kodi Forks while keeping your device safe and your streaming experience smooth.
Happy streaming, and feel free to reach out if you have any questions or need further assistance!