If you’re new to Kodi, don’t worry—this Guide For Kodi will help you hit the ground running. By the end of this post, you’ll be familiar with Kodi’s basics and ready to dive into streaming your favorite movies, TV shows, and more in no time.
When I first started with Kodi, I found the app a bit intimidating. Its layout and features are unlike any other media player I had used before, which gave it a steep initial learning curve.
However, it didn’t take long for me to realize that Kodi is actually quite simple once you get the hang of it. You don’t need to be a tech expert or go through hours of tutorials to start enjoying your content through Kodi.
That being said, I understand that a little guidance can go a long way, especially for beginners. In hindsight, if I had known a few tips from the start, I would’ve gotten comfortable with Kodi much faster. Since many readers have asked for a beginner’s guide, I decided to create one to make your Kodi experience as smooth as possible.
In this guide, I’ll break down the essentials so you can get the most out of Kodi right away.
⚠️ Attention, Kodi Users!
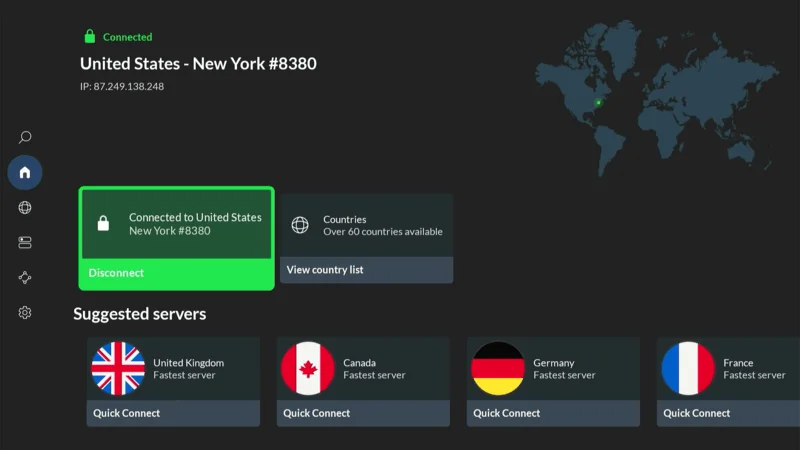
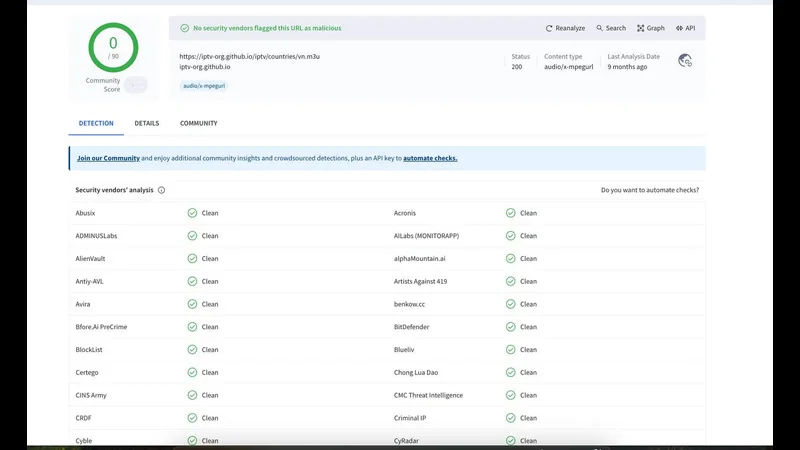
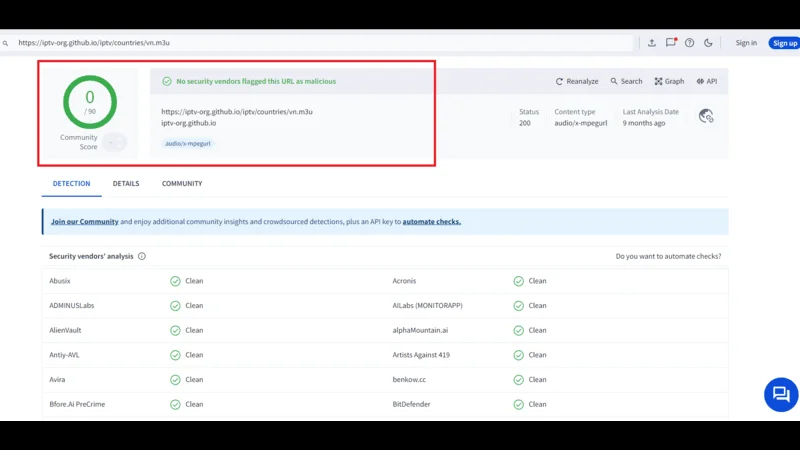
Kodi Addons and builds offer unlimited streaming content, but they could also get you into trouble if you’re caught streaming free movies, TV shows, or sports. Currently, your IP 2400:adc3:12c:e600:bcd3:880f:e0ab:5a62 is visible to everyone. Kodi users are strongly advised to always connect to a VPN while streaming online. Kodi VPN hides your identity plus bypasses government surveillance, geo-blocked content, and ISP throttling (which also helps in buffer-free streaming).
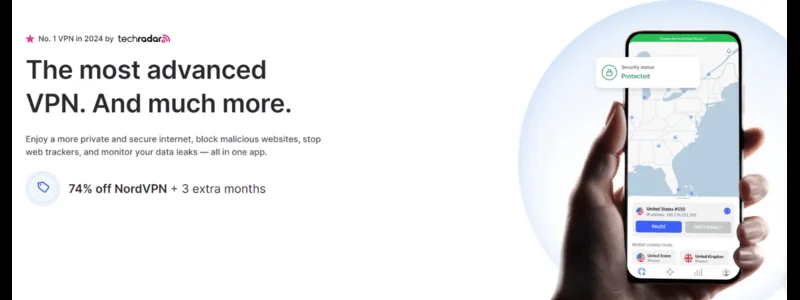
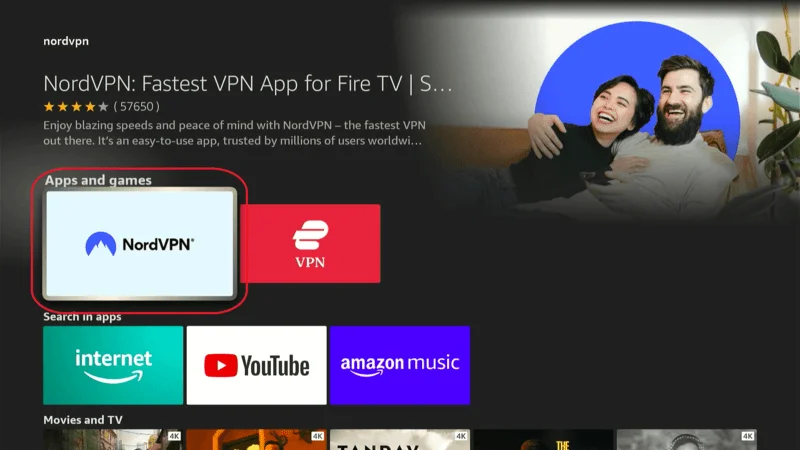
I personally use NordVPN, which is the fastest and most secure VPN. It is easy to install on Amazon FireStick and any other device. You get 3 months free and save 49% on its annual plans. Also, it comes with a 30-day money-back guarantee. If you are not satisfied, you can always ask for a refund.
What is Kodi?
Kodi is a powerful, open-source media player designed to handle all your multimedia needs. Whether you’re watching videos, listening to music, or accessing other media files, Kodi makes it easy to manage your content on any device.
While Kodi can be used to play local files, it’s best known for its ability to stream content from the internet. With Kodi, you can stream almost anything, including:
- Movies
- TV Shows
- Documentaries
- Live Sports
- Music
- And more!
One of the standout features of Kodi is its customizability. You can tweak everything from general settings to the app’s appearance, thanks to skins and builds that allow you to change the look and feel of the interface.
Despite being a popular and user-friendly tool, there’s one thing to note: Kodi doesn’t host any content itself. To stream movies, TV shows, and other content, you’ll need to install Kodi addons. These addons act as extensions, giving you access to a variety of media sources.
Kodi offers official addons from its own repository, but you also have the option to explore third-party repositories, many of which host a wide range of fantastic content.
With Kodi’s flexibility and countless addons available, it’s easy to see why it’s become a go-to media player for streaming enthusiasts worldwide.
How to Install Kodi on Various Devices
Kodi is a versatile media player supported on a wide range of devices. While this Guide For Kodi won’t cover the step-by-step process for every platform, I’ll give you an overview of how to install Kodi on some of the most popular ones. I’ll also point you to the right sources to get Kodi and provide a quick explanation of the installation process.
Here are the platforms we’ll focus on:
- Amazon FireStick & Fire TV
- Android Mobiles & Tablets
- Windows PC
- Mac OS
- iOS
- Android Smart TV & Android TV Boxes
Before we dive into the specifics, it’s worth noting that the latest official version of Kodi is Kodi 21.1 Omega. Some users still use the older version, Kodi Nexus, but it’s no longer available through official channels, as Kodi Omega has replaced it.
Legal Disclaimer: This tutorial is intended solely for educational purposes. KodiExpert.org does not own, host, operate, resell, or distribute any streaming apps, addons, websites, IPTV services, or similar platforms. The content on this page may include some unverified services, and we cannot confirm whether they possess the necessary legal licenses to distribute the content they offer.
KodiExpert.org does not verify the legality of each app or service in every region. It is your responsibility to conduct your own due diligence if you choose to use any unverified apps or services. Please ensure that you only stream content that is legally available in the public domain. The end-user is solely responsible for any media accessed.
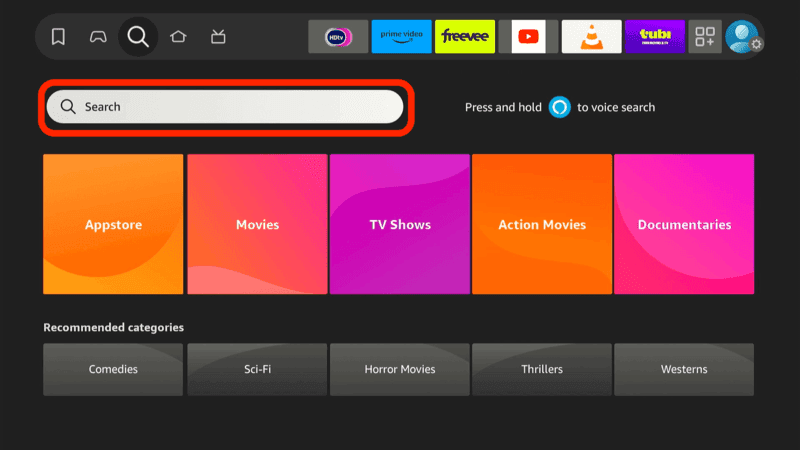
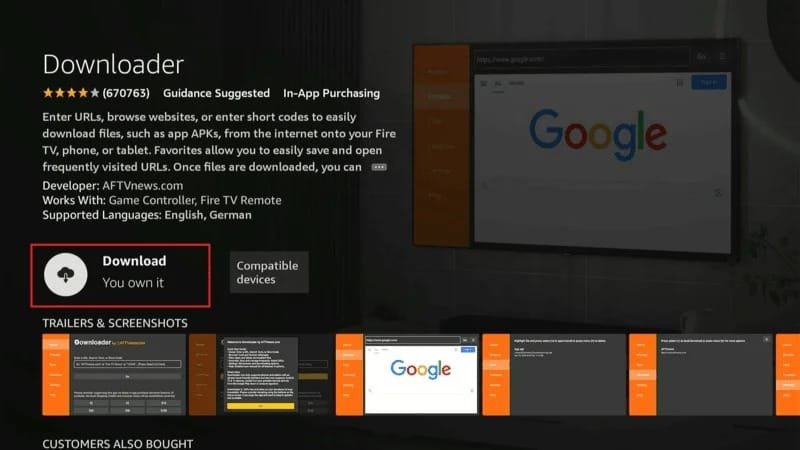
1. Installing Kodi on Amazon FireStick & Fire TV
The Amazon FireStick is a hugely popular streaming device that transforms any TV with an HDMI port into a Smart TV. Since it runs on an Android-based system, it’s highly versatile and supports a wide range of apps and services.
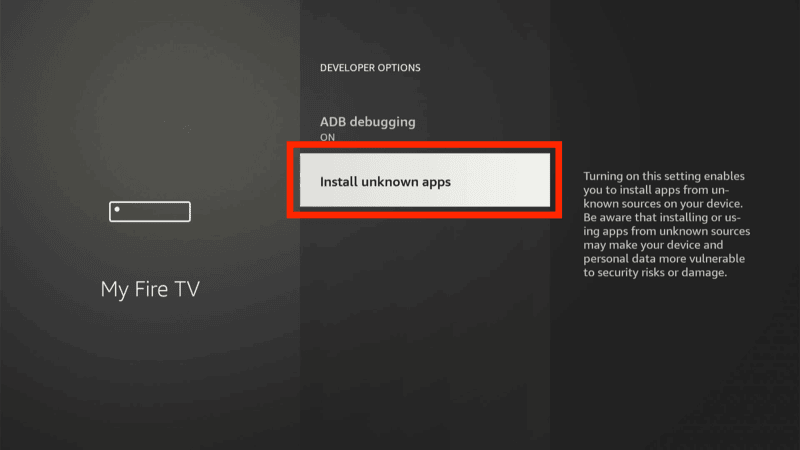
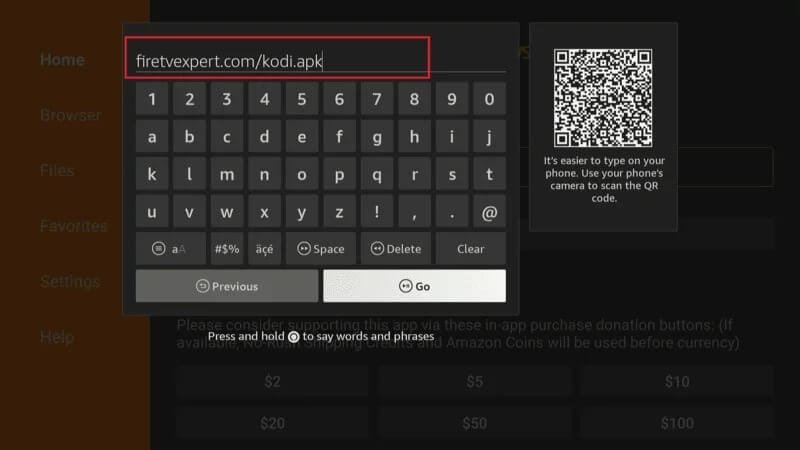
When it comes to Kodi, you should know that Amazon Store does not host the app. Therefore, you’ll need to manually download and install the Kodi APK from a trusted source. Don’t worry, though—the process is simple and quick, and the same steps apply whether you’re using a FireStick or Fire TV, as there are only a few minor physical differences between the two devices.
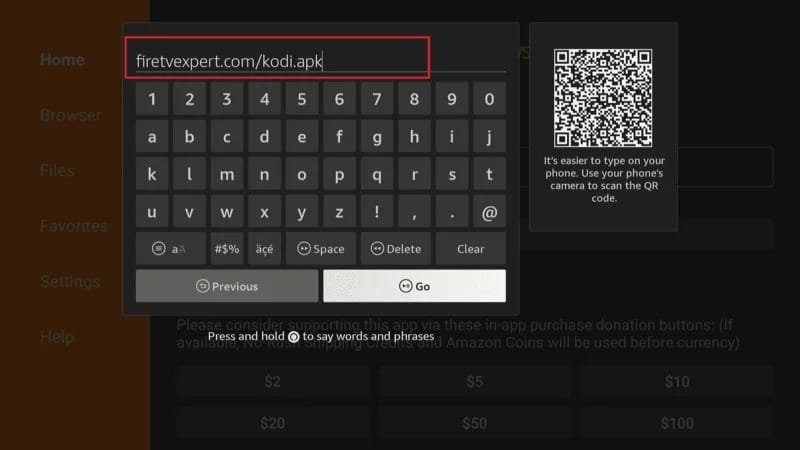
Here is how you can install Kodi on Firestick & Fire TV (Click Here to Get Complete Guide For Kodi)
Open Downloader> Type Url: kodi.tv/downlaod> Choose Andriod> Select 32bit Version for Kodi> Wait until the installations Complete

Pictuere of downloader app
2. Installing Kodi on Android Mobiles & Tablets
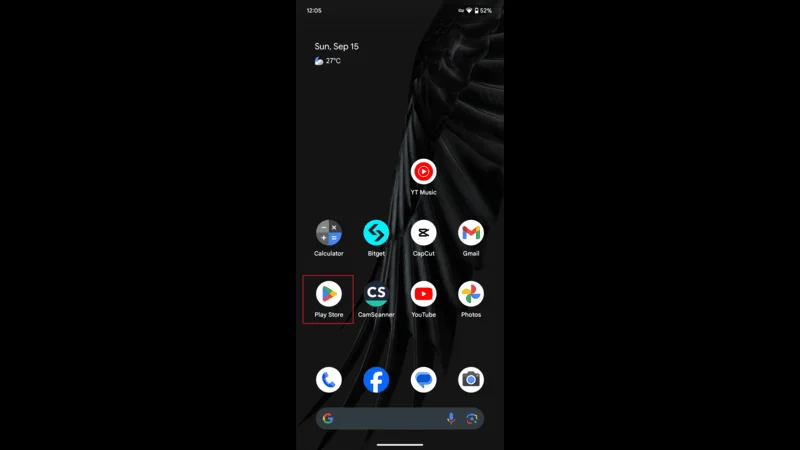
If you’re using an Android device, installing Kodi couldn’t be easier. Unlike Amazon FireStick or Fire TV, there’s no need to sideload or manually install Kodi on Android phones and tablets. Google has verified the Kodi app as safe, so you can find it directly in the Google Play Store.
Since the app is available in the Play Store, you can trust that it’s both secure and approved by Google. Here’s how to get Kodi up and running on your Android device:
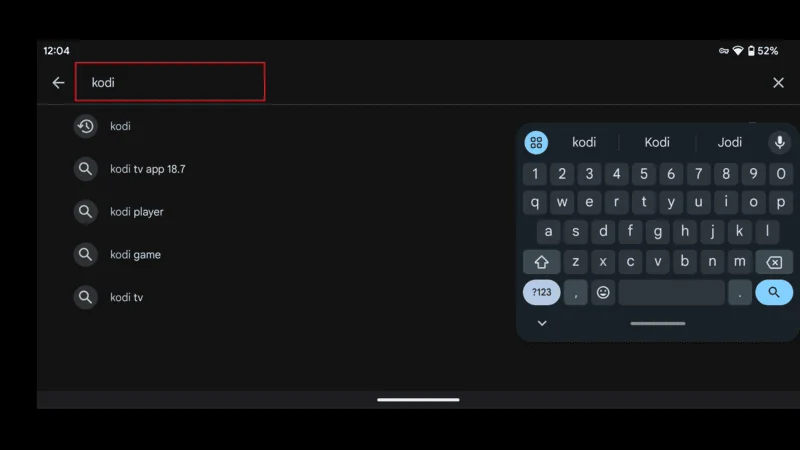
Open the Google Play Store.
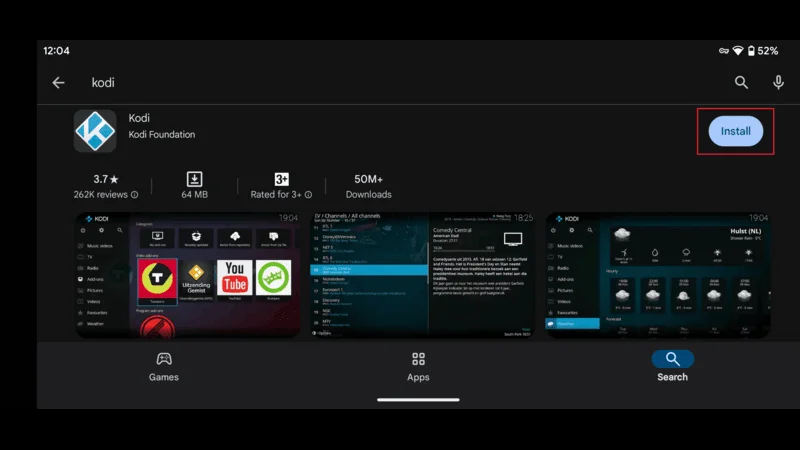
Search for “Kodi” in the search bar. Select Kodi from the search results.
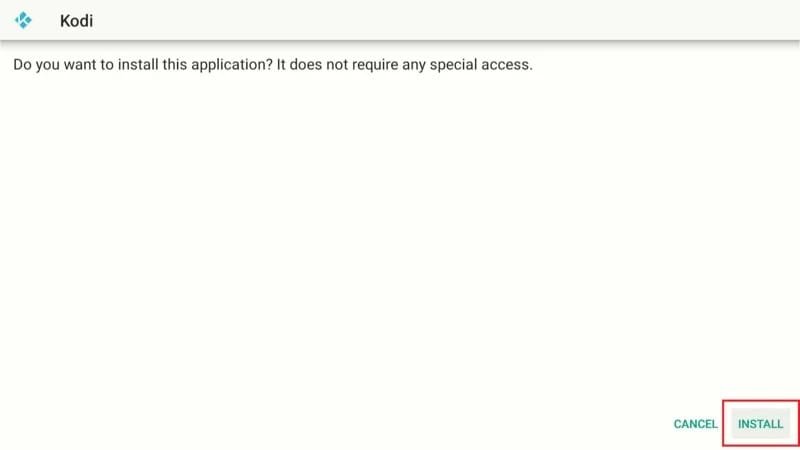
Click Install.
And that’s it! In just a few taps, Kodi will be installed on your Android device, and you’re ready to start streaming content. It’s as straightforward as installing any other app.
3. Installing Kodi on Windows PC
The installation process for Kodi varies slightly depending on your version of Windows. Below, we’ll cover how to install Kodi on Windows 10 & 11. If you’re running an older version of Windows (like 8.1 or below), the process is a bit different, which we’ll explain in the next section.
3.1 Installing Kodi on Windows 10 & 11
If you’re using Windows 10 or Windows 11, you can easily install Kodi from the Microsoft Store. This method is both quick and secure, as the Microsoft Store ensures the app is legitimate and safe.
Here’s how you can do it:
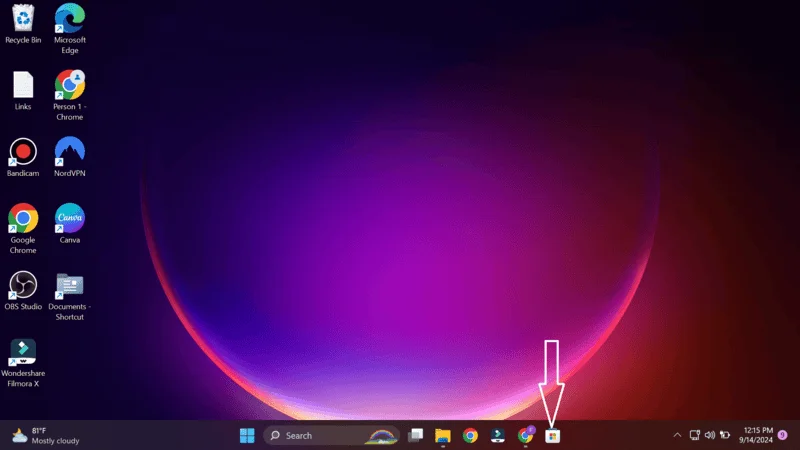
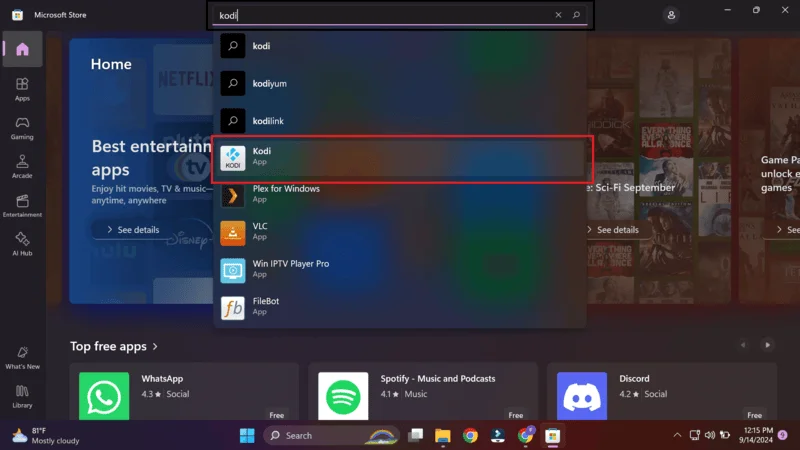
Launch the Microsoft Store by either searching for it in the Windows search bar or clicking the icon on your taskbar.
Use the search bar located at the top-middle part of the screen to type in “Kodi.”
Click on the Kodi app from the search results to open its app dashboard.
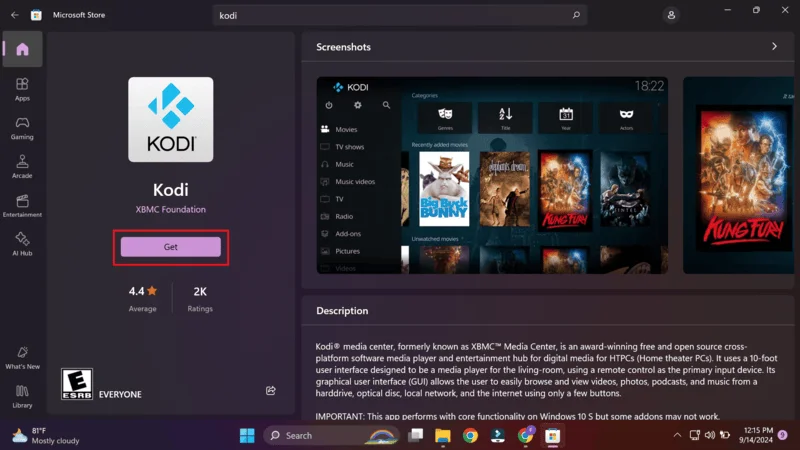
Once you’re on the Kodi app page, click the Get button. The app will start downloading and installing automatically.
In just a minute or two, Kodi will be successfully installed on your Windows 10 or 11 PC, and you’ll be ready to start streaming!
3.2 Installing Kodi on Windows 8.1 & Older Versions
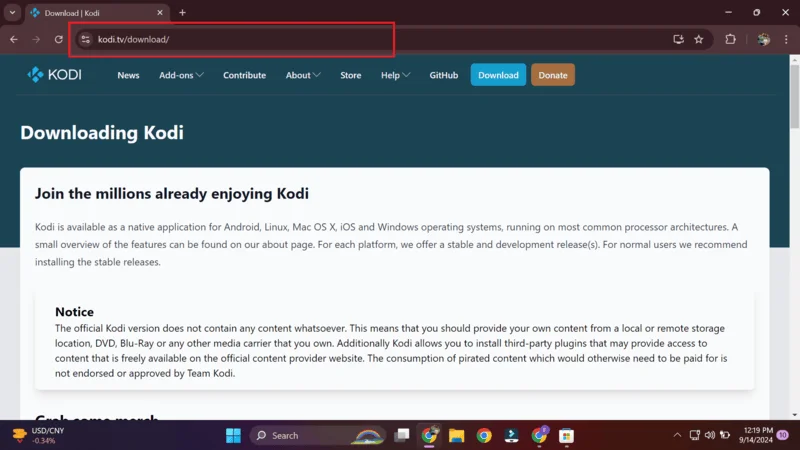
For users running Windows 8.1 or older versions of Windows, you won’t find Kodi in the Microsoft Store. However, you can easily download and install it directly from the official Kodi website. Here’s how to do it step by step Guide For Kodi:
Open your browser and navigate to https://kodi.tv. You can either click the DOWNLOAD button on the top-right corner of the home page or go directly to https://kodi.tv/download.
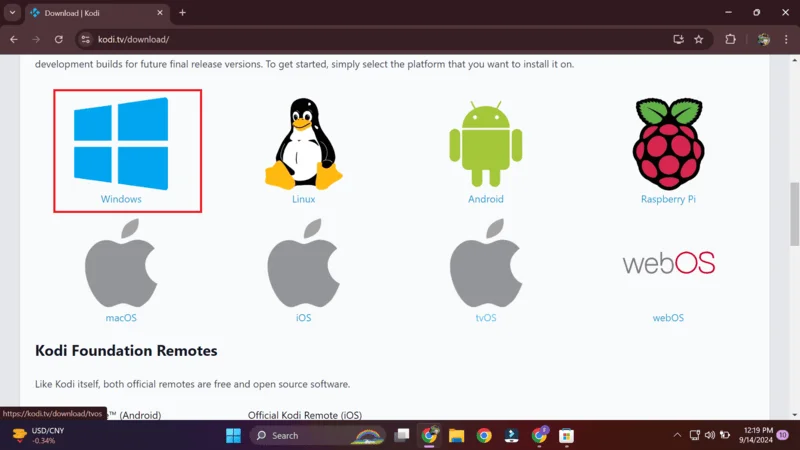
Once on the download page, scroll down until you see a row of logos for different platforms. Click on the Windows logo to proceed.
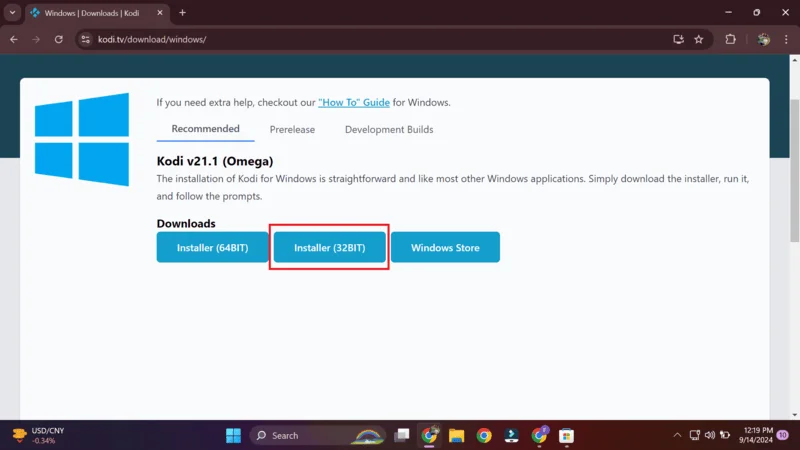
On the next page, make sure you’re on the Recommended tab to download the latest stable version of Kodi. Select the installer based on your computer’s architecture:
- Installer (64 BIT): If your computer runs on a 64-bit system.
- Installer (32 BIT): If you’re using a 32-bit PC.
Once downloaded, run the installer and follow the on-screen instructions to complete the installation process. In just a few minutes, you’ll have Kodi ready to go on your older version of Windows.
4. Installing Kodi on Mac OS
While Kodi is not available on Apple’s App Store, there is a dedicated macOS version available on Kodi’s official website. If you’re using Mac OS 10.8 X or higher, you can easily install Kodi by following these steps also you can read our step by Guide For Kodi HERE:
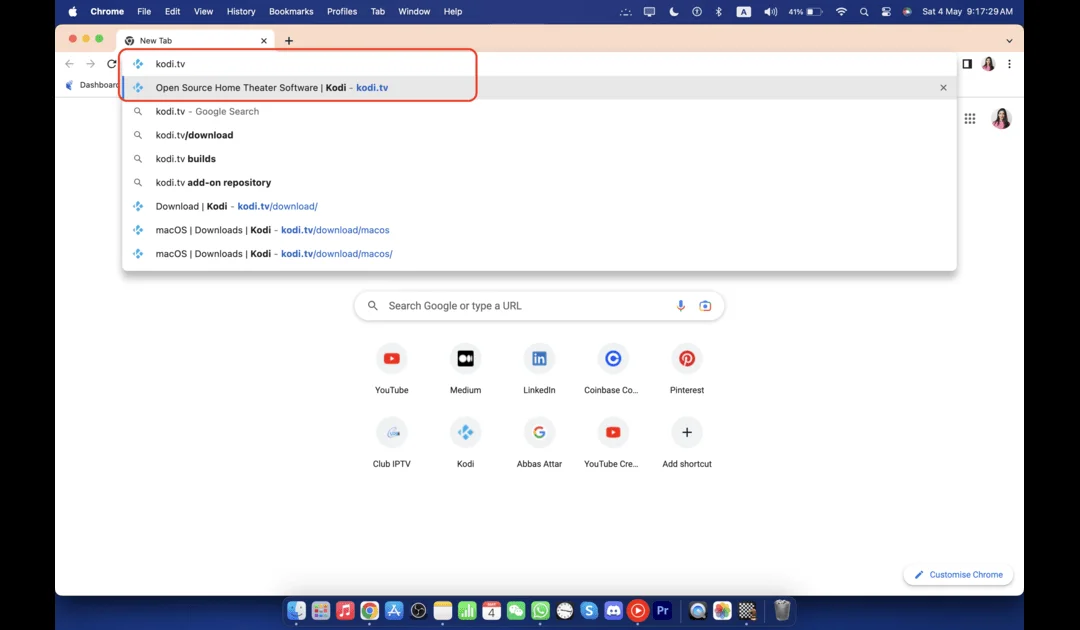
Open the Safari web browser (Safari auto-mounts the DMG file, making installation easier) and navigate to https://kodi.tv/download.

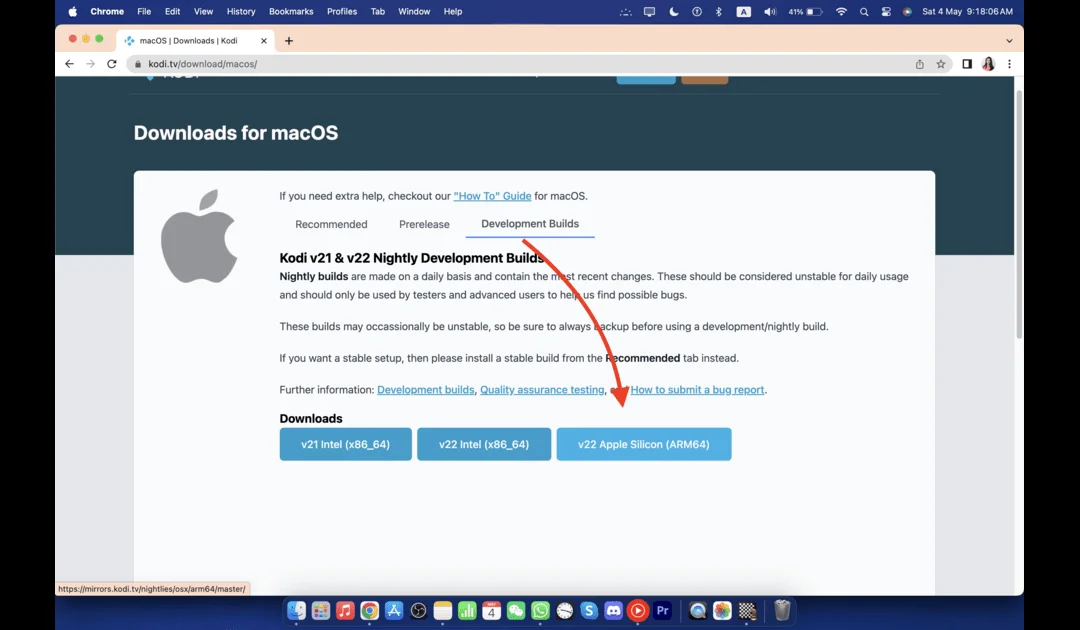
Scroll down on the download page until you see the platform logos. Click the MacOS logo to proceed.

In the pop-up window that appears, ensure that the Recommended tab is selected. Then, click on Installer (v22 Apple Silicon 64-BIT) to download the version suited for your Mac.

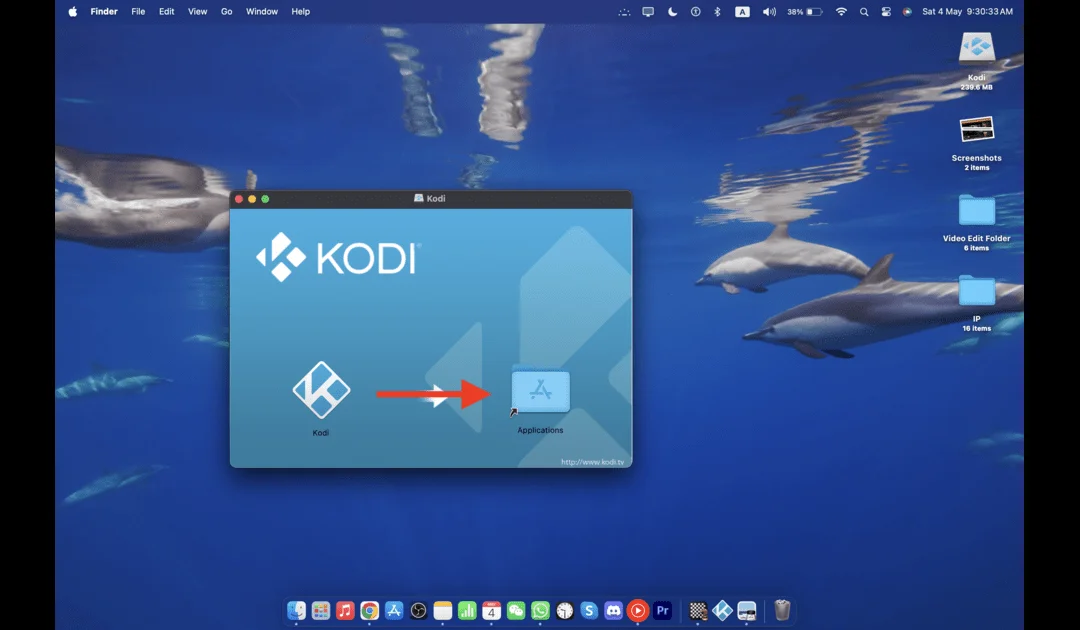
Once the DMG file is downloaded, follow the usual macOS installation process:
- Open the downloaded DMG file.
- Drag the Kodi app to your Applications folder.
- If prompted by macOS security, you may need to adjust your System Preferences under Security & Privacy to allow apps from unknown developers.

After installation, Kodi will be ready to use on your Mac! Enjoy streaming your favorite content with ease.
5. Installing Kodi on iOS (iPhone, iPad & iPod Touch)
Kodi offers various methods for installation on iOS devices, whether they’re jailbroken or non-jailbroken. Here’s a brief overview of the options:
- For Non-Jailbroken Devices: You can sideload Kodi using Cydia Impactor or Xcode (Mac users only). This method involves manually downloading the Kodi IPA file and transferring it to your device via these tools.
- For Jailbroken Devices: If your device is jailbroken, you can install Kodi directly using Cydia, a popular app manager for jailbroken iOS devices. You can also explore third-party app stores, like TweakBox, which host the iOS version of Kodi for easy download and installation.
Each of these methods ensures that you can use Kodi on your iPhone, iPad, or iPod Touch, even though it’s not available in the official App Store.
6. Installing Kodi on Android Smart TV & TV Boxes
If you’re using an Android Smart TV or an Android TV Box, you’re in luck! These devices support the Google Play Store, making the installation of Kodi quick and easy. Here’s Guide For Kodi:
If you’re using an Android TV Box, ensure it is properly connected to your TV.
From the home screen, navigate to the Google Play Store.
In the Play Store’s search bar, type “Kodi” and select the official app from the search results.
Follow the on-screen instructions by clicking the Install button. In just a few minutes, Kodi will be installed and ready to use on your Android Smart TV or TV Box.
This simple process ensures you can enjoy Kodi’s full features directly on your big screen without any hassle.
What Are Kodi Addons?
Kodi addons are essential tools that allow you to stream online content directly through Kodi, including movies, TV shows, live sports, documentaries, and more. Without addons, Kodi would function like a basic media player, capable only of playing locally stored files on your device.
In short, addons are what transform Kodi into a versatile streaming platform. They allow you to access:
- Movies
- TV Shows
- Live TV
- Music
- Sports
- News
- Documentaries, and much more.
To simplify, think of Kodi as a DVD player and addons as the DVDs. Without the addons (the DVDs), Kodi would be practically useless for streaming online content. These addons work by scraping data from various streaming services and platforms, bringing you the best available content.
There are addons specialized in live streaming, on-demand content, and news, among others. You can install dedicated addons for specific types of content or opt for multipurpose addons that offer a wide range of videos under one roof.
To get started, check out our list of the best Kodi addons, which will help make your search quick and easy, so you can enjoy your favorite content effortlessly.
How to Install Best Addons on Kodi: A Quick Guide
Installing addons on Kodi is fast and straightforward, whether you’re downloading from the official repository or using third-party sources. Addons unlock Kodi’s full potential by allowing you to stream movies, TV shows, sports, live TV, and more.
Here’s a generic Guide For Kodi to help you install any addon on Kodi:
Before you begin, decide on the type of addon you want. For instance, if you’re into movies, you should pick a movie-specific addon. Check out our list of the best Kodi addons for various categories to help you make the choice.
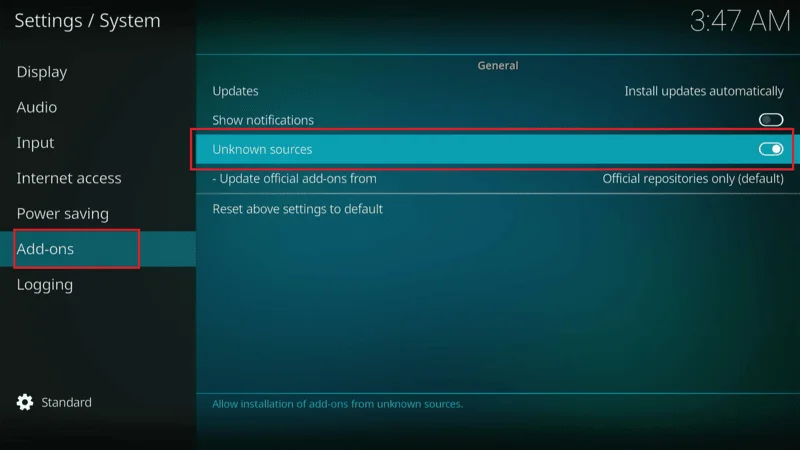
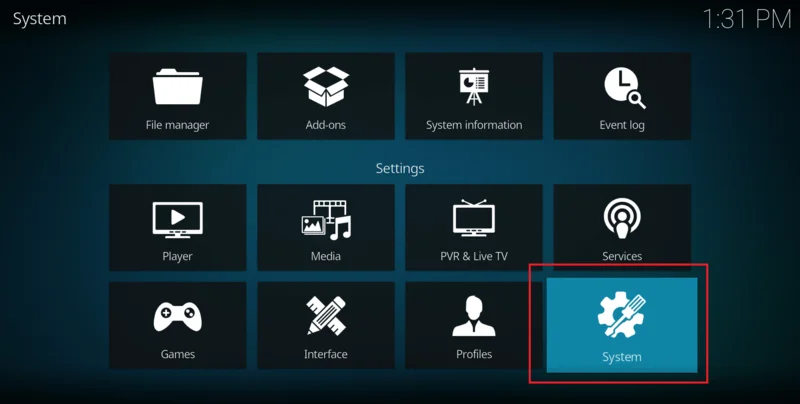
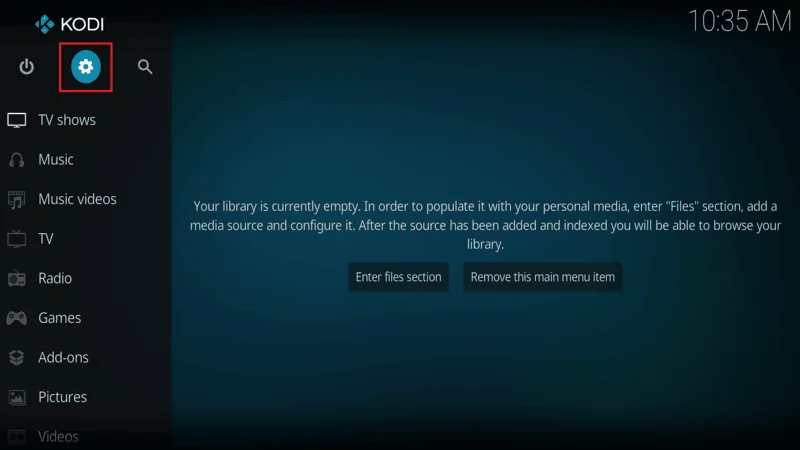
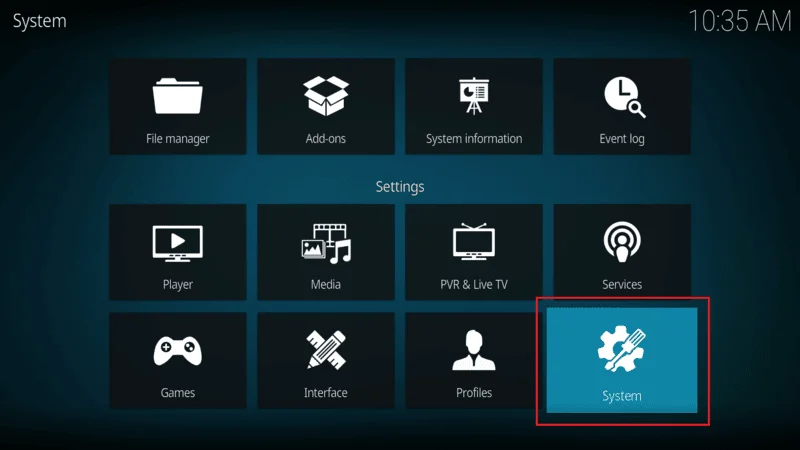
To install addons from unofficial sources, you’ll need to enable this option: go to Settings from the Kodi home screen.

Select System.
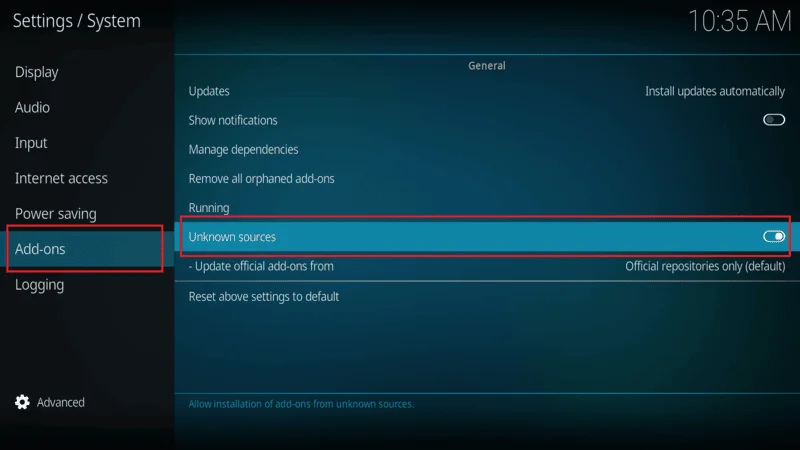
Navigate to Add-ons and toggle on Unknown Sources. This allows Kodi to install third-party addons.
Add the Addon Source
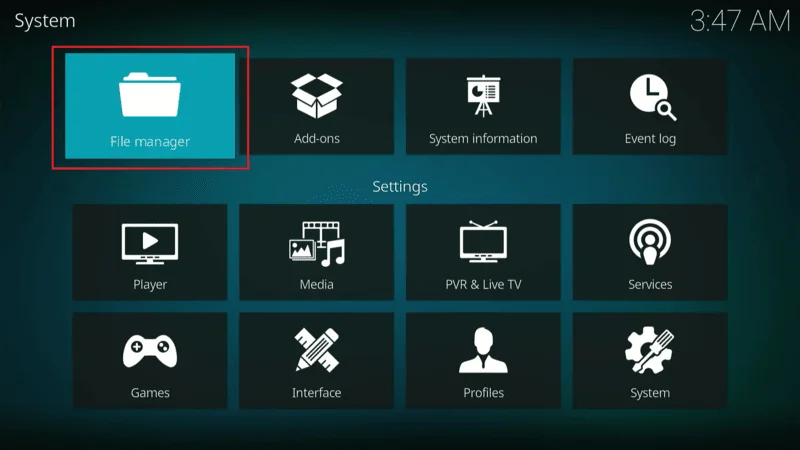
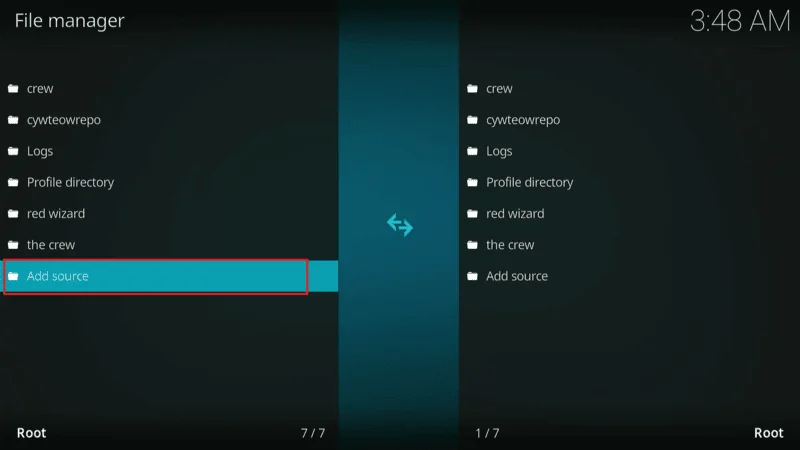
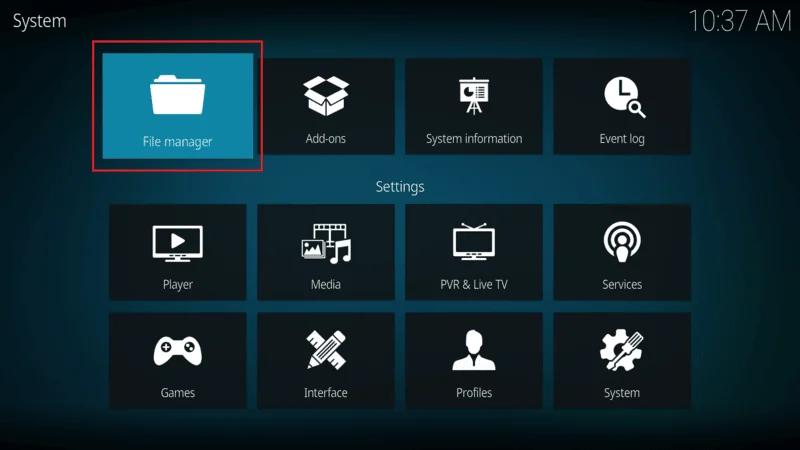
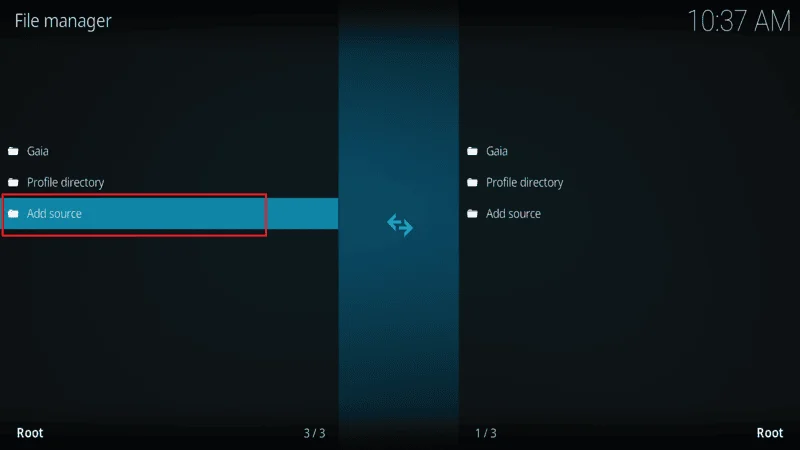
You’ll need to locate the source URL for the addon and add it to Kodi: Go to File Manager in the Settings menu.
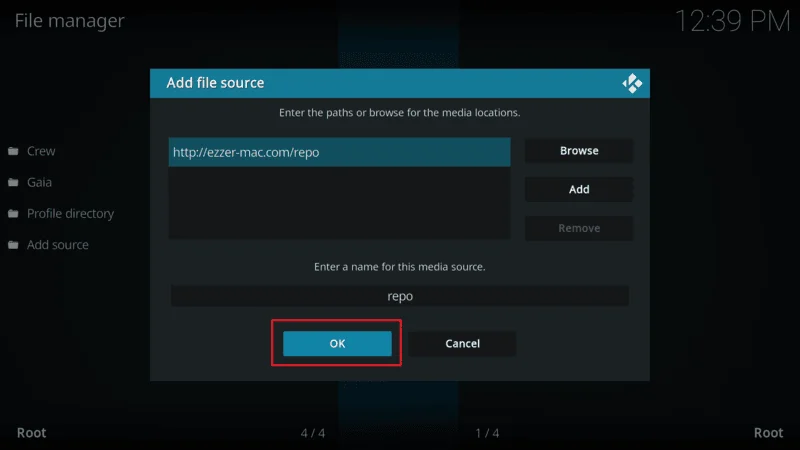
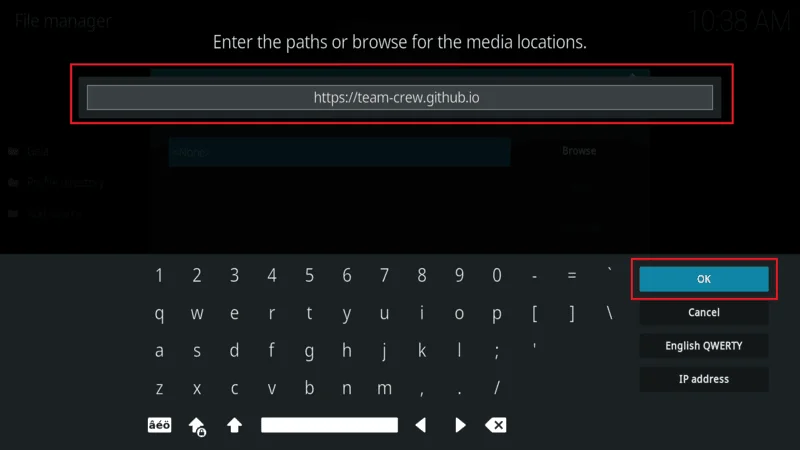
Click Add Source and enter the source URL of the addon you want to install.
URL: http://ezzer-mac.com/repo
Once the source is added, use it to download the repository that hosts the addon:
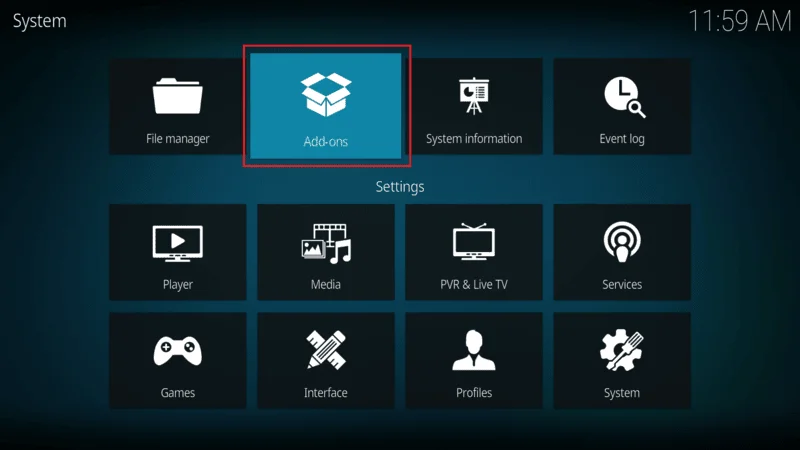
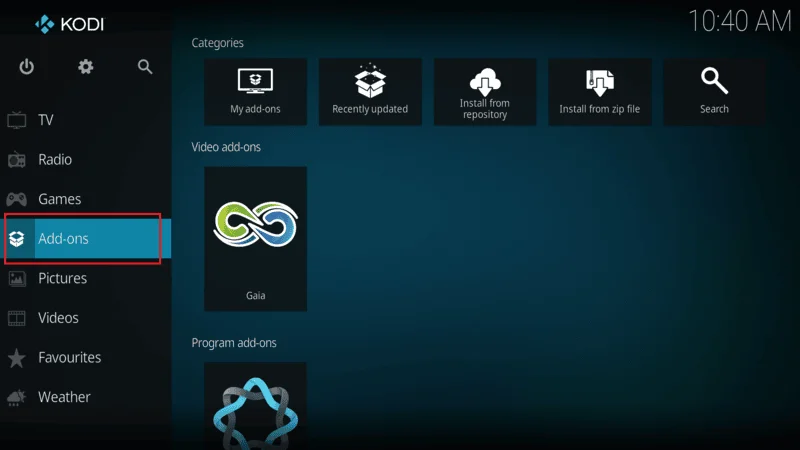
Go back to Add-ons in the main menu.
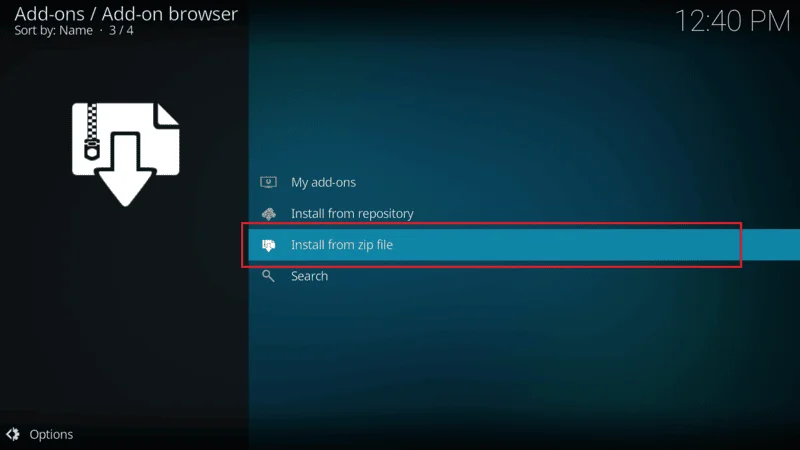
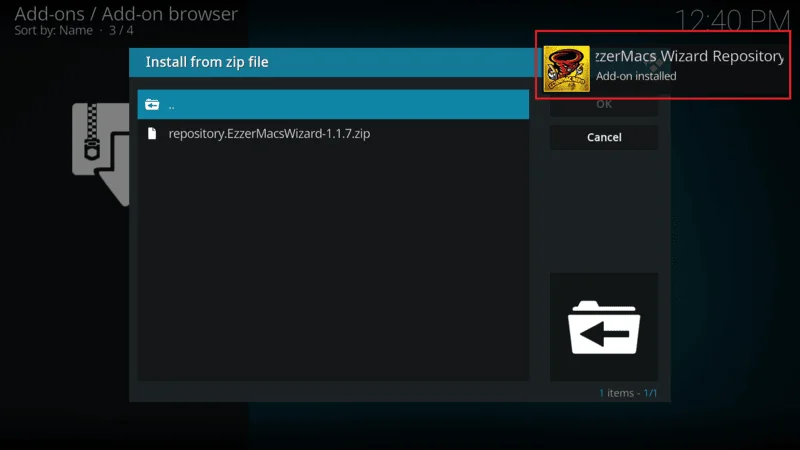
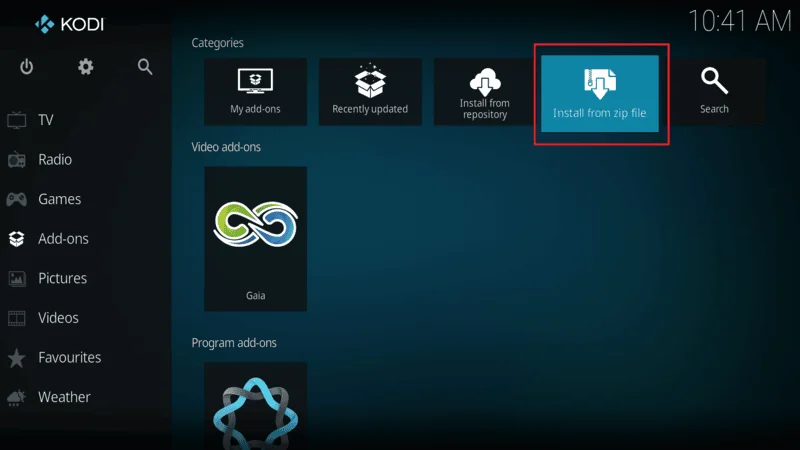
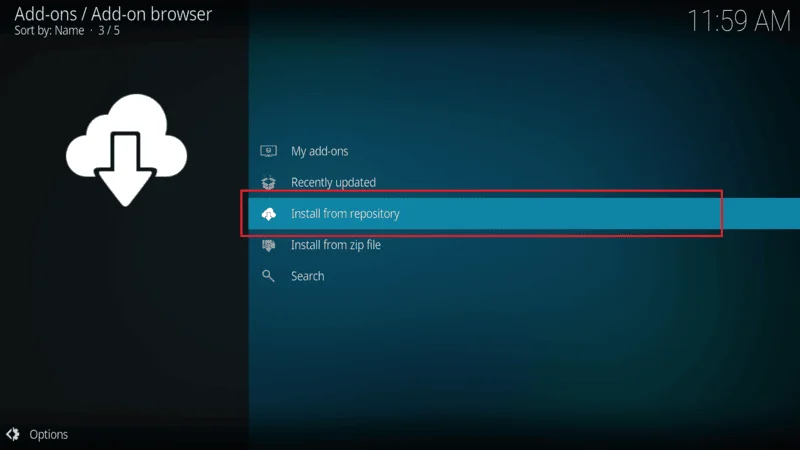
Select Install from Zip File, choose the source you added, and install the repository.
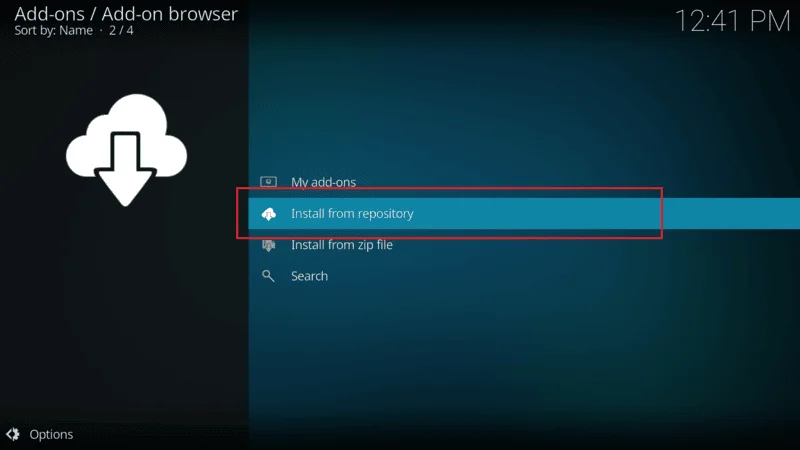
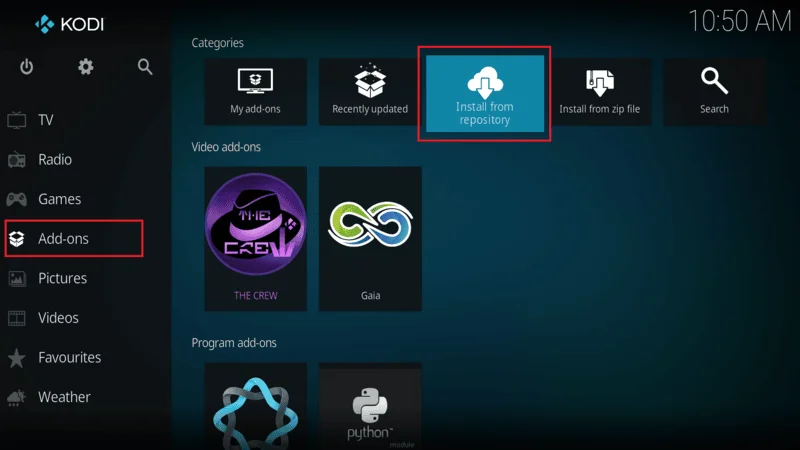
After the repository is installed, you can now install the addon:
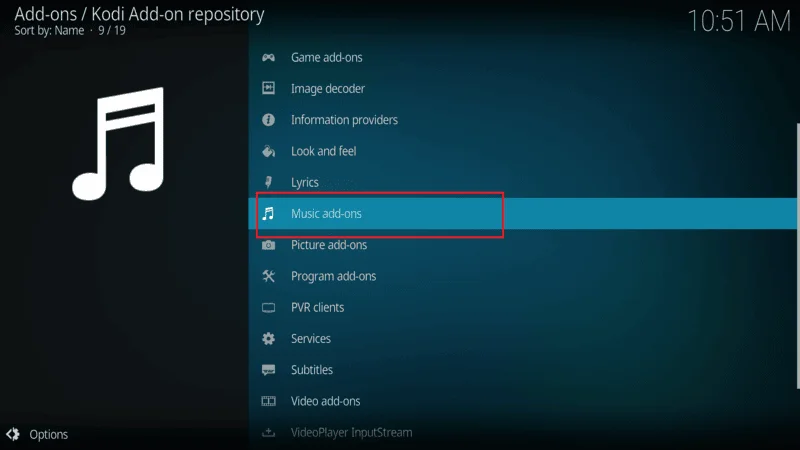
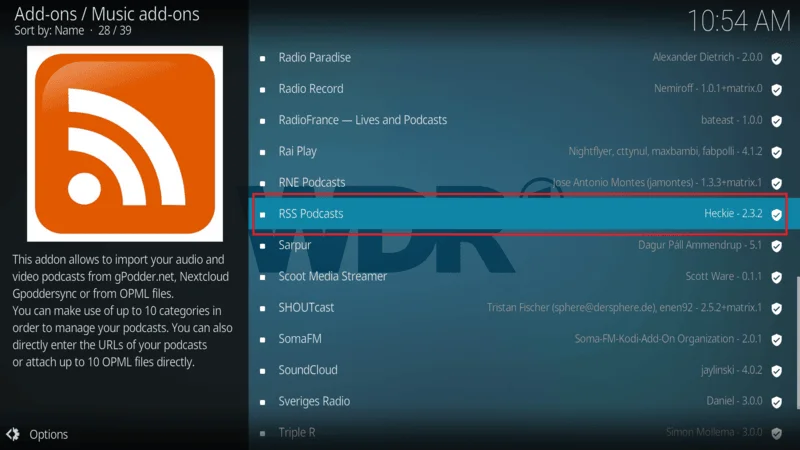
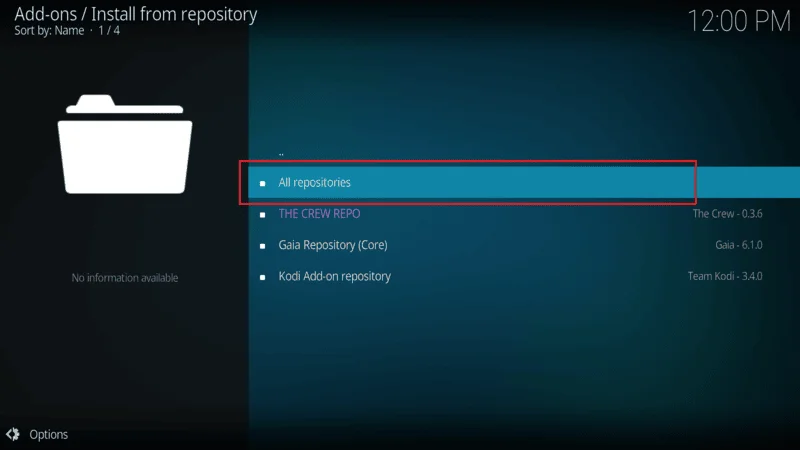
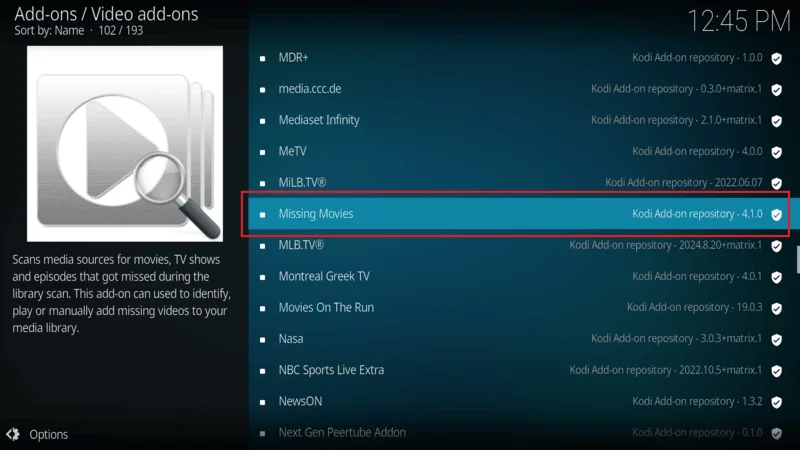
In Add-ons, select Install from Repository.
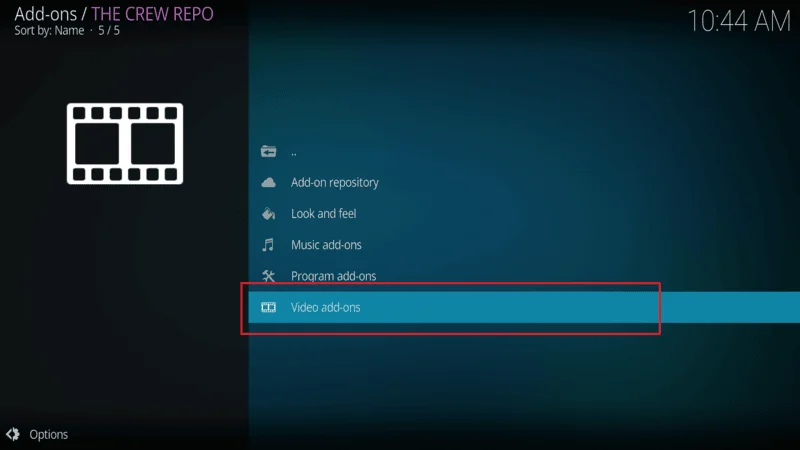
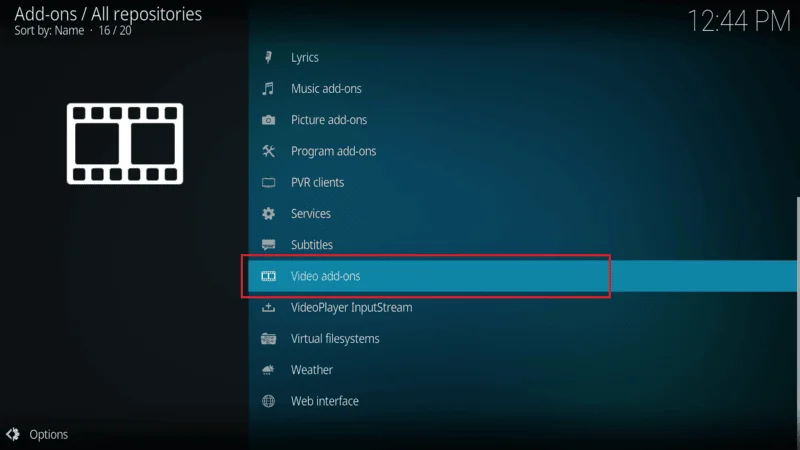
Open the relevant repository and navigate to the addon category (e.g., Video Add-ons for streaming).
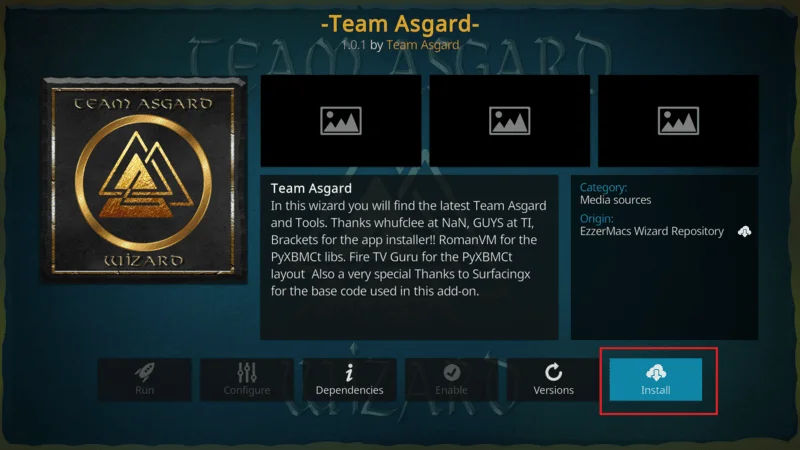
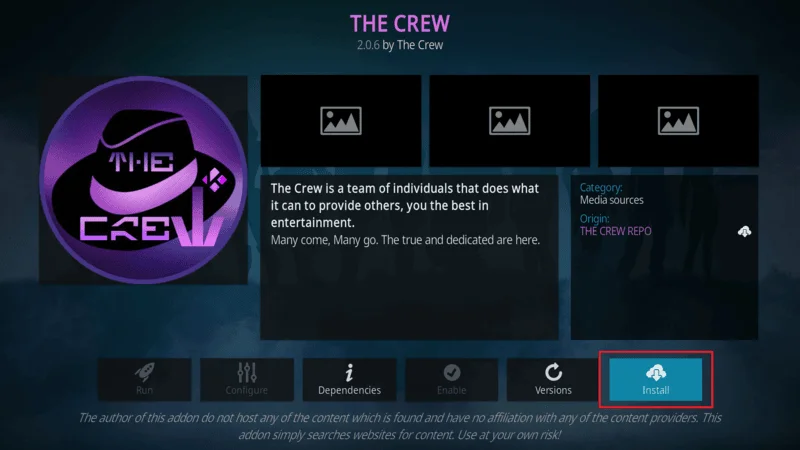
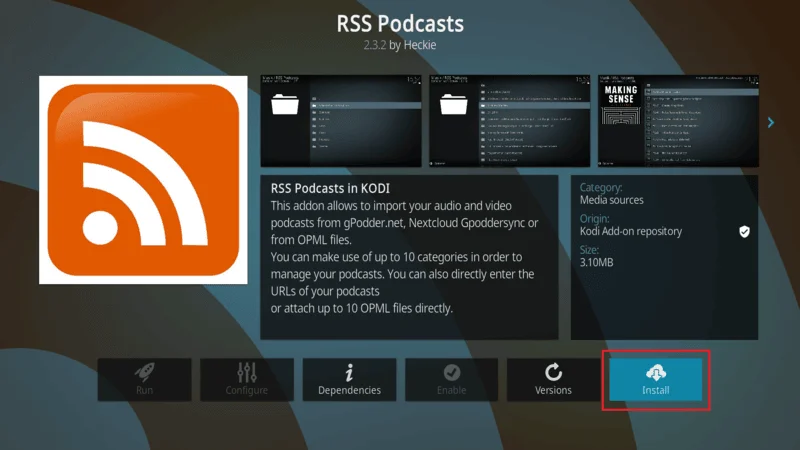
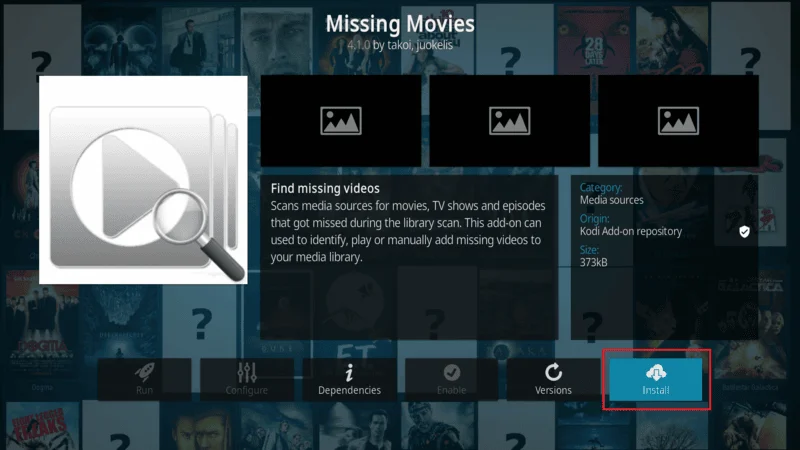
Select the addon and click Install.
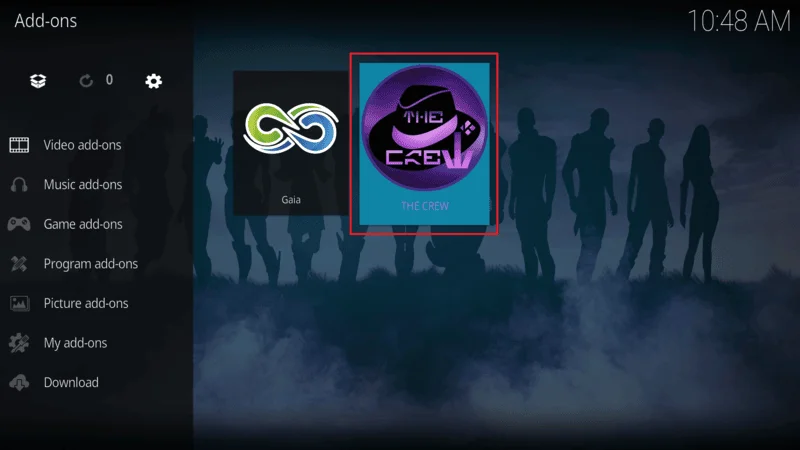
Once the addon is installed, it will appear in your Add-ons section, ready to stream content.
For detailed step-by-step instructions with screenshots, check out our guides on how to install popular addons like:
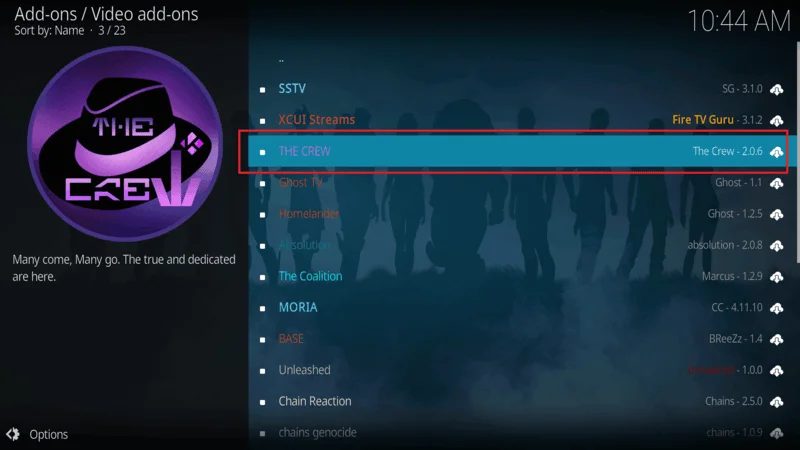
- The Crew
- Asgard
- Homelander
- The Magic Dragon
- The Loop
These Guide For Kodi will walk you through the installation process for each addon, ensuring you’re set up to stream your favorite content effortlessly.
How to Use Kodi Addons to Watch Movies, Shows, Live TV, and more
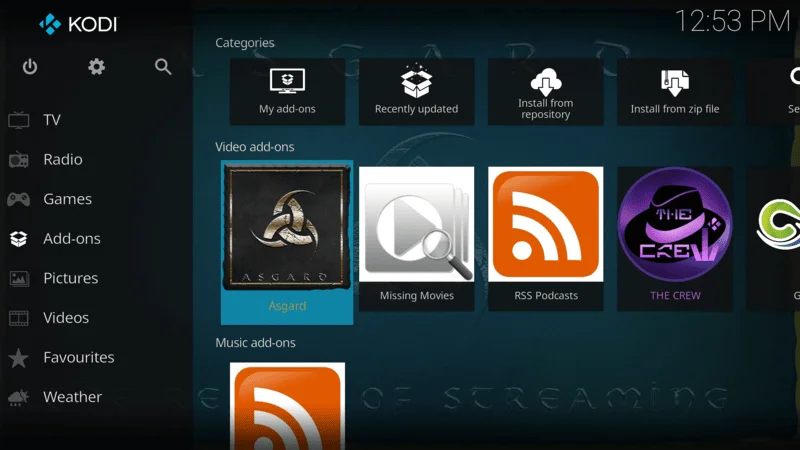
Once you’ve successfully installed a Kodi addon, you can find it in the Video Addons section, especially if it streams video content like movies or TV shows. Although Kodi also supports other types of addons, such as Program Add-ons (for utilities and tools), since you’re just getting started, we’ll focus on Video Addons.
If you’re not already on the home screen, press the back button repeatedly to return.
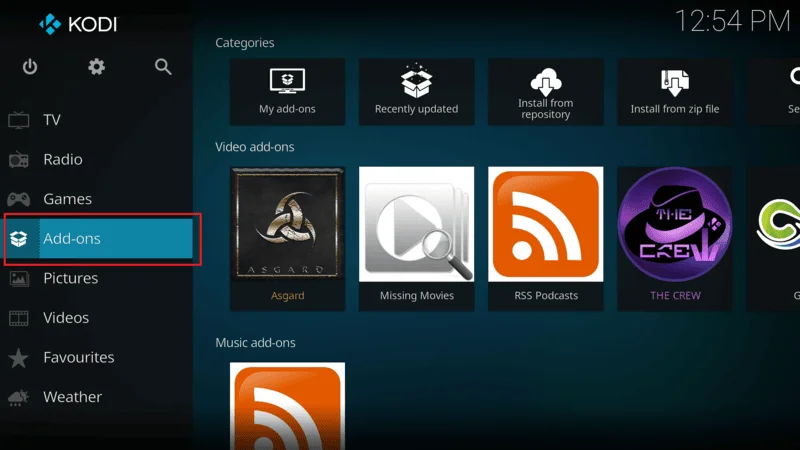
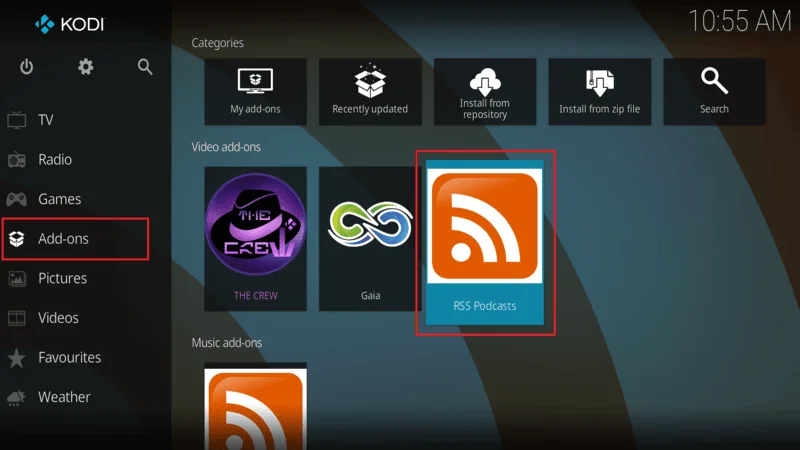
On the left sidebar, click Add-ons to enter the addon section.
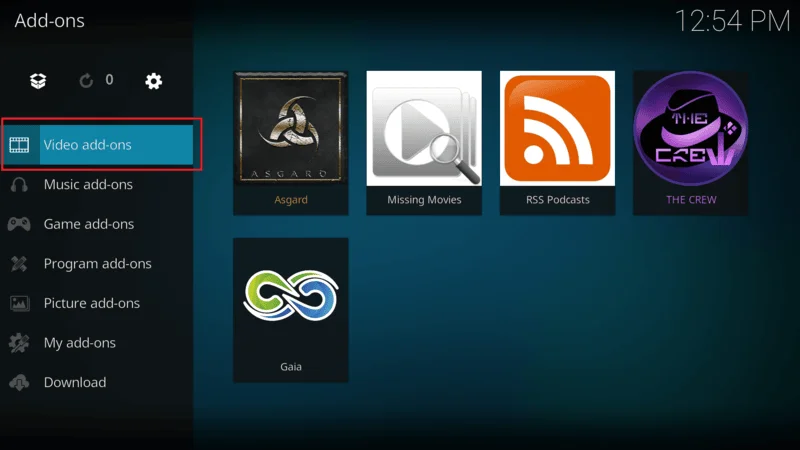
On the left sidebar again, click Video Add-ons.
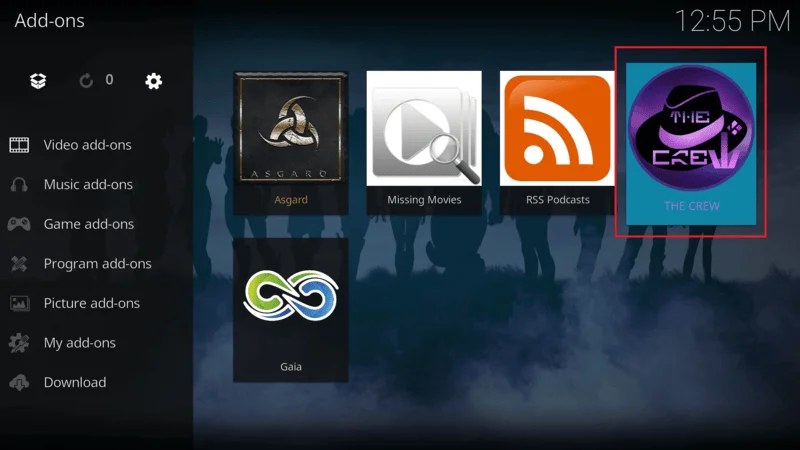
If you hover over the Video Add-ons section without clicking, all your installed video streaming addons will appear on the right side of the screen.
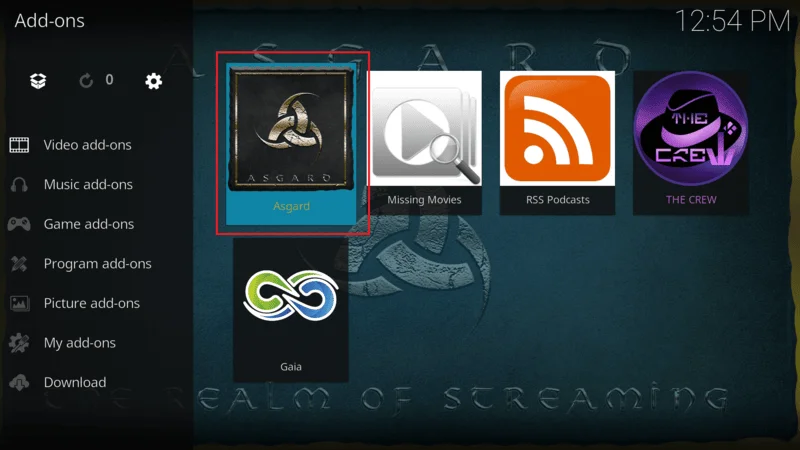
Now, you’ll see the list of all the video addons you’ve installed, with their icons displayed.
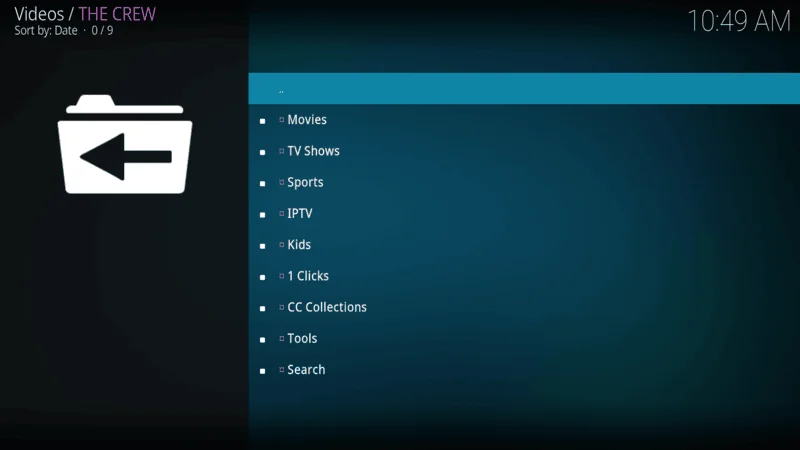
To launch an addon, click on its icon. For demonstration, let’s use The Crew, one of the top Kodi addons for streaming on-demand content.
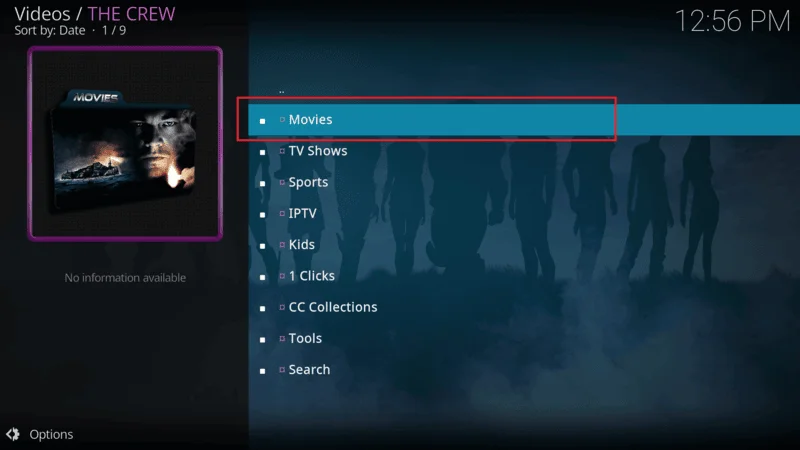
Once inside the addon, you’ll see a range of categories (e.g., Movies, TV Shows, Sports, etc.). These categories help organize the content available in the addon.
For example, if you select the Movies category, you might see subcategories like:
- My Movies
- New Movies
- In Theaters
- Trending, and more.
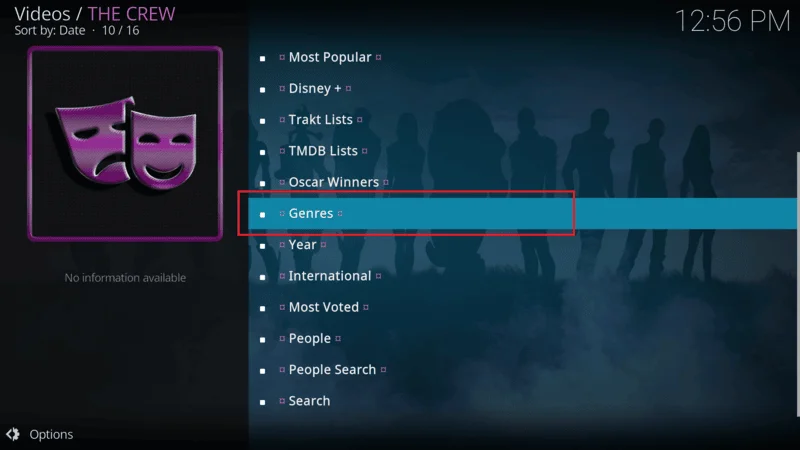
Some categories have subcategories. For instance, inside Genres, you might find options like:
- Action
- Adventure
- Animation
- Anime, and more.
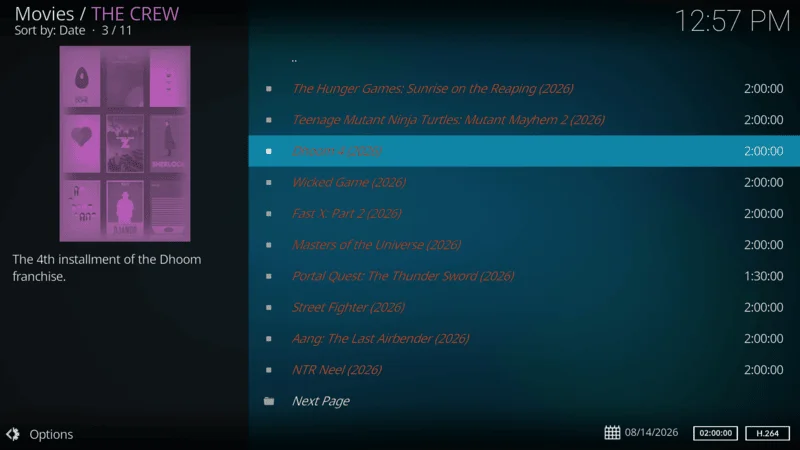
After navigating through categories and subcategories, you’ll eventually see a list of titles. Click on the title you want to watch.
The addon will now scrape through servers and fetch streaming links for the selected title. Once the links appear, click one to start streaming.
And that’s it! This is all you need to know to start using Kodi addons and enjoy your favorite content. As you explore more addons, you’ll find many features, categories, and subcategories that enhance your Kodi experience.
What Are Kodi Builds?
When you first install Kodi, you are greeted with the default interface, which uses the Estuary skin. While you can add amazing video-on-demand (VOD) and live content through addons, the default interface remains unchanged unless you decide to customize it. This is where Kodi builds come into play.
A Kodi build serves two main purposes:
- Customizing the Interface:
A build gives Kodi a complete visual overhaul, often with a more modern, user-friendly, and visually appealing layout. If you want to give Kodi a new look and feel, installing a build is the easiest way to do it. - Pre-packaged Addons:
A build usually comes with a selection of pre-installed addons. Instead of downloading and setting up individual addons, a build provides you with a bundle of the most popular addons in one go. This makes it convenient for users who want instant access to a wide variety of content without the hassle of manual addon installation.
Benefits of Kodi Builds:
- Enhanced Interface: Builds offer a visually enhanced, organized, and streamlined user interface, making navigation easier and more appealing.
- Multiple Addons in One Install: Popular builds come pre-loaded with multiple addons, saving you time and effort.
- Simplified Setup: If you’re new to Kodi, builds can simplify the setup process by installing everything you need at once.
For example, after installing a popular build like Xenon, Kodi looks completely different with a trendy, modern design, and you also gain access to a variety of streaming addons immediately.
In short, Kodi builds are an excellent way to both improve Kodi’s appearance and streamline access to content.
How to Install Kodi Builds
Installing a Kodi build may seem a bit more complex than downloading an addon, but once you understand the steps, it’s quite simple. Much like installing addons, builds require downloading repositories and installing them through Kodi. Here’s a general Guide For Kodi to help you get started:
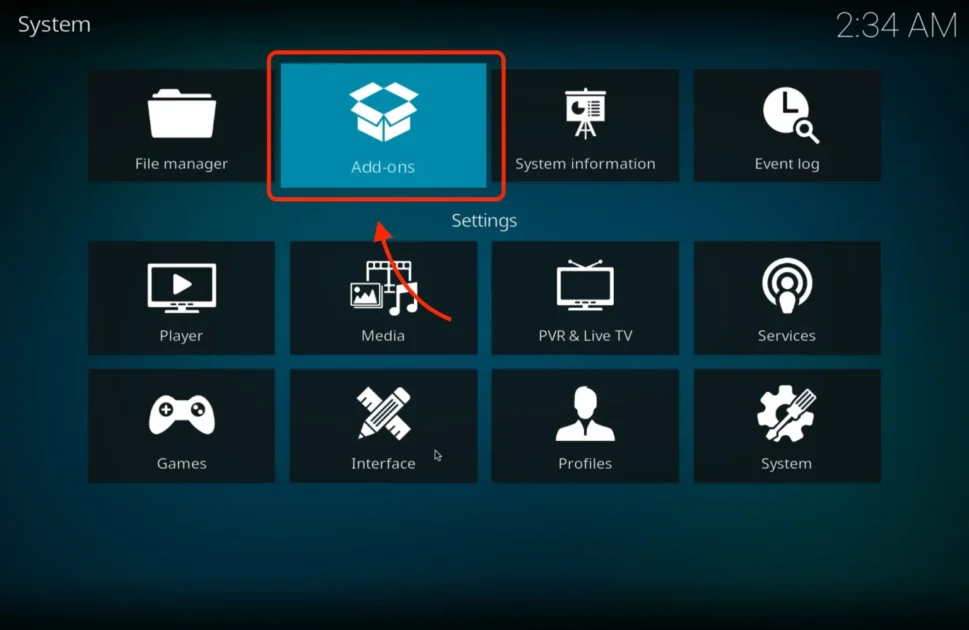
Go to Settings from the Kodi home screen.
Select System.
Click Add-ons
And toggle on Unknown Sources to allow third-party installations.
From the home screen, go to Settings > File Manager.
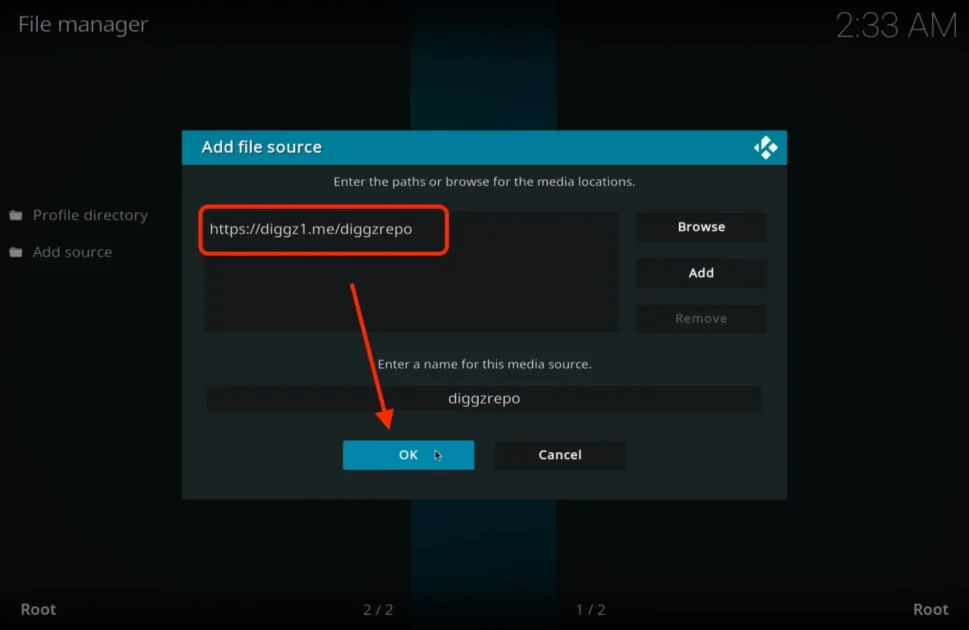
Click Add Source.
Enter the source URL by clicking on ”None” URL Is ( https://diggz1.me/diggzrepo )
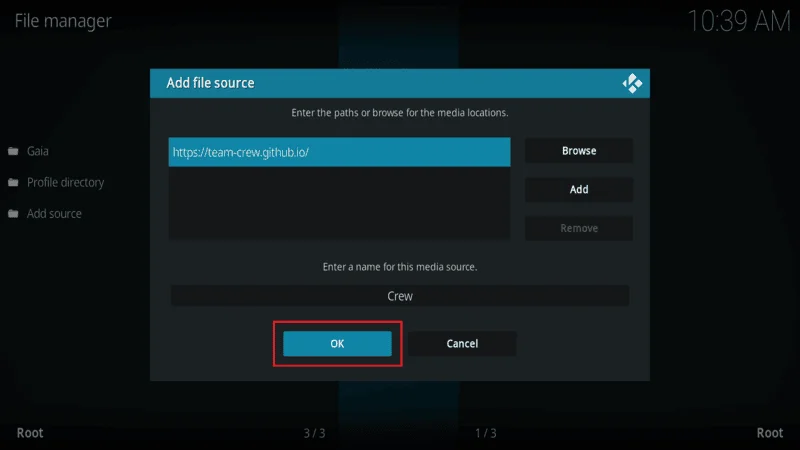
Then type name for the source and click “OK.”

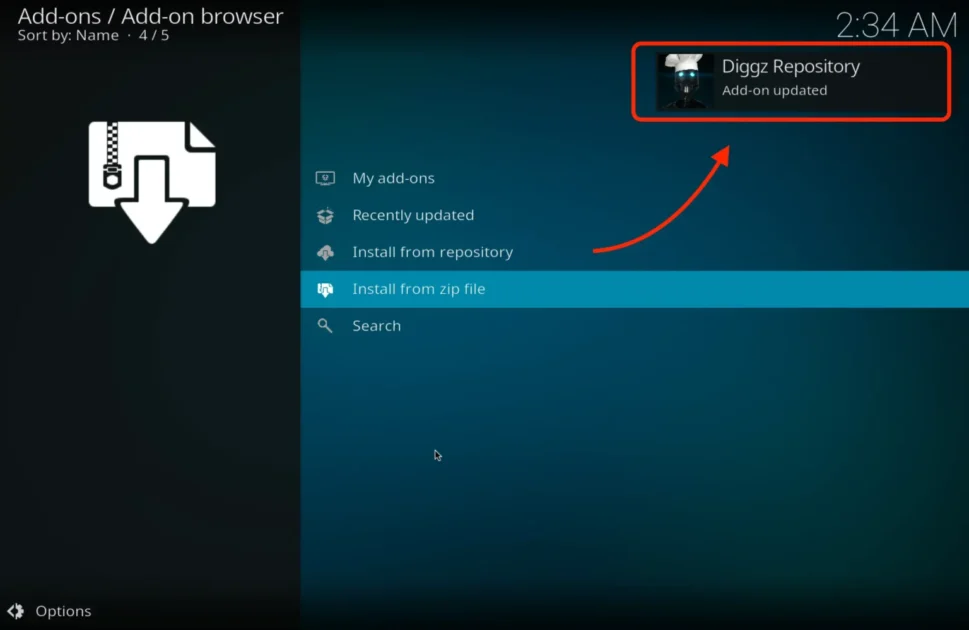
Go back to the Kodi home screen and click Add-ons.

Select Install from Zip File, then select the source you just added.

Install the relevant zip file from the repository.
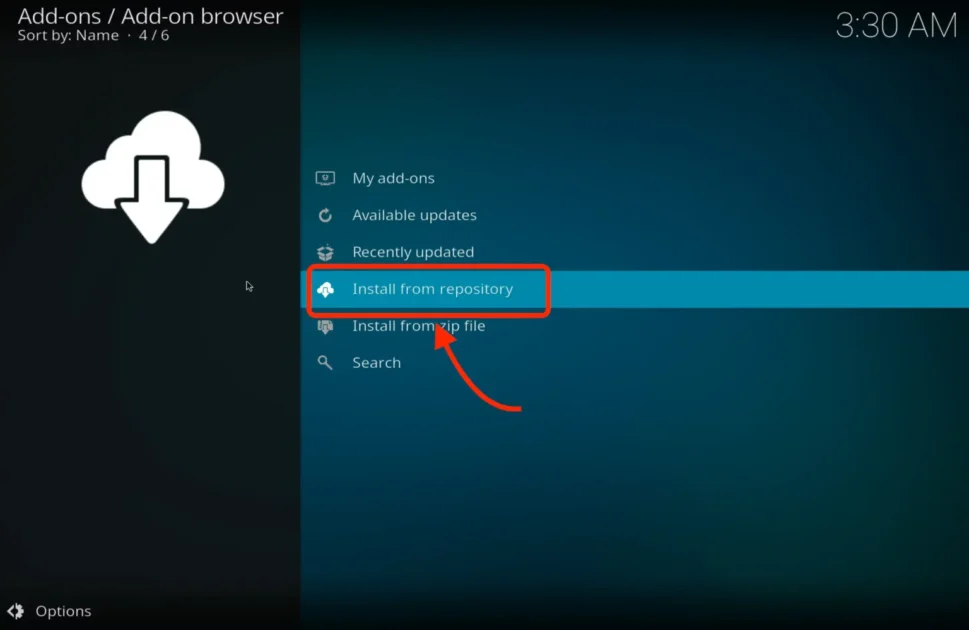
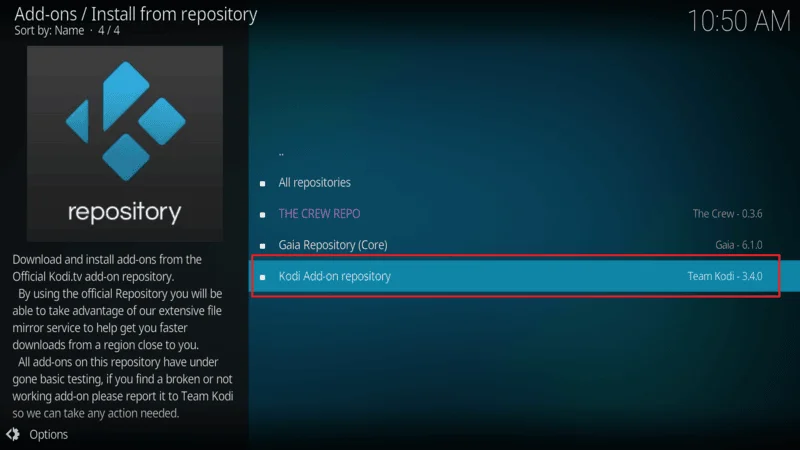
Once the repository is installed, go to Install from Repository.
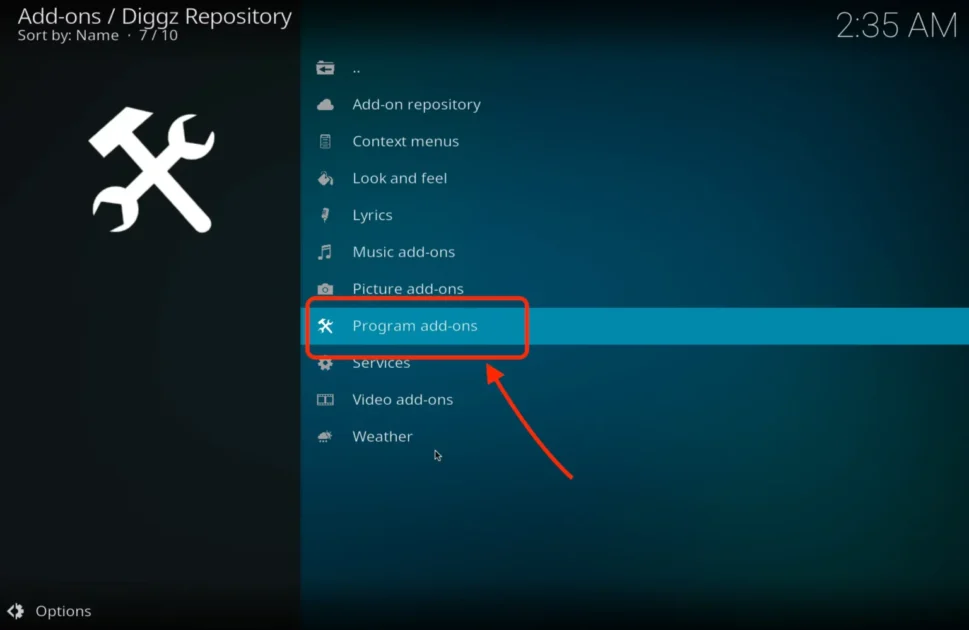
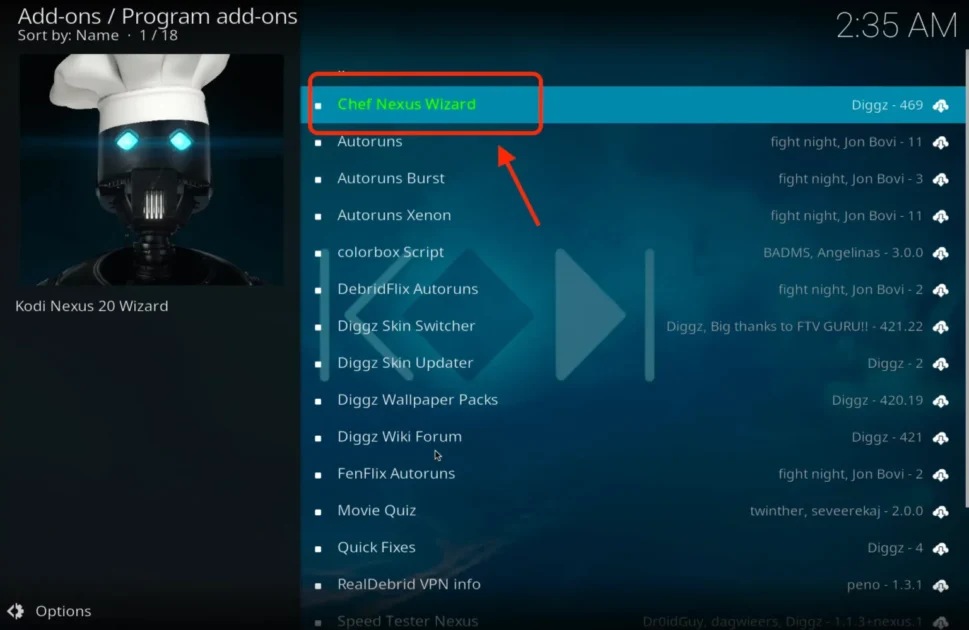
Find the repository and look for the Program Add-ons section.
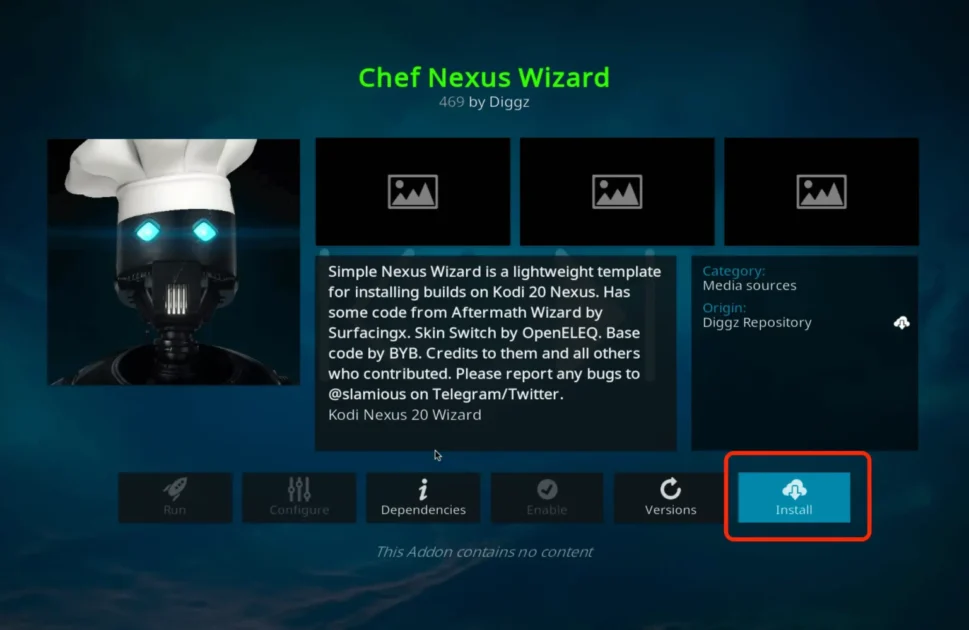
Click on the ” Chef Nexus Wizard ”
Click on ” Install ” Button

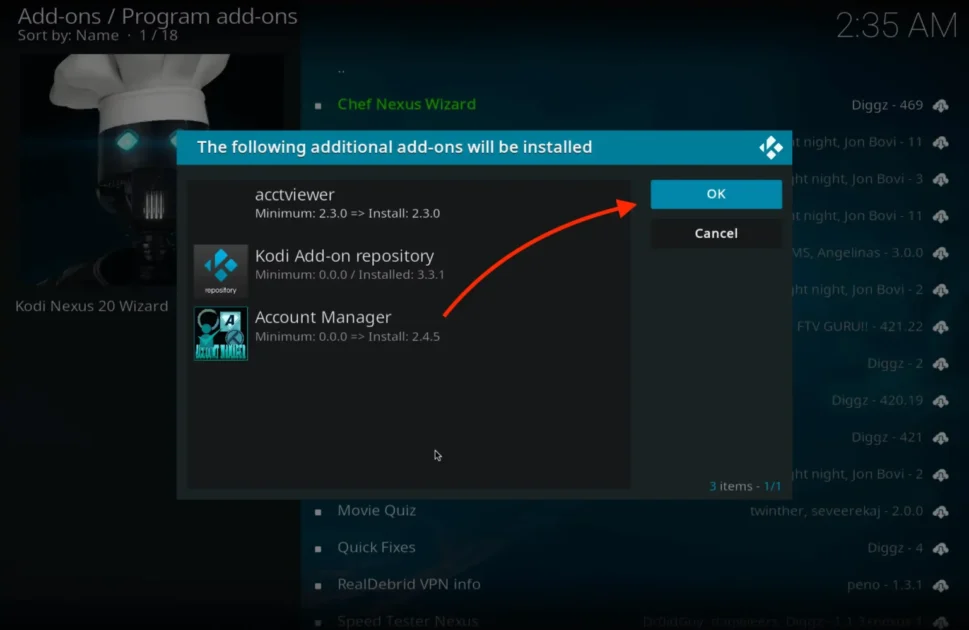
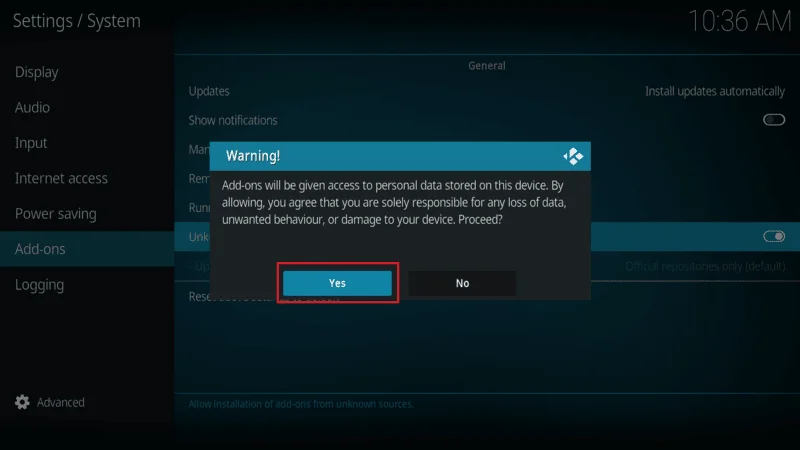
After clicking Install button a liltle Popup Appears on your srceen Select OK

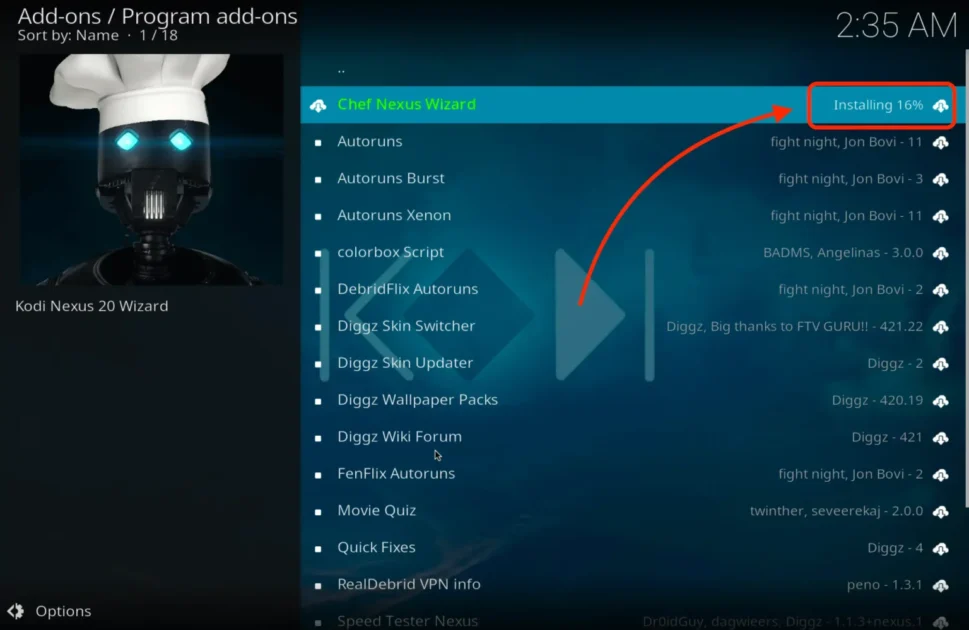
Wait Until the Kodi Diggz Download and it will Installed automaticly.

Once the build is installed, Kodi will prompt you to restart. After restarting, your new build interface will be applied, and you will have access to all the pre-installed addons.
Links to Popular Kodi Builds:
Following these steps, you’ll have your chosen Kodi build installed and ready to go, providing you with both a refreshed interface and a bundle of useful addons.
How to Add Addons to a Kodi Build
While Kodi builds come with multiple preinstalled addons, there may be times when you want to add a specific addon that isn’t included in the build. Fortunately, you can easily install additional addons over your existing build without affecting its functionality. The process is similar to installing addons on a fresh Kodi installation.
Here’s a step-by-step guide for kodi to manually adding addons to a Kodi build:
From the Kodi home screen, go to Settings (the gear icon).
Select File Manager.
Click Add Source.
A pop-up window will appear. Click on <None> and enter the URL of the addon repository source you want to install. For example, if you’re adding a popular addon like The Crew, you would enter the source URL for The Crew repository.
After entering the URL, give the source a name Crew Repo and click OK.
2. Install the Repository via the Source
- Return to the Kodi home screen and go to Add-ons.
- Click the Install from zip file option.
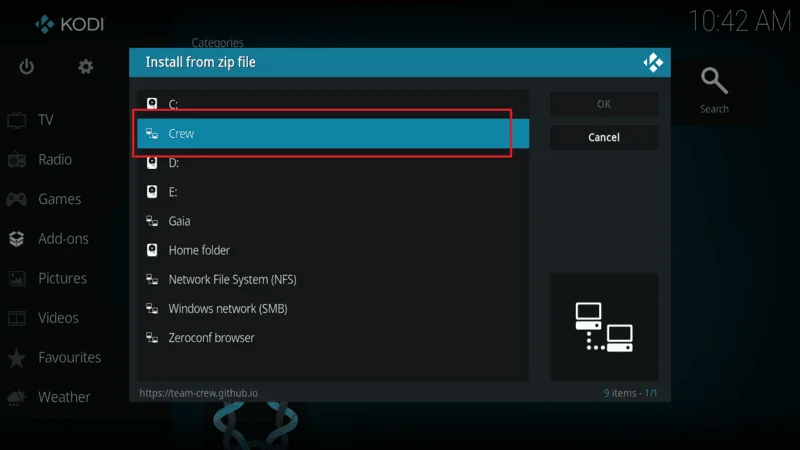
- Locate the source you added earlier (e.g., “Crew Repo”) and select it.
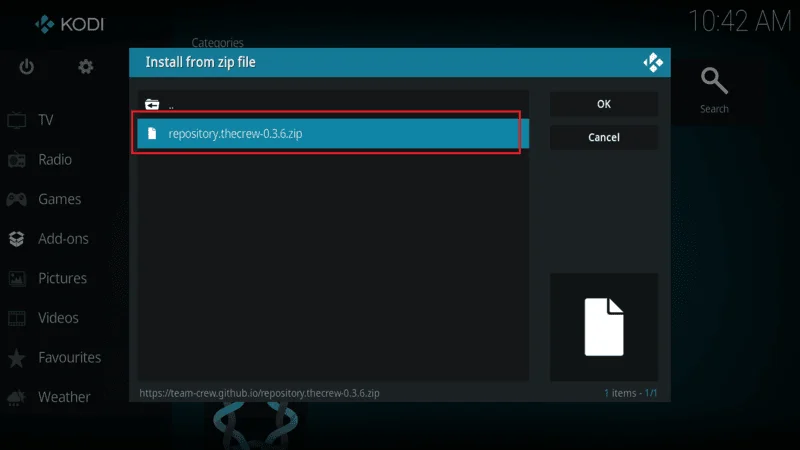
- Choose the repository zip file and click on it. This will install the repository to Kodi.
3. Install the Addon from the Repository
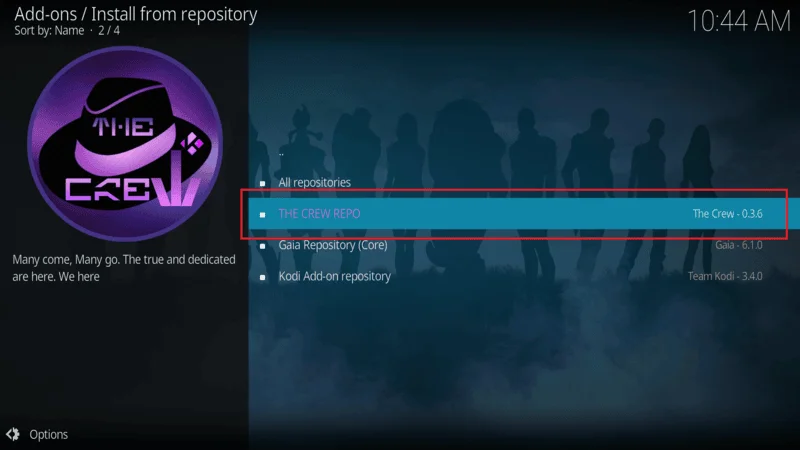
- Once the repository is installed, go back to Add-ons and click Install from repository.
- Open the repository you just added and navigate to the appropriate addon category (e.g., Video Add-ons).
- Find the addon you want to install and click on it.
- Select Install and wait for the addon to be downloaded and enabled.
4. Access the Addon
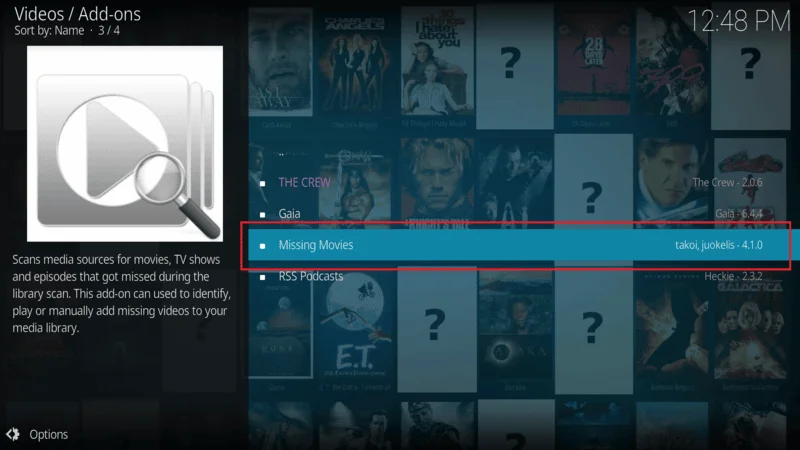
- After the addon is installed, you can access it by going to Add-ons > Video Add-ons from the Kodi home screen.
- The newly installed addon will appear alongside the preinstalled addons of the build.
Now you’re ready to use the new addon along with the existing ones that came with the build! This method allows you to customize any Kodi build by adding the addons you need, ensuring you get access to your favorite content.
#Recommended – Get A Kodi VPN
Before you start streaming your favorite movies, TV shows, or sports on Kodi, I highly recommend using a reliable VPN to protect your privacy.
A Kodi VPN safeguards your streaming activities from prying eyes, including your ISP, the government, or hackers. It does this by masking the internet traffic going to and from your device, ensuring that no one can log or track your online activity.
Many of the addons used on Kodi for streaming content are provided by third-party sources, and they often allow you to stream for free. While I do not encourage accessing copyrighted content illegally, I believe that everyone has the right to maintain their privacy while online.
A VPN encrypts your internet connection and routes your traffic through private servers. This encryption makes it impossible for anyone to track your activities.
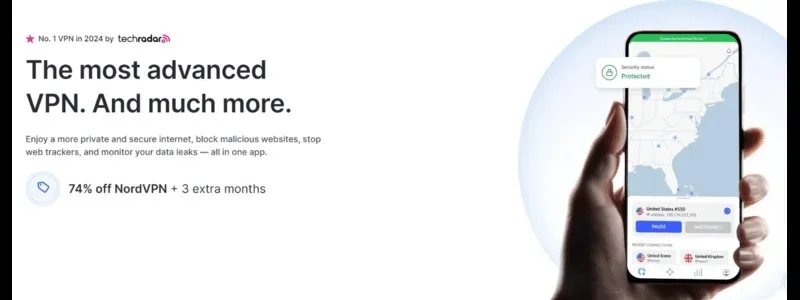
I recommend NordVPN because it offers fast, highly secure connections and uses strong encryption technology to protect your privacy and identity online.
NordVPN is compatible with all Kodi devices, including Android, FireStick, iOS, Mac, Windows, and more. It also works seamlessly with popular services like Netflix and Hulu.
To protect your privacy before you start streaming, here’s how to get VPN protection in just 3 simple steps:
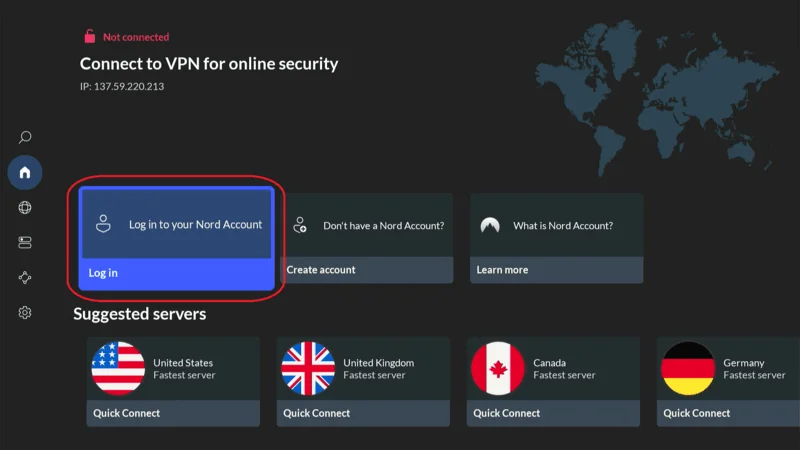
Step 1: Get a NordVPN subscription HERE.
Step 2: Download and install the NordVPN app on your device.
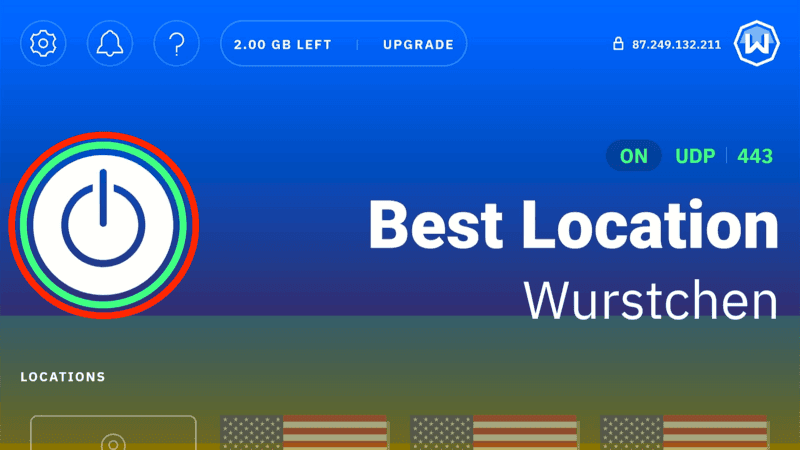
Step 3: Open the app and click the Power icon to connect to a VPN server. That’s it! Your connection is now secure with NordVPN, the fastest and most reliable VPN for Kodi.
Frequently Asked Questions (FAQs)
If you’re using Kodi to stream your favorite shows, movies, or live TV, it’s crucial to protect your privacy with a VPN (Virtual Private Network).
A VPN ensures that your online activities remain private and secure while also providing access to geo-restricted content. Below is a complete guide on how to use a VPN with Kodi and why it’s essential for Kodi users.
1. What is Kodi?
Kodi is an open-source media player that allows you to access and manage your digital media library. It supports various file formats and can play movies, music, TV shows, and more. You can enhance its functionality by installing addons that give you access to additional content, including third-party streaming services like YouTube, Netflix, and Plex.
2. Is Kodi Legal?
Kodi itself is legal, as it’s merely a media player. However, some third-party addons can access copyrighted content without permission, which could lead to legal issues. Kodi’s developers do not condone piracy and advise users to avoid such addons. It’s essential to stick with official or legally compliant addons to ensure you’re using Kodi within legal limits.
3. How Can I Get Started with Kodi?
To start with Kodi, you’ll need to download and install the software from the official Kodi website. It supports various devices, including Windows, Mac, Linux, Android, and iOS (with jailbreaking required for Apple devices). After installing Kodi, you can begin by adding your media files and configuring libraries to organize your content efficiently.
4. Do I Need a VPN for Kodi?
Using a VPN with Kodi is highly recommended, especially if you’re accessing geo-restricted content or third-party addons. A VPN helps keep your online activity private and protects you from ISPs or other entities tracking your streaming habits. VPNs like NordVPN or Surfshark are commonly recommended for Kodi as they offer fast speeds, secure connections, and excellent privacy features.
5. How Do I Add Addons to Kodi?
To add an addon to Kodi, you typically follow these steps:
- Go to the Add-ons section in Kodi.
- Select Install from Repository to browse official addons or Install from Zip File for third-party sources.
- Choose the addon you want to install and hit Install. You can find a wide range of addons in Kodi’s official repository, but be cautious when installing third-party addons, as some may provide access to pirated content.
6. Can I Use Kodi to Watch Live TV?
Yes, Kodi supports live TV through its PVR (Personal Video Recorder) functionality. You will need to install a PVR backend (like NextPVR or TVHeadend) and connect it to Kodi to enable live TV and radio. This allows you to watch and record live broadcasts directly from Kodi.
7. What Hardware Do I Need for Kodi?
Kodi runs on a wide range of devices, including Windows and Linux PCs, Android phones and tablets, Raspberry Pi, and even Amazon Fire TV Stick. You just need basic audio and video hardware, but for the best experience, devices like the NVIDIA Shield or Amazon Fire TV are highly recommended due to their robust hardware performance and ease of setup.
8. How Do I Add My Personal Movies and Music to Kodi?
You can add personal movies, TV shows, or music files to Kodi by setting up libraries. Go to the Files section under the Movies or Music tabs and add your folders. Kodi will scrape metadata from sources like IMDb or MusicBrainz to organize your library and provide artwork, descriptions, and other details.
Final Words
And that’s all there is to know about using Kodi From installing the software to adding the right addons, and even exploring customized builds for a better interface, Kodi offers an all-in-one media experience. Whether you want to organize your personal media library or explore online streaming content, Kodi provides a flexible and powerful platform.
Feel free to try out different builds and addons that suit your preferences. Don’t forget to protect your privacy with a VPN, especially when using third-party addons.
I’d love to hear your thoughts or questions in the comments below. Enjoy your Kodi experience!