Looking for Kodi live TV addons? This guide showcases the top options available for streaming live TV on Kodi. These addons are compatible with all Kodi-enabled devices, including FireStick, PCs, Android TVs, smartphones, tablets, and more.
While I enjoy catching my favorite cable channels, traditional cable TV has become increasingly costly. This has pushed many of us to explore alternative options. If you’re new to Kodi, be sure to check out my comprehensive beginner’s guide to get started.
Finding the right addon is key to enjoying live TV on Kodi. But with so many choices, which ones are truly the best?
With hundreds of Kodi addons to choose from, I’ve compiled a list of the most reliable live TV addons for Kodi. These addons make it easy to stream your favorite channels on your internet-connected devices, making live TV viewing more accessible and flexible than ever.
Kodi is a powerful media player that seamlessly handles content from local storage, online on-demand services, and live TV channels.
Top Live TV Kodi Addons
We’ve carefully selected some of the most reliable live TV addons for Kodi to enhance your streaming experience. In this article, you’ll learn how to set up and watch live TV on Kodi seamlessly. Keep reading for the full guide!
Legal Disclaimer: This tutorial is intended solely for educational purposes. KodiExpert.org does not own, host, operate, resell, or distribute any streaming apps, addons, websites, IPTV services, or similar platforms. The content on this page may include some unverified services, and we cannot confirm whether they possess the necessary legal licenses to distribute the content they offer.
KodiExpert.org does not verify the legality of each app or service in every region. It is your responsibility to conduct your own due diligence if you choose to use any unverified apps or services. Please ensure that you only stream content that is legally available in the public domain. The end-user is solely responsible for any media accessed.
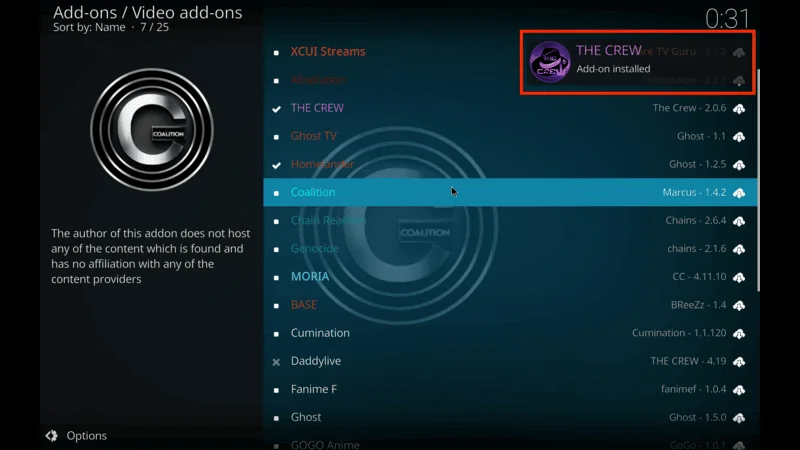
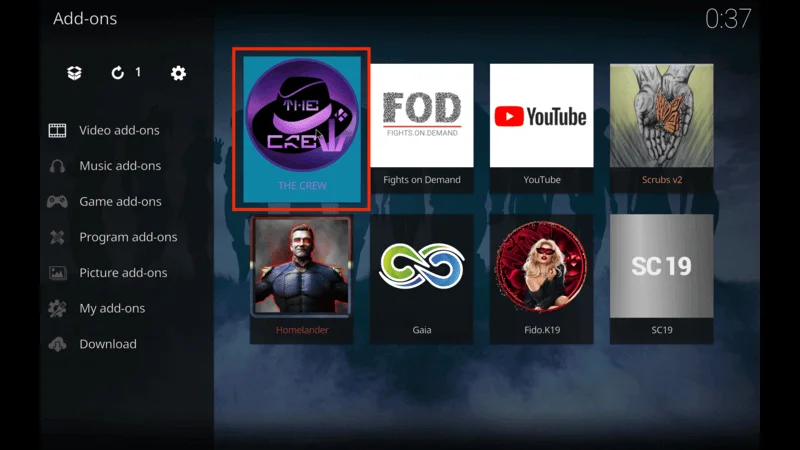
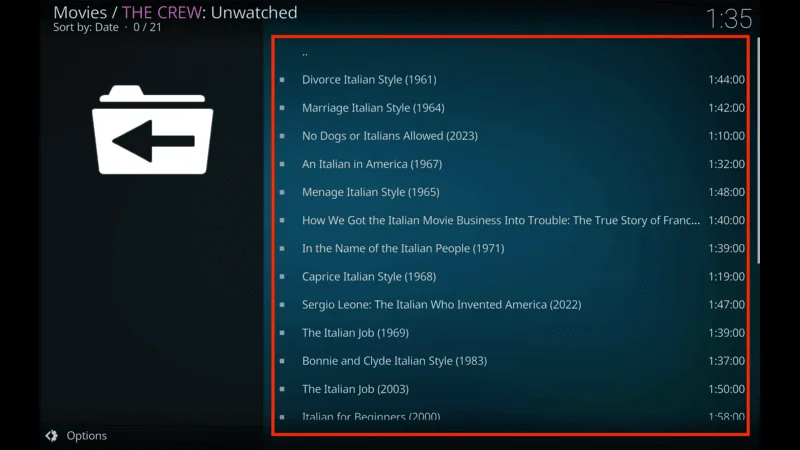
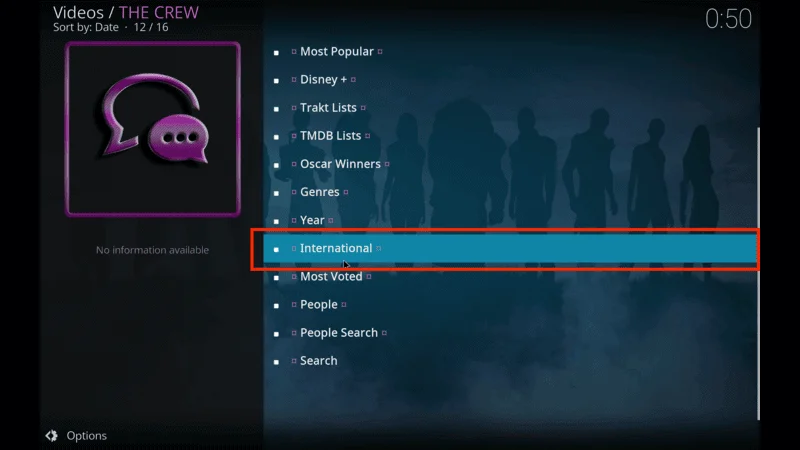
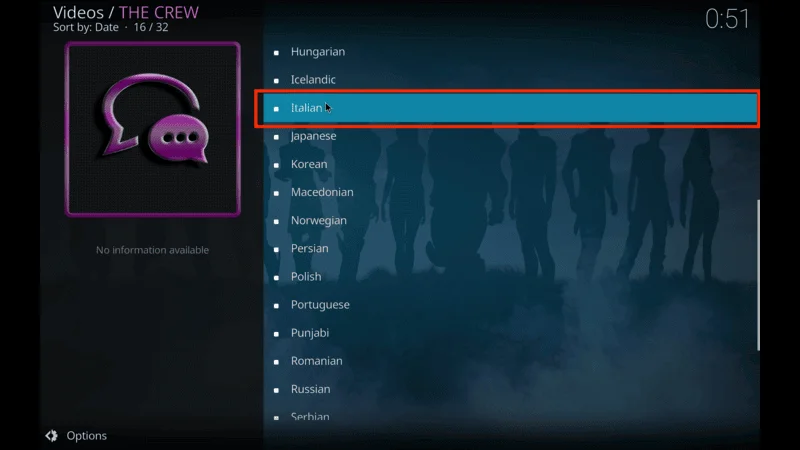
1. The Crew:

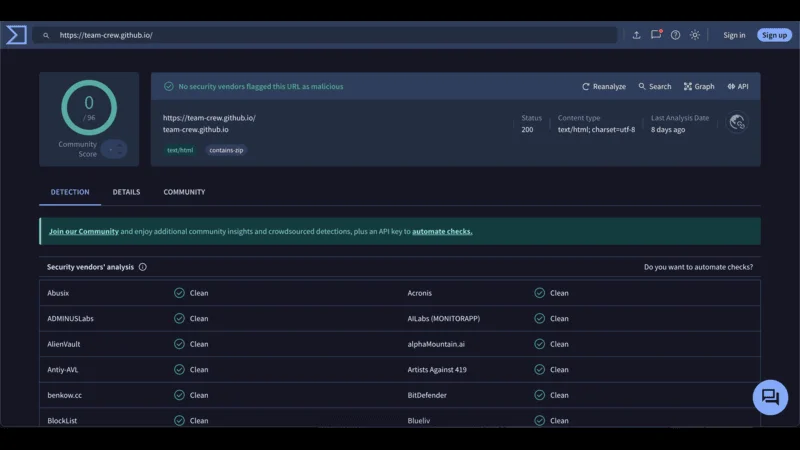
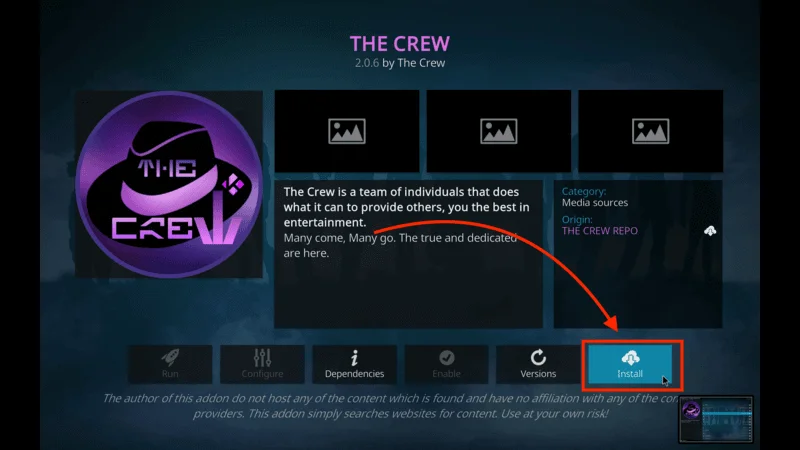
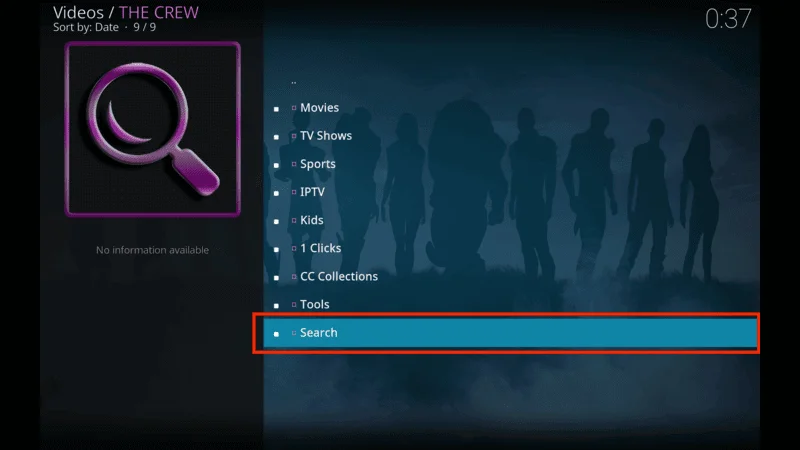
The Crew stands out as one of the most popular Kodi addons, offering a comprehensive collection of live TV channels from the USA and across the globe. Known as an all-in-one addon, it brings together a vast array of cable channels across different genres, including News, Entertainment, Weather, Music, Lifestyle, and Drama.
The addon gathers streaming links from various sources, ensuring that even if one link is down, you have other options available. With The Crew, you can access global, national, and local channels with ease.
Beyond Kodi live TV addons?, The Crew provides a rich library of on-demand movies and shows, making it an excellent choice for a complete entertainment experience.
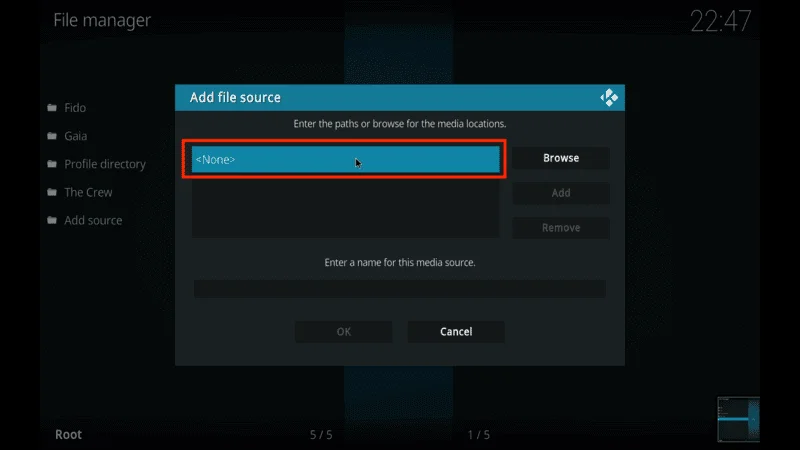
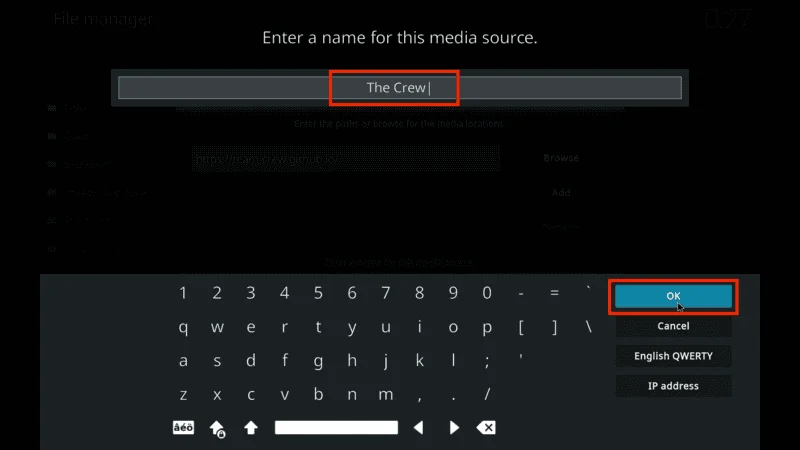
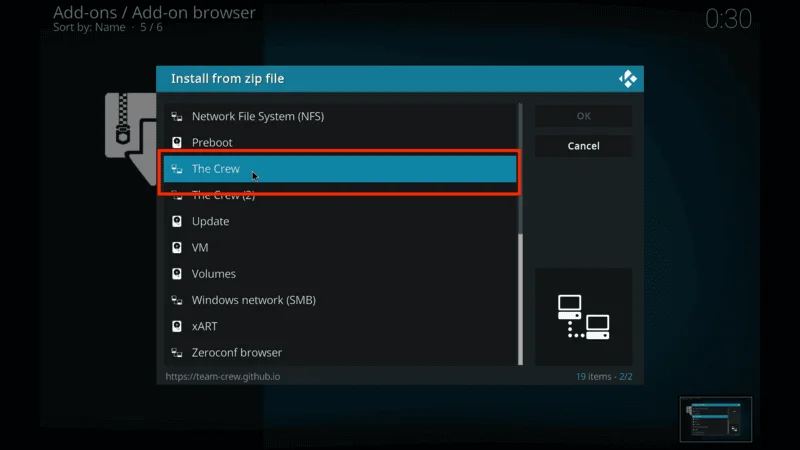
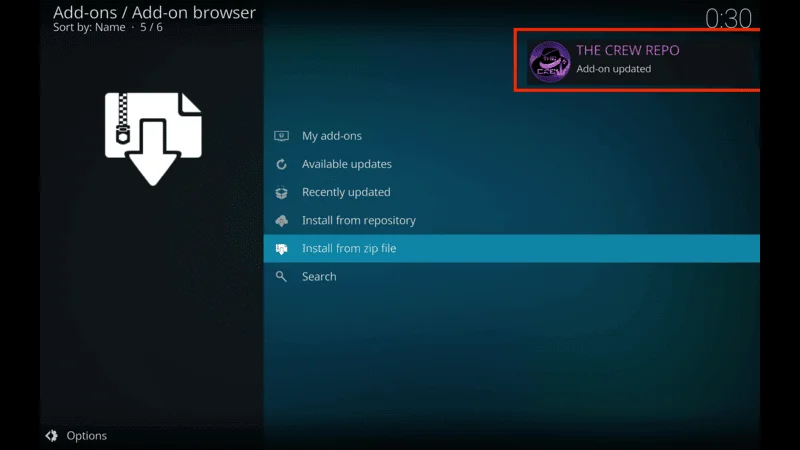
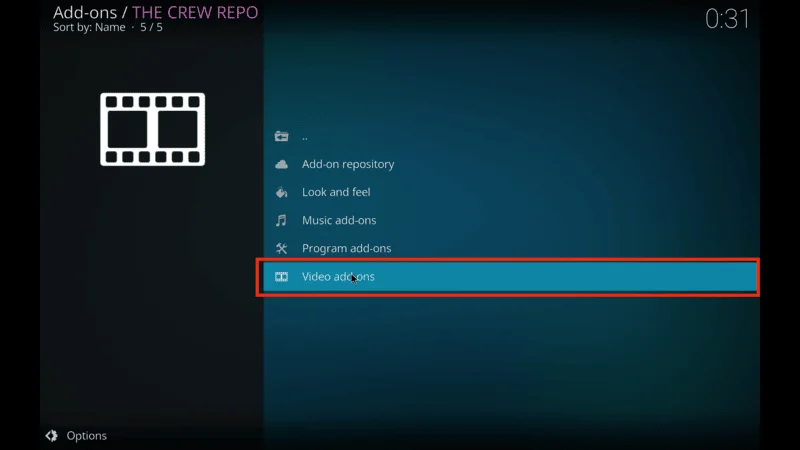
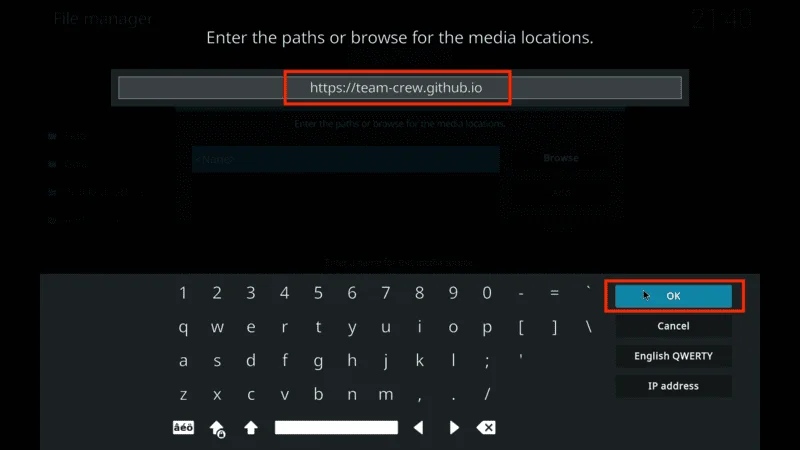
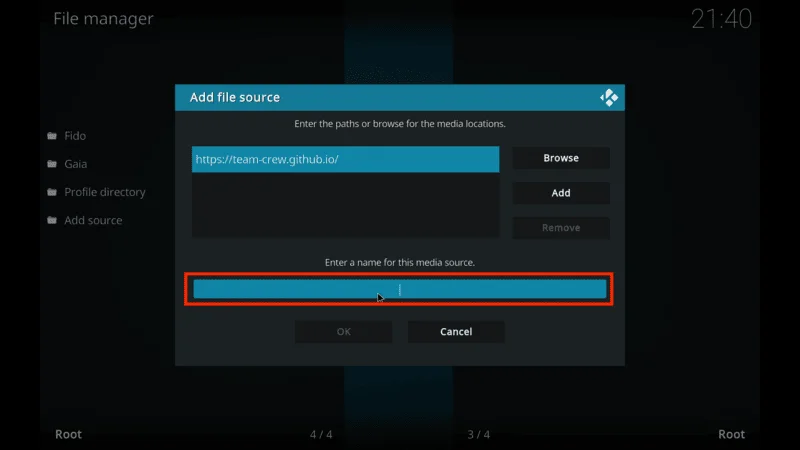
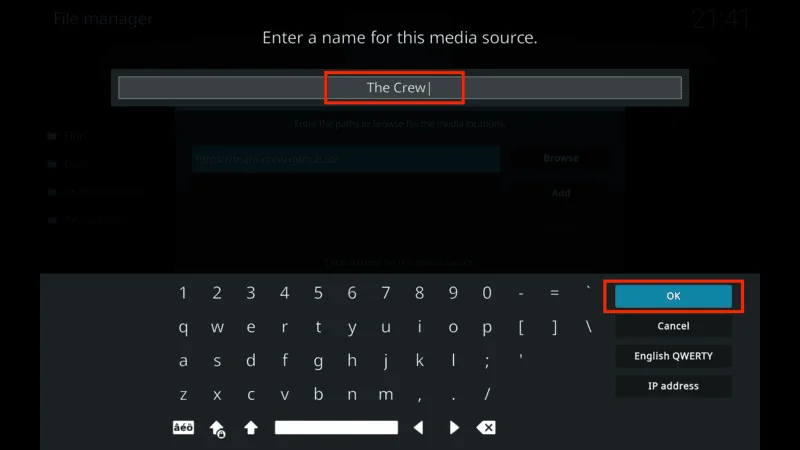
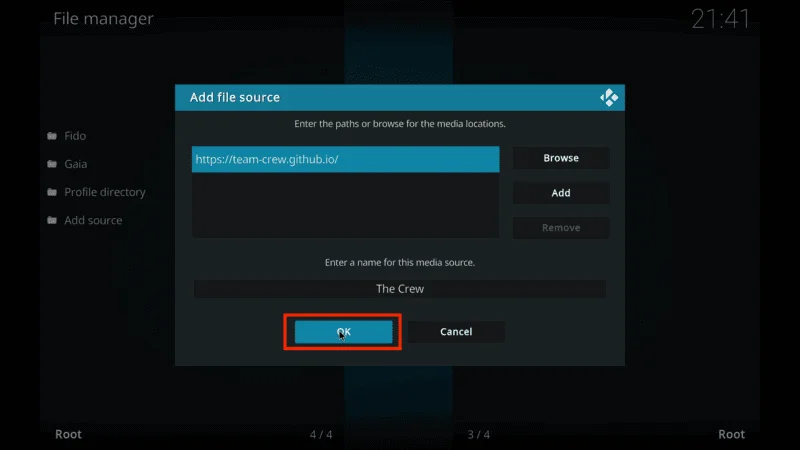
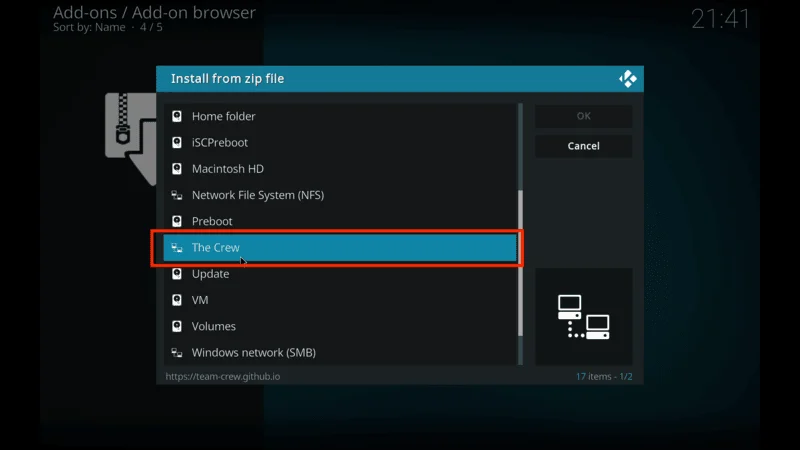
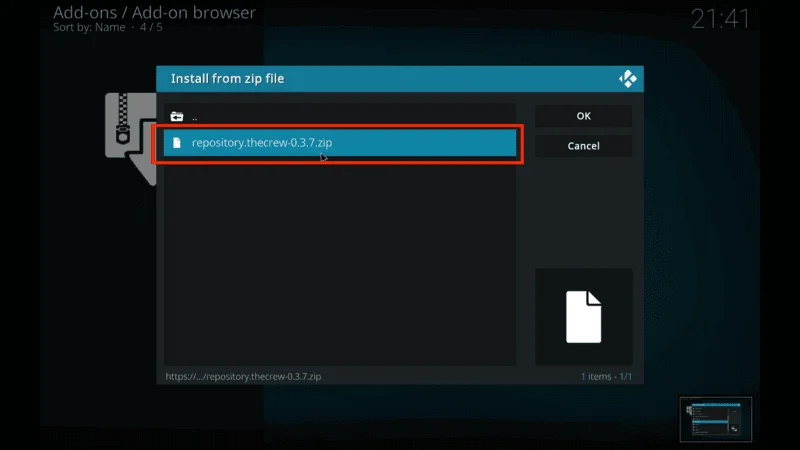
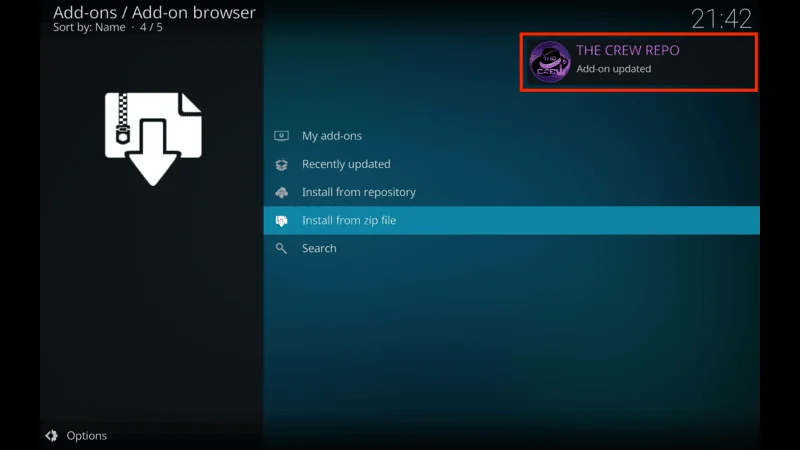
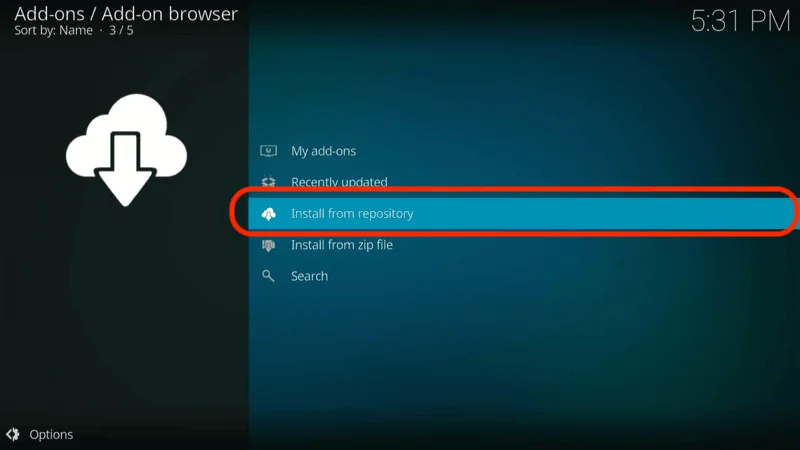
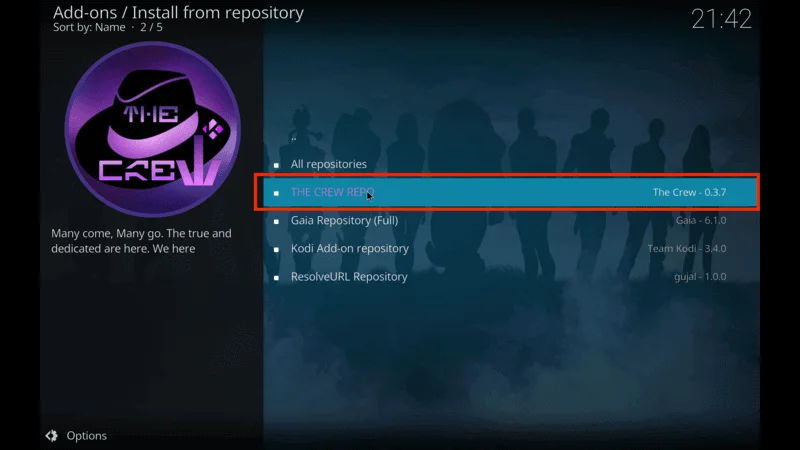
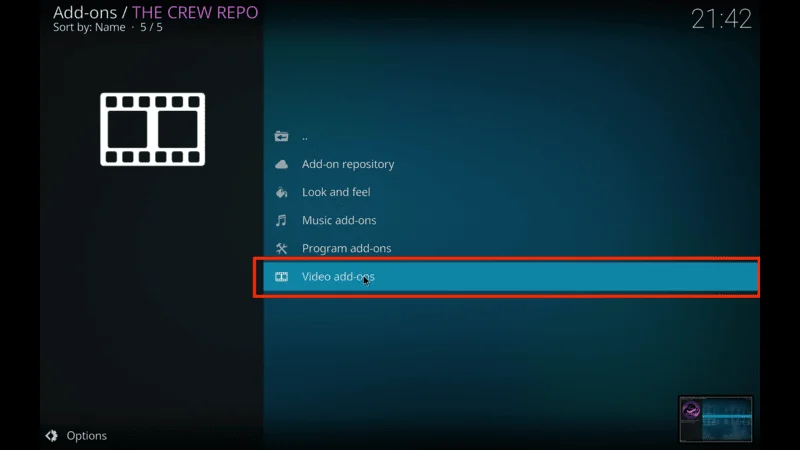
How to Install The Crew Addon on Kodi
2. Fetch:
Fetch has rapidly gained popularity as a reliable live TV addon for Kodi, providing access to a wide array of TV channels from the USA, UK, Canada, and several European nations. It’s a versatile addon that covers various categories, such as Comedy, Lifestyle, Entertainment, Sports, Travel, News, Auto, Business, and more.
Developed by the Doomzday Repo team (best known for their Kodi builds), Fetch offers helpful features like adding channels to favorites, displaying recently watched channels, and searching channels by keywords for quick access.
How to Install Fetch Kodi Addons
3. Stirr:
Stirr is a streaming service offered by Sinclair Broadcast Group, bringing a lineup of free-to-air channels to viewers. You can easily download the Stirr app on FireStick through the Amazon Store or find it on popular platforms like the Apple Store, Google Play, and Roku.
To add Stirr on Kodi, though, you’ll need to install it from a third-party source, the Sly Guy repository, as it’s not available in Kodi’s official repo.
With the Stirr addon, you’ll have access to a variety of channels from Sinclair’s network, along with a selection of other streaming services. You can even find some on-demand content, adding to your options.
How to Install Stirr Kodi Addon
4. UK Turks Playlists:
UK Turks Playlists is a fan favorite among FireStick users, offering both an Android app and a Kodi addon. Both the app and the addon share a similar interface, making it easy to navigate through a wide range of streaming categories.
Though UK Turks primarily focuses on on-demand content, it also provides a solid selection of live TV channels. This mix of options earns it a place among the top live TV addons for Kodi. With channels from the USA, UK, Canada, and beyond, UK Turks brings global entertainment right to your device.
How to Install UK Turks On Kodi
5. iPlayer WWW:
iPlayer WWW is a free addon that provides direct access to BBC Network’s live TV and on-demand shows via BBC iPlayer. You can download this addon easily from the official Kodi Add-ons Repository.
To use iPlayer WWW, you’ll need to sign up for a free BBC account on the BBC’s website. Keep in mind, though, that BBC iPlayer is only accessible within the UK. If you’re located outside the UK, a VPN connection is required to use the service. I recommend connecting to a UK server through ExpressVPN to access iPlayer WWW from other regions.
With iPlayer WWW, you can stream BBC channels like BBC One, BBC Two, BBC Three, BBC Four, BBC News Channel, CBeebies, and more. It’s user-friendly and quick to set up, offering a seamless experience for live TV and BBC content.
- Repository: Kodi Add-on Repository
How to Install IPlayer WWW Kodi Addon
6. Catch Up TV & More:
Catch Up TV & More is a reliable Kodi addon offering a selection of live TV and catch-up streams. This addon provides streaming options from several countries, including the United States, the UK, France, and Poland.
Available on the official Kodi 19 Matrix Add-ons Repository, Catch Up TV & More focuses exclusively on free, legally available channels. In the US section, you can access channels like CBS News, ABC News, and PBS Kids. Note that the channel lineup may occasionally change as new options become available or others are removed.
- Repository: Kodi Add-ons Repository
How to Install Catch UP TV Kodi Addon
7. Pluto TV:
Pluto TV is a legitimate and official addon that provides free access to a broad range of TV channels from the US and beyond. With Pluto TV, you can stream content without needing to register. However, since it’s available on various platforms, including FireStick, Android, iOS, and more, creating an account can be beneficial if you plan to use it across multiple devices. Signing in lets you sync your streaming activity, and some features may only be accessible when logged in.
Supported by ads, Pluto TV offers popular channels such as CNN, Sky News, MTV, NBC News, NFL, and more.
- Repository: Kodi Add-on Repository
8. NewsOn:
For staying up-to-date with local news across the United States, NewsOn is one of the top live TV addons for Kodi. This free, ad-supported addon offers access to live broadcasts from over 175 local stations across 114 different regions and markets, making it a comprehensive source for regional news.
Along with live streaming, NewsOn allows users to catch up on recent broadcasts for up to 48 hours after airing, so you can stay informed even if you miss the live show.
As an official service, NewsOn is available in the Kodi Add-ons Repository. It also offers a free app for FireStick.
- Repository: Kodi Add-on Repository
9. Fluxus IPTV:
Fluxus IPTV is a popular addon for Kodi users who want easy access to live TV channels on their smart devices. Through M3U playlists, this addon provides access to over 4,000 channels and VOD content directly over the internet.
With channels spanning various categories like music, news, sports, and international content, Fluxus IPTV offers a broad selection without the need for registration. This ad-supported addon is compatible with all Kodi-enabled devices and is known for its straightforward interface, making it an appealing option for free IPTV streaming.
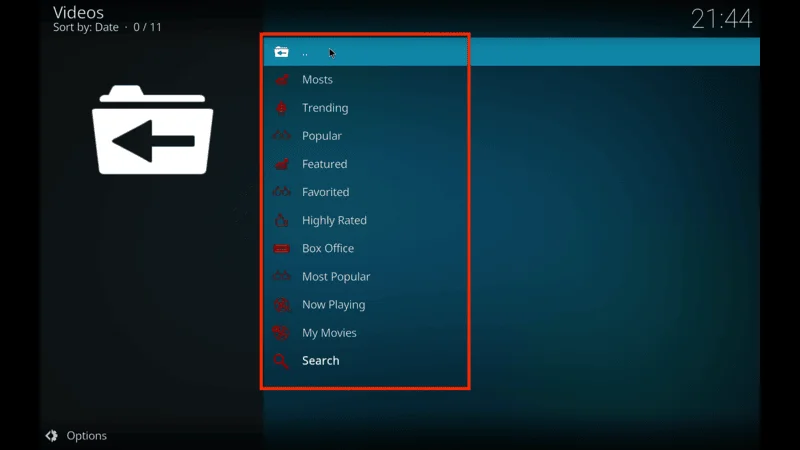
10. Daddy Live:
Daddy Live, available through THE CREW Repository, is a versatile Kodi addon that delivers live sports and TV channels across multiple genres. With a clean, straightforward interface, Daddy Live makes it easy to browse and find content.
Upon opening the addon, you’ll find two main sections: Live Sports and Live TV, each containing numerous subcategories. The Live Sports section covers a range of sports, including WWE, Table Tennis, Baseball, Cycling, and more.
Additionally, Daddy Live offers a TV Shows section with a mix of classic and recent shows, making it an excellent choice for high-quality live TV and sports streaming on Kodi.
11. The TV App:
The TV App, available through the G-Live repository, is a popular Kodi addon for streaming a wide range of live TV channels from various regions. It offers high-quality streams across categories like sports, news, entertainment, cooking, music, kids’ shows, and more.
Primarily focused on sports, The TV App delivers a large selection of live sporting events and matches, making it a go-to for sports enthusiasts. With a simple, easy-to-navigate interface, browsing is smooth and intuitive.
In the Home menu, you’ll find sections like Live TV, NBA, MLB, NHL, and NFL, each further divided into relevant categories for convenient browsing.
12. Plex Live:
Plex Live is a top-rated live TV addon for Kodi, offering over 200 channels from various countries, with a strong emphasis on American and English content. Channels from regions like Mexico, Germany, India, and Canada are also available, providing diverse viewing options.
With content spanning categories such as sports, news, entertainment, lifestyle, and gaming, Plex Live caters to a broad audience. Available in the SlyGuy repository, this addon is free to use with no subscription or registration required. Its minimalist interface features four main menus—Live TV, Search, Bookmarks, and Settings—making navigation straightforward.
Within the Live TV menu, you’ll find channels from regions including Australia, Brazil, Hong Kong, India, Mexico, Spain, the USA, Germany, and the UK.
13. Mega IPTV
Mega IPTV is a highly popular live TV addon that offers an extensive collection of streaming options. With channels from over 180 countries, viewers have access to thousands of channels across categories like sports, news, comedy, kids, and more.
The Home menu is organized into sections like IPTV-Org Channels by Country, Flexus Channels English, Samsung TV, Recently Played, Search, and Settings, making it simple to explore content based on preferences.
This versatile addon is compatible with all Kodi devices and provides a seamless experience for live streaming.
14. Samsung TV Plus
Samsung TV Plus is a free international live TV addon accessible through the SlyGuy repository. It offers an ad-supported IPTV service with a variety of popular channels, covering genres like news, crime, films, and documentaries. Samsung TV Plus requires no login or registration, providing quick, hassle-free access to channels from the UK, Canada, and the US. The simple interface includes sections such as Live TV, My Channels, Search, and Settings, allowing users to easily browse and watch content.
15. PBS Live
PBS Live is an official addon available in the SlyGuy repository, bringing over 1,000 live channels from PBS without any subscription fees.
This addon is a fantastic cable TV alternative, featuring a broad range of genres, including news, sports, arts, and entertainment. With an intuitive search function, PBS Live lets users quickly find specific networks or channels.
This addon is perfect for anyone who wants easy access to PBS content directly on their Kodi device.
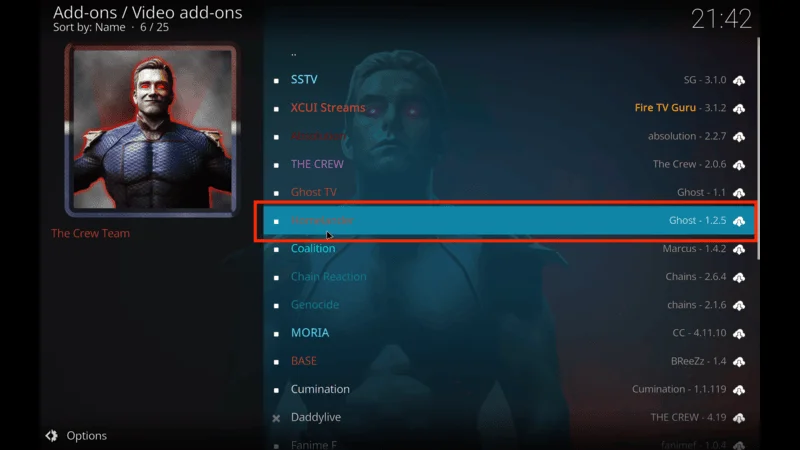
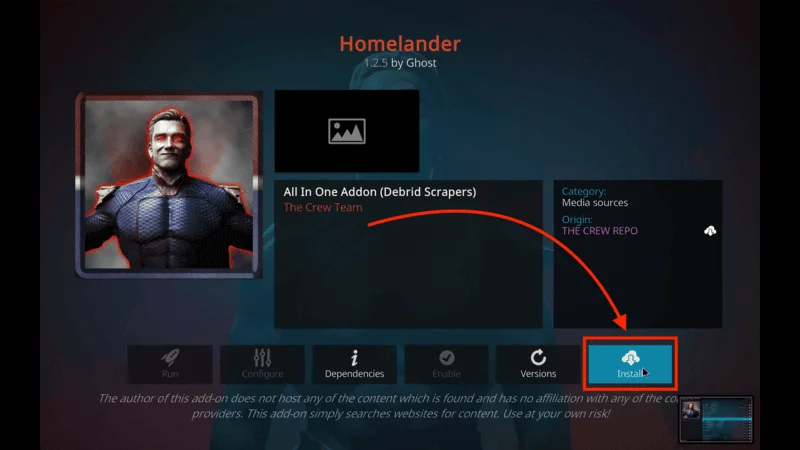
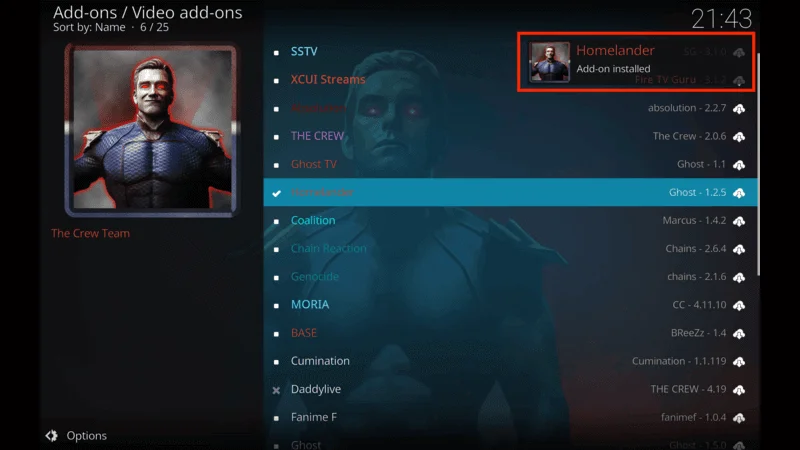
16. Homelander
Homelander, hosted in THE CREW Repository, is an all-in-one Kodi addon that doesn’t host content directly but instead uses scrapers to find high-quality links to your favorite movies, TV shows, and live channels.
The interface is easy to navigate, with sections for Movies, TV Shows, Live TV, My Movies, New Episodes, People, and more. Homelander is especially known for its reliable live TV section, which offers access to various networks and streaming options.
17. Ghost
Ghost is another Kodi addon from THE CREW repository known for its wide range of entertainment options, including movies, TV shows, sports, and live TV.
The addon’s interface is straightforward, with a Home menu divided into Movies, TV Shows, Replays, Live TV, Trakt, Search, and Settings.
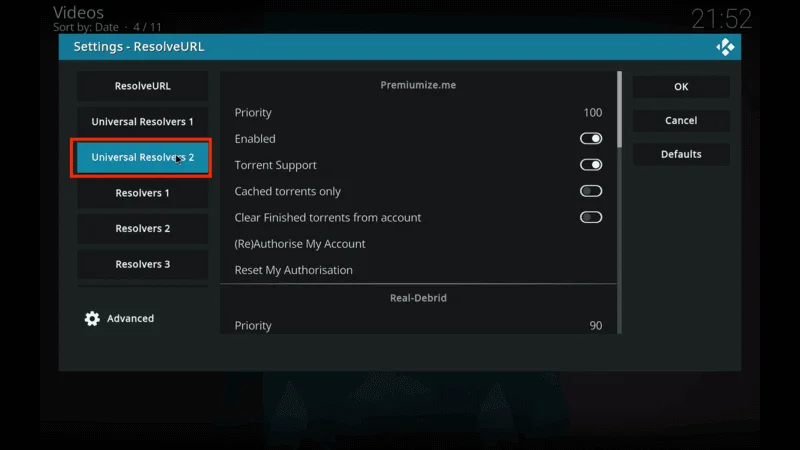
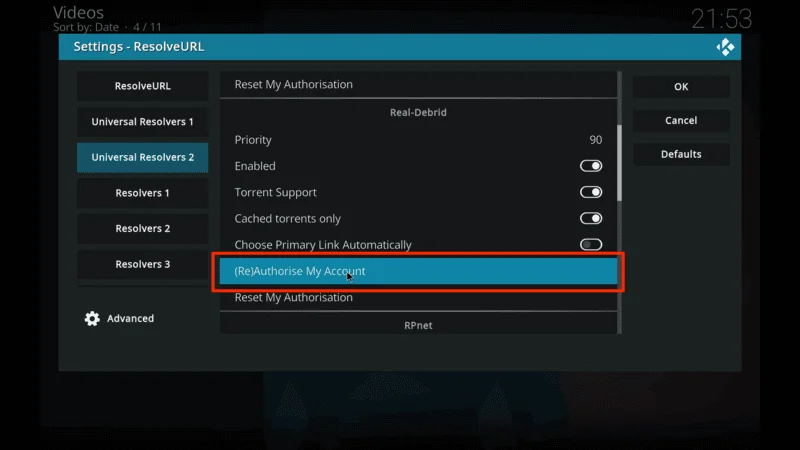
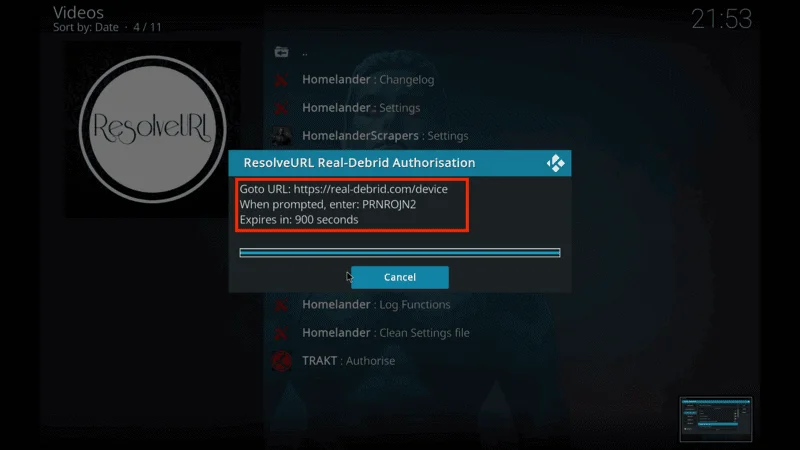
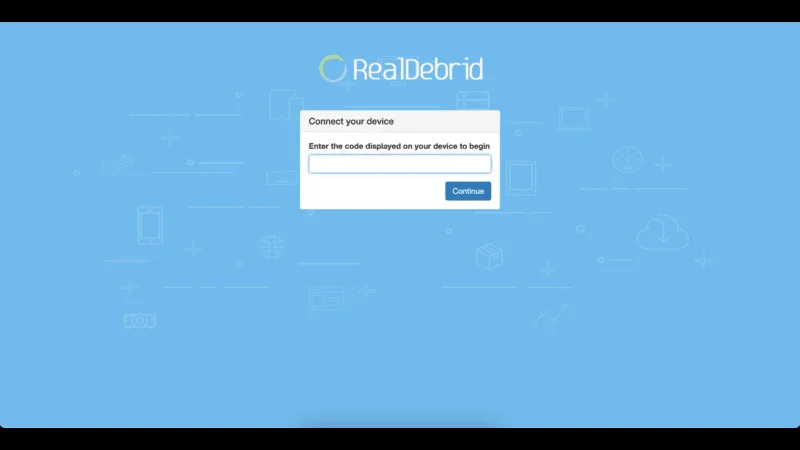
Ghost also supports Real Debrid and Trakt integration, which enhances streaming quality and lets you keep your library synced across devices.
18. Asgard
Asgard is a popular Kodi addon in Narcacist’s Wizard repository, offering an all-encompassing selection of content. Known for its variety, Asgard features streaming options that range from kids’ shows and documentaries to movies and live TV.
The Home menu includes sections like TV Scrapers, OneClick Section, Non-Debrid, and more, with dedicated categories for Live TV, Anime, Movies, and Kids. You can integrate Real Debrid and Trakt for a more personalized and high-quality streaming experience.
19. Json IPTV
Json IPTV is a newer Kodi addon found in the G-Live repository. It offers access to a variety of live channels, covering categories such as entertainment, sports, and international broadcasts.
The addon’s minimalistic interface is easy to navigate, with sections like IPTV Channels, IPTV Providers, and Radio Providers. Json IPTV is compatible with devices like FireStick and Fire TV, making it a versatile choice for live streaming on multiple platforms.
20. tvOne
Available in cMaN’s Wizard repository, tvOne is a simple yet effective live TV addon featuring channels from various regions, including the USA and the UK.
Its Home menu is neatly organized, with categories such as Sports, Pakistani, Indian, Turkish, South Indian, Kids, Religious, Science, and more.
Each category allows for easy selection and browsing of specific channels, making it an ideal addon for users looking for a straightforward live TV experience.
21. IPTV AU
IPTV AU is a free Kodi addon tailored for Australian audiences, featuring over 30 channels, including Al Jazeera, Redbull TV, ABC, Fuel TV, and 10 Bold.
When selecting a channel, users can manually choose the streaming quality, ranging from 240p to 1080p, for optimal performance. Although primarily for Australian viewers, a VPN can be used to access it from other regions.
21. IPTV NZ
IPTV NZ, as the name suggests, is designed for New Zealand users. Hosted in the SlyGuy repository, it provides a wide range of free channels but is geo-restricted to New Zealand.
Users outside the region can use a VPN to bypass these restrictions. IPTV NZ supports Android devices, including the NVIDIA Shield and Fire TV.
22. Halcyon
Halcyon, found in the cMaN’s Wizard repository, combines live TV with on-demand content, including movies, comedy shows, documentaries, and live webcams.
The interface is classic yet functional, with sections for Movies, TV Shows, 4K Movies, and more. Users can connect premium accounts like Real Debrid and Trakt to access high-quality streaming and additional features.
23. Fork-Q
Fork-Q is a live TV addon that focuses on channels from the UK and the USA. Hosted by cMaN’s Wizard repository, this free and user-friendly addon delivers what it promises, with no complicated features.
Fork-Q is accessible on most Kodi-compatible devices, but as an unofficial addon, caution is advised regarding its legal and safety aspects.
Before you start streaming on Kodi with your FireStick or Fire TV, it’s essential to take precautions. Everything you stream can be monitored by your internet service provider (ISP) and even government authorities. Accessing free content like movies, TV shows, or live sports on Kodi could potentially lead to legal issues.
To protect your privacy, using a VPN is the most effective solution. A VPN hides your real IP address, keeping your streaming activities private and secure. It also helps you bypass geo-restrictions and prevents your ISP from throttling your connection during streaming sessions.
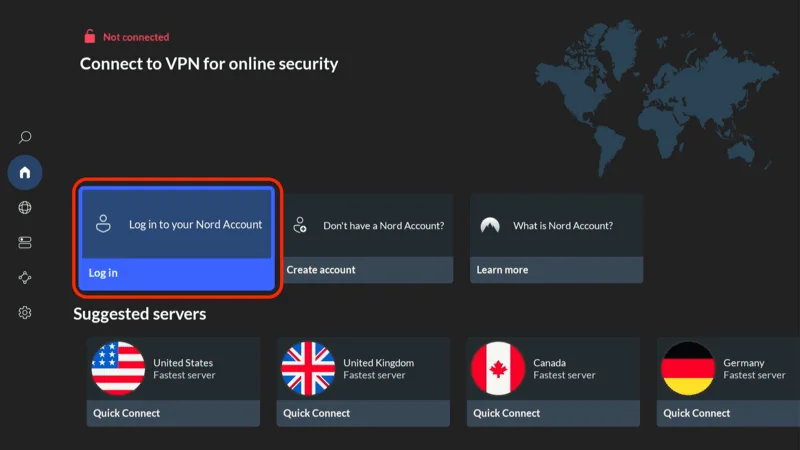
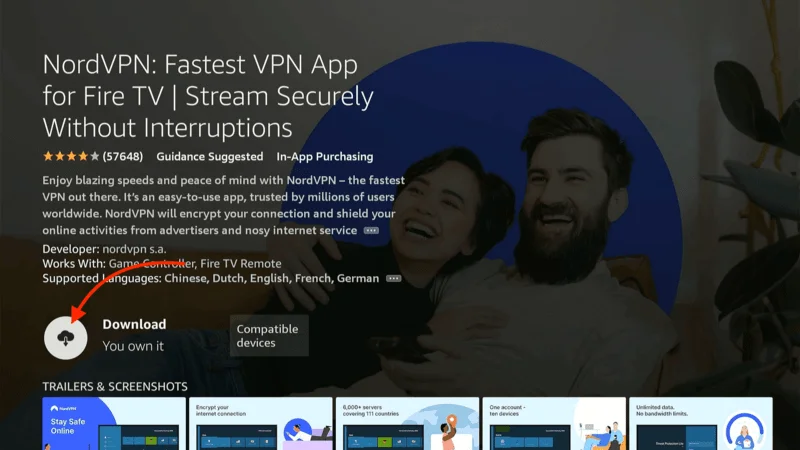
For Kodi users on FireStick, I recommend NordVPN. It’s a top-tier VPN that works seamlessly with Kodi, ensuring fast, uninterrupted streaming.
While we don’t encourage illegal streaming, it’s not always clear if the content you’re watching on Kodi is from legitimate sources. That’s why using a VPN like NordVPN provides the necessary protection to keep your streaming safe.
Here’s how to install and use NordVPN with Kodi on FireStick:
Sign Up for NordVPN – They offer a 30-day money-back guarantee, allowing you to try it out without any risk.

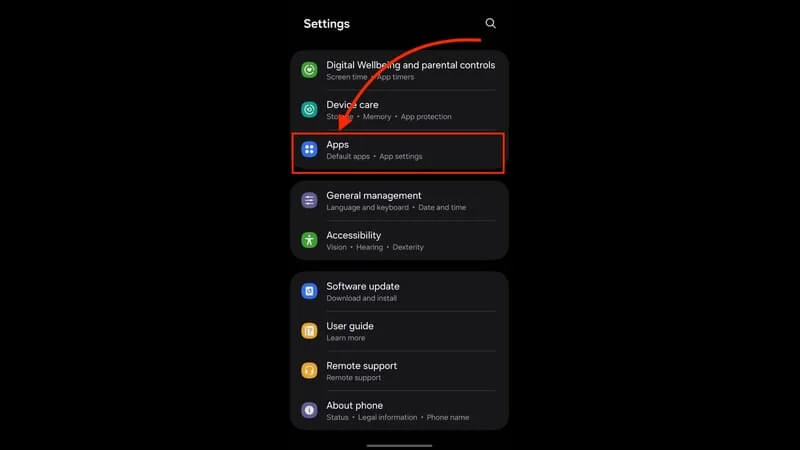
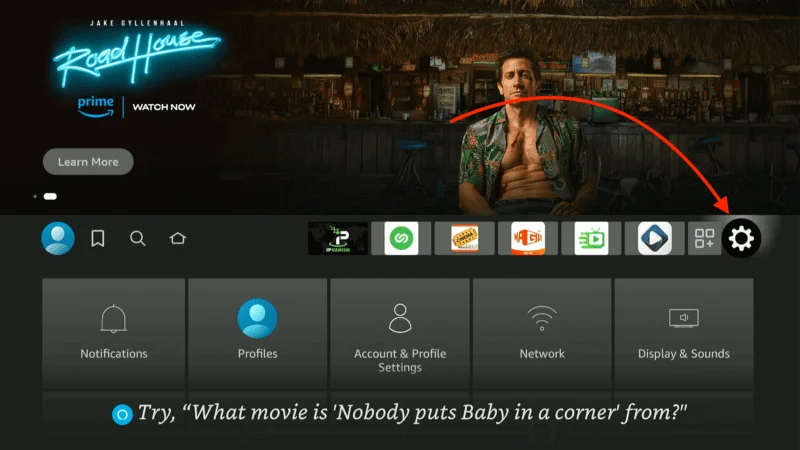
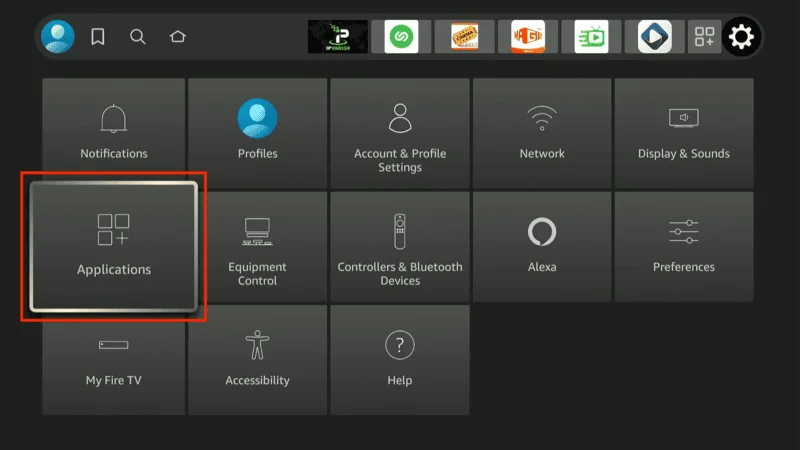
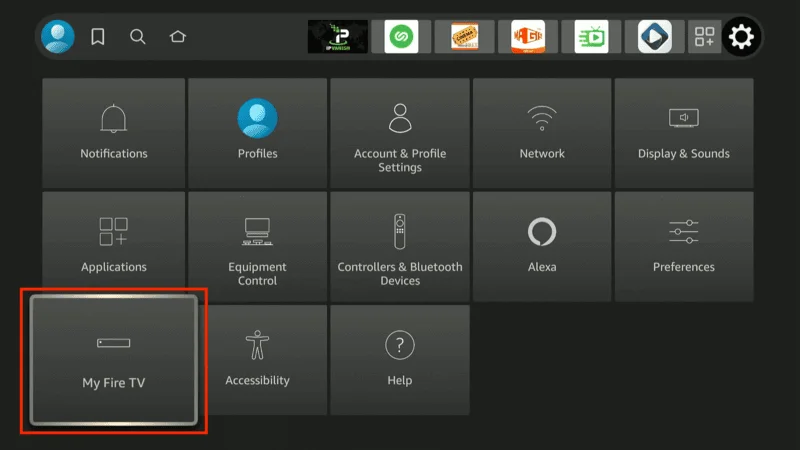
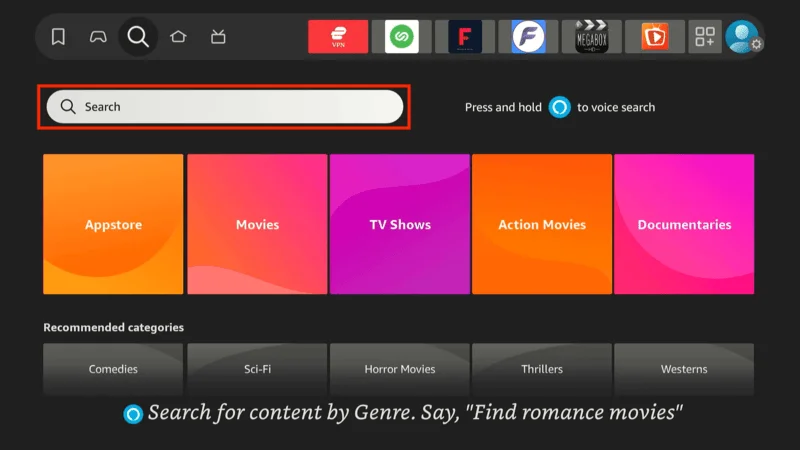
Turn on Your FireStick – Navigate to the Find menu and select the Search option.

Search for NordVPN – Type “NordVPN” in the search bar and choose it from the results.
Download the App – Click Download to install the NordVPN app.
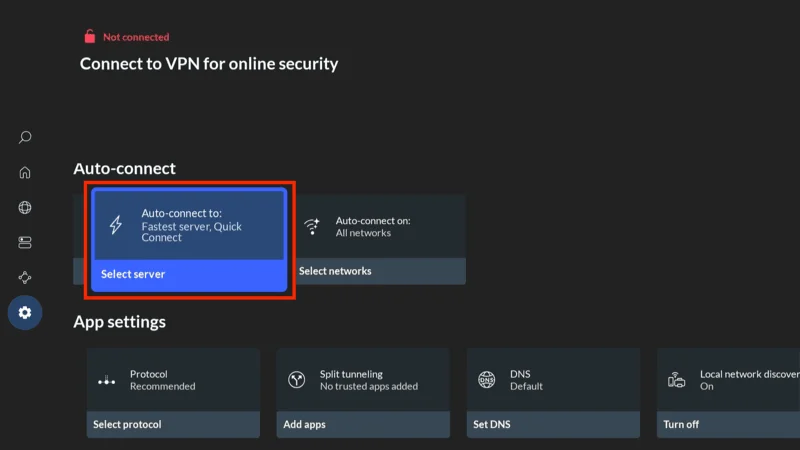
Log In – Open the app and sign in using your NordVPN account details.
Connect – Tap Quick Connect to connect to the best server available, ensuring your Kodi streaming is private and secure.
For more detailed instructions on setting up NordVPN with Kodi on FireStick, check out additional resources. Stay safe and enjoy secure, unrestricted streaming!
Frequently Asked Questions (FAQs)
If you’re new to Kodi live TV addons or simply looking for the best ways to enhance your streaming experience, you may have some questions. Here, we’ve compiled answers to five of the most commonly searched questions to help you get started and make the most of your setup.
1. How do I install Kodi live TV addons?
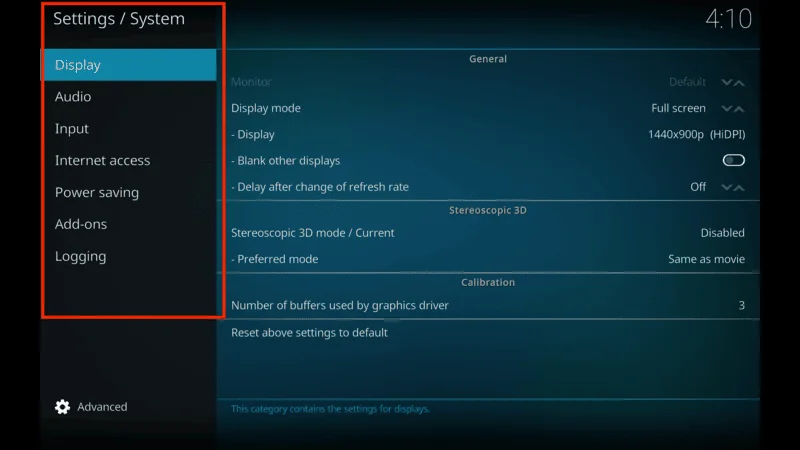
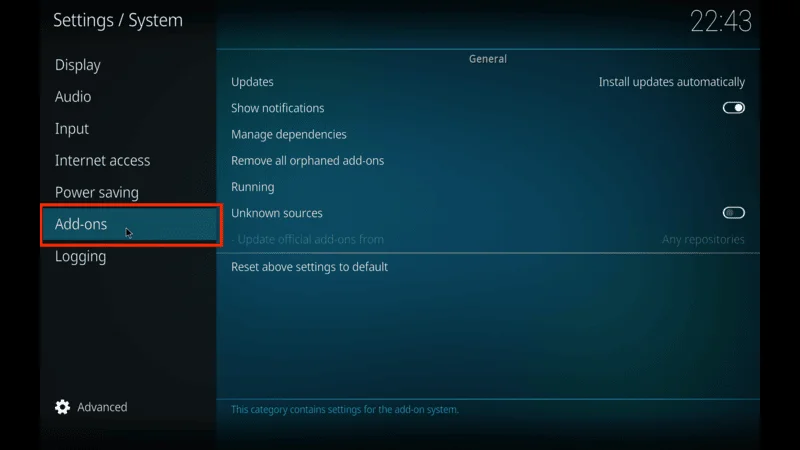
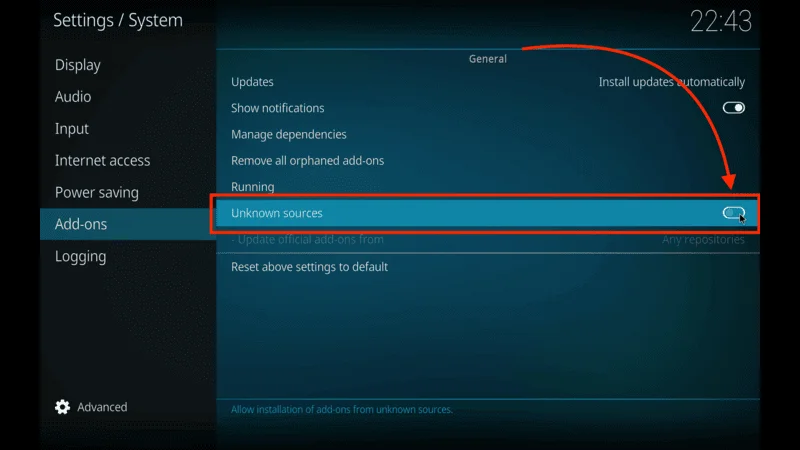
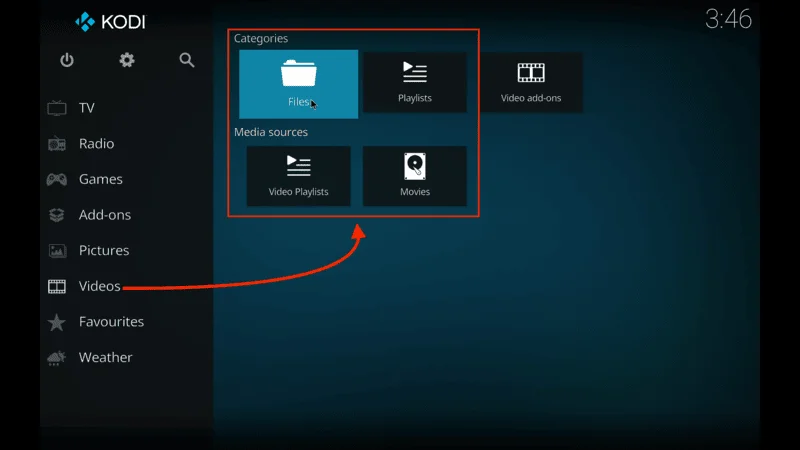
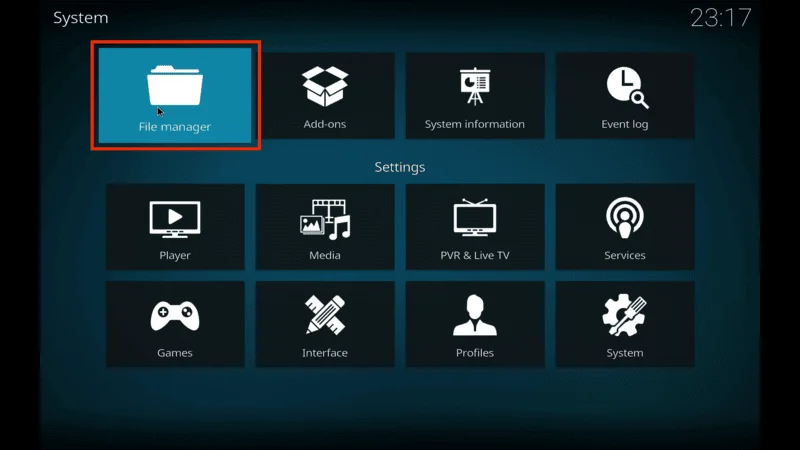
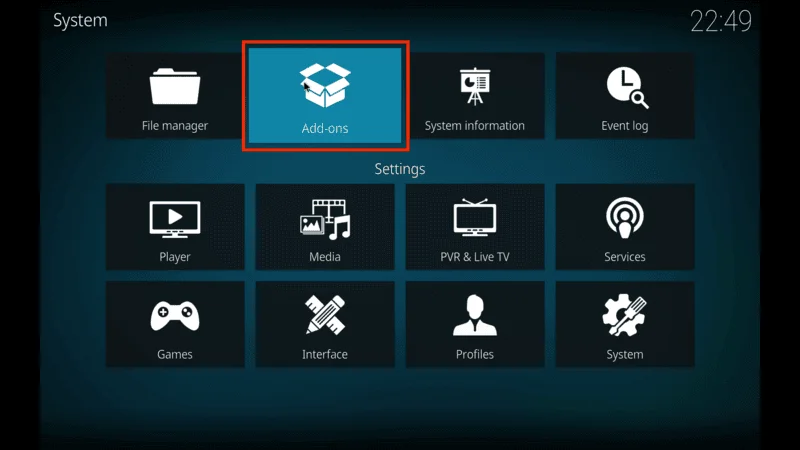
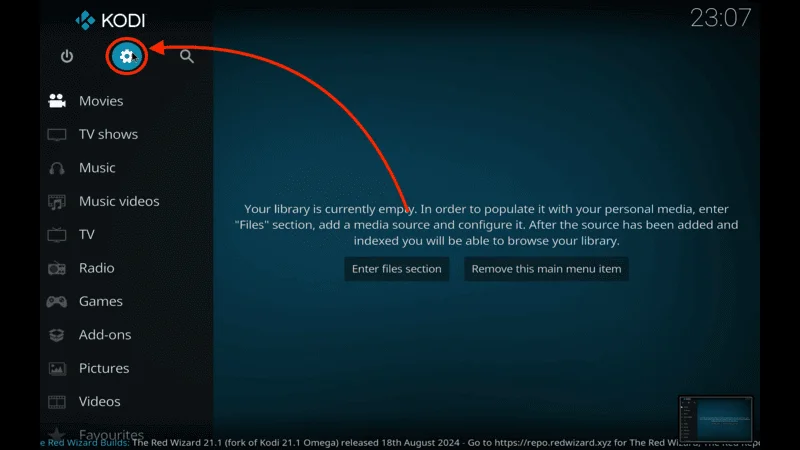
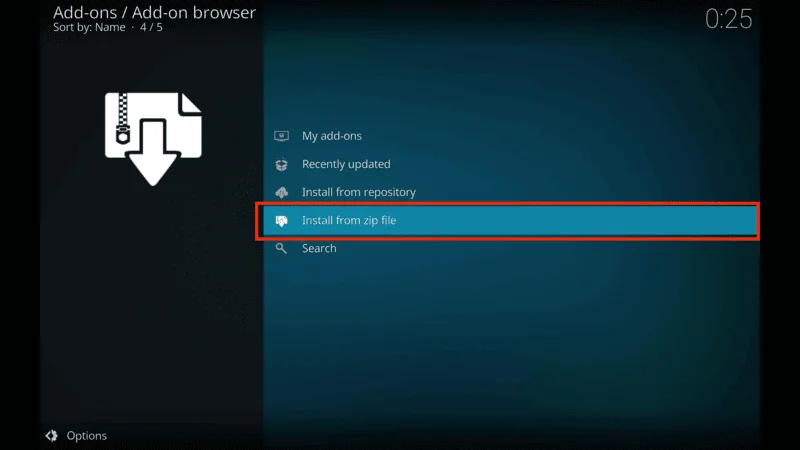
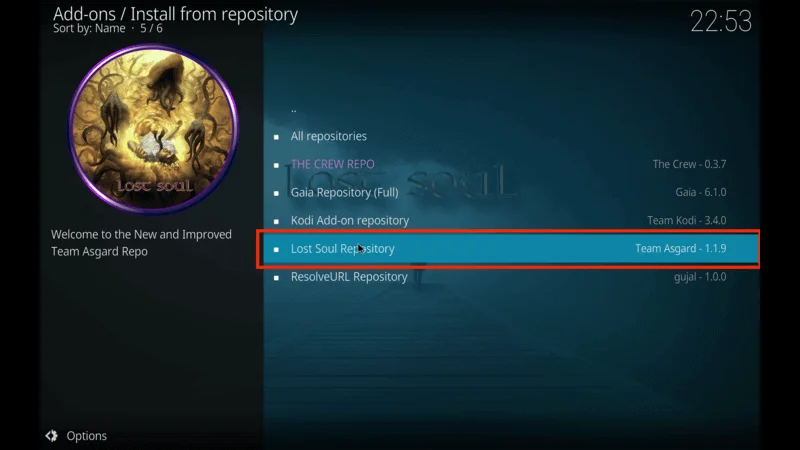
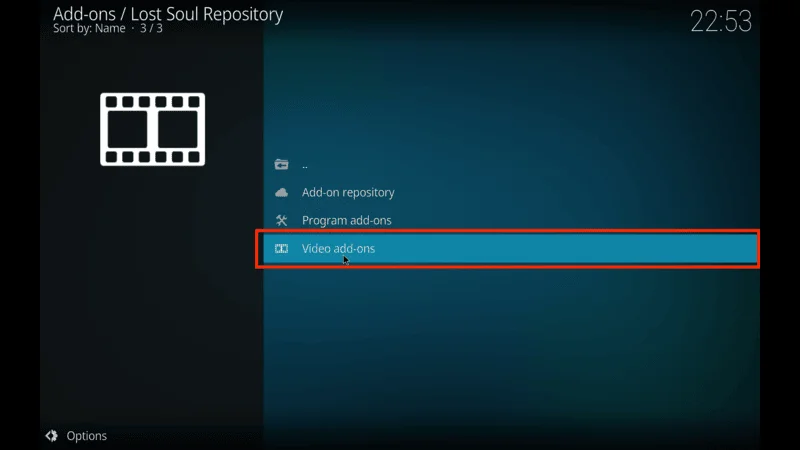
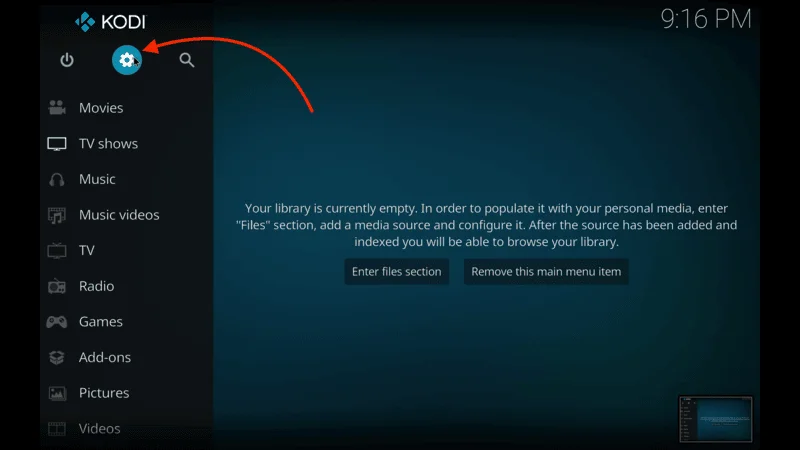
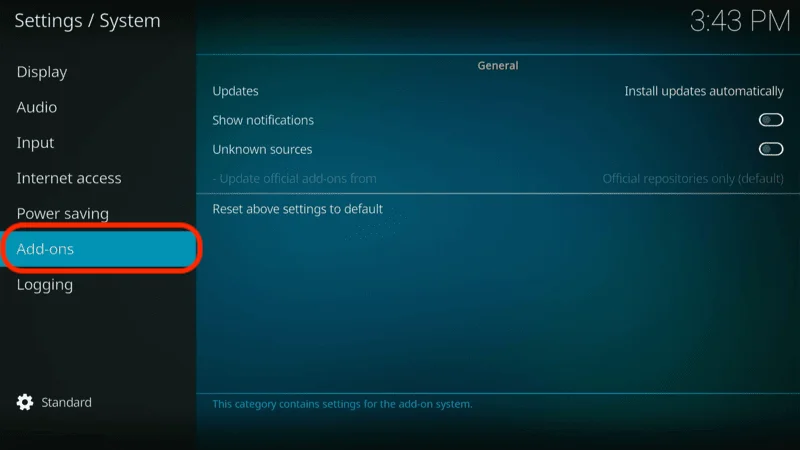
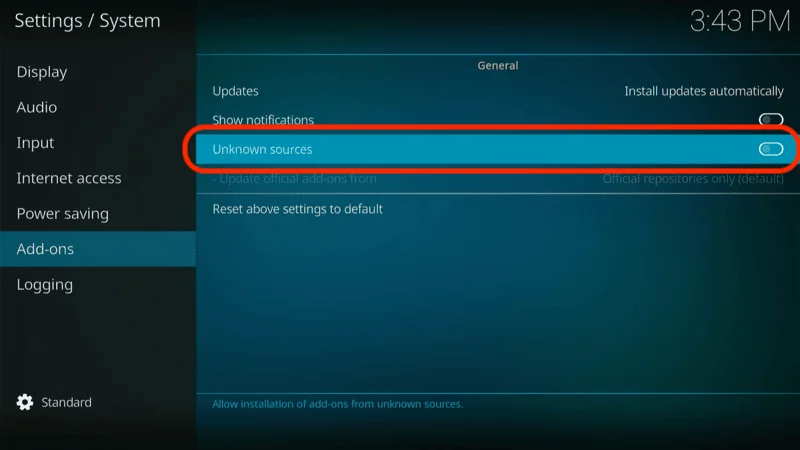
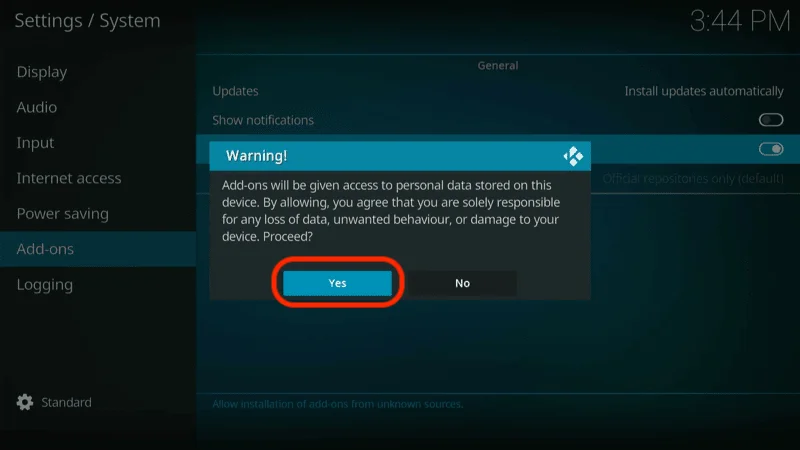
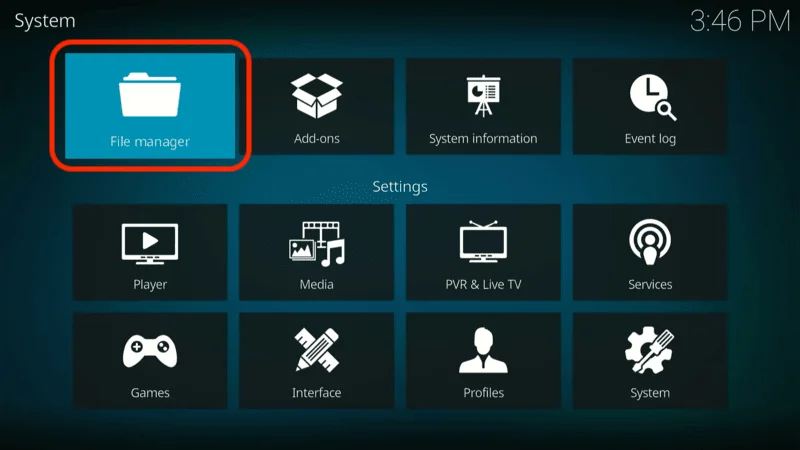
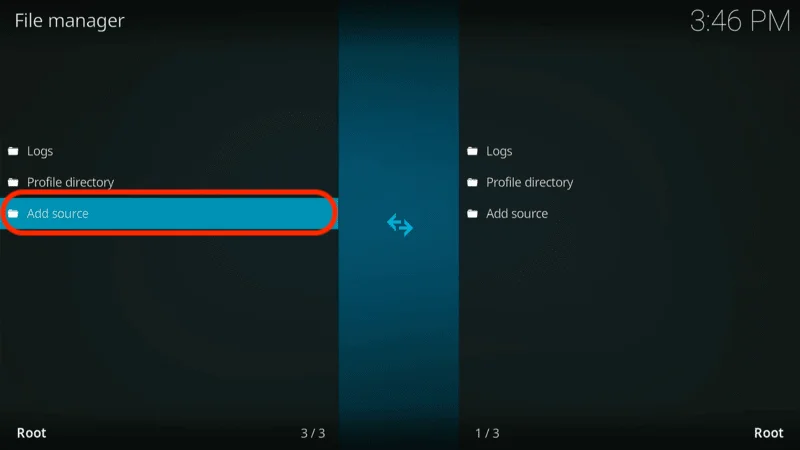
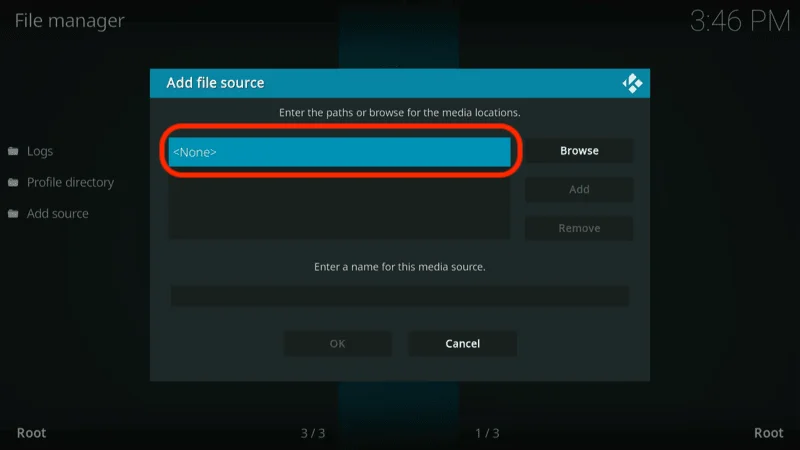
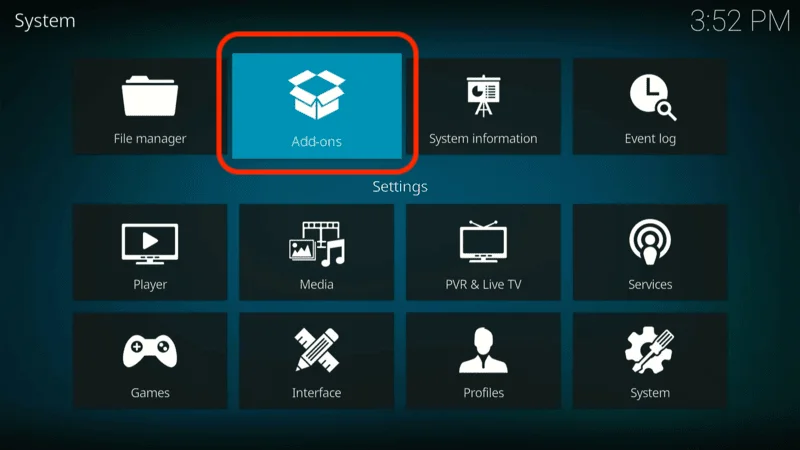
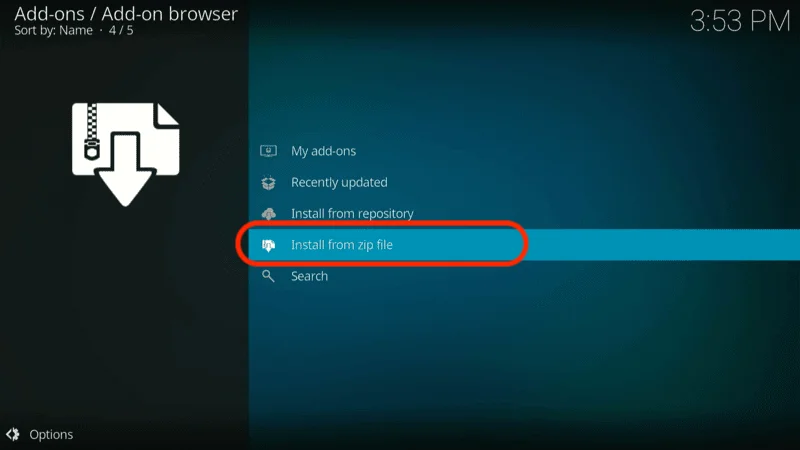
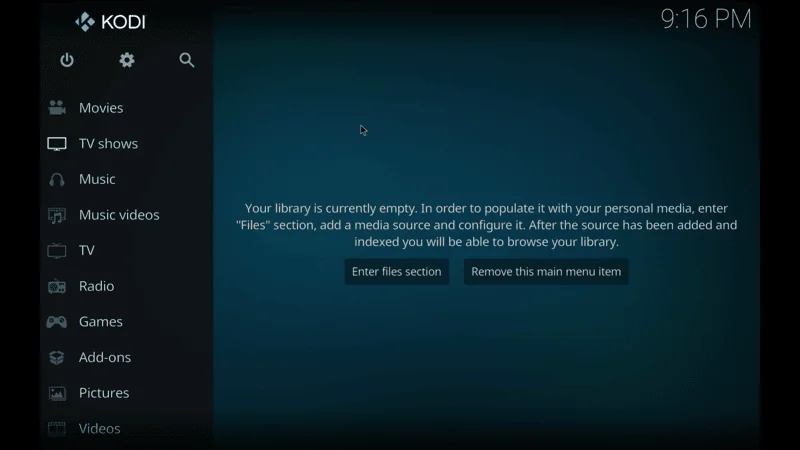
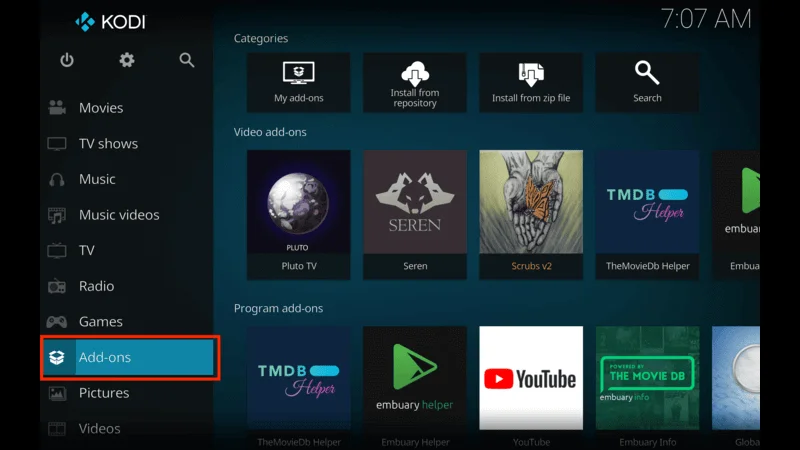
To install a Kodi live TV addon, open Kodi and go to “Settings” > “System” > “Add-ons” and enable “Unknown Sources” to allow third-party installations. Then, from the main screen, go to “Add-ons” > “Install from Zip File” and enter the repository URL of the addon you want. Once the repo is added, select “Install from Repository” and locate the specific addon to install it.
2. Are Kodi live TV addons legal to use?
Most Kodi live TV addons are legal, especially if they’re from official repositories and provide content from free-to-air or legally licensed channels. However, certain third-party addons may offer access to copyrighted content without authorization. It’s essential to ensure that you’re using addons that comply with your region’s copyright laws.
3. Do I need a VPN to use Kodi live TV addons?
Using a VPN with Kodi can improve your streaming privacy and help you access geo-restricted content. A VPN can mask your location, which is helpful if certain content is blocked in your region. It’s recommended to use a reliable VPN, especially if you’re accessing addons that may be region-locked or if you’re concerned about privacy.
4. Can I use Kodi live TV addons on any device?
Yes, Kodi and its live TV addons are compatible with a wide range of devices, including Android smartphones, FireStick, Windows PC, macOS, Linux, and more. Simply install Kodi on your device and follow the setup instructions to add live TV addons. For specific platforms like Roku, users often mirror or cast Kodi from a compatible device.
5. Why is my Kodi addon not working or buffering a lot?
Buffering issues with Kodi addons are usually due to slow internet speeds, server issues on the addon’s end, or high traffic. Try improving your connection speed, clearing the cache in Kodi, or choosing a different server if the addon allows it. Additionally, using a VPN can sometimes reduce buffering if your ISP is throttling streaming services.
Final Thoughts
That wraps up our list of the best Kodi live TV addons for 2024! Each of the addons listed above comes with working links to help you get started with live TV streaming right away. If you come across any other great addons or have suggestions, feel free to share them in the comments below.
We’d love to hear about your experiences and recommendations. Thank you for reading, and happy streaming!