

This article will walk you through how to download subtitles on kodi from OpenSubtitles.org. These steps are applicable to subtitle installation on Kodi using any device, which includes the FireStick, FireStick 4K, FireStick 4K Max, Windows PC, Mac, Nvidia Shield, Android, and other operating systems that have Kodi.
Previously, the actors used to shout at the sets so that dialogue could reach the microphones, and it resulted in clearer audio. Nowadays, due to advanced microphone technology, even the softest sounds are captured, making the performance of the actor easy and natural.
Sometimes, even for native speakers, it can be difficult to hear and understand the dialogue, so it is necessary to add subtitles. Here are some more reasons why subtitles can be useful:
- Low Volume Situations: When you need to keep the volume low, subtitles help you follow the dialogue without missing key details.
- Noisy Environments: Watching on a mobile device in a noisy setting? Subtitles ensure you don’t miss anything.
- Foreign Language Content: Subtitles make it easy to enjoy content in languages you’re not fluent in.
⚠️ Attention, Kodi Users!
Kodi Addons and builds offer unlimited streaming content, but they could also get you into trouble if you’re caught streaming free movies, TV shows, or sports. Currently, your IP 2400:adc3:12c:e600:bcd3:880f:e0ab:5a62 is visible to everyone. Kodi users are strongly advised to always connect to a VPN while streaming online. Kodi VPN hides your identity plus bypasses government surveillance, geo-blocked content, and ISP throttling (which also helps in buffer-free streaming).
I personally use NordVPN, which is the fastest and most secure VPN. It is easy to install on Amazon FireStick and any other device. You get 3 months free and save 49% on its annual plans. Also, it comes with a 30-day money-back guarantee. If you are not satisfied, you can always ask for a refund.
Note: Some addons require subtitles to be enabled in their settings for them to work correctly. If your subtitles aren’t showing, try enabling them within the specific addon’s settings.
How to Set Up Subtitles on Kodi with OpenSubtitles
OpenSubtitles is undoubtedly one of the best subtitle sources on Kodi, boasting thousands of subtitles in many languages for practically all movies and TV series. Here’s how you can create an account on OpenSubtitles and configure Kodi to use it.
Step 1: Create an OpenSubtitles Account
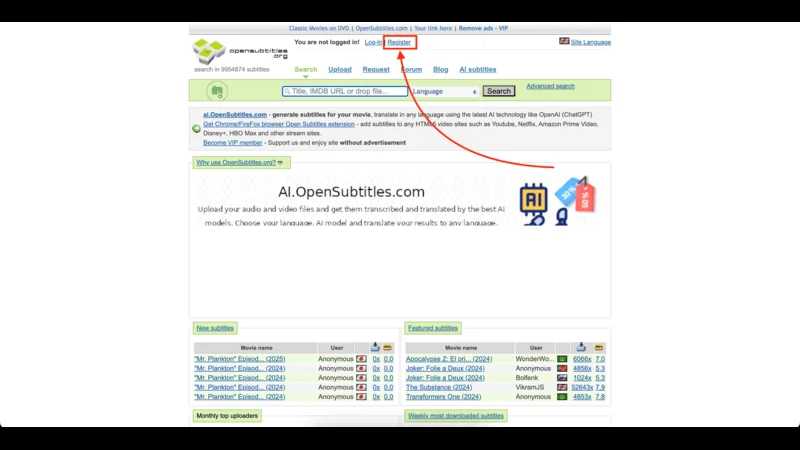
Visit OpenSubtitles.org in your web browser and select the Register link at the top of the page.
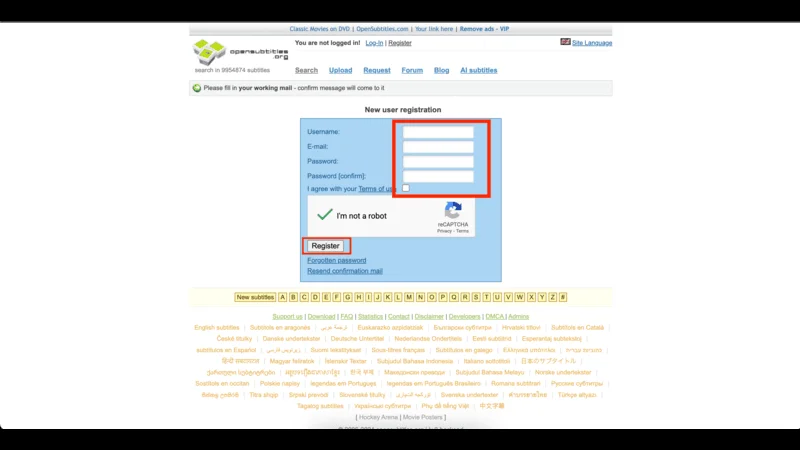
Enter the required details: username, email, and password. Confirm your password, check the box to agree to the terms of use, and complete the captcha box to confirm you’re not a robot. Click Register to proceed.
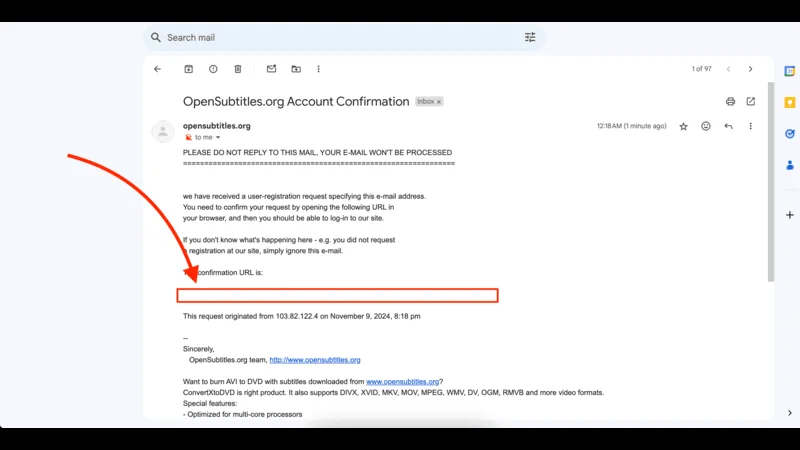
Open your email inbox and look for a confirmation email from OpenSubtitles. Click the link within the email to confirm your account, and follow any additional on-screen instructions to complete the login.
Now that your OpenSubtitles account is set up, you’re ready to configure Kodi to automatically download subtitles.
Step-by-Step Guide to Configure OpenSubtitles on Kodi
Once you’ve created an account on OpenSubtitles.org, follow these steps to set it up on Kodi for easy access to subtitles for your favorite movies and TV shows.
Legal Disclaimer: This tutorial is intended solely for educational purposes. KodiExpert.org does not own, host, operate, resell, or distribute any streaming apps, addons, websites, IPTV services, or similar platforms. The content on this page may include some unverified services, and we cannot confirm whether they possess the necessary legal licenses to distribute the content they offer.
KodiExpert.org does not verify the legality of each app or service in every region. It is your responsibility to conduct your own due diligence if you choose to use any unverified apps or services. Please ensure that you only stream content that is legally available in the public domain. The end-user is solely responsible for any media accessed.
Step 2: Configure OpenSubtitles on Kodi
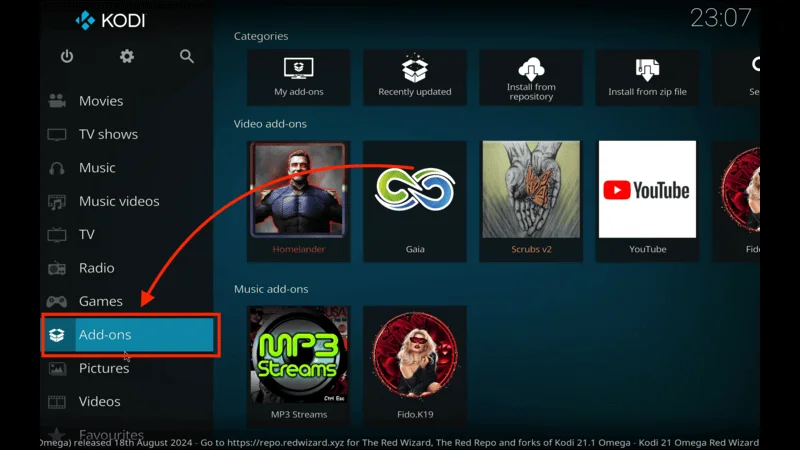
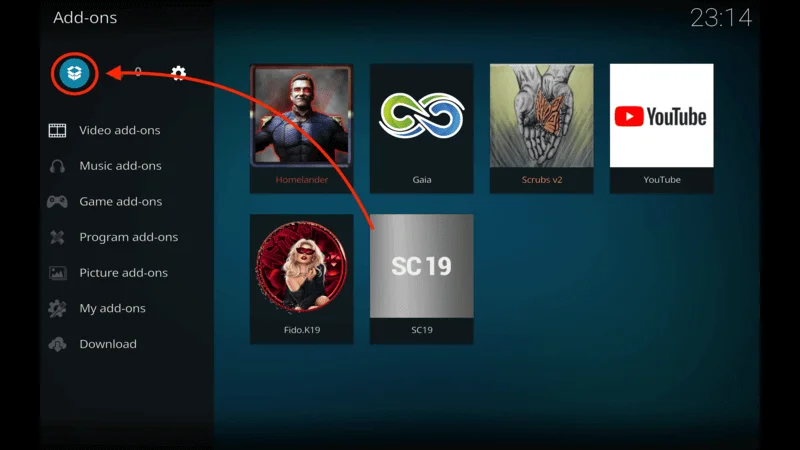
Launch Kodi and select Add-ons from the left-hand menu on the home screen.
At the top left, open the Package Installer (it looks like an open box icon).
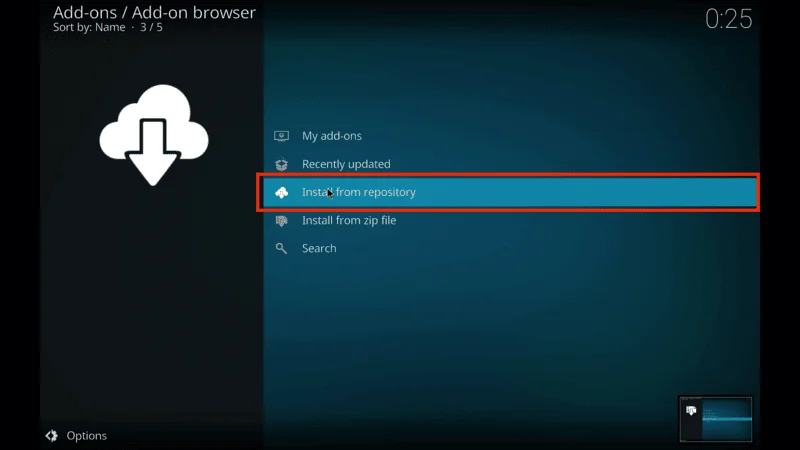
Select Install from repository on the next screen.
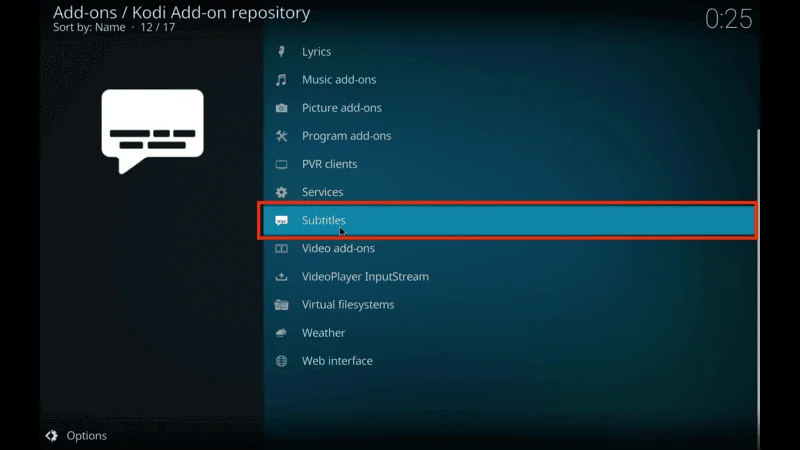
In the list of repositories, click on Kodi Add-on repository—the official repository that comes pre-installed with Kodi.

Choose Subtitles from the list.
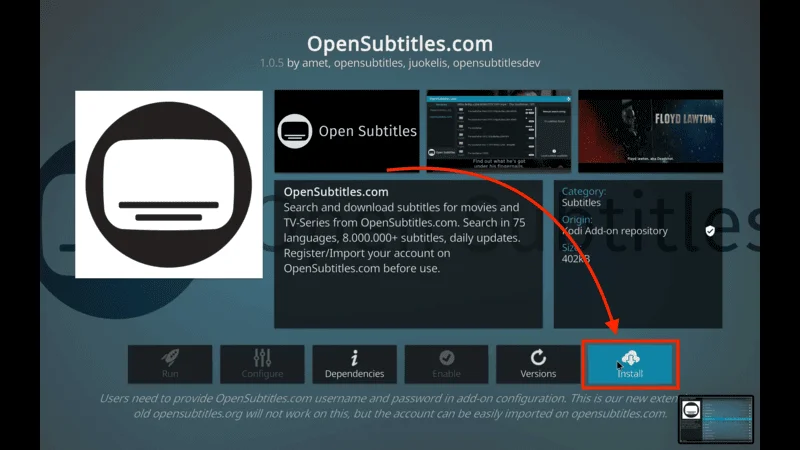
Scroll down and select OpenSubtitles.org from the options.
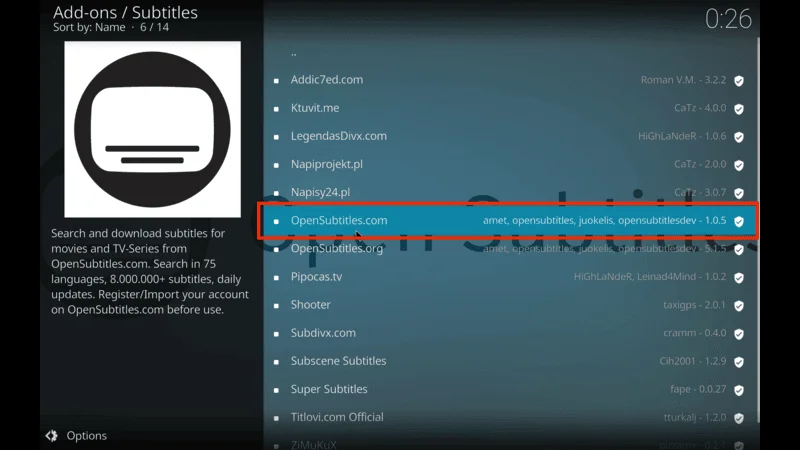
Click Install on the following screen.
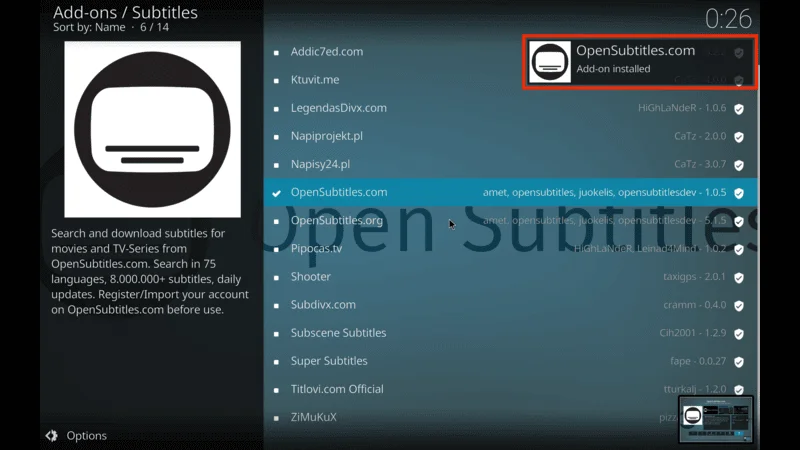
Wait for the OpenSubtitles.org add-on installed notification to appear in the top-right corner of the screen.
Click OpenSubtitles.org again and select Configure.
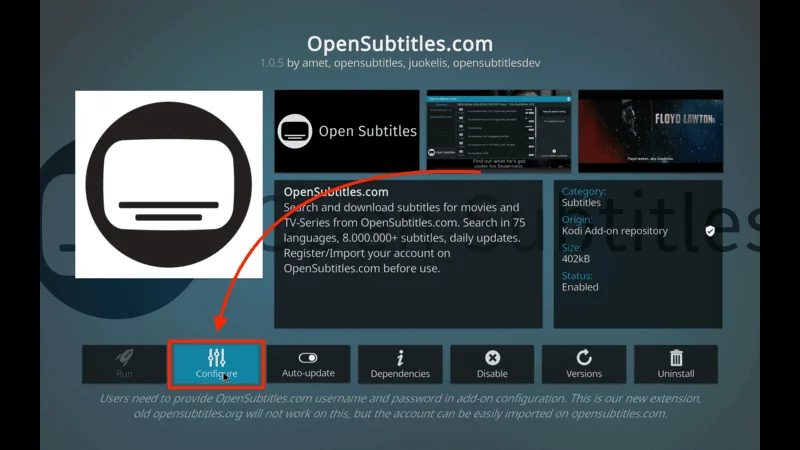
In the dialog box that appears, enter your OpenSubtitles username and password (the credentials you created in Step 1). Click OK to save your settings.

Step 3: Set Up OpenSubtitles for Kodi
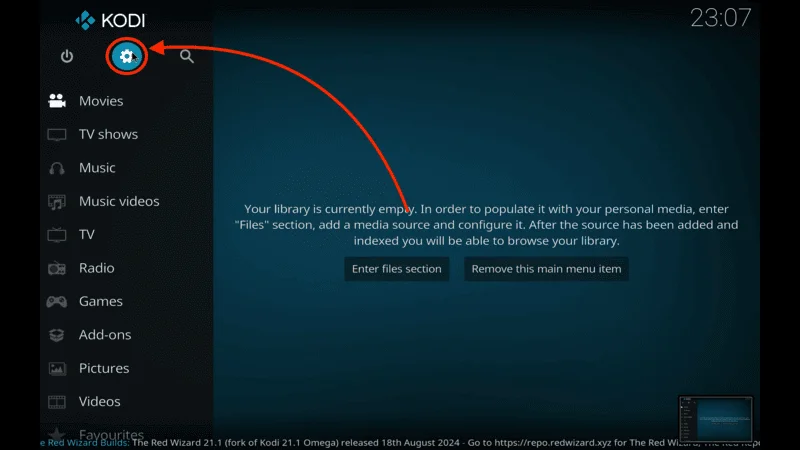
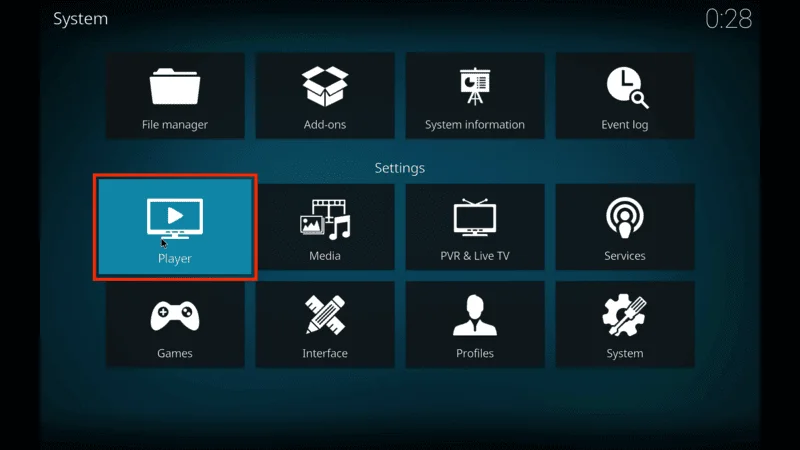
Return to the Kodi home screen and open Settings (gear icon).
Select Player.
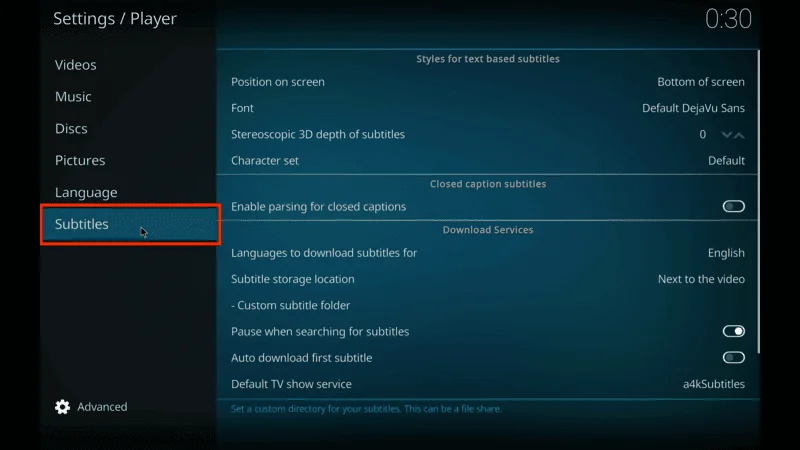
Ensure Standard mode is selected in the bottom left (click the gear icon if needed). Then, select Subtitles.
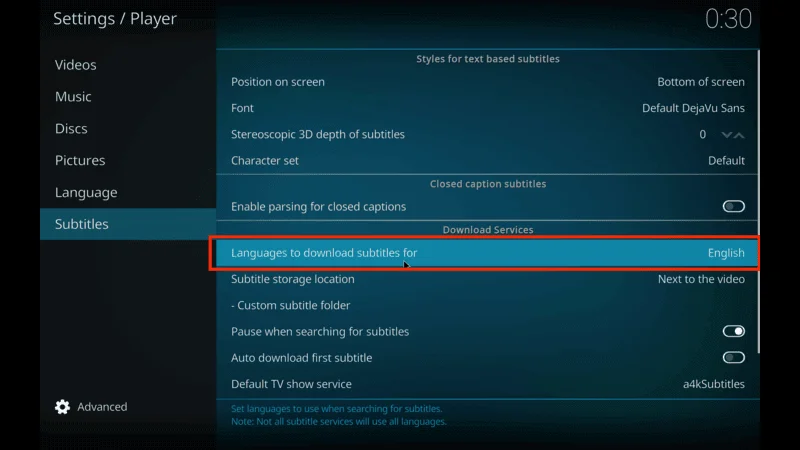
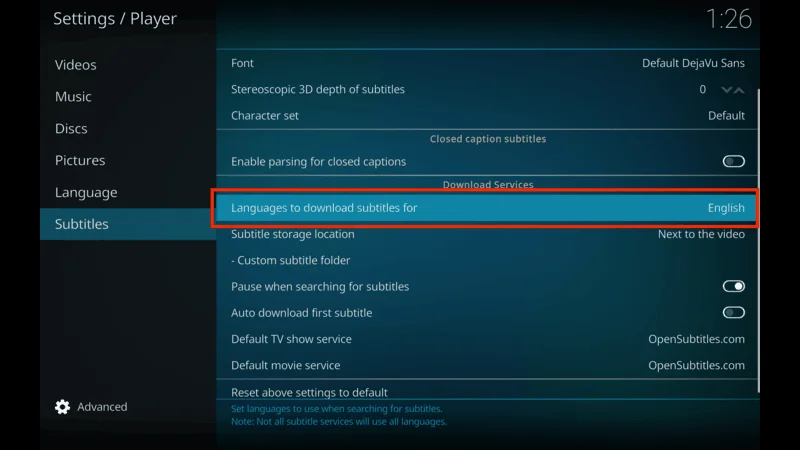
On the right side of the screen, click Languages to download subtitles for and choose your preferred language.
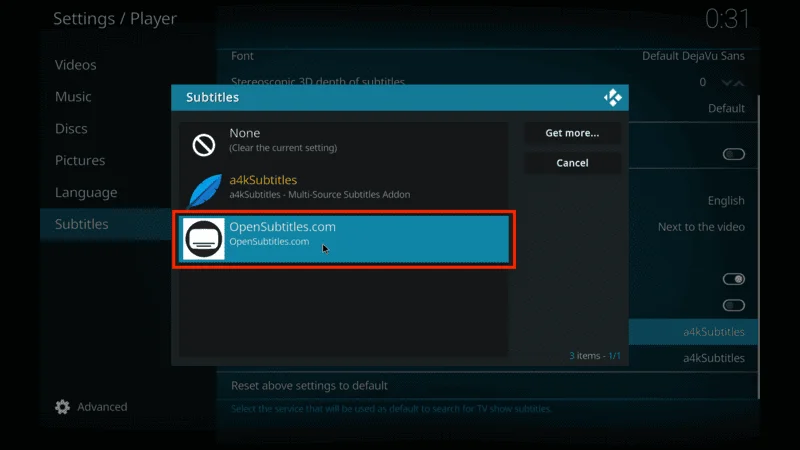
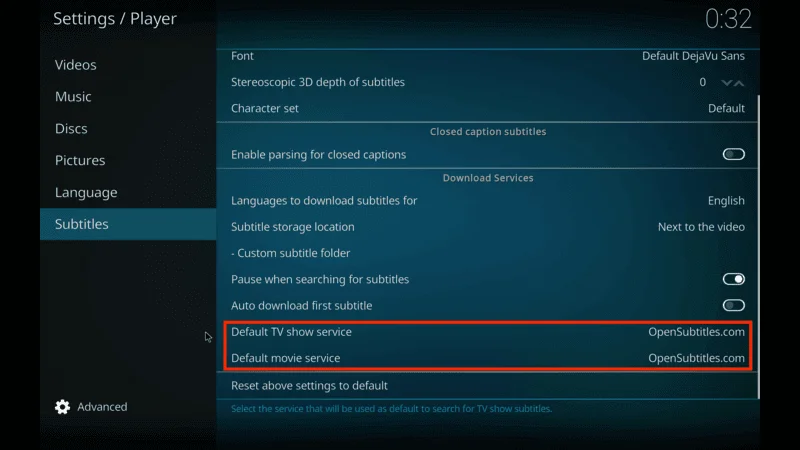
Under Default TV show service, select OpenSubtitles.org.

Similarly, under Default Movie Service, select OpenSubtitles.org.
Your screen should now display OpenSubtitles.org as the default source for both TV shows and movies.
To add subtitles, simply play the movie or TV show, click the CC (closed caption) icon in the media player settings, and start streaming with subtitles enabled. This setup will make accessing subtitles fast and easy on any Kodi-supported device.
Before you start streaming on Kodi with your FireStick or Fire TV, it’s essential to take precautions. Everything you stream can be monitored by your internet service provider (ISP) and even government authorities. Accessing free content like movies, TV shows, or live sports on Kodi could potentially lead to legal issues.
To protect your privacy, using a VPN is the most effective solution. A VPN hides your real IP address, keeping your streaming activities private and secure. It also helps you bypass geo-restrictions and prevents your ISP from throttling your connection during streaming sessions.
For Kodi users on FireStick, I recommend NordVPN. It’s a top-tier VPN that works seamlessly with Kodi, ensuring fast, uninterrupted streaming.
While we don’t encourage illegal streaming, it’s not always clear if the content you’re watching on Kodi is from legitimate sources. That’s why using a VPN like NordVPN provides the necessary protection to keep your streaming safe.
Here’s how to install and use NordVPN with Kodi on FireStick:
Sign Up for NordVPN – They offer a 30-day money-back guarantee, allowing you to try it out without any risk.
Turn on Your FireStick – Navigate to the Find menu and select the Search option.
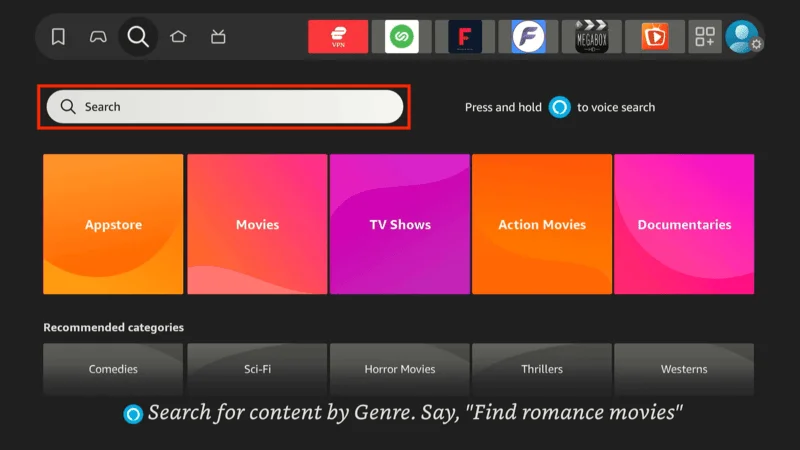
Search for NordVPN – Type “NordVPN” in the search bar and choose it from the results.
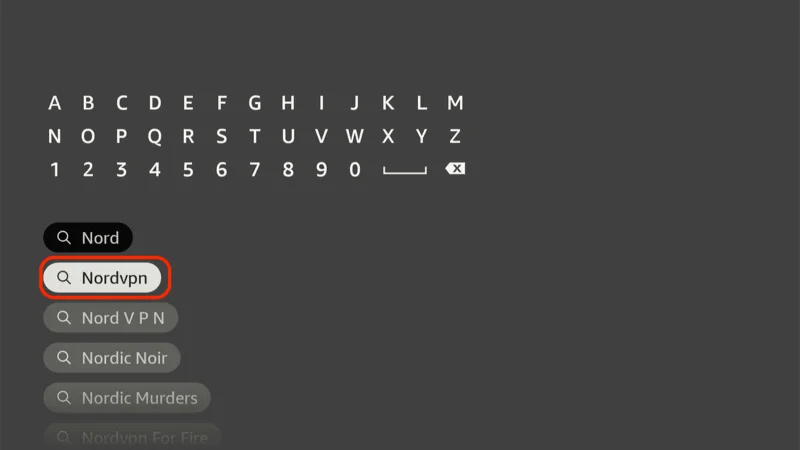
Download the App – Click Download to install the NordVPN app.

Log In – Open the app and sign in using your NordVPN account details.
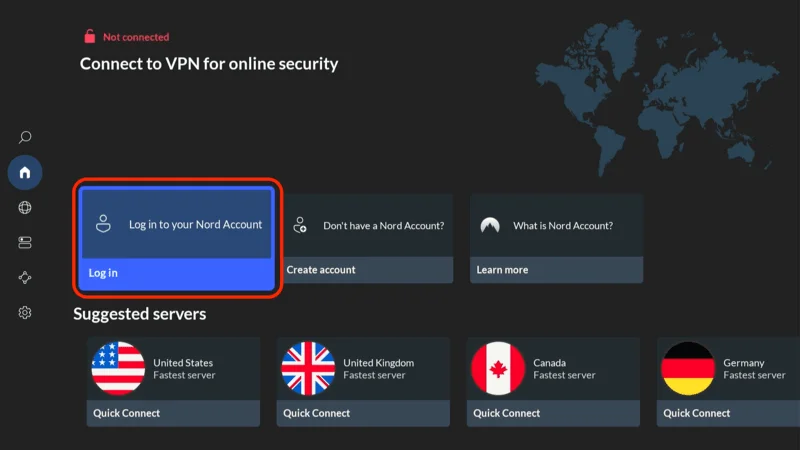
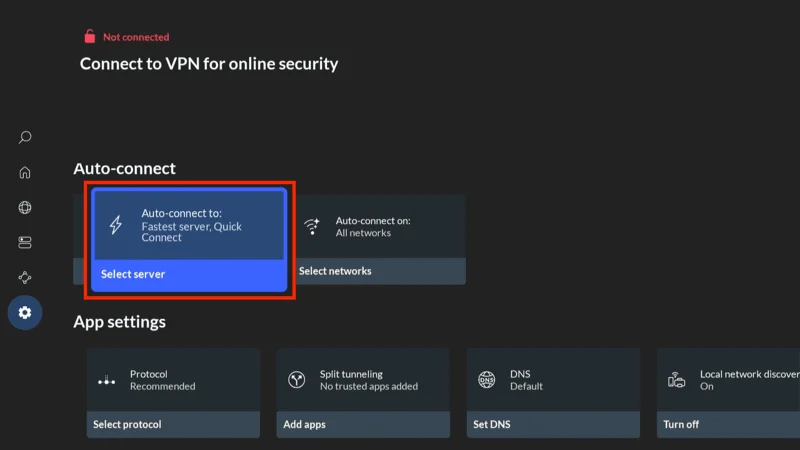
Connect – Tap Quick Connect to connect to the best server available, ensuring your Kodi streaming is private and secure.
For more detailed instructions on setting up NordVPN with Kodi on FireStick, check out additional resources. Stay safe and enjoy secure, unrestricted streaming!
Subtitles Not Working? Enable Subtitles in Addon Settings
If subtitles are not visible, some Kodi add-ons will automatically hide subtitles unless you enable them in the settings for the respective add-on. Here’s how to turn on subtitles using The Crew as an examplethe steps work similarly for all but a few other Kodi add-ons.
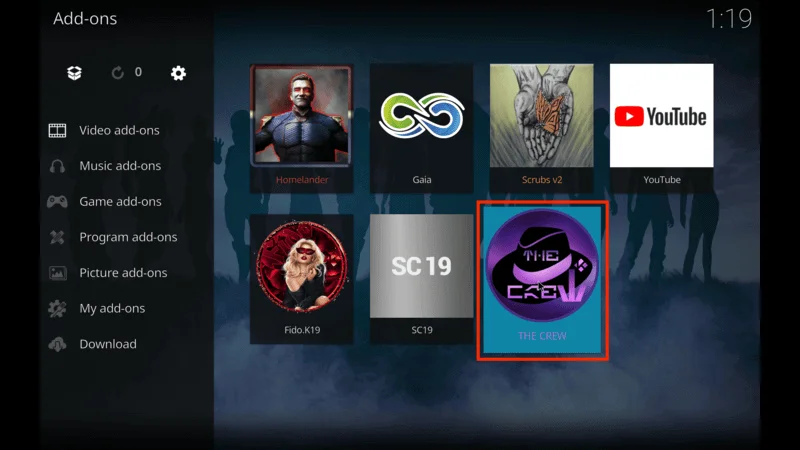
From the Kodi home screen, go to Add-ons > Video add-ons, and open The Crew addon.
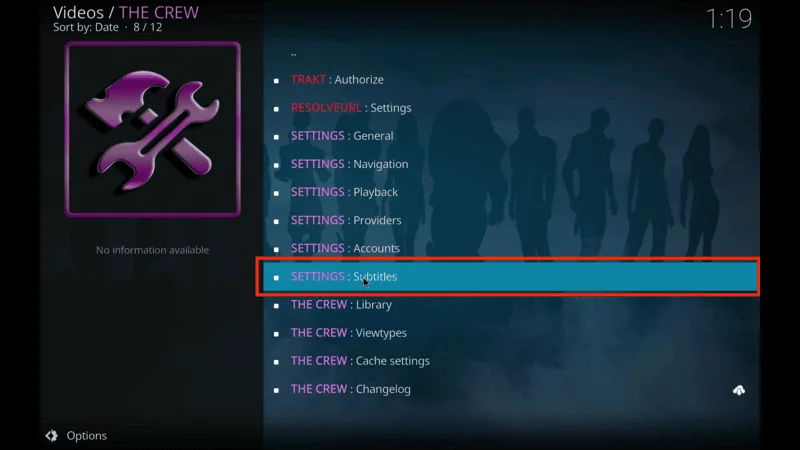
Scroll down and select Tools from The Crew’s main menu.
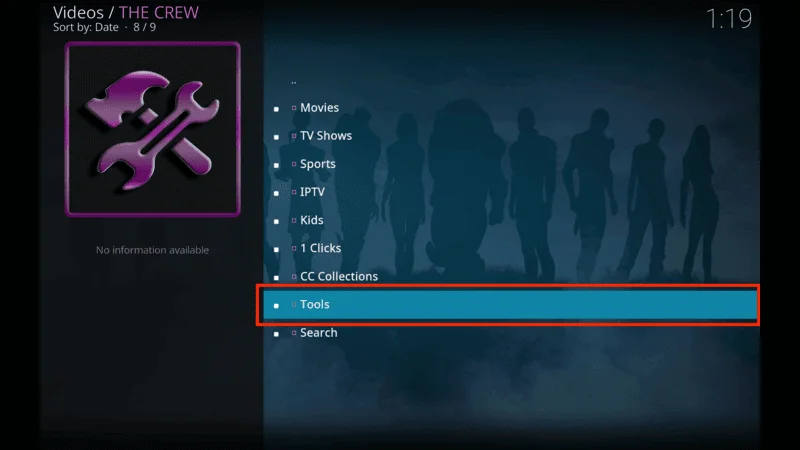
In the next window, click SETTINGS: Subtitles.
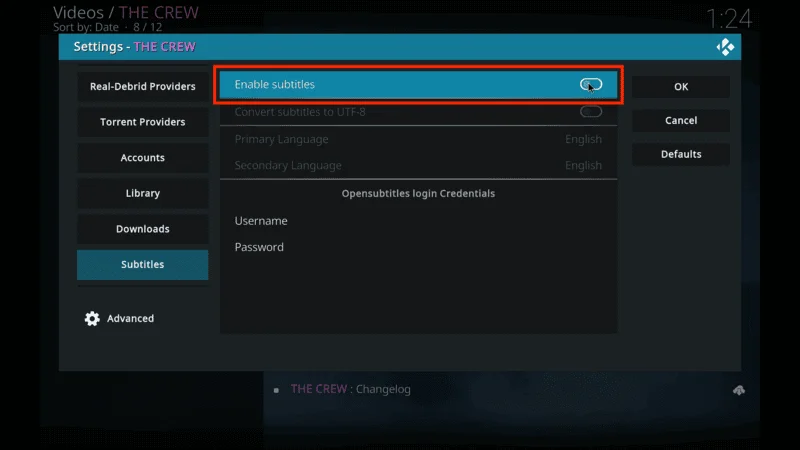
Ensure that Subtitles are selected in the left menu. On the right, toggle Enable Subtitles to turn it on.
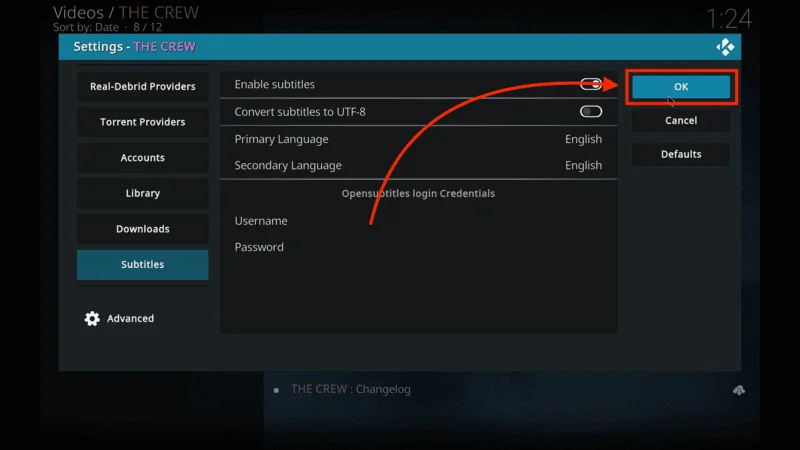
Click OK to save the changes.
Now, with subtitles enabled in the addon settings, subtitles should appear when you play your content on Kodi. This adjustment should make subtitles accessible for any supported media.
How to Get Subtitles on Kodi Without Registration
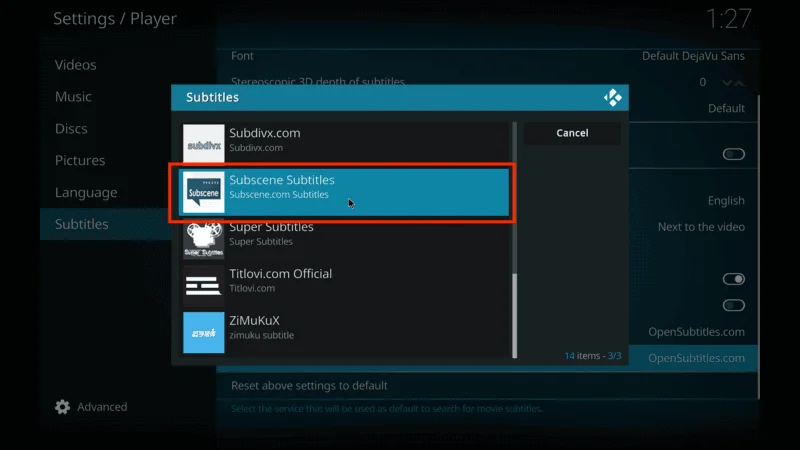
While OpenSubtitles is really well used in Kodi, it does force account registration and login. Subscene Subtitles is an effective alternative if you want something quicker and hassle-free. Subscene probably has fewer subtitles compared to OpenSubtitles. However, it’s still pretty effective and doesn’t require registration. Sometimes, the audio might not be in synchronization with the subtitles.
Follow these steps to set up Subscene Subtitles on Kodi:
Open Kodi and go to Settings (gear icon).

Select Player.

In the Player settings, go to Subtitles.

Under Download Services on the right, click Languages to download subtitles for and select your preferred language.
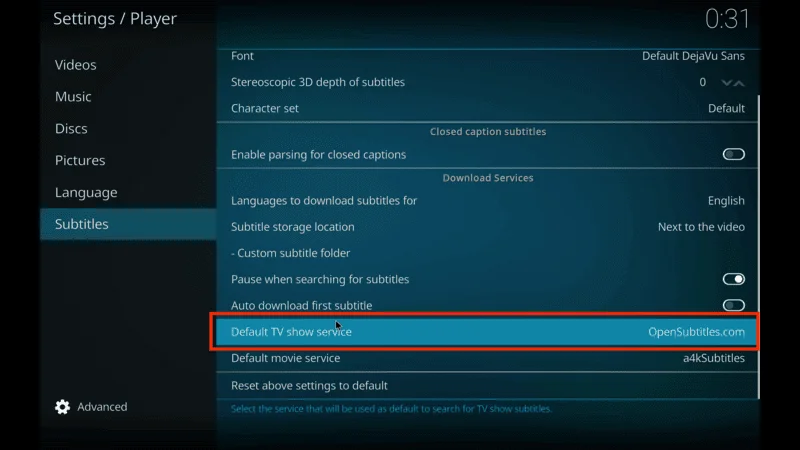
Click Default TV show service.
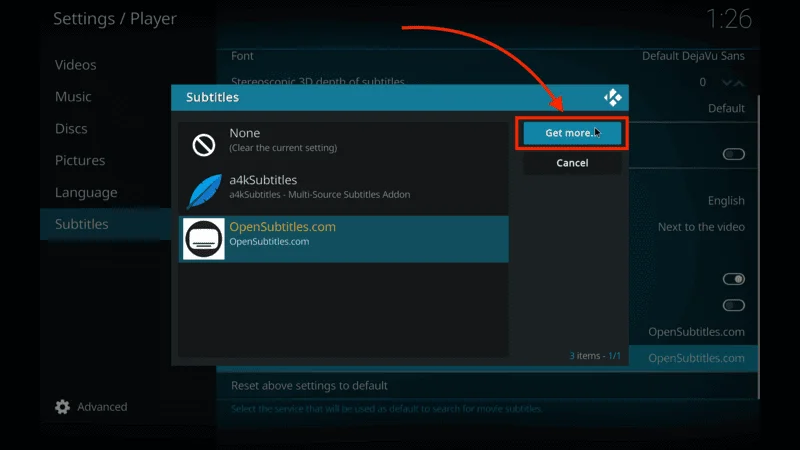
Choose Get more from the list that appears.
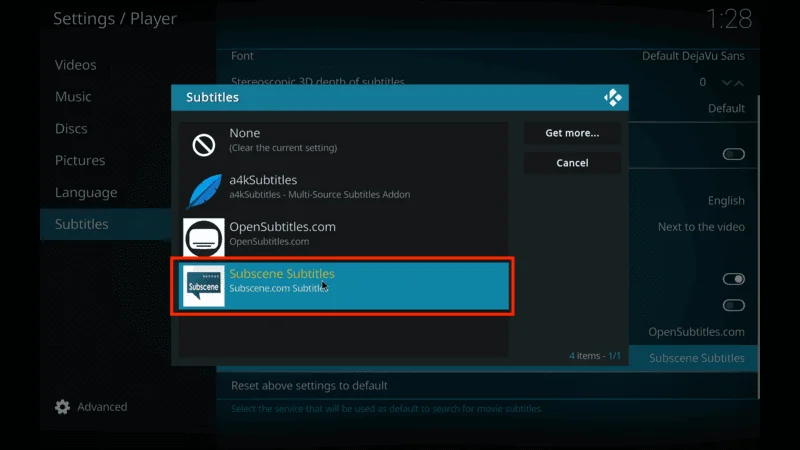
Scroll down to find and select Subscene.com (Subscene Subtitles).
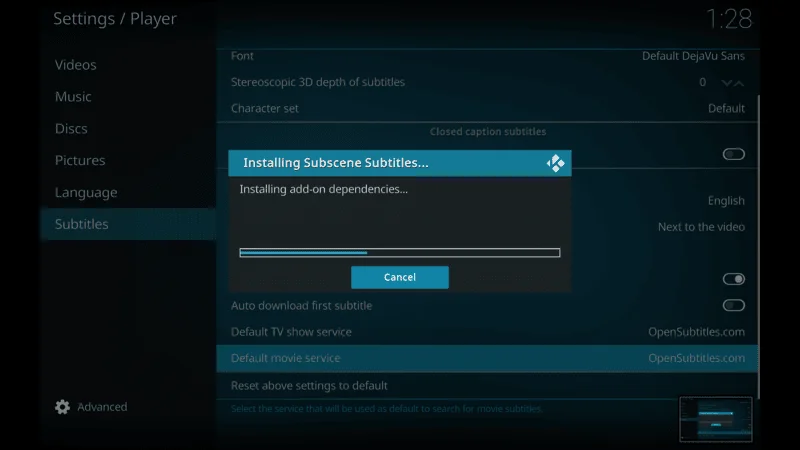
Wait for the Subscene Subtitles service to download.
Next, click Default movie service and select Subscene.com (Subscene Subtitles) to make it the default service for movies.
You’re all set! Subscene Subtitles is now configured on Kodi and will automatically fetch available subtitles for the media you play. Enjoy your content with ease, no registration needed.
Frequently Asked Questions (FAQs)
If you want to enjoy subtitles with your Kodi experience, OpenSubtitles is really a very reliable subtitle provider offering subtitles in multiple languages for almost all movies and TV shows. Here are some frequently asked questions to set up and troubleshoot OpenSubtitles in Kodi.
1. Do I need to create an account to use OpenSubtitles on Kodi?
Yes, OpenSubtitles requires you to create an account. You’ll need to register at OpenSubtitles.org, then enter your username and password in Kodi’s OpenSubtitles settings to enable subtitle downloads.
2. Can I use OpenSubtitles on all Kodi-supported devices?
Absolutely! OpenSubtitles works on all Kodi-supported devices, including FireStick, Windows PC, Mac, Android, Nvidia Shield, and more. Once configured, it allows seamless subtitle downloads across different platforms.
3. How do I change the subtitle language in OpenSubtitles on Kodi?
To change the language, go to Settings > Player > Language and select Languages to download subtitles for. Choose your preferred language, and OpenSubtitles will prioritize it when fetching subtitles.
4. What should I do if OpenSubtitles isn’t working in Kodi?
If subtitles aren’t displaying, make sure you’ve entered your OpenSubtitles login credentials correctly. Also, check the addon settings—some addons require subtitles to be enabled in their settings. You may also want to reinstall the OpenSubtitles addon from the Kodi repository if issues persist.
5. Are there alternatives to OpenSubtitles if I don’t want to register?
Yes, Subscene Subtitles is a good alternative that doesn’t require registration. It offers a straightforward setup directly within Kodi and works similarly to OpenSubtitles, although the subtitle selection may be more limited.
Final Thoughts
Subtitles are always great on Kodi. They enhance watching content with subtitles from different languages or watching at very low volumes. OpenSubtitles is a good source of a huge library of subtitles in various languages and makes the dialogue easy to follow. Although registration is very quick, benefits of OpenSubtitles are great, providing seamless, on-demand access to subtitles across all Kodi-supported devices.
Subscene Subtitles offers a good alternative if you prefer something less painful, with no hassle of registration, though it might not be as extensive with subtitles. Using whichever of these services will, however, ensure that your subtitles are at your fingertips and make the difference between a neat Kodi installation and an excellent one.
So, after reading this guide, you should be all set to set up, administer, and troubleshoot subtitles on Kodi. Any more questions or problems? Feel free to get in touch; we’re here to help you get the most out of your Kodi setup. Happy watching!
Releted Article:
- Best IPTV Service – Top 5 Picked
- How to Install the Red Wizard Kodi Build
- How to Install Stirr Kodi Addon on FireStick
- How to Install Fido K19 Kodi Addon for
Legal Disclaimer
At [Website Name], we don’t verify the legality or security of the add-ons, apps, or services featured on our site. We’re all about safe and legal streaming, so we don’t promote or link to any copyrighted content. We strongly encourage our readers to steer clear of piracy and stick to content that’s free to stream and in the public domain. For more information, check out our full disclaimer.
Disclosure
[Website Name] is a reader-supported site, which means we may earn a small commission if you decide to purchase through links on our pages. This helps us keep providing valuable content to you at no extra cost. Learn More