Kodi is a powerful media player that allows you to stream movies, TV shows, live TV, sports, and much more. However, after you first install Kodi, you’ll be greeted by a blank screen with no content.
This is where the Xenon Build comes in. In this detailed guide, we’ll walk you through the entire process of transforming your empty Kodi setup into a fully-loaded media hub using the Kodi Xenon Build.
Why You Need the Kodi Xenon Build
When you first launch Kodi, it can seem like there’s nothing to do with the app—just a plain interface. This is because Kodi is a platform that requires add-ons and builds to unlock its true potential.
The Xenon Build is one of the most popular and comprehensive builds available, offering users a wide range of movies, TV shows, live TV, sports, pay-per-view content, and even arcade games.
By following this guide, you’ll learn how to quickly transform your basic Kodi setup into a rich, feature-packed entertainment system.
⚠️ Attention, Kodi Users!
Kodi Addons and builds offer unlimited streaming content, but they could also get you into trouble if you’re caught streaming free movies, TV shows, or sports. Currently, your IP 2400:adc3:12c:e600:bcd3:880f:e0ab:5a62 is visible to everyone. Kodi users are strongly advised to always connect to a VPN while streaming online. Kodi VPN hides your identity plus bypasses government surveillance, geo-blocked content, and ISP throttling (which also helps in buffer-free streaming).
I personally use NordVPN, which is the fastest and most secure VPN. It is easy to install on Amazon FireStick and any other device. You get 3 months free and save 49% on its annual plans. Also, it comes with a 30-day money-back guarantee. If you are not satisfied, you can always ask for a refund.
Installion Of Kodi Xenon Build step by step
Before you can install third-party builds like Xenon, you must first enable a setting in Kodi called Unknown Sources. This allows Kodi to accept add-ons and builds from sources outside the official Kodi repository.
Step 1: Enable Unknown Sources:
Open Kodi and go to the Settings menu by clicking the gear icon in the top-left corner.
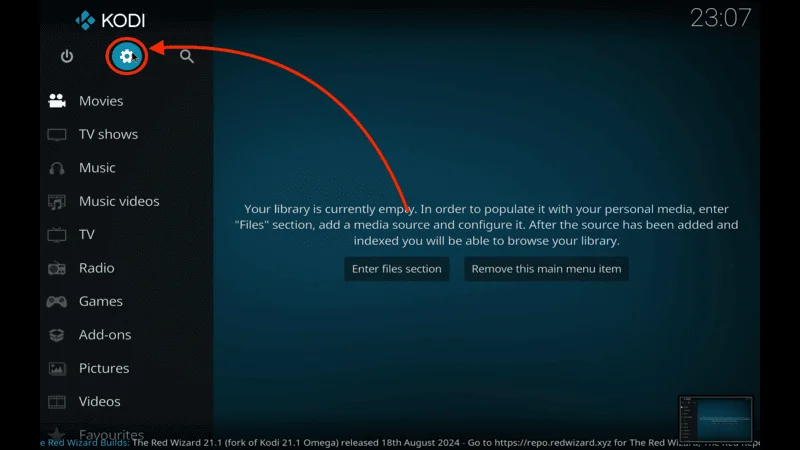
In the Settings screen, select System.
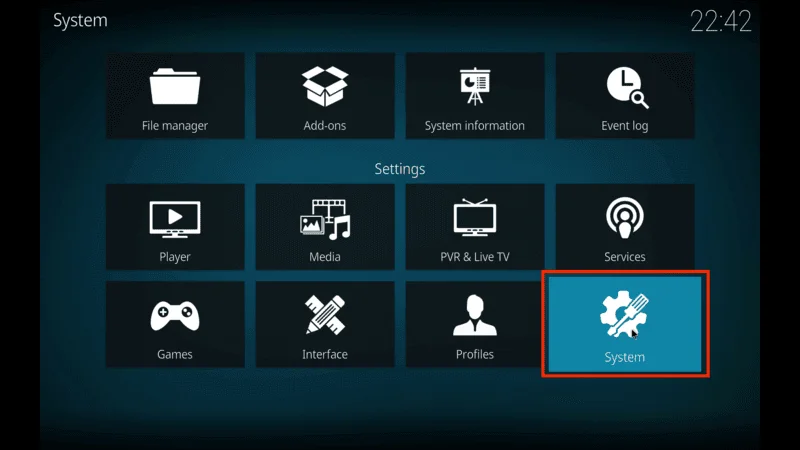
Navigate to Add-ons and toggle the setting for Unknown Sources to On.
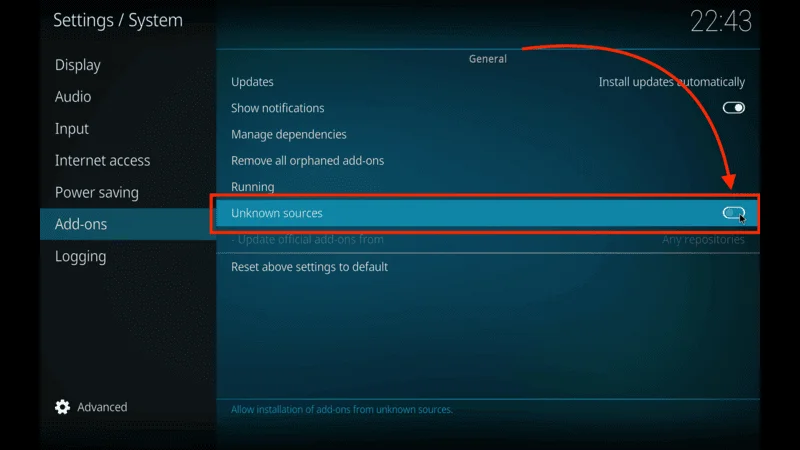
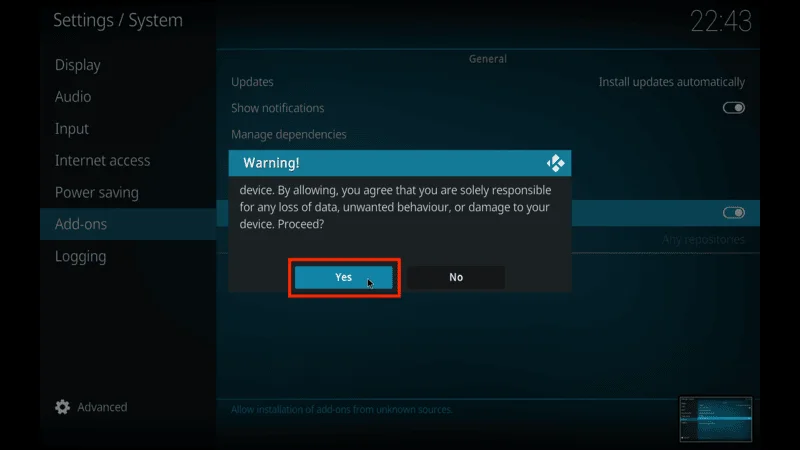
A warning message will appear. Confirm by clicking Yes to allow third-party add-ons.
This step is essential to allow Kodi to accept and install the Xenon build from an external source.
Step 2: Adding the Source URL for the Kodi Xenon Build Repository
Now that you’ve enabled unknown sources, the next step is to add the repository that contains the Xenon Build. This is where you’ll get all the necessary files for the installation process.
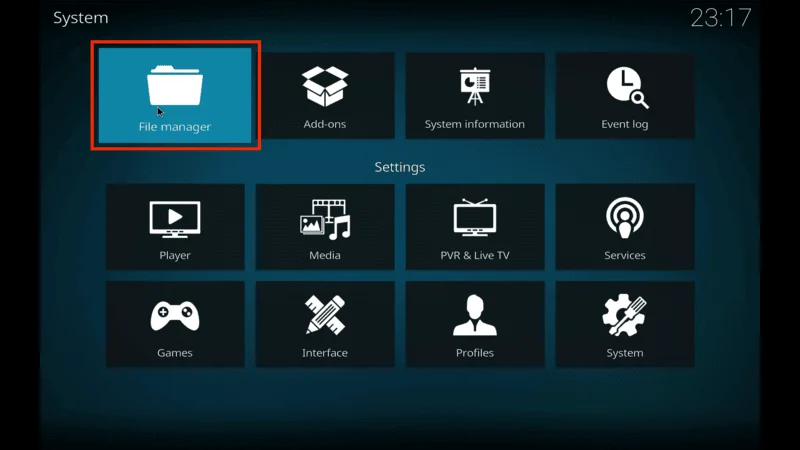
Return to the main Settings menu and select File Manager.
In File Manager, click Add Source.
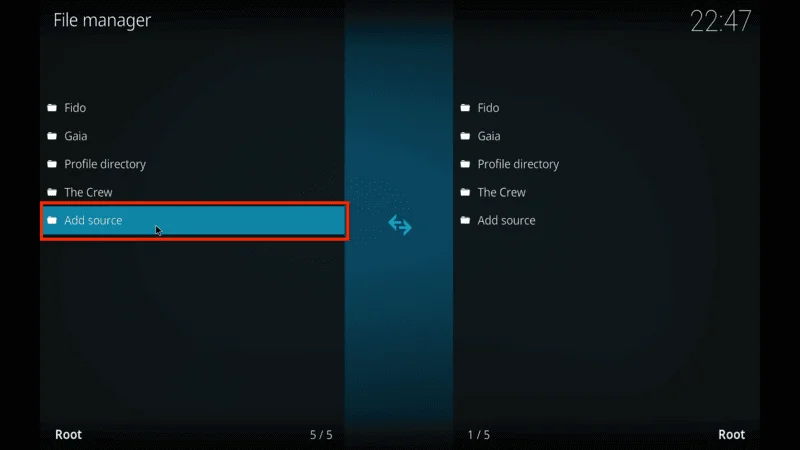
Type in the following URL exactly: https://diggzrepo.ddns.net
Note: If you encounter issues with the https version, try http instead: https://tinyurl.com/diggz123
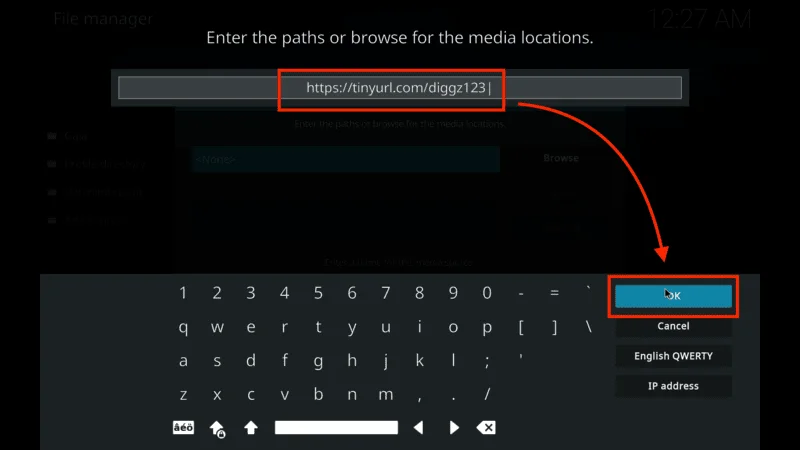
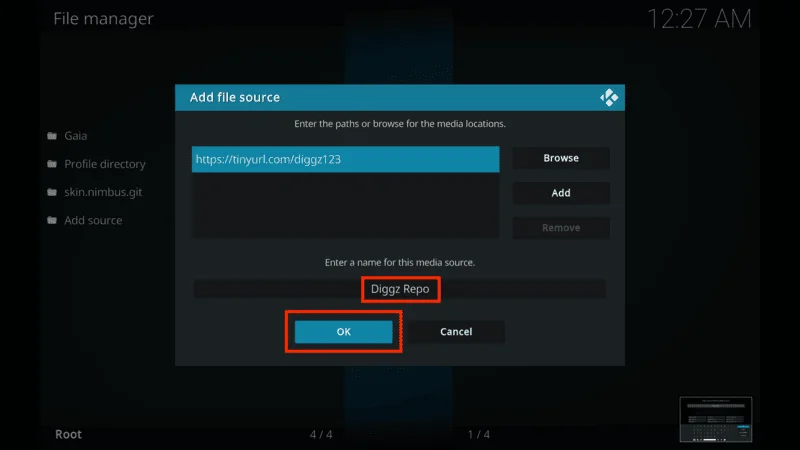
After entering the URL, click OK to confirm. Kodi will prompt you to name this source—call it Diggz Repo or any name you prefer.
Ensure you enter the URL exactly as shown above. Common mistakes include misspelling the URL or failing to add the two dots and slashes correctly.
Step 3. Installing the Diggs Repository: A Vital Step
The repository you just added contains the necessary files for the Xenon Build, including the Chef Omega Wizard. In this step, you’ll install the Diggz Repository, which hosts the build.
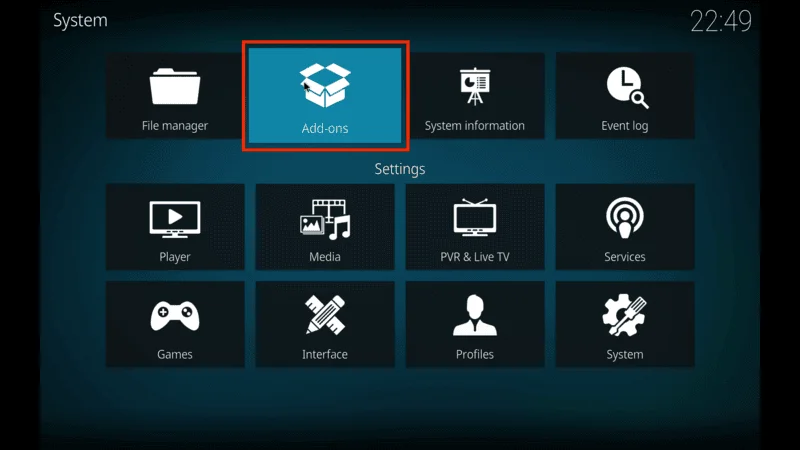
From the Kodi home screen, select the Add-ons menu.
In the Add-ons menu, click on Install from Zip File.
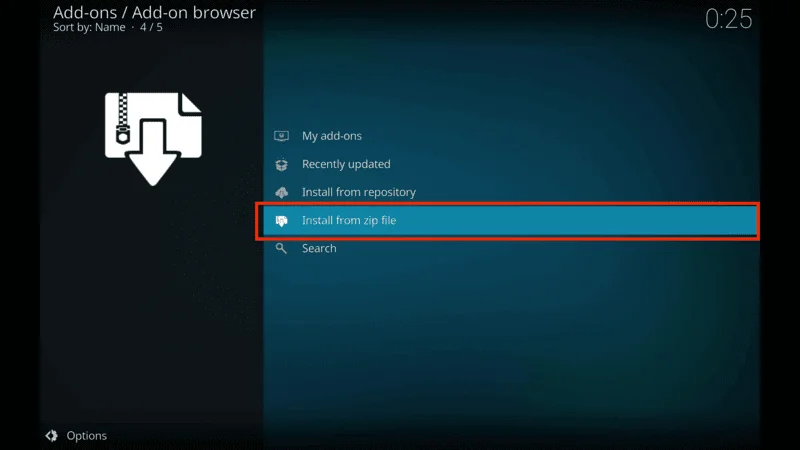
Find and select the source you just added (e.g., Diggz Repo).

Select the file called repository.diggz.x.x.zip to install the repository.
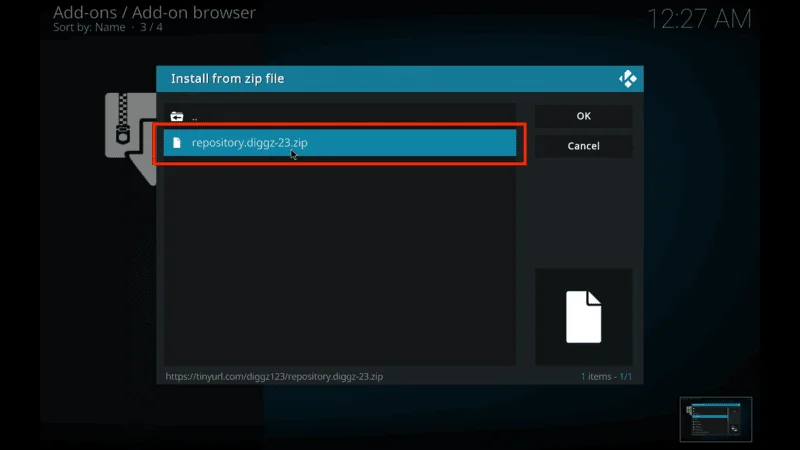
Once installed, you should see a notification confirming that the Diggz repository has been successfully added.
Step 4. Installing the Xenon Build via the Chef Omega Wizard
Now that the Diggz Repository is installed, you can use it to download and install the Xenon Build. This is the core part of the process, where you’ll use the Chef Omega Wizard to handle the installation.
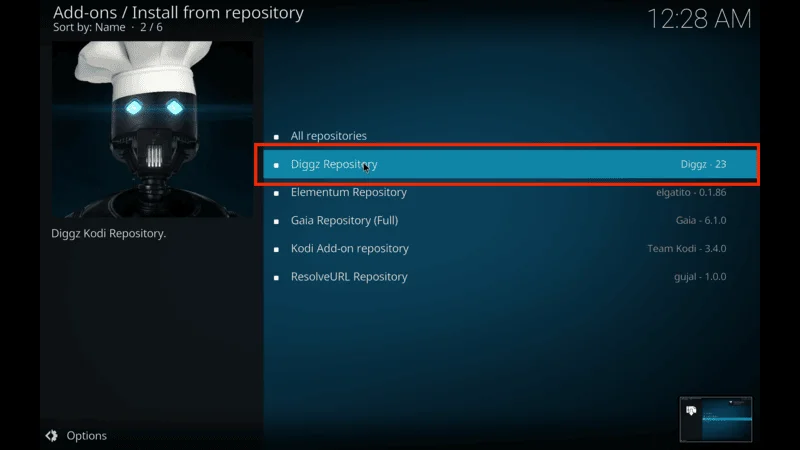
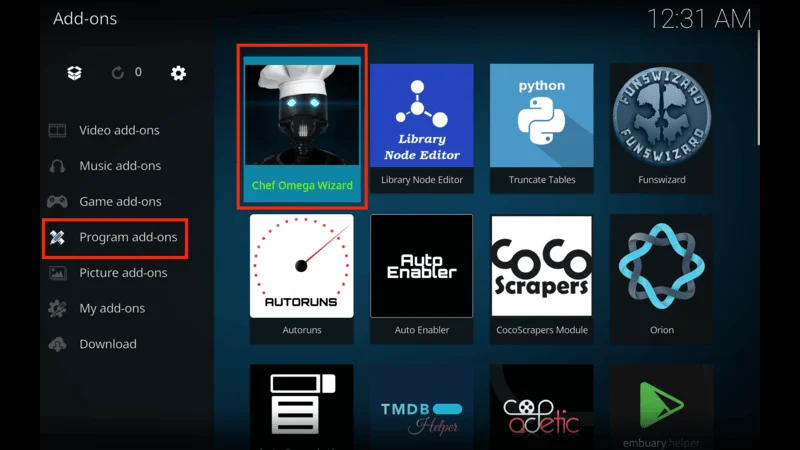
Go to Install from Repository in the Add-ons section, and select Diggz Repository.
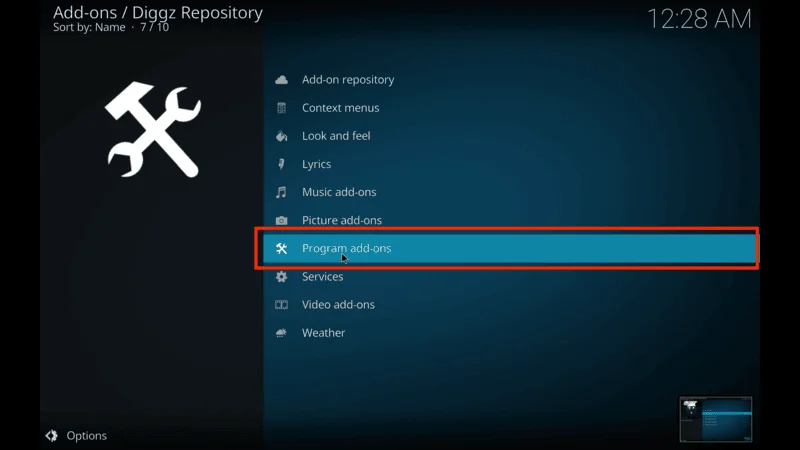
Inside the Diggz Repository, click on Program Add-ons.
Find and select the Chef Omega Wizard.
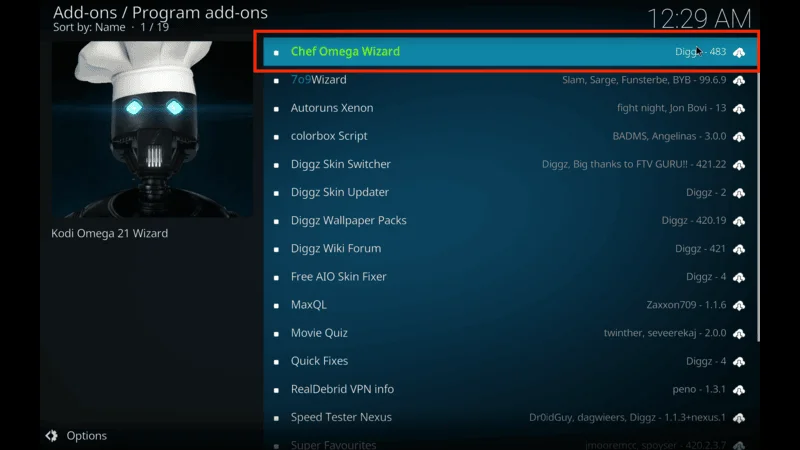
Click Install to download the wizard.
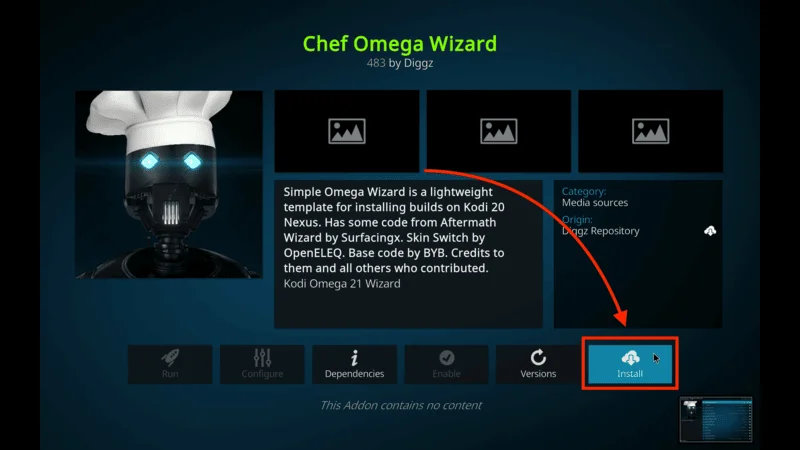
The installation might take a few seconds. Once completed, you’ll see a pop-up notification confirming that Chef Omega Wizard has been successfully installed.
Step 5. Downloading and Installing the Xenon Build
With the Chef Omega Wizard installed, it’s time to download the actual Xenon Build. The Xenon Build contains everything you need for movies, TV shows, live TV, and other media.
From the Program Add-ons section, open the Chef Omega Wizard.
Inside the wizard, you’ll see several options for different builds. Choose Xenon or Xenon Free (the free version is recommended for most users).
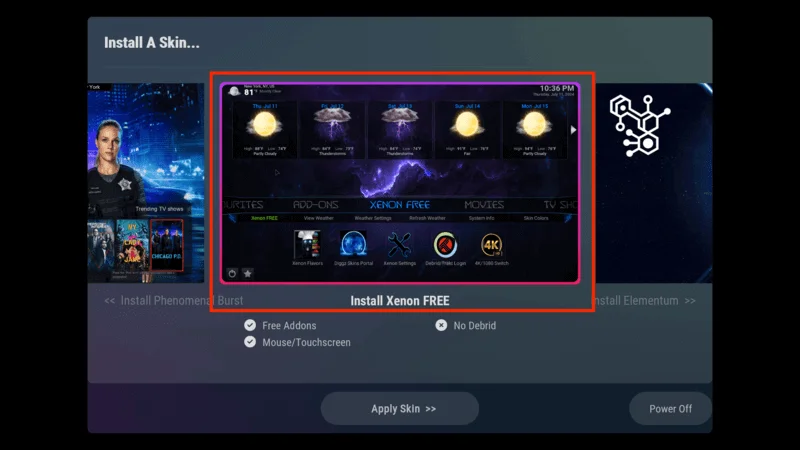
Click Yes to begin downloading the Xenon Build. The download process may take a few minutes depending on your internet speed.
Once the download finishes, the installation will begin. Be patient as the screen may flicker or flash during the installation process.

After installation is complete, Kodi will prompt you to force close the app. Click OK to exit Kodi.
Before you start streaming on Kodi with your FireStick or Fire TV, it’s essential to take precautions. Everything you stream can be monitored by your internet service provider (ISP) and even government authorities. Accessing free content like movies, TV shows, or live sports on Kodi could potentially lead to legal issues.
To protect your privacy, using a VPN is the most effective solution. A VPN hides your real IP address, keeping your streaming activities private and secure. It also helps you bypass geo-restrictions and prevents your ISP from throttling your connection during streaming sessions.
For Kodi users on FireStick, I recommend NordVPN. It’s a top-tier VPN that works seamlessly with Kodi, ensuring fast, uninterrupted streaming.
While we don’t encourage illegal streaming, it’s not always clear if the content you’re watching on Kodi is from legitimate sources. That’s why using a VPN like NordVPN provides the necessary protection to keep your streaming safe.
Here’s how to install and use NordVPN with Kodi on FireStick:
They offer a 30-day money-back guarantee, allowing you to try it out without any risk.
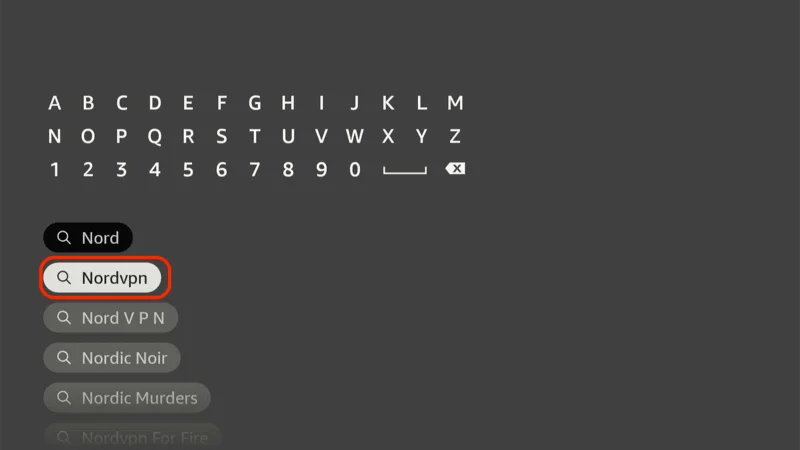
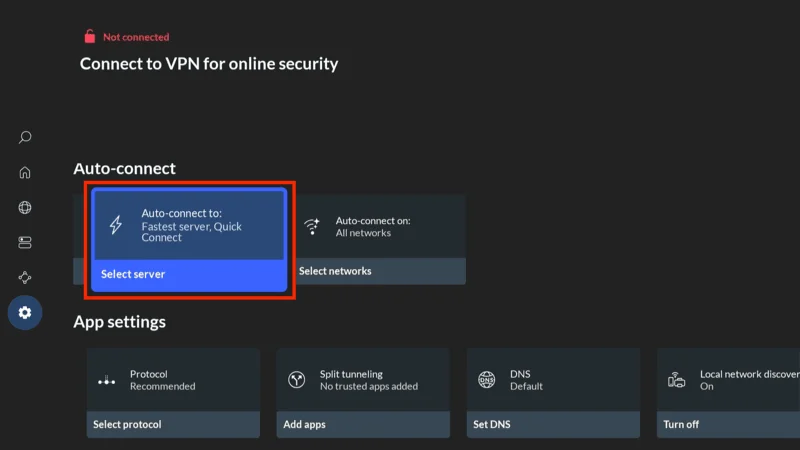
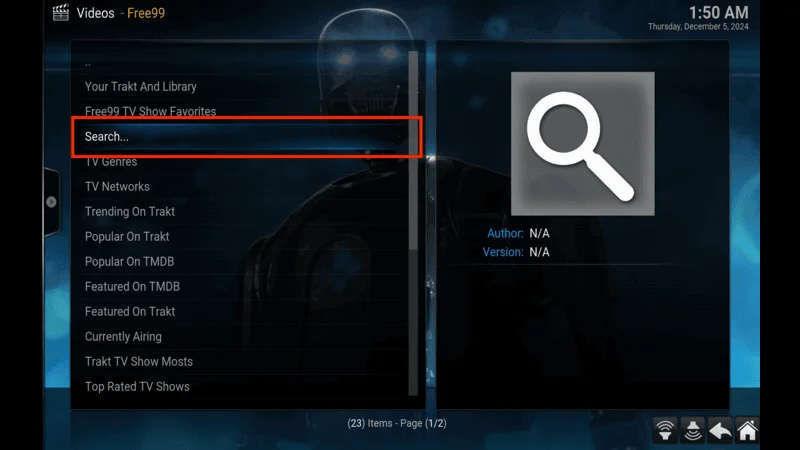
Navigate to the Find menu and select the Search option.

Type “NordVPN” in the search bar and choose it from the results.
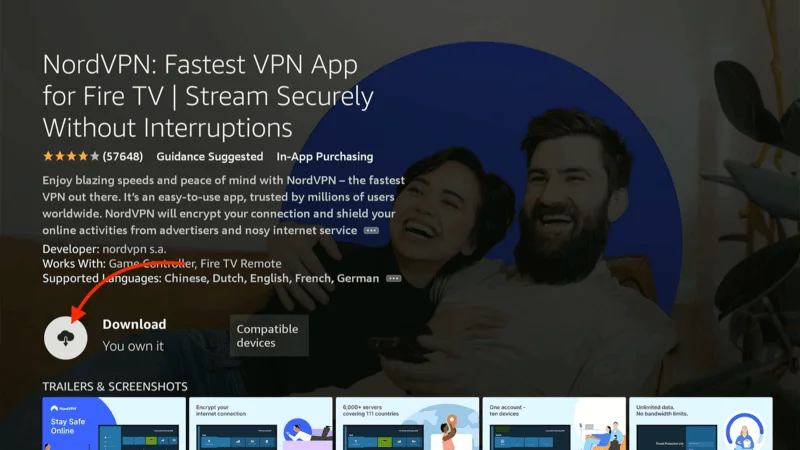
Click Download to install the NordVPN app.
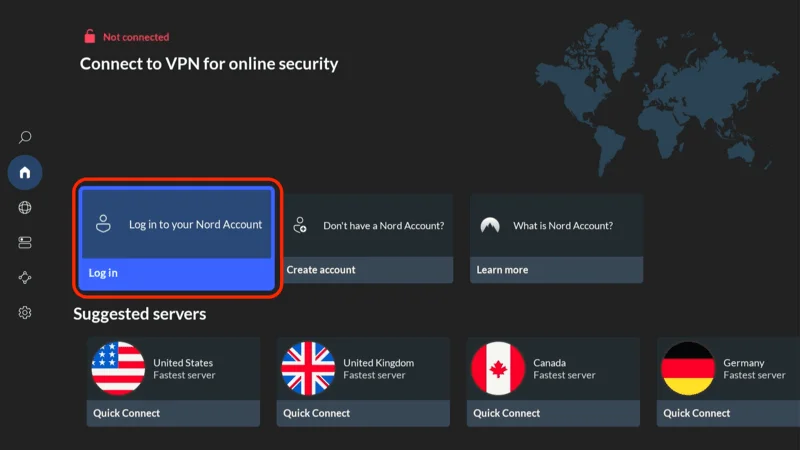
Open the app and sign in using your NordVPN account details.
Tap Quick Connect to connect to the best server available, ensuring your Kodi streaming is private and secure.
For more detailed instructions on setting up NordVPN with Kodi on FireStick, check out additional resources. Stay safe and enjoy secure, unrestricted streaming!
Applying the Xenon Skin and Finalizing the Setup
Once the Xenon Build is installed, you’ll need to apply the skin to fully activate the new interface and features. The skin gives Kodi its attractive new look, with access to all the content and features of the Xenon Build.
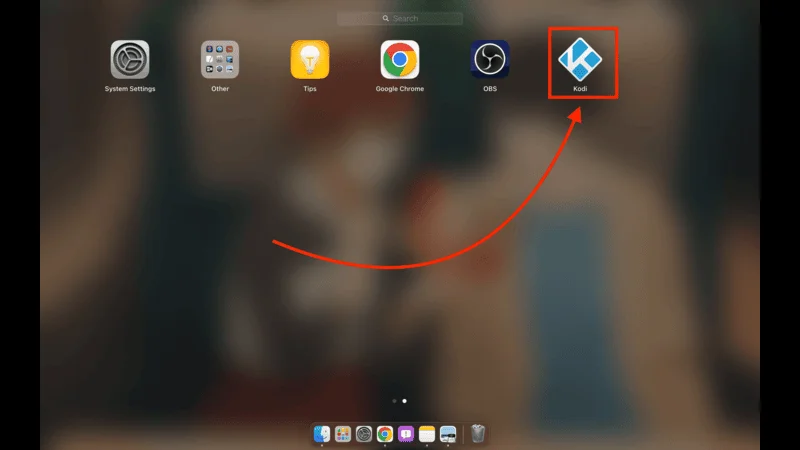
Open Kodi again, and you’ll have a screen to choose from several build options.
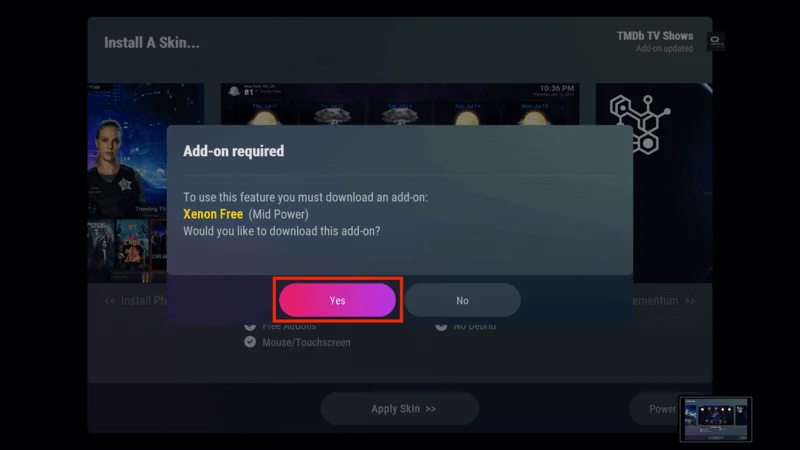
Choose Xenon Free (or another version you prefer), and click Yes to confirm.
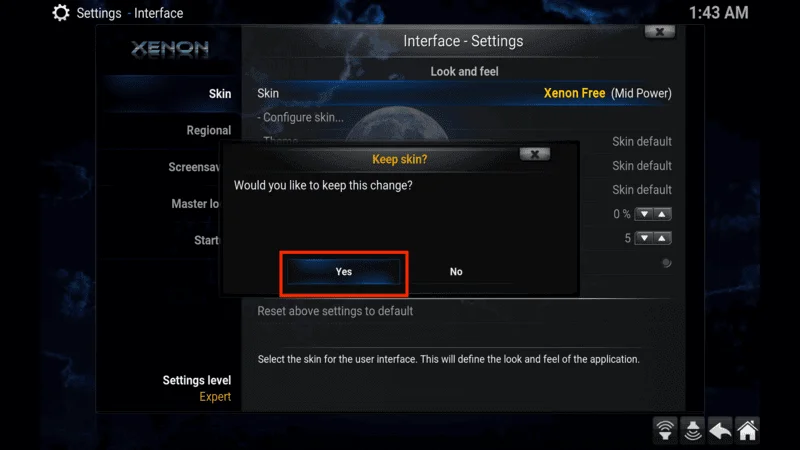
Kodi will now prompt you to apply the new skin. Select Xenon Free or the skin you chose and click Apply Skin.
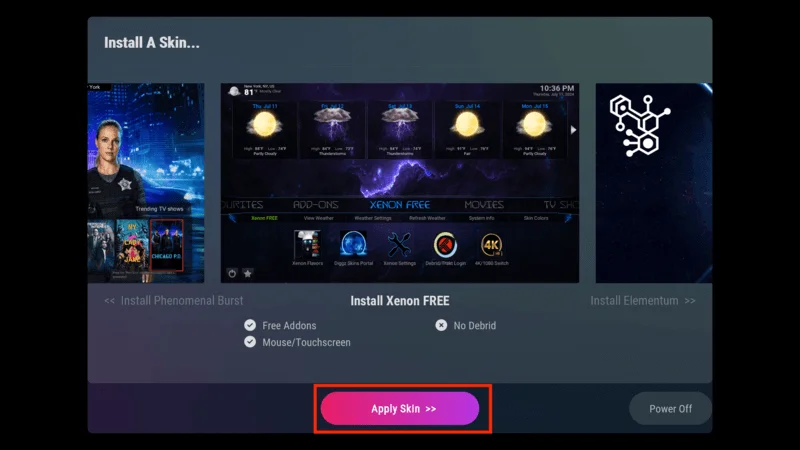
Once you’ve done this, Kodi will reload with the full Xenon interface.
How to Use Kodi Xenon Build: A Simple Guide
After installing the Kodi Xenon Build, you’ll have access to all kinds of content, including movies, TV shows, live TV, sports, and games. Here’s a simple guide to help you get started:
Navigating the Kodi Xenon Build
When you open Kodi with the Xenon Build, you’ll see the main menu with easy-to-use categories. Here’s what you’ll find:
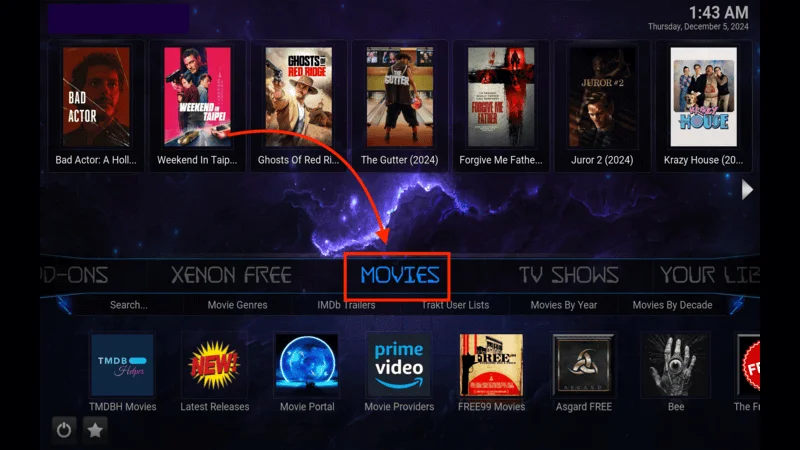
Movies: Watch the latest movies.
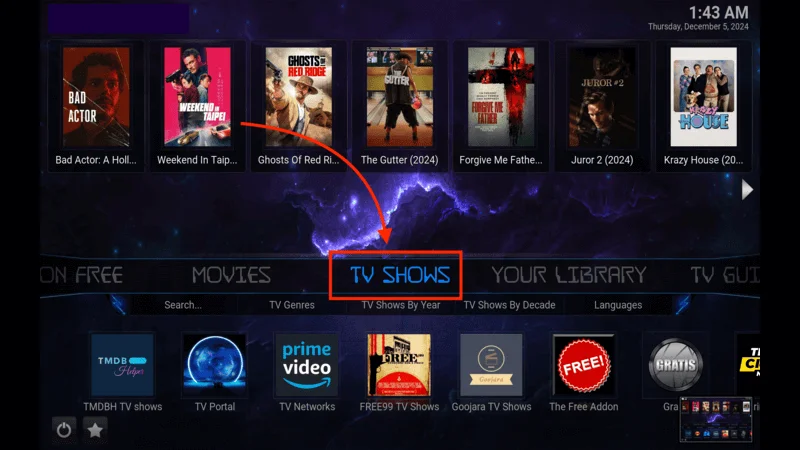
TV Shows: Stream your favorite TV series.
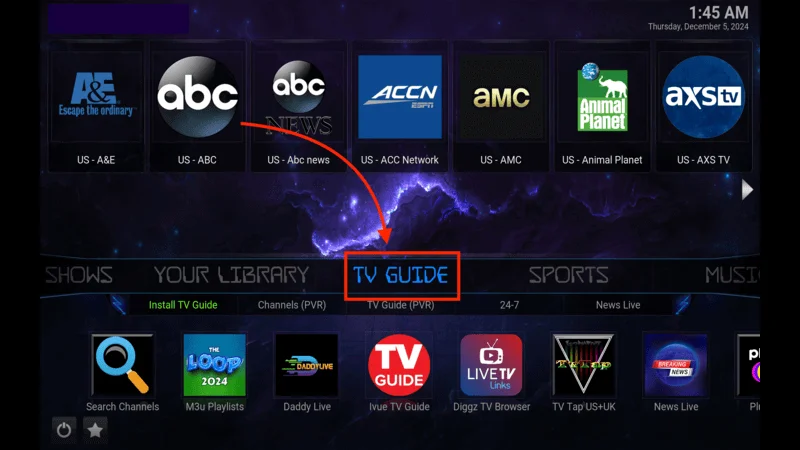
TV Guide: Watch live TV channels.
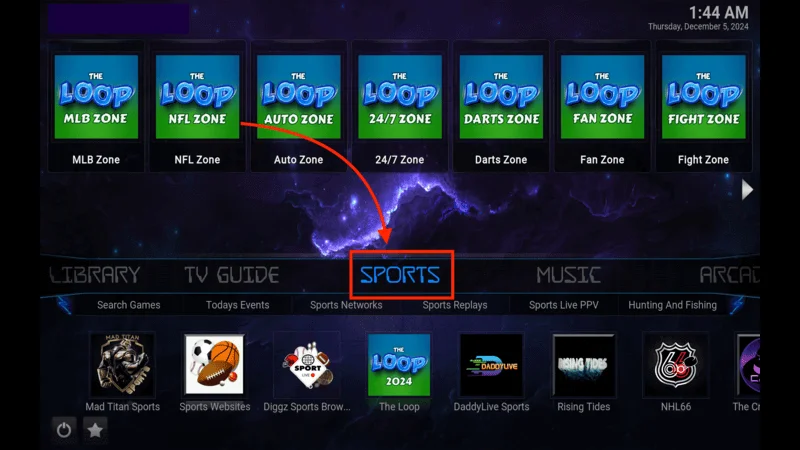
Sports: Watch live sports events.
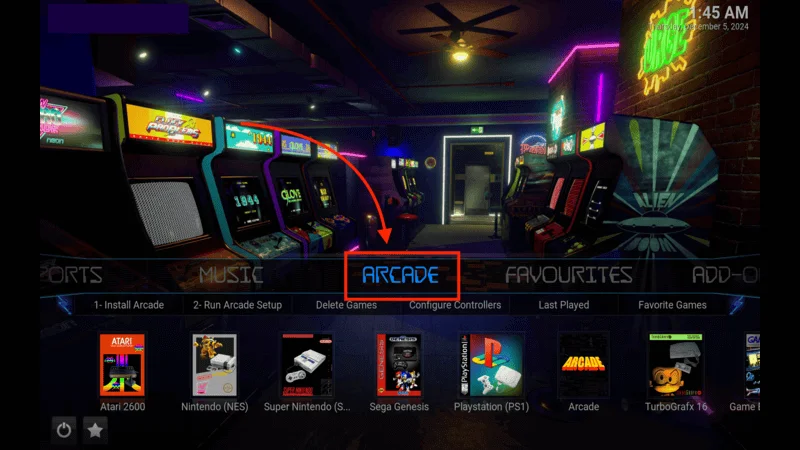
Arcade: Play retro arcade games.
Settings: Customize Kodi to your liking.
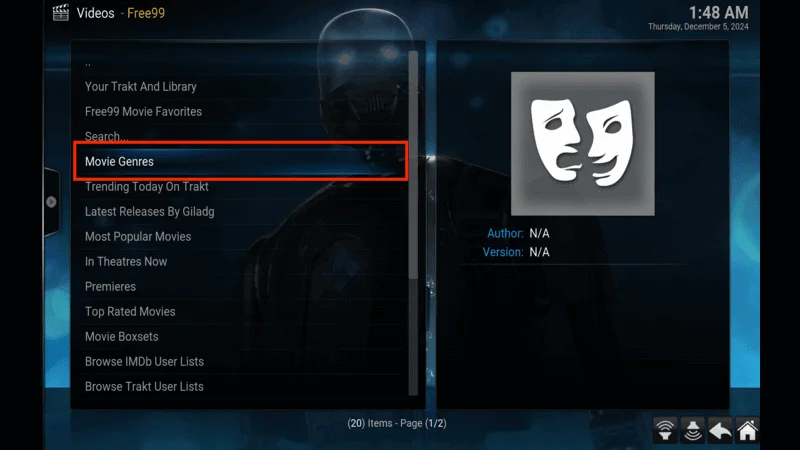
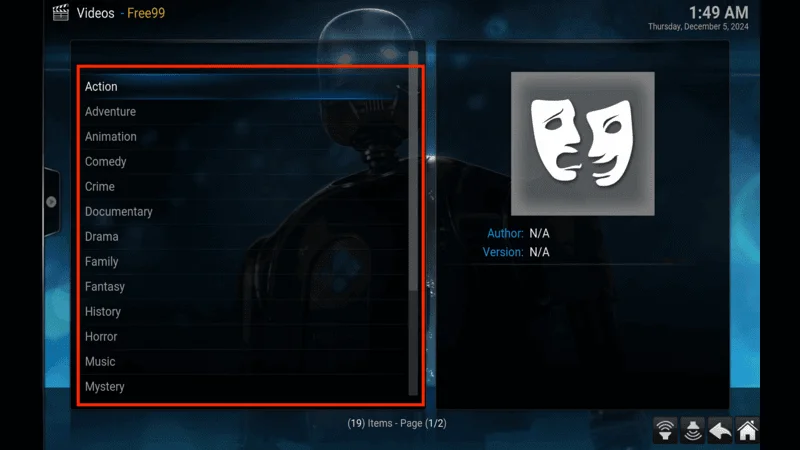
How to Watch Movies and TV Shows
Go to the Movies section.

Browse movies by genre or popularity.
Select a movie you want to watch.
Choose a stream and enjoy the movie.
Watch TV Shows:
Go to the TV Shows section.
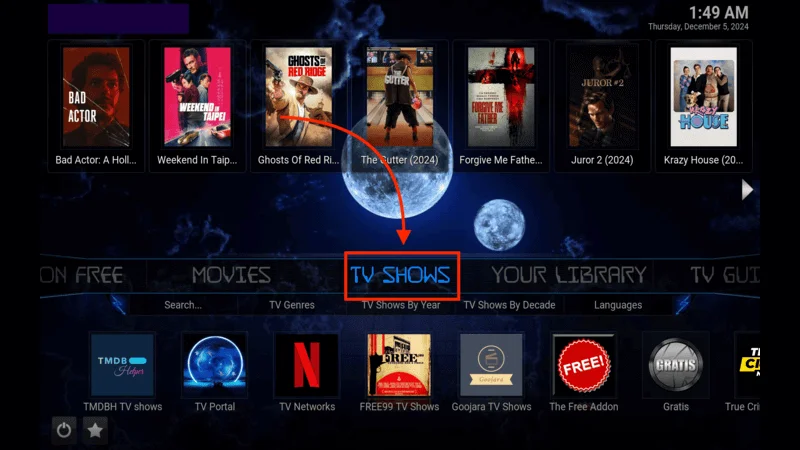
Browse or search for a TV show.
Pick a season and episode.
Choose a stream and start watching.
How to Watch Live TV and Sports
Watch Live TV:
Go to the TV Guide section.
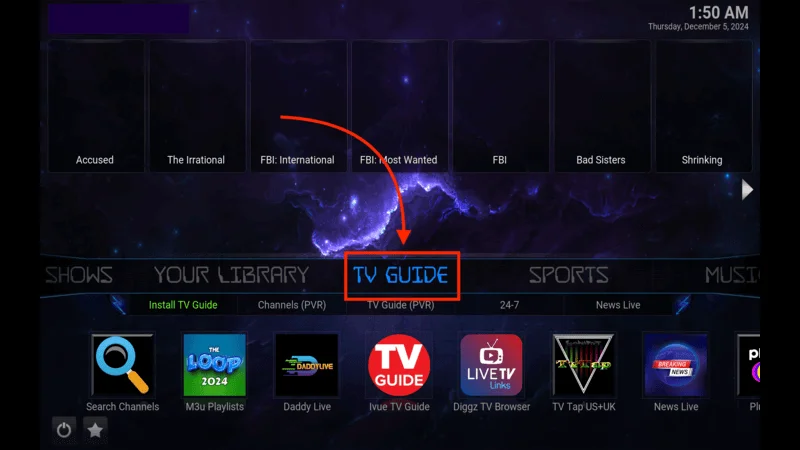
Pick a channel (news, entertainment, etc.).
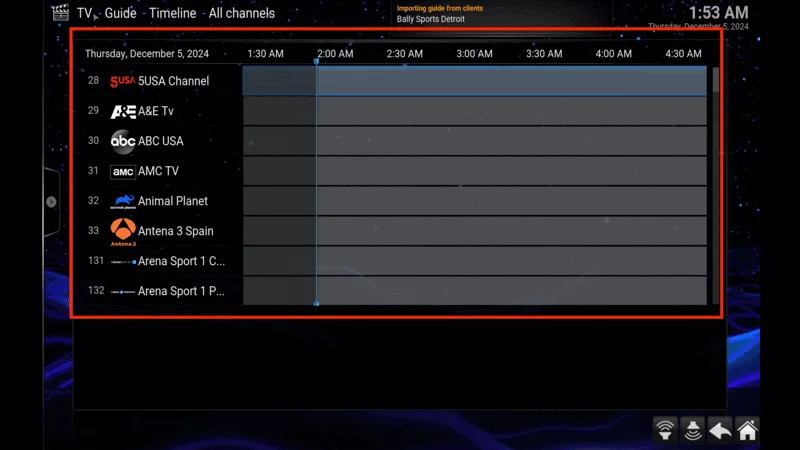
Select a stream and watch live TV.
Watch Sports:
Go to the Sports section.
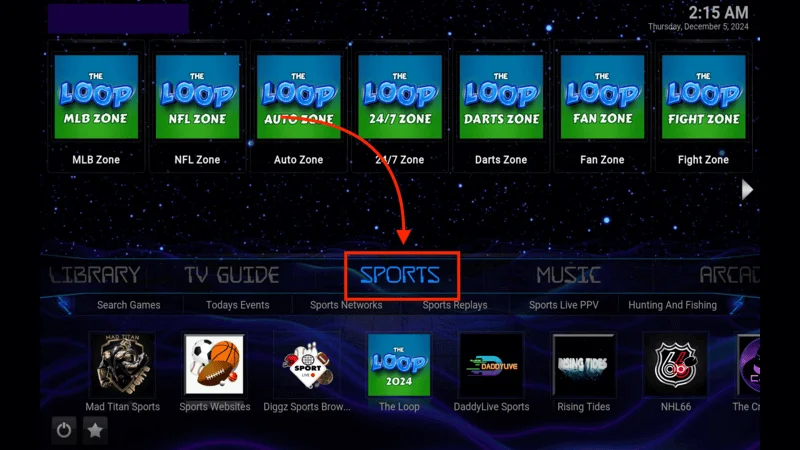
Choose the event you want to watch (football, basketball, etc.).
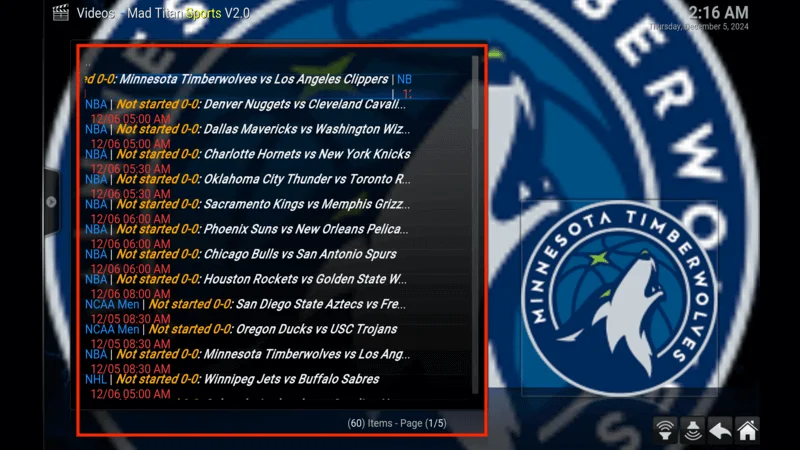
Select a stream and enjoy the game.
The Xenon Build also includes a section for retro Arcade games.

You can play classic games directly within Kodi. Just click on the Arcade section, choose a game, and start playing.
Additional Tips for Maintaining Kodi and the Xenon Build
- Updating the Xenon Build: Periodically check for updates to ensure you have the latest version of the build. You can do this through the Chef Omega Wizard.
- Clearing Cache: If you notice Kodi slowing down, consider clearing the cache to improve performance.
- Backup Your Settings: It’s a good idea to backup your settings and builds so you can easily restore them if needed.
Conclusion
You’ve done it! By following this step-by-step guide, you’ve successfully installed the Xenon Build on Kodi, transforming your media player into a powerful hub for all your entertainment needs. Now, you can sit back, relax, and enjoy a world of movies, TV shows, live sports, and more—all in one place.
Enjoy the enhanced Kodi experience, and feel free to explore the different add-ons and features available within the Xenon Build. Happy streaming!
Legal Disclaimer
At [Website Name], we don’t verify the legality or security of the add-ons, apps, or services featured on our site. We’re all about safe and legal streaming, so we don’t promote or link to any copyrighted content. We strongly encourage our readers to steer clear of piracy and stick to content that’s free to stream and in the public domain. For more information, check out our full disclaimer.
Disclosure
Kodi Expert is a reader-supported site, which means we may earn a small commission if you decide to purchase through links on our pages. This helps us keep providing valuable content to you at no extra cost. Learn More
One thought on “How to Install the Kodi Xenon Build: Diggz Repo (march 2026)”