

Are you someone who uses a MacBook and wants more entertainment options? Great news! We’ve got a super easy guide to help you set up Kodi Nexus on MacBook. This will give you tons of cool stuff to watch and listen to, all on your computer.
Kodi Nexus is like a really fancy TV that lets you watch movies, TV shows, and listen to music on your MacBook. It’s easy to use and has lots of extras you can add to make it even better.
Just follow our simple instructions to get Kodi Nexus on your MacBook. We’ll guide you through each step, so don’t worry about a thing!
Whether you love movies, TV shows, or music, Kodi Nexus on MacBook is the perfect way to enjoy it all. Lots of people all over the world love using Kodi Nexus, and now you can too! Get ready for a whole new level of fun with your MacBook.
Benefits of using Kodi Nexus on MacBook
Kodi Nexus is packed with perks that MacBook users will love, making it the top choice for all your entertainment needs. Check out some of the awesome advantages it offers:
- Versatile Streaming: Kodi Nexus lets you stream everything from movies and TV shows to music, podcasts, and even live TV channels right on your MacBook. No need to bounce around different apps anymore – everything you want is in one convenient spot.
- Loads of Add-ons: With Kodi Nexus, you get access to tons of add-ons to personalize your streaming experience. Whether you’re into Netflix, Amazon Prime Video, sports, documentaries, or anything else, there’s an add-on for you. Customize Kodi Nexus to fit your interests perfectly.
- Easy to Use: Even if you’re not a tech whiz, you’ll have no trouble with Kodi Nexus. It’s designed with a simple, user-friendly interface that anyone can navigate. No more hunting around for what you want – everything is neatly organized and easy to find.
- Works Across Devices: Kodi Nexus isn’t just for your MacBook – it’s available on Windows, Linux, Android, and iOS too. So, you can start watching something on your MacBook and pick up right where you left off on your phone or tablet.
By installing Kodi Nexus on your MacBook, you unlock all these awesome benefits and take your entertainment experience to the next level.
System requirements for installing Kodi Nexus on MacBook
Before you start setting up Kodi Nexus on MacBook, it’s important to check if your MacBook meets the necessary requirements to run it smoothly. Here’s what you need:
- Operating System: Make sure your MacBook is running on macOS 10.8 (Mountain Lion) or later versions. If it’s not, you’ll need to update your operating system before installing Kodi Nexus.
- Processor: For the best performance, your MacBook should have at least an Intel Core 2 Duo processor. However, it’s even better if you have a more powerful processor like an Intel Core i5 or i7.
- RAM: Kodi Nexus needs a minimum of 2GB of RAM to run properly. But if you want to avoid any hiccups, especially when streaming high-definition content, it’s recommended to have at least 4GB or 8GB of RAM.
- Storage Space: Ensure that you have enough free space on your MacBook to install Kodi Nexus and any extra add-ons or media files you want. It’s recommended to have at least 1GB of free space, but the more, the better.
Once you’ve checked that your MacBook meets these requirements, you’re good to go ahead with installing Kodi Nexus.
Installing Kodi Nexus on MacBook
Installing Kodi Nexus on MacBook is easy-peasy! Just follow these simple steps:
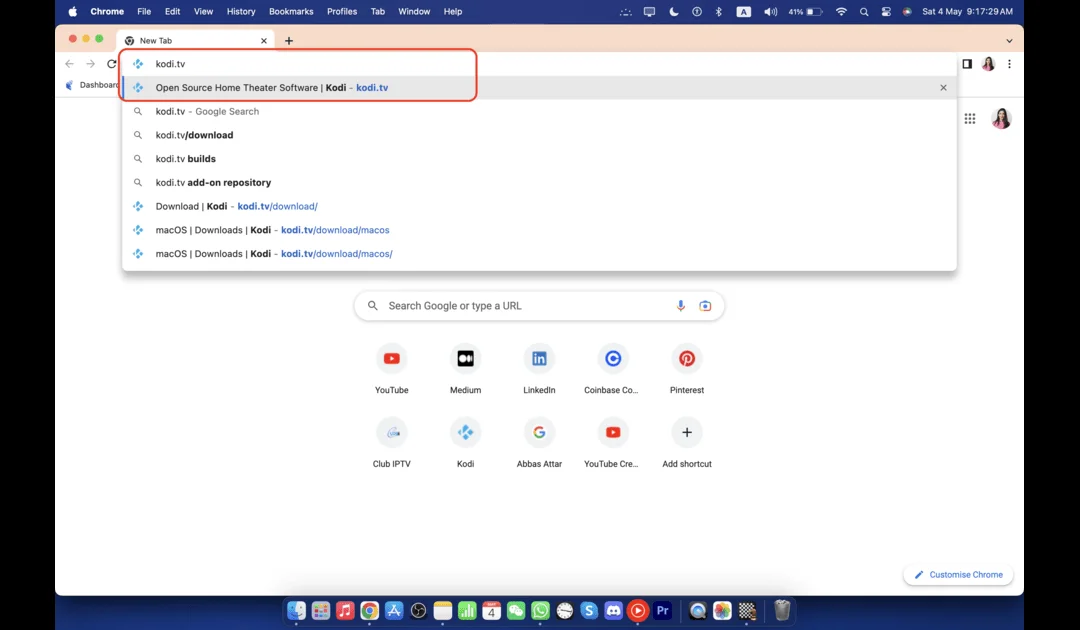
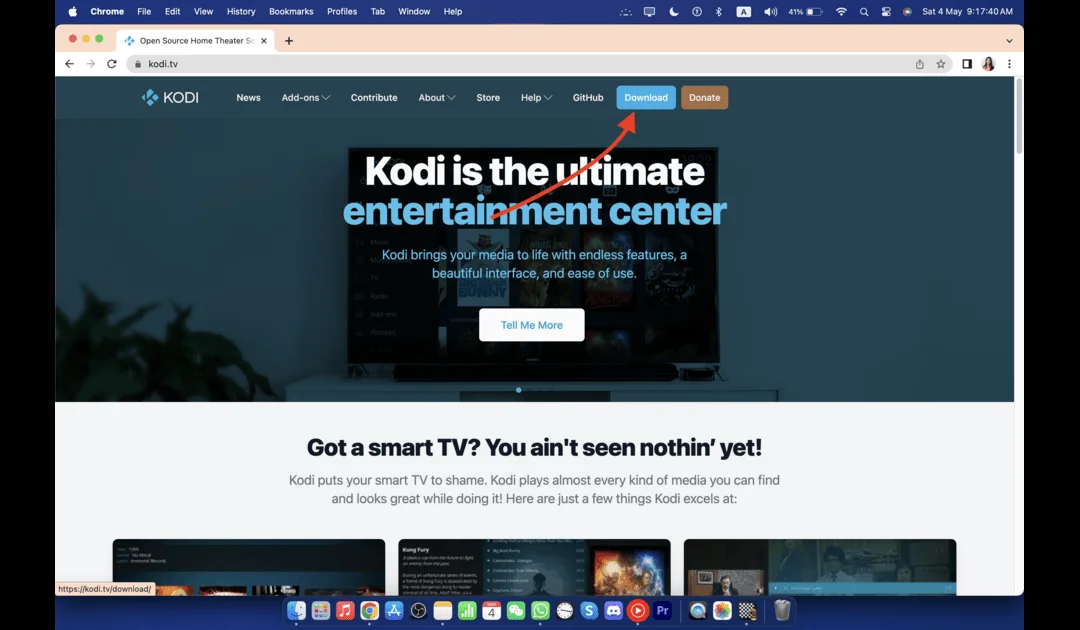
Download Kodi Nexus: Head to the official Kodi website at https://kodi.tv/.
Click on Download Buttong Above the left Side menu Bar
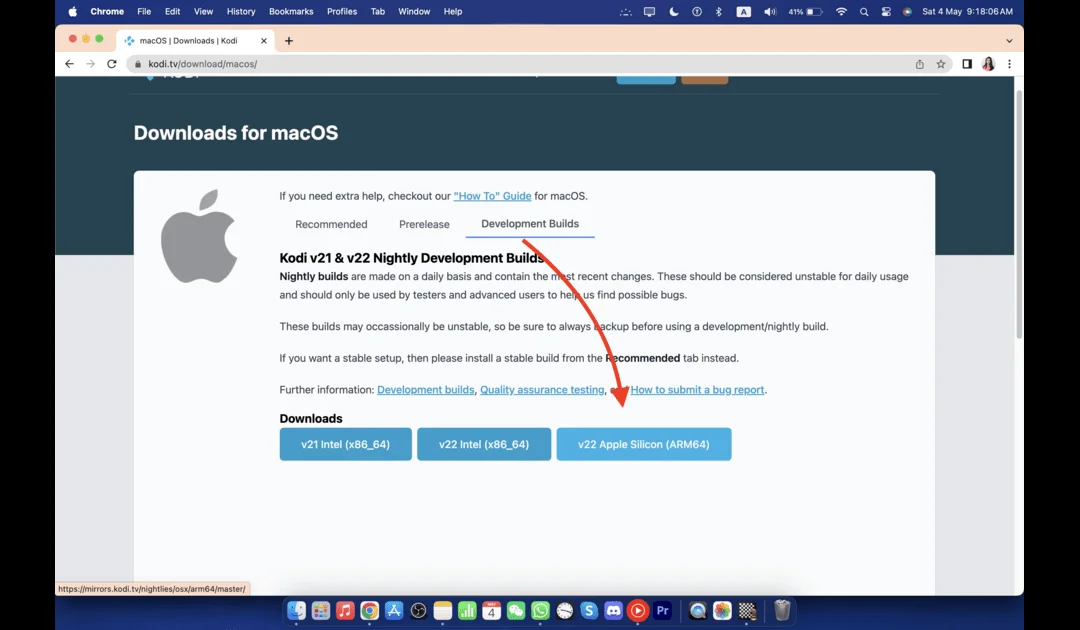
Look for the “MacOS” button and give it a click to
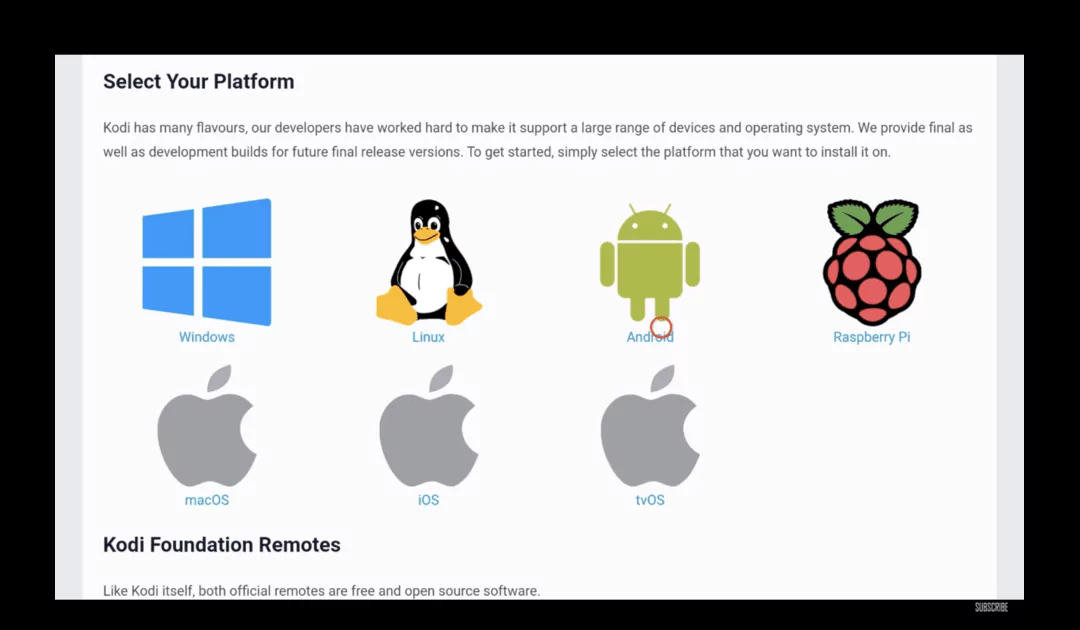
download the Kodi Nexus setup file for your MacBook.
[su_note note_color=”#fd615d” text_color=”#ffffff” radius=”4″]Note: Select the file that match your system Chip[/su_note]
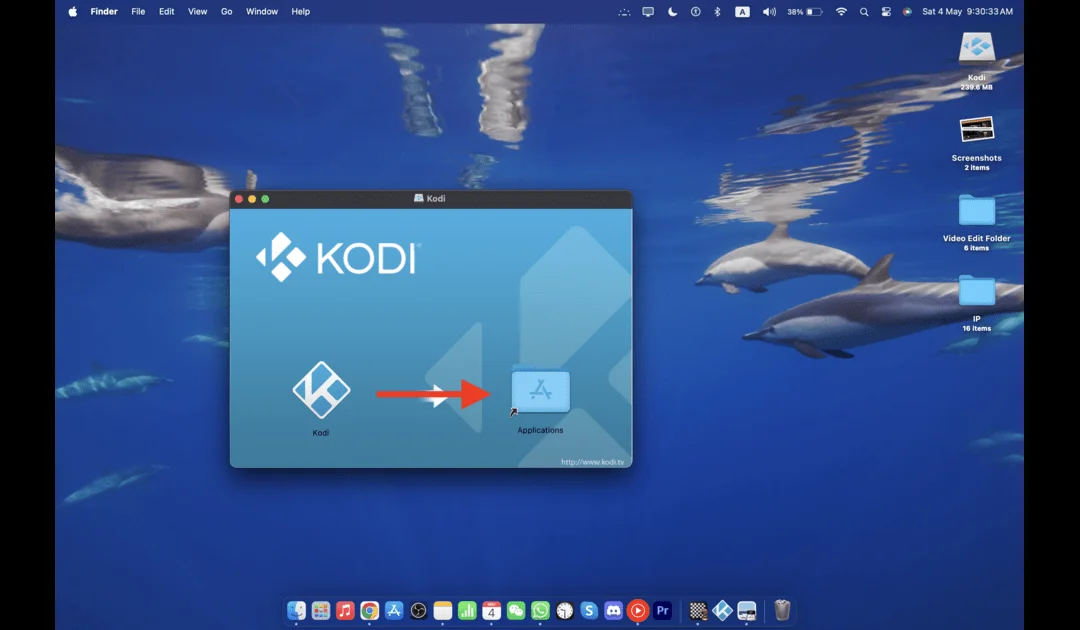
Once the download’s done, find the setup file in your Downloads folder (or wherever you saved it). Double-click on it to open it up. A window will pop up, asking you to drag the Kodi Nexus icon into your Applications folder.
Click and drag the Kodi Nexus icon into the Applications folder in the window. This kicks off the installation process. Depending on your MacBook’s security settings, you might need to type in your admin password to okay the installation.
Once the installation’s wrapped up, go to your Launch Pad and find the Kodi Nexus icon. Double-click on it to open Kodi Nexus
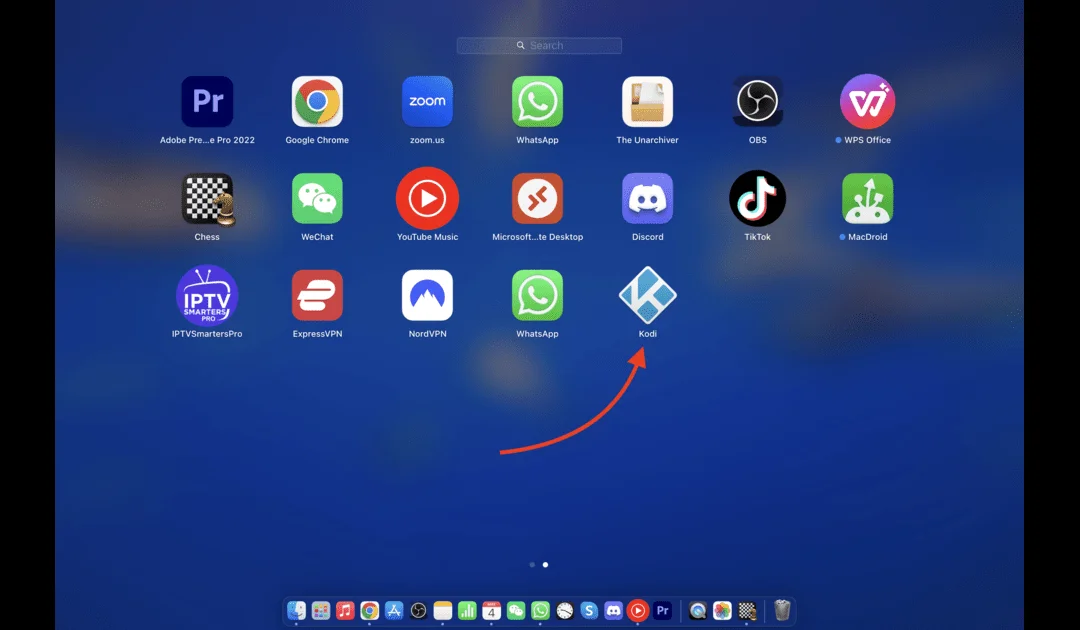
for the first time. You might get a warning from your MacBook’s security settings saying Kodi Nexus is from an unknown developer. Don’t worry – just click “Open” to keep going.
You’ve got Kodi Nexus on MacBook. Now, let’s dive into setting it up for the best performance.
Configuring Kodi Nexus for Macbook
Once Kodi Nexus is installed, it’s time to tweak the settings to make sure everything runs smoothly. Here’s what you need to do:
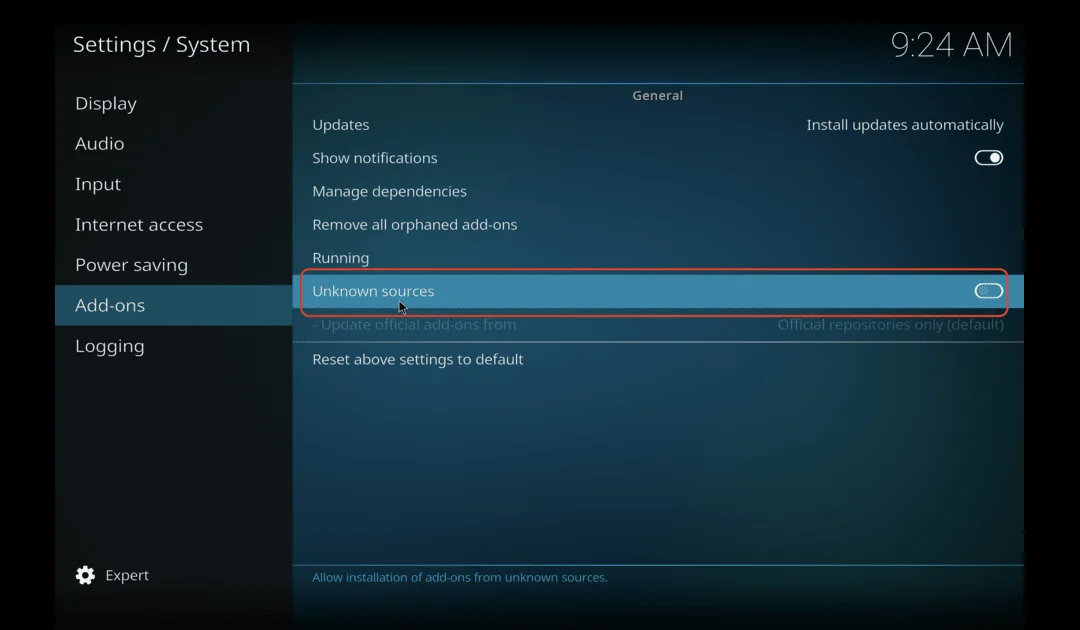
Enable Unknown Sources: By default, Kodi Nexus blocks add-ons from unknown sources. But some really cool add-ons aren’t in the official Kodi library. To allow these, head to “Settings” > “System” > “Add-ons” and switch on Unknown Sources.
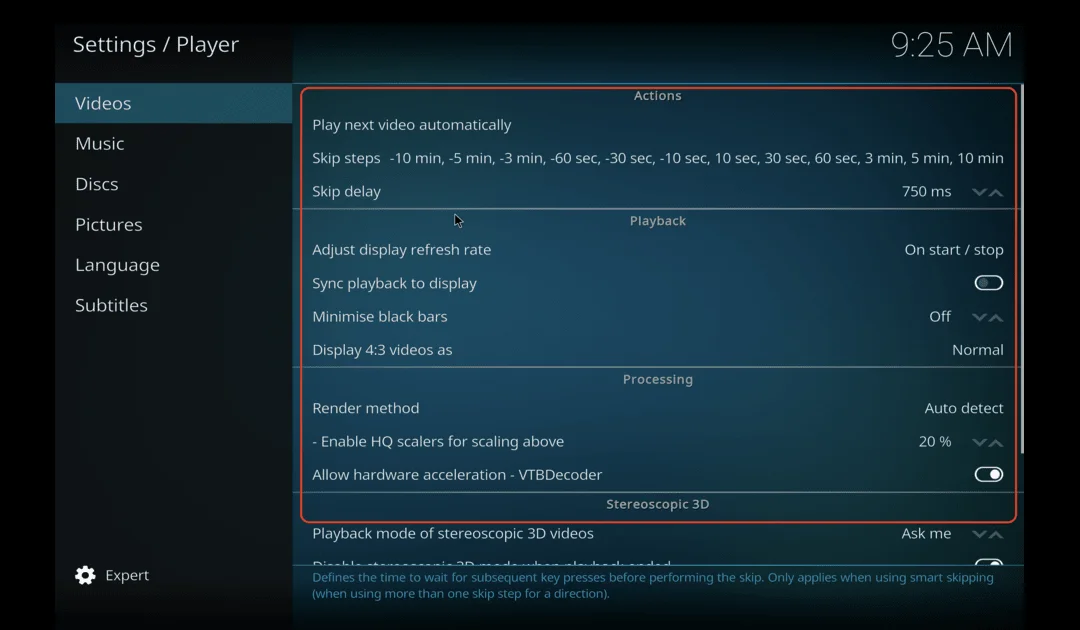
Adjust Video and Audio Settings: Customize your video and audio settings to suit your preferences and improve playback quality. Check out “Settings” > “Player” to tweak stuff like display mode, resolution, audio output, and more.
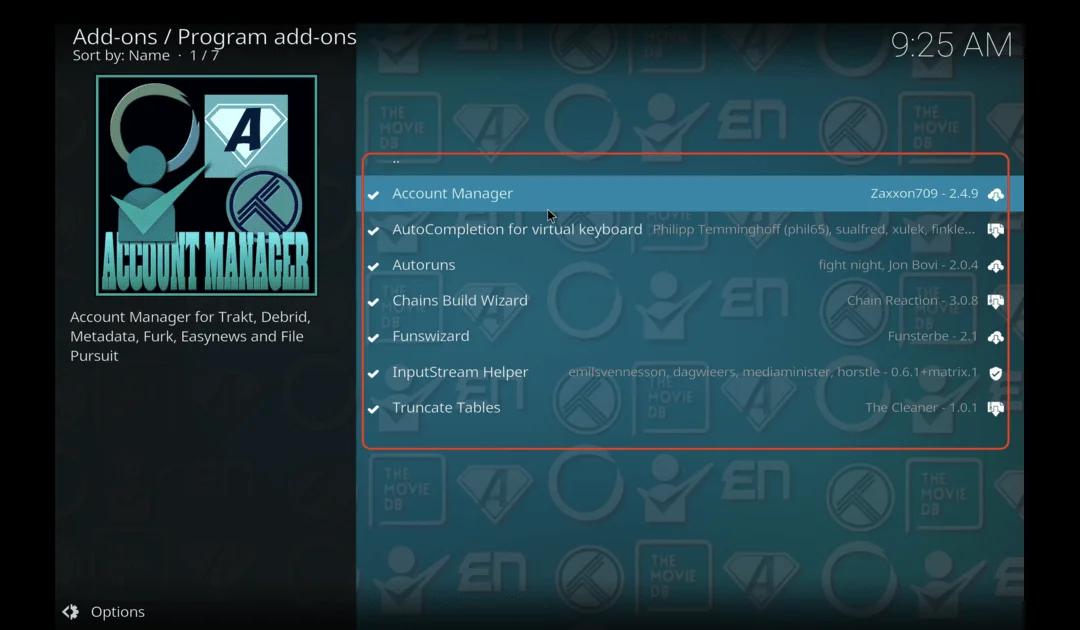
Manage Add-ons: Kodi Nexus has a huge add-on collection, but it’s smart to tidy up. Remove any add-ons you don’t use to declutter your interface and boost performance. Go to “Settings” > “Add-ons” > “My add-ons” to see and manage what you’ve got installed.
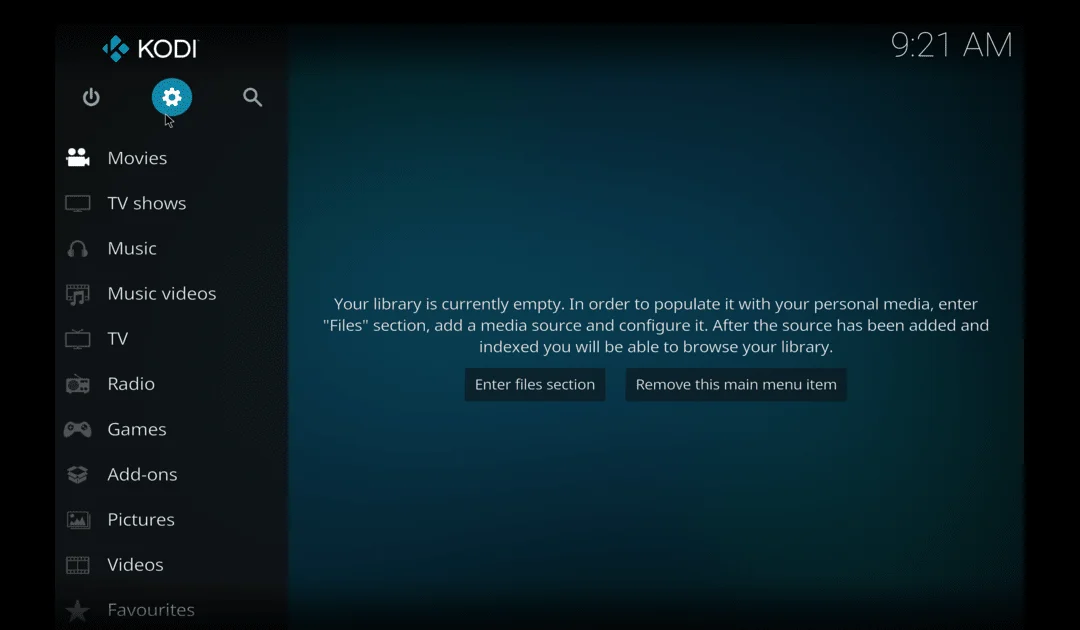
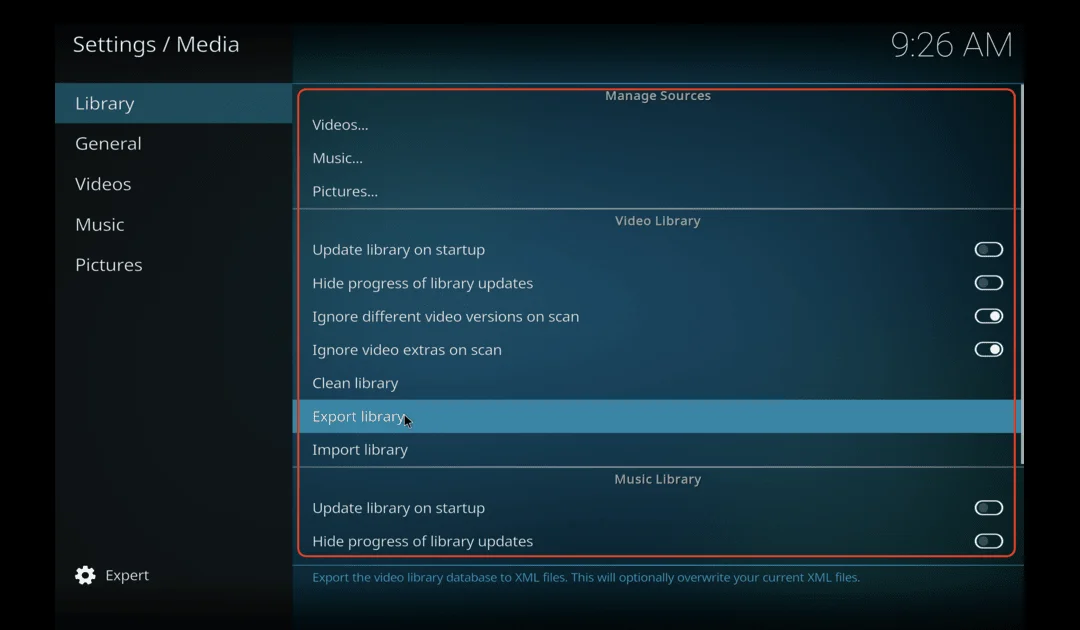
Set Up Media Sources: To enjoy your own media collection in Kodi Nexus, you need to add your media sources. This lets Kodi Nexus organize your movies, TV shows, music, and other files. Head to “Settings” > “Media” > “Library” to add folders with your media files.
Follow these steps, and you’ll have Kodi Nexus customized to your liking, running smoothly on your MacBook.
Essential add-ons and plugins for Kodi Nexus
Kodi Nexus shines bright because of its awesome collection of add-ons and plugins. These extras make your media streaming experience even better by giving you access to a ton of content. Here are some must-have add-ons and plugins to check out:
Make sure to explore the wide range of add-ons in the official Kodi repository and trusted third-party sources. There’s something for everyone, so you’re sure to find ones that fit your interests and streaming preferences perfectly.
Tips and tricks For Kodi Nexes
To supercharge your Kodi Nexus experience on your MacBook, try out these handy tips and tricks:
- Get a VPN: Using a Virtual Private Network (VPN) can beef up your privacy and security while using Kodi Nexus. Plus, it can help you bypass geo-blocks and access content that might be restricted in your area.
- Tidy Up Your Media Library: Spend some time organizing your media library in Kodi Nexus. Well-labeled movies, TV shows, and music files will make it a breeze to find and enjoy your favorite stuff in no time.
- Personalize the Interface: Kodi Nexus lets you tweak its interface to your heart’s content. Explore different skins, wallpapers, and menu layouts to give the app a look and feel that’s uniquely yours.
- Stay Updated: Keep Kodi Nexus and your add-ons up to date for the best performance. Updates often bring bug fixes, security boosts, and cool new features, so don’t skip ’em!
With these nifty tips and tricks, you can take your Kodi Nexus experience to the next level on your MacBook. Happy streaming!
Troubleshooting common issues
While setting up Kodi Nexus on your MacBook is usually smooth sailing, you might run into a few bumps along the way. Here are some troubleshooting tips to help you tackle common issues:
- Security Warning: If you get a security warning saying Kodi Nexus is from an unknown developer, don’t worry. Just go to your MacBook’s “System Preferences” > “Security & Privacy” and hit “Open Anyway.” This gives Kodi Nexus the green light to run on your MacBook.
- Installation Hiccups: If the installation fails or gets interrupted, try downloading the Kodi Nexus setup file again from the official website. Make sure your internet connection is stable and you’ve got enough space on your MacBook before giving it another shot.
- Add-on Glitches: Sometimes, certain add-ons might not play nice with the latest version of Kodi Nexus or your MacBook’s operating system. If you’re having trouble with specific add-ons, look for updates or try out alternatives that do the same thing.
- Buffering or Playback Woes: Slow internet speeds or network congestion can lead to buffering or playback problems when streaming on Kodi Nexus. Try switching to a faster, more stable internet connection, or tinker with the video playback settings in Kodi Nexus.
If you’re still stuck or need more help, head over to the Kodi Nexus community forums or reach out to their official support channels for more targeted troubleshooting tips. They’re there to lend a hand!
Frequently asked questions
If you’ve read through the guide and still have questions or uncertainties about the installation process, don’t sweat it. Check out the list of frequently asked questions below for answers to some common queries:
If your question isn’t covered here, don’t hesitate to drop a comment below. I’m here to assist you and provide solutions to any queries you may have. Just ask away, and I’ll do my best to help you out!
Conclusion
Installing Kodi Nexus on MacBook opens up a whole new world of entertainment possibilities. You can stream movies, TV shows, music, and more with just a few clicks. Kodi Nexus comes with a user-friendly interface, a wide range of add-ons, and customizable features, making it the perfect media streaming platform for your MacBook.
With our easy-to-follow guide, you’ll be able to install Kodi Nexus on your MacBook in no time and set it up for the best performance. Explore the vast selection of add-ons and plugins, troubleshoot any issues that may arise, and discover tips and tricks to enhance your Kodi Nexus experience.
Now that you have the ultimate guide to installing Kodi Nexus on MacBook, it’s time to dive in and unleash the full potential of your entertainment system. Enjoy seamless streaming, personalized content, and endless hours of entertainment with Kodi Nexus on your MacBook.