Introduction to IPTV Streaming
Internet-based television has changed how people access live channels and on-demand content. Instead of relying on traditional cable or satellite signals, IPTV delivers television through an internet connection. This allows viewers to stream channels, movies, and series directly on smart devices without the limitations of conventional broadcasting systems.
One of the biggest reasons IPTV is gaining popularity is flexibility. Users can watch content on a wide range of devices including smart TVs, streaming sticks, mobile phones, tablets, and computers. With the right application and a stable connection, viewers can access their entertainment library from almost anywhere.
Another advantage is the scale of content available. Many IPTV platforms provide thousands of live channels along with extensive video-on-demand libraries that include movies, TV series, and international programming. Services such as Xtreme HD IPTV are often mentioned when discussing modern IPTV platforms because they combine large channel selections with multi-device compatibility.
For many households, IPTV has become an alternative to expensive cable subscriptions, offering broader content choices and greater control over how and where entertainment is consumed.
Why IPTV Services Are Growing Rapidly
The rise of IPTV is closely tied to improvements in internet infrastructure and streaming technology. Faster broadband speeds and more reliable connections have made high-quality streaming possible for millions of users worldwide.
Another major factor is cost efficiency. Traditional cable packages often bundle channels that viewers rarely watch. IPTV services tend to offer more flexible options, allowing users to access a wide range of international channels and on-demand content without large monthly contracts.
Convenience also plays a role. IPTV platforms allow viewers to:
- Stream live TV and on-demand content from a single interface
- Access content across multiple devices
- Watch international channels that may not be available through local cable providers
Communities online frequently discuss different providers, which is why searches like Xtreme HD IPTV reddit or detailed Xtreme HD IPTV review threads have become common among users researching IPTV options.
As more viewers move toward internet-based streaming, IPTV continues to grow as a flexible alternative to traditional TV distribution.
What Users Look For in a Premium IPTV Service
Not all IPTV providers offer the same level of performance. Experienced users usually evaluate several factors before choosing a service.
One of the most important elements is content availability. Premium IPTV platforms typically offer thousands of live channels along with large VOD libraries that include movies, sports, and international programming.
Streaming quality is another key factor. Viewers increasingly expect HD, Full HD, or even 4K streams with minimal buffering. Many IPTV platforms, including services such as Xtreme HD IPTV, position stable streaming and reduced buffering as key selling points for live broadcasts.
Users also pay attention to device compatibility. A strong IPTV service usually supports:
- Amazon Firestick and Android TV devices
- Smart TVs
- Smartphones and tablets
- Desktop computers
Applications play a big role as well. Many viewers rely on a compatible Xtreme HD IPTV app or similar IPTV player to access their subscription and manage channels.
Finally, ease of access matters. Simple account management, quick setup guides, and straightforward Xtreme HD IPTV login processes can make the difference between a smooth streaming experience and a frustrating one.
Because of these factors, experienced IPTV users tend to compare providers carefully before committing to a service.
What Is Xtreme HD IPTV?
Xtreme HD IPTV is a subscription-based IPTV platform that delivers television content through an internet connection instead of traditional cable or satellite systems. The service is designed for users who want access to a wide selection of live channels and on-demand entertainment from a single streaming platform.
Unlike conventional TV services that rely on fixed broadcasting schedules, IPTV platforms stream content digitally. This allows viewers to watch live TV, movies, and series on multiple devices while maintaining more control over what they watch and when they watch it.
Platforms such as Xtreme HD IPTV are often discussed in streaming communities for their large channel libraries and multi-device access. For many users exploring IPTV alternatives, services like this offer a modern way to access television content without relying on traditional broadcasting infrastructure.
Overview of the Platform
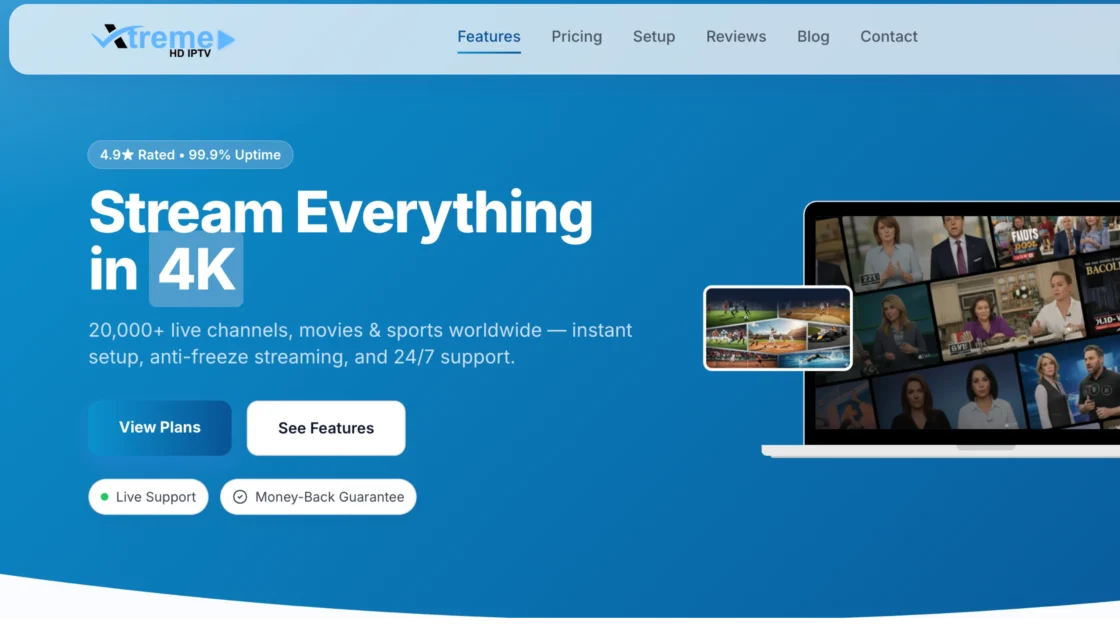
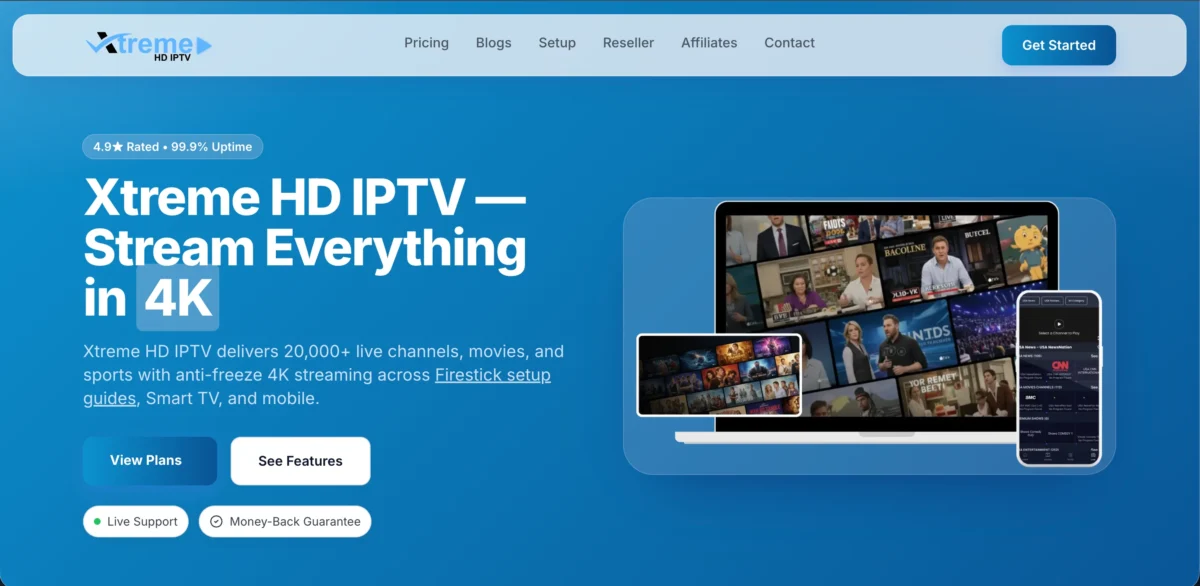
At its core, Xtreme HD IPTV is built to provide a large streaming catalog through internet-based delivery. The platform is known for offering an extensive selection of live television channels along with a large video-on-demand library.
Many users turn to IPTV platforms for the scale of content available. Services like Xtreme HD IPTV often provide access to:
- 20,000+ live TV channels from various countries
- A large on-demand library featuring movies and TV series
- HD, Full HD, and 4K streaming options depending on the content
- Compatibility with popular IPTV players and streaming apps
Another important aspect is device flexibility. A typical IPTV setup allows users to stream content on multiple devices, including smart TVs, streaming sticks, mobile phones, and computers. This type of multi-device compatibility is one of the main reasons IPTV services continue to gain traction among modern viewers.
How IPTV Technology Works
IPTV stands for Internet Protocol Television. Instead of broadcasting channels through satellite signals or cable networks, IPTV delivers video content through internet data packets.
When a user selects a channel or movie, the IPTV server sends the video stream directly to the user’s device through the internet. The media is then decoded and played through an IPTV application or compatible media player.
The process usually involves three main components:
- Content servers that host live channels and on-demand media
- Streaming infrastructure that delivers the video data over the internet
- IPTV player applications that allow users to browse channels and play streams
Because everything is delivered digitally, IPTV services can support features such as large channel libraries, on-demand viewing, and multi-device access without relying on physical broadcasting equipment.
Why Services Like Xtreme HD IPTV Are Popular
Interest in IPTV has grown quickly over the past few years, largely because viewers are looking for alternatives to traditional television packages.
One major reason is content variety. IPTV platforms often provide international channels, sports networks, entertainment channels, and movie libraries within a single subscription.
Another factor is convenience. With services like Xtreme HD IPTV, users can stream content on several devices instead of being tied to a single television setup. This makes it possible to watch content on smart TVs, Firestick devices, mobile phones, or laptops depending on the situation.
Streaming quality and reliability also play an important role. Many modern IPTV platforms focus on delivering stable streams with minimal buffering, which improves the overall viewing experience.
Because of these advantages, IPTV services continue to attract users who want broader content choices and more flexibility in how they watch television.
Key Features of Xtreme HD IPTV
Modern IPTV platforms compete largely on the strength of their features. Users typically compare factors such as channel availability, streaming quality, device support, and reliability before choosing a provider.
Services like Xtreme HD IPTV aim to deliver a full streaming ecosystem rather than just a list of channels. The platform focuses on providing a large content catalog, stable streaming performance, and compatibility with the devices people already use for entertainment.
Below are some of the features that users often look for when evaluating IPTV services.
Massive Channel Library
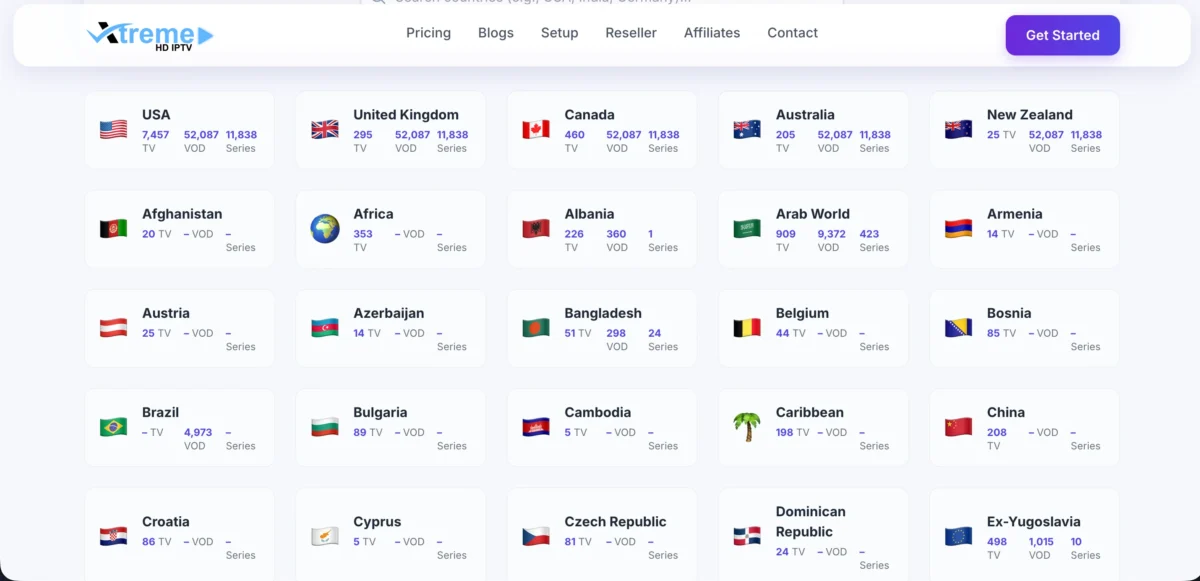
One of the most noticeable aspects of Xtreme HD IPTV is the size of its channel lineup. The platform is known for offering 20,000+ live TV channels, covering a wide range of categories.
This typically includes:
- Sports networks
- News channels
- Entertainment and movie channels
- Kids programming
- International channels from multiple regions
A large channel library allows viewers to explore content beyond what traditional cable packages usually provide. It also gives users access to programming from different countries without needing multiple subscriptions.
For many IPTV users, the variety of available channels is one of the main reasons they consider platforms like Xtreme HD IPTV.
4K and HD Streaming Quality
Streaming quality is another key factor when choosing an IPTV provider. Modern viewers expect clear video playback that matches the quality of conventional broadcasting.
Many IPTV services now offer HD, Full HD, and 4K streams, depending on the source channel and internet speed. This helps maintain a smooth viewing experience, especially on large screens such as smart TVs.
Higher resolution streams also make sports broadcasts, movies, and live events more enjoyable to watch. As internet speeds continue to improve, high-definition streaming has become a standard expectation for IPTV users.
Anti-Freeze Streaming Technology
Buffering and stream interruptions are common concerns with online streaming. IPTV platforms often address this by using optimized servers and streaming infrastructure designed to maintain stable playback.
Services such as Xtreme HD IPTV often highlight anti-freeze streaming technology, which focuses on reducing buffering during live broadcasts. This helps keep channels running smoothly even during peak viewing times.
A reliable stream is especially important for live events like sports matches or news broadcasts, where interruptions can disrupt the viewing experience.
Multi-Device Compatibility
Another major advantage of IPTV platforms is device flexibility. Instead of being restricted to a single television connection, IPTV subscriptions can typically be used across several devices.
Many IPTV users stream their content on devices such as:
- Amazon Firestick
- Smart TVs
- Android smartphones and tablets
- iOS devices like iPhone and iPad
- Desktop and laptop computers (PC)
Because of this multi-device compatibility, viewers can access their channels and content from almost anywhere as long as they have an internet connection and a compatible IPTV player.
VOD Movies and Series Library
In addition to live television, many IPTV platforms include a video-on-demand (VOD) library. This allows users to stream movies and TV series without waiting for scheduled broadcasts.
The VOD section typically includes:
- Popular movies
- TV series and full seasons
- Recently released content
- International films and shows
Having both live channels and on-demand content in the same platform makes IPTV services more versatile. Users can switch between live TV and movies within the same interface, which adds to the overall convenience of the service.
Xtreme HD IPTV Review
When evaluating an IPTV service, users typically focus on four main factors: streaming quality, channel availability, interface usability, and server reliability. These elements directly affect the overall viewing experience.
Among IPTV platforms frequently discussed online, Xtreme HD IPTV is often mentioned because of its large content catalog and multi-device streaming support. The service delivers television through internet-based streaming rather than traditional cable or satellite systems, allowing viewers to access content on different devices and locations.
Below is a closer look at some of the areas users typically examine when reviewing IPTV platforms like this.
Streaming Quality and Performance
Streaming quality is one of the first things users notice when testing an IPTV service. Clear picture quality and smooth playback are essential, especially for sports broadcasts, movies, and live events.
Many IPTV platforms now support HD, Full HD, and sometimes 4K streaming, depending on the source and the viewer’s internet speed. In practice, picture quality can vary by channel, app, device, and network conditions.
Performance also depends heavily on connection stability. A reliable IPTV service should allow fast channel switching and minimal buffering during peak viewing hours.
When the infrastructure is optimized correctly, viewers can watch live broadcasts or on-demand content with little interruption.
Channel Selection and Categories
Content variety is another major factor in any IPTV review. A broad channel lineup allows viewers to access multiple types of programming within a single subscription.
Many IPTV services aim to provide large channel catalogs covering entertainment, sports, news, documentaries, and international networks. Platforms like Xtreme HD IPTV are often described as offering 20,000+ live channels, spanning different regions and languages.
This wide selection typically includes categories such as:
- Sports and live events
- News and international broadcasts
- Movies and entertainment channels
- Kids and family programming
- Regional and global networks
A large channel library makes IPTV appealing to viewers who want access to both local and international programming without maintaining several separate subscriptions.
User Interface and Experience
A well-designed interface can make a big difference when navigating thousands of channels and on-demand titles.
Most IPTV services rely on compatible player applications that organize channels into categories and provide browsing tools. Features like an Electronic Program Guide (EPG) help users see what is currently playing and what programs are scheduled next.
A good IPTV interface usually allows users to:
- Browse channels by category
- Search for movies or TV shows in the VOD library
- Save favorite channels
- Quickly switch between streams
When these elements are organized clearly, the experience becomes much closer to using a traditional TV guide but with more flexibility.
Stability and Server Reliability
Server stability is one of the most important factors in IPTV performance. Because all content is delivered over the internet, reliable server infrastructure is essential to keep streams running smoothly.
Many IPTV providers operate distributed servers across different regions to maintain uptime and reduce streaming interruptions. This type of infrastructure helps balance traffic during large events or peak viewing hours.
Some platforms also use anti-freeze streaming technology designed to minimize buffering and maintain consistent playback during live broadcasts.
When the servers are stable and properly optimized, users typically experience faster loading times, smoother streams, and fewer interruptions while watching live TV.
Xtreme HD IPTV App & Device Compatibility
One of the advantages of IPTV services is the ability to stream content on different devices instead of being limited to a single television setup. Most modern IPTV platforms are designed to work with various streaming applications and operating systems.
Platforms such as Xtreme HD IPTV focus on broad compatibility so users can access their subscription across multiple devices. This flexibility allows viewers to watch live TV or on-demand content whether they are at home on a smart TV or using a mobile device while traveling.
Because IPTV streams are delivered over the internet, the service can typically be accessed through compatible IPTV player apps on supported devices.
Does Xtreme HD IPTV Have an App?
Xtreme HD IPTV itself functions primarily as a streaming service rather than a standalone application. Instead of relying on a single official app, the service is commonly used through compatible IPTV player applications.
These players act as the interface where users enter their login credentials or playlist details. Once connected, the app loads the channel list, electronic program guide, and video-on-demand library.
This approach gives users flexibility because they can choose the IPTV player that works best on their device. Many IPTV users prefer this method since it allows them to customize their viewing experience while still accessing the same streaming service.
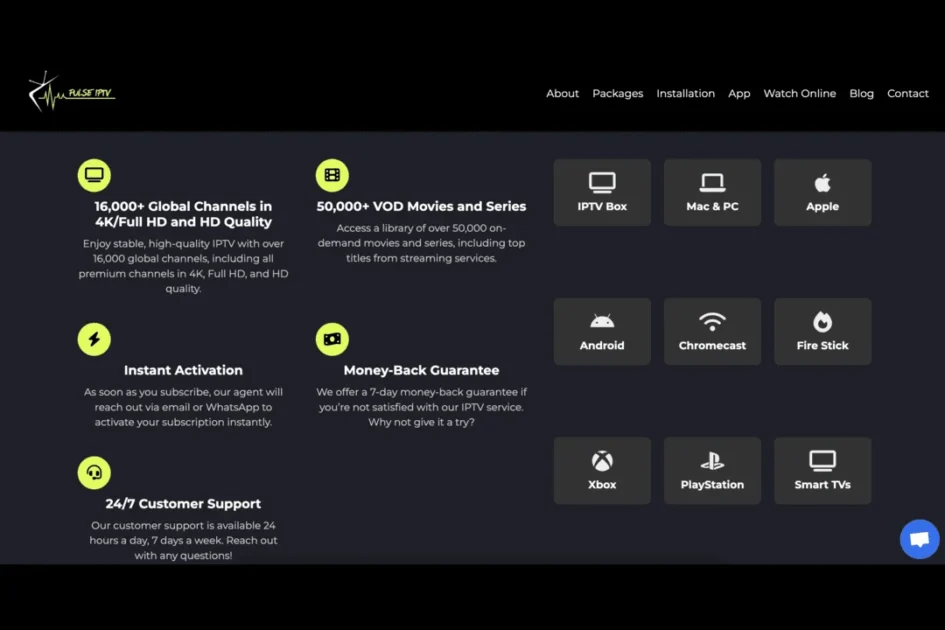
Supported Devices
Another reason IPTV platforms continue to grow in popularity is the number of devices they support. Instead of being restricted to a cable box, IPTV subscriptions can work across a wide range of modern streaming devices.
Services like Xtreme HD IPTV are typically compatible with devices such as:
- Amazon Firestick
- Android TV devices
- Smart TVs
- Android smartphones and tablets
- iPhone and iPad
- Windows PCs and Mac computers
Because of this broad compatibility, users can access their channels from almost any internet-connected device. Many viewers even switch between devices depending on where they are watching.
For example, someone might watch live sports on a smart TV at home and continue watching on a phone or tablet later.
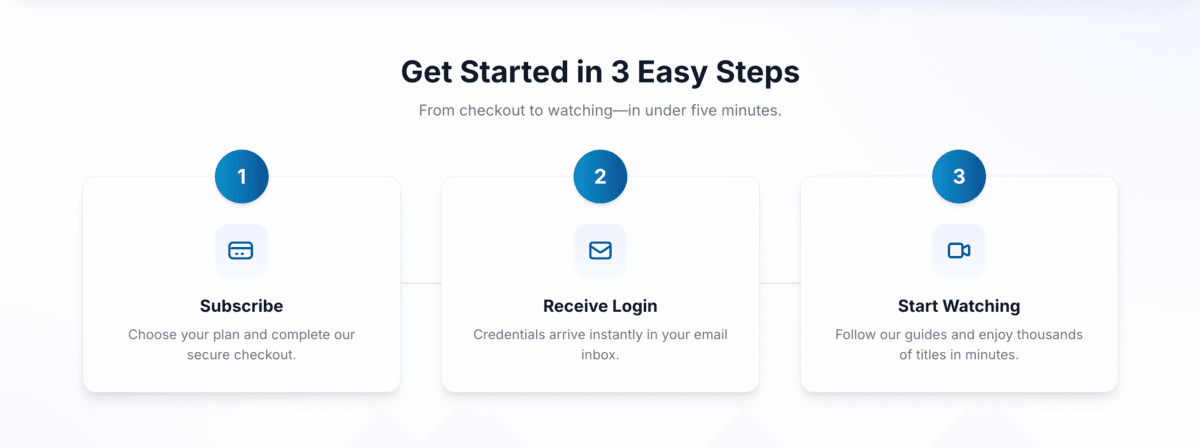
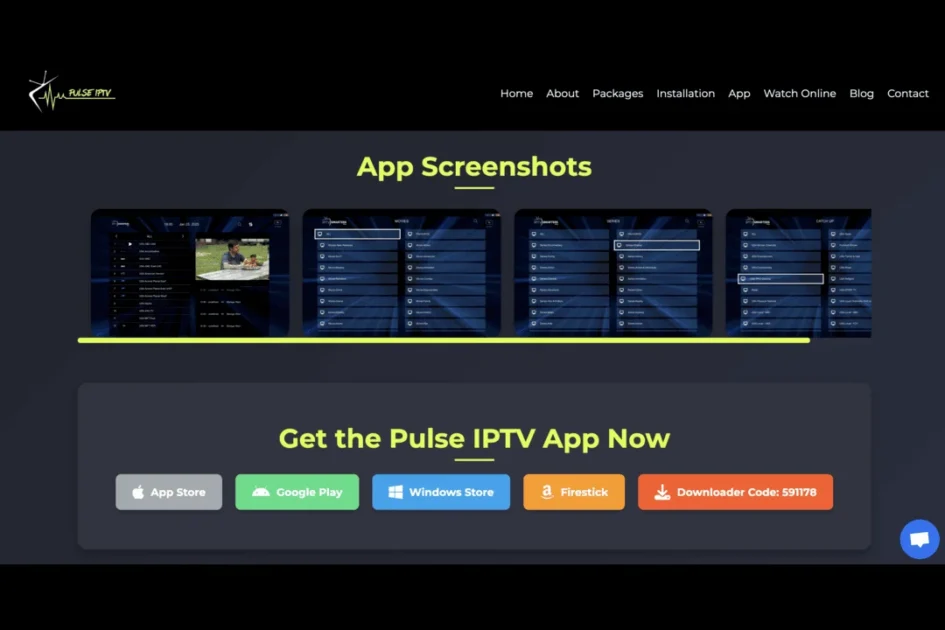
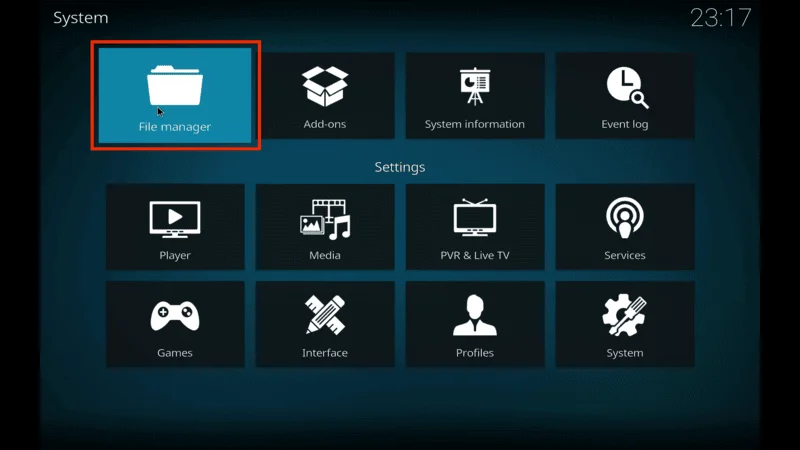
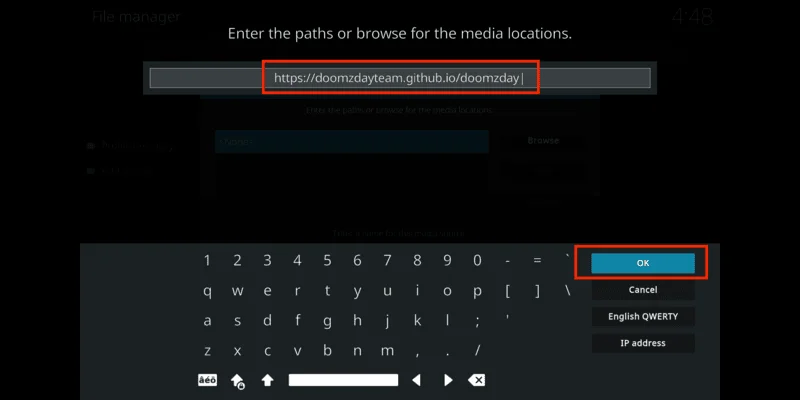
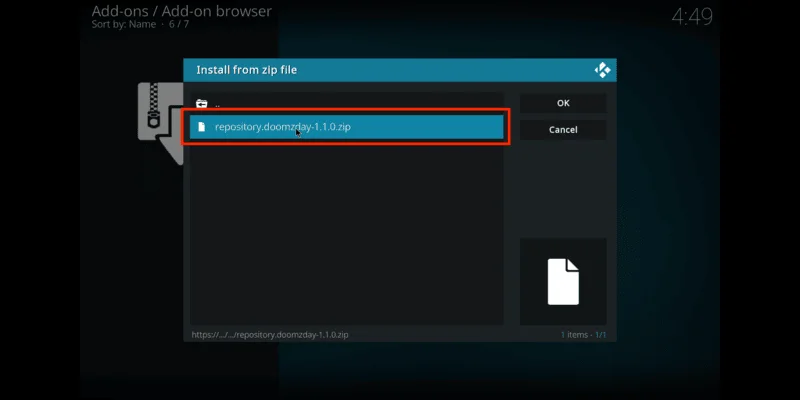
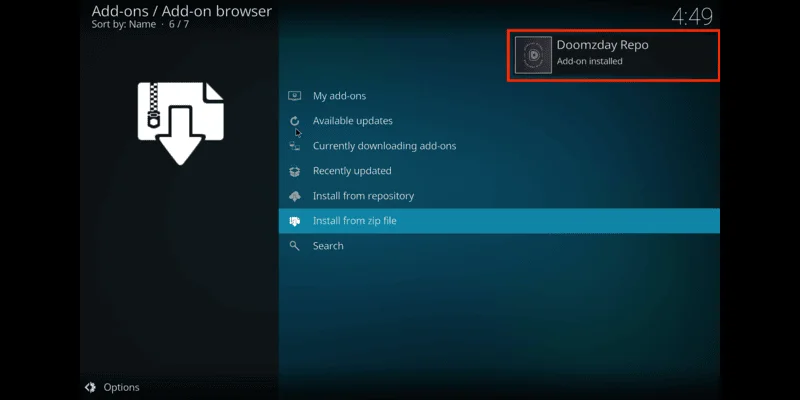
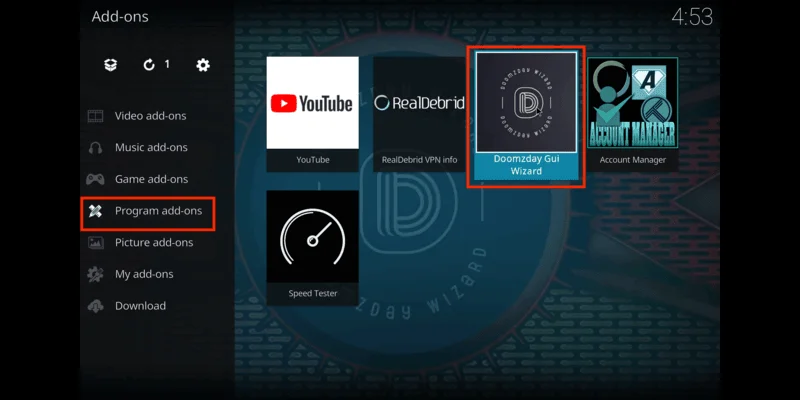
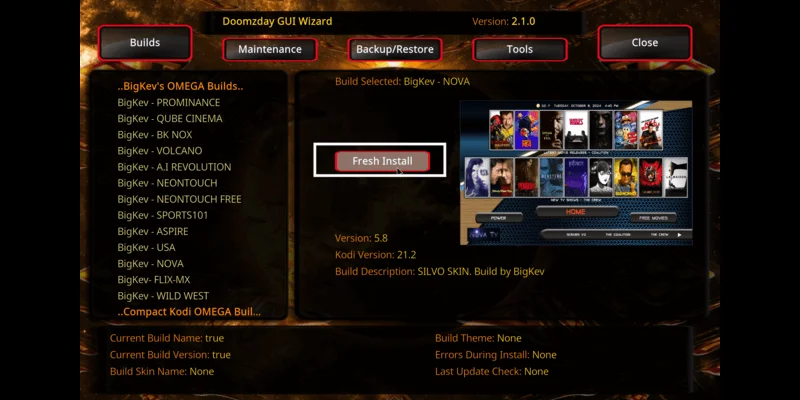
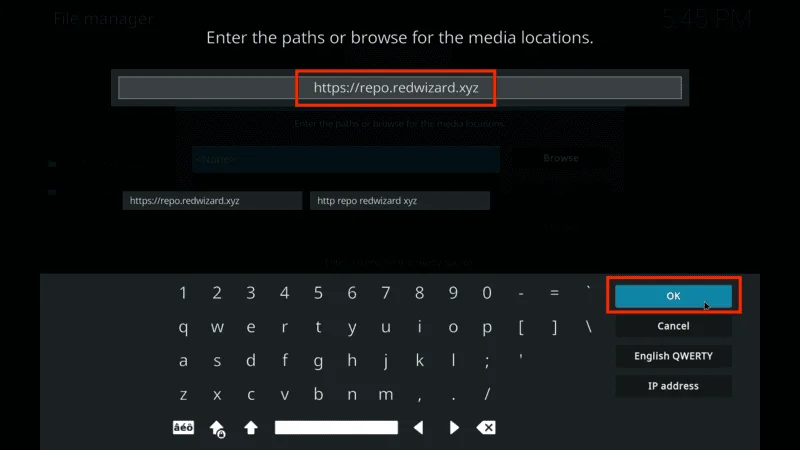
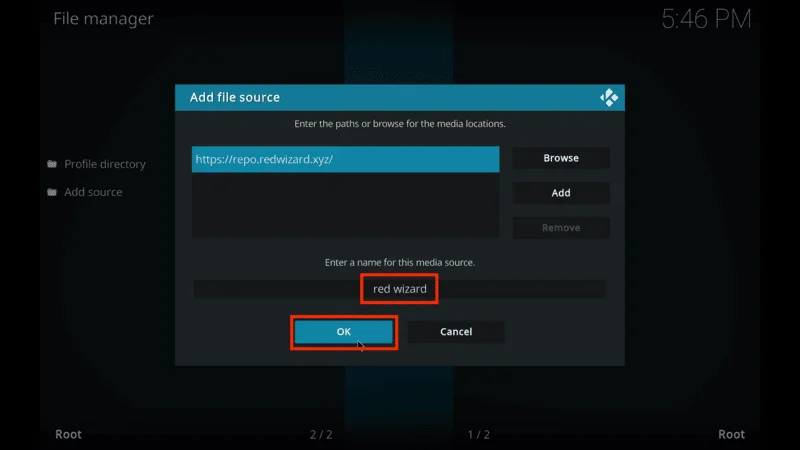
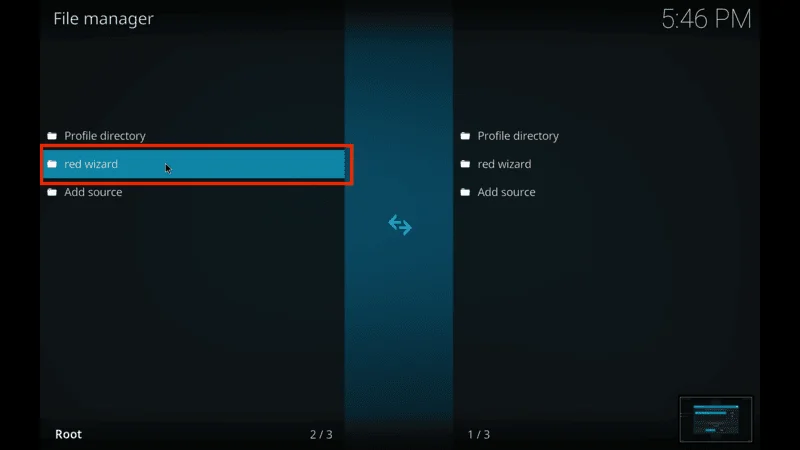
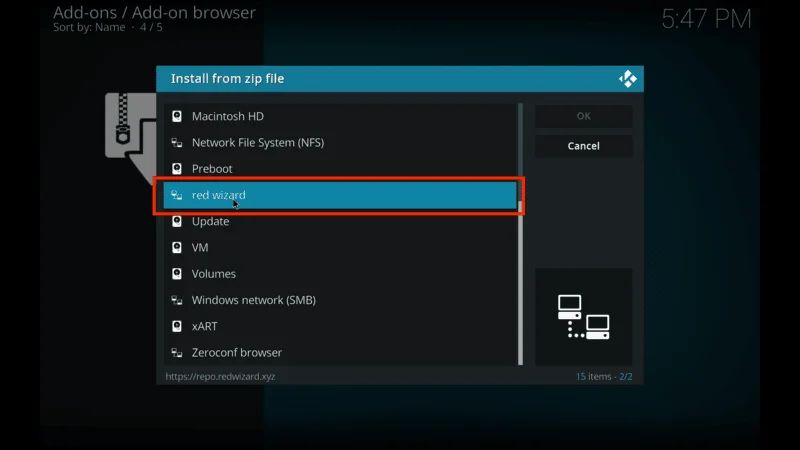
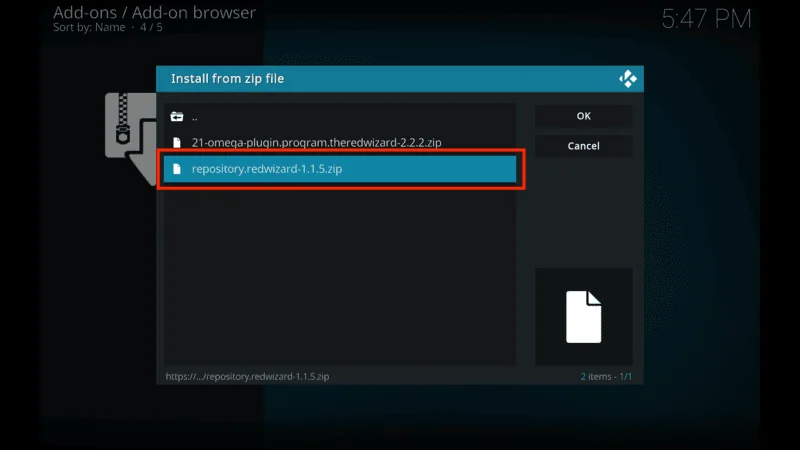
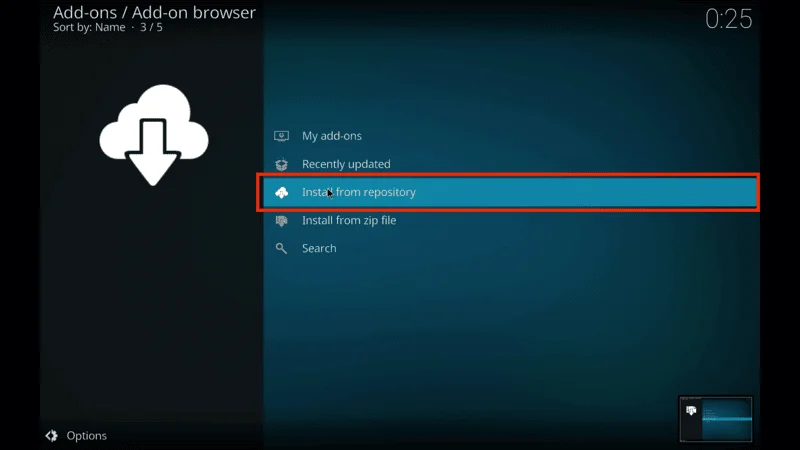
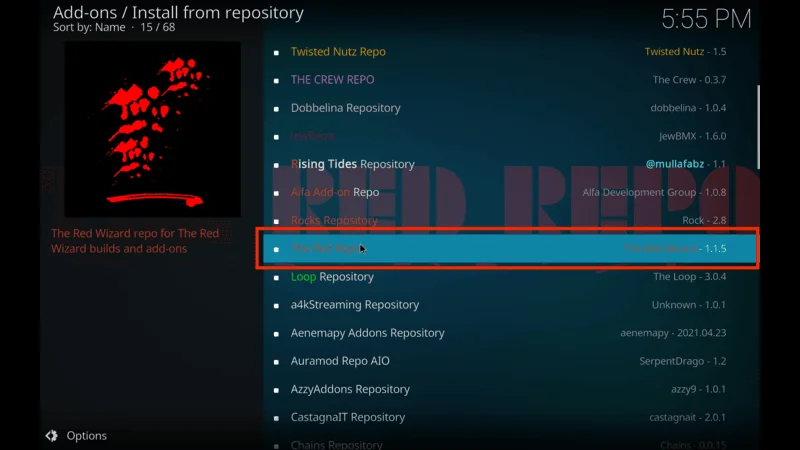
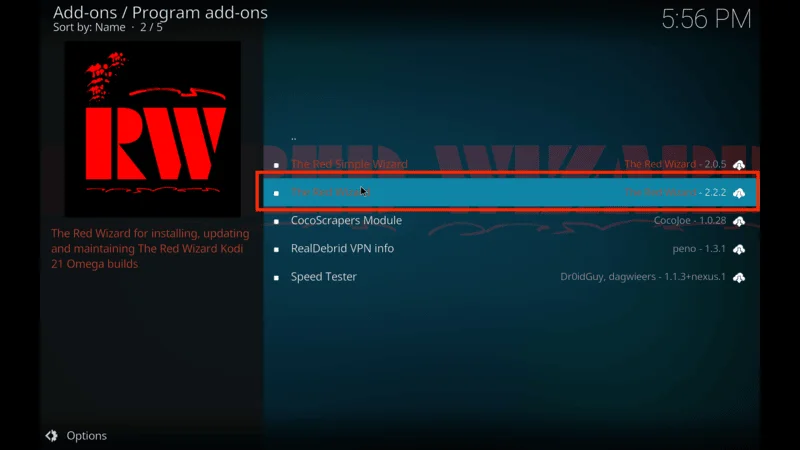
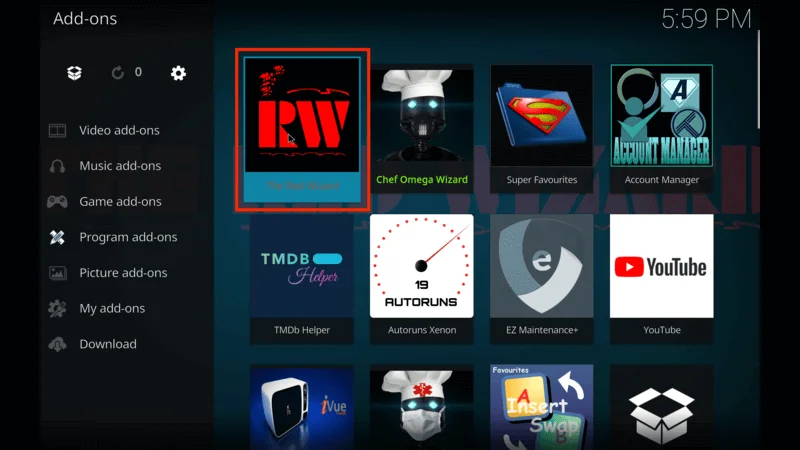
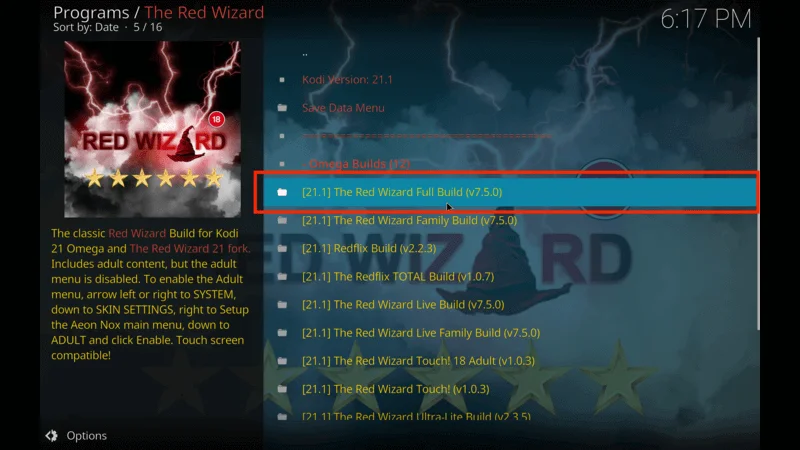
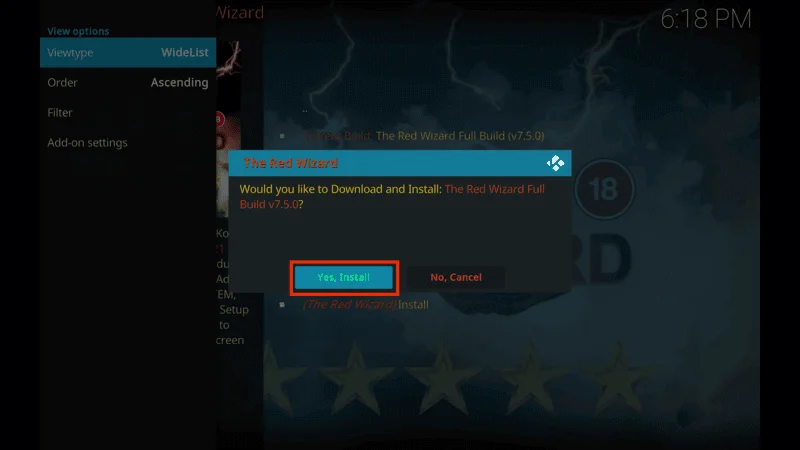
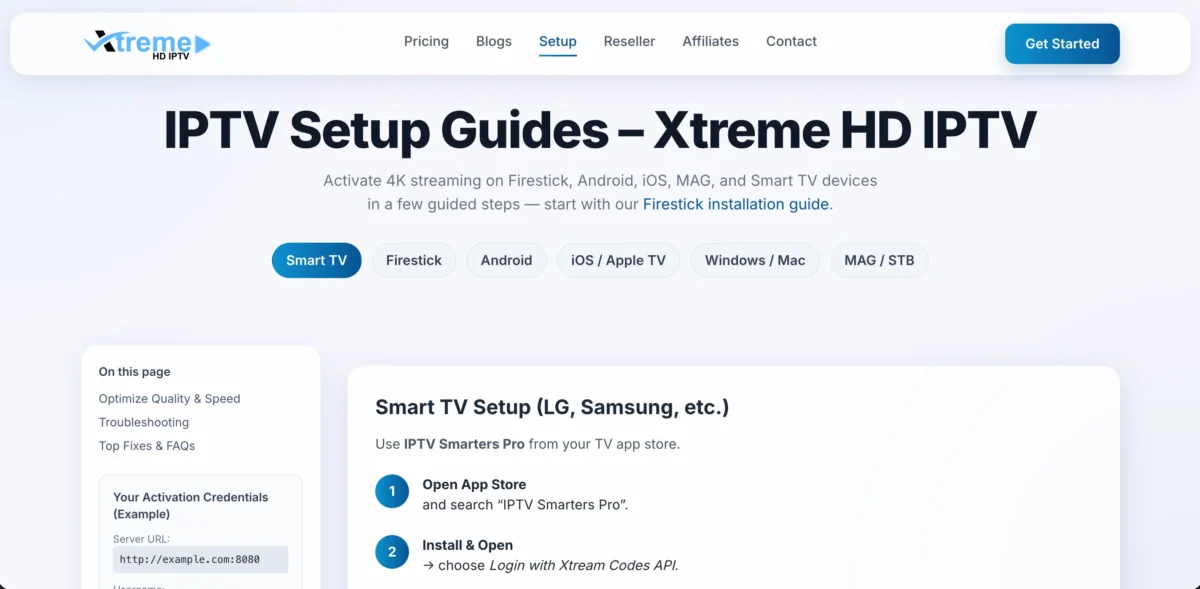
How to Install the Xtreme HD IPTV
The setup process for IPTV services is usually straightforward. After subscribing, users receive login details or a playlist link that connects their IPTV player to the service.
Installation steps may vary depending on the device, but the general process typically includes:
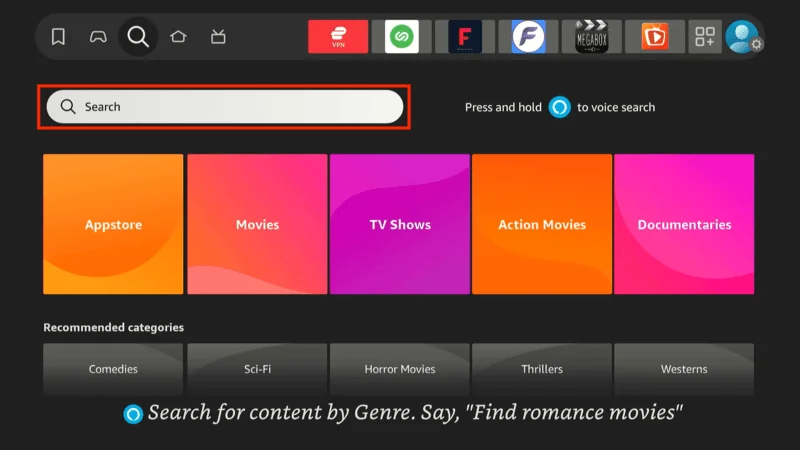
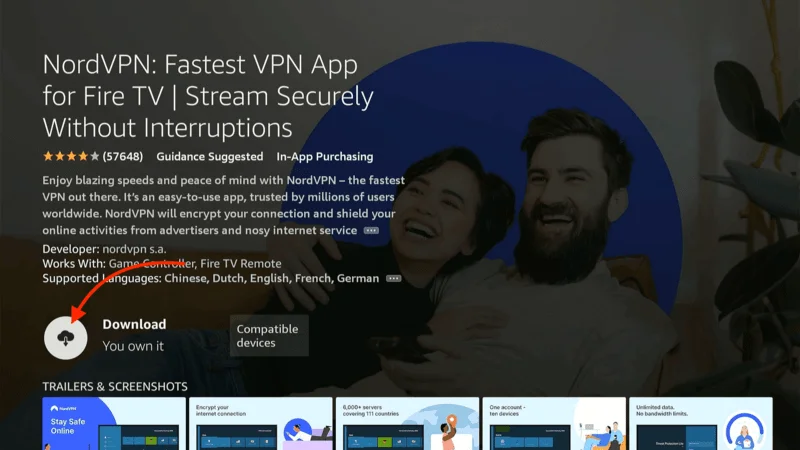
- Installing a compatible IPTV player app
- Entering the provided login credentials or playlist details
- Loading the channel list and electronic program guide
Because different devices require slightly different setup steps, many providers publish detailed installation guides.
For step-by-step device setup, users can follow the Xtreme HD IPTV setup guide provided in the official installation documentation.
Xtreme HD IPTV Login Guide
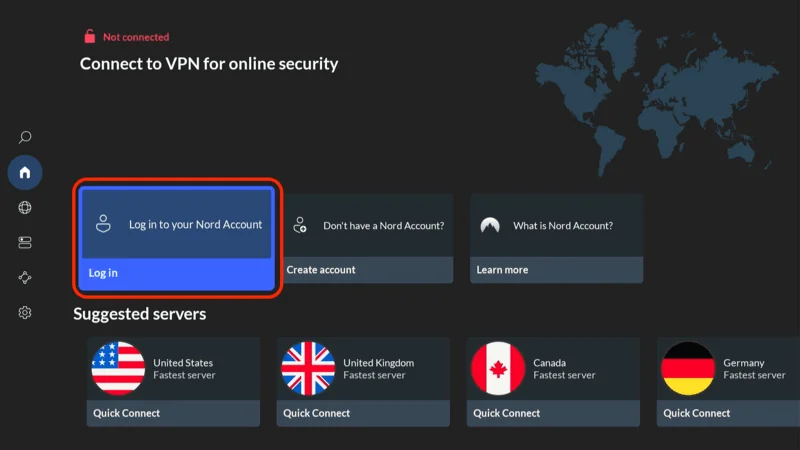
Accessing an IPTV service typically requires entering login credentials into a compatible IPTV player. These credentials connect the application to the IPTV servers and allow the user to load the available channels, movies, and TV series.
With services such as Xtreme HD IPTV, users usually receive their login information after activating a subscription. Once entered into a supported IPTV app, the player automatically pulls the channel list, electronic program guide, and on-demand library.
Most IPTV services use either Xtream Codes API credentials or M3U playlist links for authentication.
How the Login System Works
The login system used by IPTV services is designed to connect a user’s IPTV player directly to the streaming servers.
After subscribing, users typically receive a set of credentials in their email inbox that may include:
- Server URL (Portal or Host URL)
- Username
- Password
These details are entered into an IPTV player application. Once the connection is established, the player retrieves the channel lineup, categories, and available on-demand content.
This login system allows the IPTV platform to manage subscriptions and ensure that only authorized users can access the service.
Using Xtream Codes API
One of the most common login methods for IPTV services is the Xtream Codes API. Many IPTV player apps include a dedicated option for this login method because it simplifies the setup process.
With the Xtream Codes method, users usually enter three pieces of information:
- Server URL
- Username
- Password
After submitting these details, the IPTV player automatically loads the channel list, electronic program guide, and video-on-demand library.
This method is popular because it organizes channels neatly within the app and often provides faster loading times compared to manual playlist setups.
| ||||||||||
| Welcome to Xtreme HD IPTV Your premium 4K streaming experience starts now. Your account has been successfully created. Sign in to your IPTV app and enjoy live TV, movies, and sports in crystal-clear 4K. | ||||||||||
| ||||||||||
Getting Started
| ||||||||||
Using M3U Links
Another common way to access IPTV services is through an M3U playlist link. This method works with many IPTV players and media applications that support playlist-based streaming.
Instead of entering separate login fields, the user simply pastes a single M3U URL into the IPTV player. The playlist file then loads the available channels and organizes them inside the application.
M3U links are widely supported and are compatible with many IPTV apps across different devices.
Both login methods—Xtream Codes API and M3U playlists—are commonly used with IPTV services such as Xtreme HD IPTV, allowing users to choose the setup method that works best for their device and preferred IPTV player.
What Reddit Users Say About Xtreme HD IPTV
Online communities often play a big role in how people research IPTV providers. Forums and discussion platforms give users a place to share their experiences, ask setup questions, and compare different services before subscribing.
One search that appears frequently is “Xtreme HD IPTV reddit.” Many people look through Reddit threads to understand how the service performs in real-world situations. These discussions usually include opinions about streaming quality, channel availability, and overall reliability.
Like most community discussions, the feedback is a mix of positive experiences and occasional concerns. Understanding both sides helps users get a clearer picture of what to expect.
Common Positive Feedback
Across many IPTV discussions, users often highlight several advantages associated with platforms like Xtreme HD IPTV.
A common point mentioned is the large channel selection. Many users appreciate having access to thousands of live channels along with a sizeable on-demand library in one place.
Another frequently discussed benefit is device flexibility. Since IPTV services can be used on multiple devices, viewers often mention streaming through Firestick, smart TVs, mobile devices, or computers without being tied to a single setup.
Some users also point out that the streaming quality is generally stable, especially when using a reliable internet connection and a compatible IPTV player.
Overall, a large content library combined with multi-device access is often cited as the reason many viewers try IPTV platforms in the first place.
Common Concerns Mentioned by Users
As with any online service, community discussions sometimes include concerns or misunderstandings. In IPTV-related threads, these concerns often revolve around setup issues, player compatibility, or temporary connection problems.
Some Reddit discussions also occasionally raise questions about whether certain IPTV websites are operational. In some cases, confusion around IPTV services comes from outdated links, unofficial domains, or temporary access issues rather than the provider itself.”
When users report access issues, the cause may relate to outdated links, unofficial domains, player setup problems, or local network restrictions. When users access the correct domain, the platform and its setup resources remain available.
Because IPTV services rely on proper configuration through compatible apps, many concerns mentioned online are actually related to setup errors rather than issues with the service itself.
Comparing Community Feedback with Real Usage
Community discussions can be helpful, but they should be viewed alongside actual usage experience.
Many Reddit posts come from users who are experimenting with different IPTV players, devices, or internet setups. Because IPTV performance depends on factors like internet speed, device capability, and app configuration, experiences can vary from one user to another.
As with most IPTV platforms, the user experience often depends on correct setup, app compatibility, and connection quality. Proper setup through supported IPTV players and following the official installation guides usually resolves many of the issues mentioned in community threads.
For users researching IPTV providers, community feedback can offer useful insights—but it is always best to verify information through official sources and current setup documentation.
Xtreme HD IPTV Pricing & Coupon Options
Pricing is one of the factors many users evaluate before choosing an IPTV provider. Most IPTV platforms offer different subscription tiers depending on how long you want the service and how many devices you want to connect at the same time.
Services like Xtreme HD IPTV follow a flexible subscription model where users can choose between short-term plans or longer subscriptions. The pricing typically scales based on the number of devices allowed on a single account and the duration of the plan.
This structure allows viewers to select a plan that fits their viewing habits without committing to long contracts commonly seen with traditional cable services.
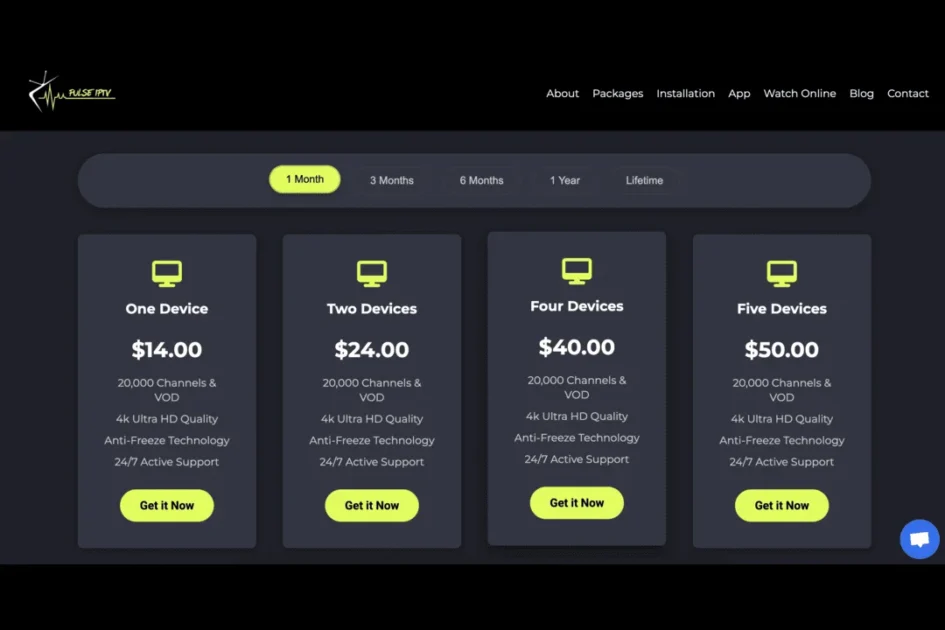
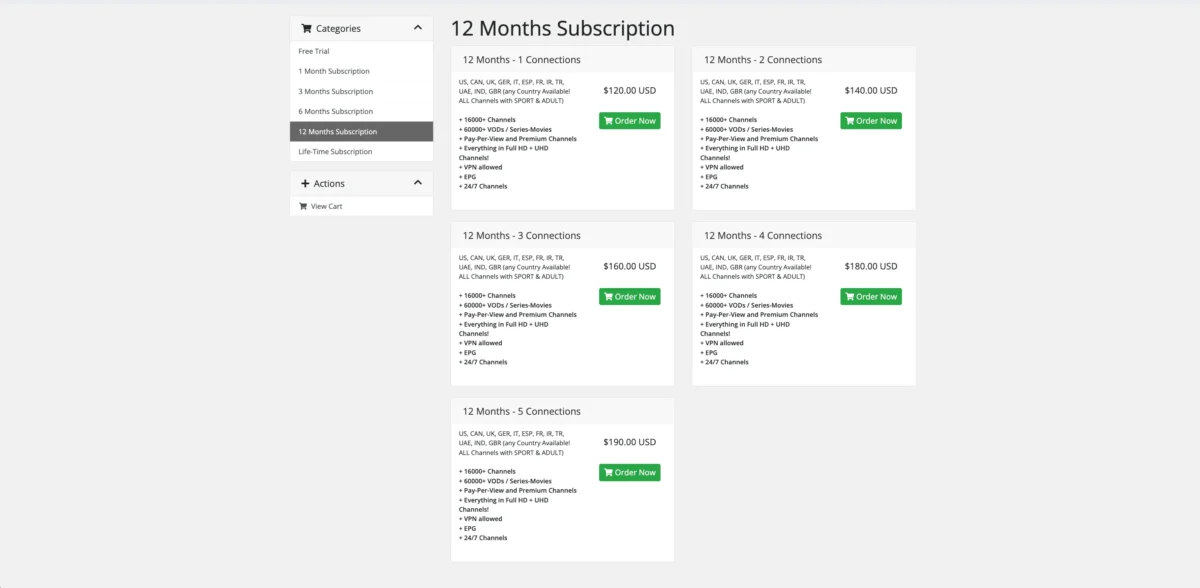
Subscription Plans Overview
The official pricing structure includes several duration options so users can choose between monthly access or longer subscriptions.
Typical plan durations available include:
- 1 Month
- 3 Months
- 6 Months
- 12 Months
- Lifetime access
For example, the standard monthly plan for one device generally starts around $15 per month, while longer plans offer different price points depending on the number of devices connected.
Each subscription tier generally includes the core features of the platform such as:
- Access to 20,000+ live TV channels
- A large movies and TV series VOD library
- HD, Full HD, and 4K streaming
- Technical support and server uptime
The main difference between plans usually comes down to the subscription duration and the number of devices that can stream simultaneously.
![]()
Multi-Device Pricing
Another aspect of the pricing model is device-based plan tiers. Users who want to stream on multiple devices at the same time can choose plans that allow additional connections.
Typical tiers include:
- 1 device connection
- 2 device connections
- 3 device connections
- 4 device connections
- 5 device connections
This type of structure is useful for households where several people want to stream simultaneously on different screens. For example, one user might watch content on a smart TV while another streams on a tablet or mobile device.
All device tiers usually provide the same channel lineup and features; the difference lies only in how many devices can access the service at once.
![]()
![]()
![]()
Are There Xtreme HD IPTV Coupons?
Some IPTV platforms occasionally promote discount offers or seasonal promotions. However, when reviewing the official pricing structure of Xtreme HD IPTV, the plans are already listed with fixed subscription tiers directly on the pricing page.
Because of this, users typically subscribe through the official website rather than relying on third-party coupon codes or affiliate promotions.
For the most accurate plan details, users should review the Xtreme HD IPTV pricing page for the latest subscription options.
This ensures users are viewing accurate plan details and subscribing through the correct source.
Pros and Cons of Xtreme HD IPTV
When evaluating any IPTV service, it helps to look at both the advantages and the potential limitations. IPTV platforms offer a different experience compared to traditional cable or satellite TV, so understanding the trade-offs can help users decide whether the service fits their needs.
Like many modern IPTV platforms, Xtreme HD IPTV focuses on providing a large content library and flexible streaming across devices. However, the experience can also depend on factors such as internet quality and proper setup.
Below is a balanced look at some commonly discussed pros and cons.
Pros
Huge channel selection
One of the most noticeable benefits is the large number of available channels. IPTV platforms like Xtreme HD IPTV provide access to 20,000+ live TV channels, covering entertainment, sports, news, movies, and international programming.
This wide range of content allows users to explore channels that may not be available through local cable providers.
4K support
Many streams are available in HD, Full HD, and sometimes 4K resolution, depending on the source channel and internet speed. High-resolution streaming improves the viewing experience, especially on large smart TVs or home entertainment systems.
Multi-device compatibility
Another advantage is device flexibility. IPTV services can typically run on several devices at the same time, including Firestick, smart TVs, Android devices, iPhones, and desktop computers.
This allows users to watch content on different screens without being limited to a single TV setup.
Fast activation
IPTV subscriptions are usually activated quickly after purchase. Once users receive their login credentials, they can enter them into a compatible IPTV player and begin streaming without waiting for physical equipment or installation appointments.
Cons
Requires stable internet
Since IPTV streams content through the internet, a stable and reasonably fast connection is necessary for smooth playback. Slower or unstable connections may lead to buffering or lower video quality.
For the best experience, users typically rely on broadband connections that can support HD or 4K streaming.
Setup may require an IPTV player
Unlike traditional cable services, IPTV platforms often require users to install a compatible IPTV player app before they can access their subscription.
This setup process usually involves entering login credentials such as server URL, username, and password. While the process is generally straightforward, new users may need to follow installation guides when setting up the service for the first time.
Who Should Use Xtreme HD IPTV?
IPTV services appeal to a wide range of viewers because they provide flexibility that traditional television services often lack. Instead of being tied to a fixed cable package, users can access large channel libraries and on-demand content through internet streaming.
Platforms like Xtreme HD IPTV are especially useful for viewers who want more control over what they watch and the devices they use. Because the service supports multiple devices and a large selection of channels, it fits different viewing habits.
Below are some of the types of users who typically benefit the most from IPTV platforms.
Sports Fans
Sports viewers are often among the first to explore IPTV services. Traditional cable packages may not always include every sports network or international broadcast.
IPTV platforms often provide access to a wide range of sports channels from different regions. This can include football, basketball, cricket, combat sports, and other live events.
For fans who follow multiple leagues or international competitions, having a large channel library can make it easier to keep up with games without relying on several separate subscriptions.
International Channel Viewers
Another group that frequently turns to IPTV services is viewers who want international television channels.
Cable providers often focus mainly on local or regional content. IPTV platforms, however, typically include channels from many countries. This allows viewers to watch news, entertainment, and cultural programming from their home regions or from other parts of the world.
For expatriates or multilingual households, access to international channels can be a major advantage.
Cord-Cutters Replacing Cable
Many viewers today are looking for ways to move away from traditional cable television. Rising subscription costs and bundled channel packages have pushed some households to explore streaming alternatives.
IPTV platforms provide a way to access live television and on-demand content through an internet connection. Services such as Xtreme HD IPTV are often considered by cord-cutters because they combine live channels, movies, and series within a single platform.
For users who prefer internet-based streaming over conventional cable installations, IPTV offers a more flexible approach to watching television.
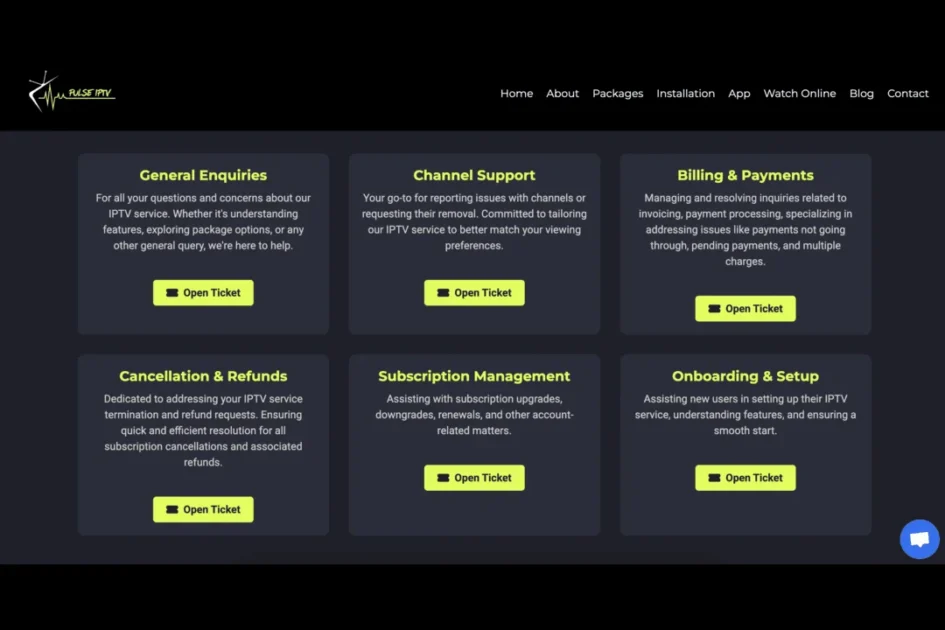
Frequently Asked Questions About Xtreme HD IPTV
Is Xtreme HD IPTV worth it?
In many Xtreme HD IPTV review discussions, users highlight the platform’s large channel lineup, stable streaming quality, and broad device compatibility. Compared to traditional cable or satellite packages, Xtreme HD IPTV often offers greater channel variety and on-demand content at a more flexible subscription cost.
Does Xtreme HD IPTV have an app?
Many users searching for the Xtreme HD IPTV app expect a standalone application. Instead, Xtreme HD IPTV typically works through compatible IPTV player apps. These players run on devices such as Firestick, Android TV, Smart TVs, smartphones, and tablets, allowing users to stream channels and on-demand content across multiple devices.
How do you login to Xtreme HD IPTV?
The Xtreme HD IPTV login process usually involves entering credentials into a compatible IPTV player. Users receive a server URL, username, and password that connect the player to the service. Xtreme hd iptv login can also be configured using Xtream Codes API or an M3U playlist link.
Are there Xtreme HD IPTV coupon codes?
When searching for an Xtreme HD IPTV coupon, users may find occasional promotions or reseller offers online. However, most subscriptions for Xtreme HD IPTV are purchased directly through standard plan tiers listed on the official website, where pricing and subscription durations are already clearly defined.
What do Reddit users say about Xtreme HD IPTV?
Searches for Xtreme HD IPTV reddit often lead to community discussions about streaming performance and channel availability. Many users mention the large content library and device flexibility, while some discussions focus on setup tips or IPTV player configuration. Overall, Xtreme HD IPTV reddit threads typically reflect mixed but informative community experiences.
Is Xtreme HD IPTV legal?
The legality of Xtreme HD IPTV depends on regional broadcasting laws and how IPTV services are used. IPTV technology itself is legal because it simply delivers television through internet protocols. However, viewers should always check local regulations and ensure they access streaming services through legitimate providers.
What internet speed is required for Xtreme HD IPTV?
To stream Xtreme HD IPTV smoothly, a stable broadband connection is important. Most IPTV users recommend at least 10 Mbps for HD streaming, while 25 Mbps or higher provides better performance for Full HD or 4K content. Faster internet speeds also help reduce buffering during live broadcasts.
Related Streaming Guides
Best Kodi Addons for Streaming
Safe Kodi Add-ons for Streaming
How to Install the Exodus Kodi Addon