
Kodi, a popular open-source media player, allows users to stream and enjoy a wide range of content. While Kodi provides a vast library of official add-ons, some users may want to explore additional sources for content. To do so, you’ll need to enable Unknown Sources on Kodi. In this step-by-step guide, we’ll walk you through the process in simple terms, making it easy for anyone to follow.
This guide is made to help you on different devices like Firestick, Android, iPhone, MacBook, and Samsung TV. It gives easy-to-follow instructions so you can use these devices without any trouble. Whether you’re on your TV, phone, or computer, this guide is here to simplify things.
Benefits of Enabling Unknown Sources on KODI
Turning on Unknown Sources on Kodi opens up a lot of cool stuff and makes your media streaming experience way better. It lets you add extra features and content by allowing installations from outside sources. This means you can customize Kodi to fit what you like, try new things, and find different shows and movies. It’s an easy process with big benefits, letting you stay on top of the latest and coolest stuff in the Kodi community.
Best VPN For KODI
Before you start setting up your devices, consider using a VPN for extra security and benefits. A VPN protects your online activities by encrypting them and routing them through a remote server, making it tough for your internet service provider or advertisers to track what you do online.
What’s more, a VPN can help you get around location-based restrictions. For example, if you want to access content from a streaming service available only in a specific country, a VPN can connect you to a server there, letting you unlock the content.
For a VPN service, I recommend IPVanish. It works well with various devices like Firestick, Windows, Mac, iOS, Android, Linux, and routers, not just Firestick. IPVanish has over 3000 servers in 94 countries, providing fast and reliable connections globally.
IPVanish keeps your data secure with strong encryption and follows a strict no-logs policy, meaning it doesn’t store any records of your online activities. Apart from boosting online security and privacy, IPVanish also allows you to access geo-restricted content, including various streaming services that may not be available in your area.
How to Enable Unknown Sources on Kodi
Now that you know why it’s important to Enable Unknown Sources on Kodi, you might be wondering how to do it. Let’s get started with the steps. Pay close attention to the guide, because if you miss any step, you won’t be able to Enable Unknown Sources on Kodi. Let’s begin the process!
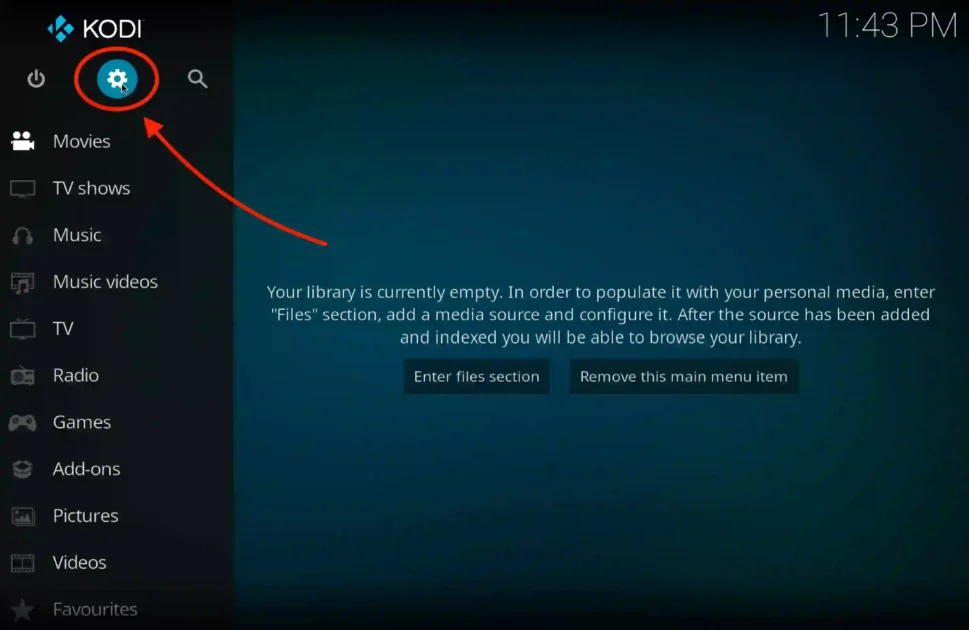
Open Kodi on your device.
Navigate to the Settings menu. (Usually represented by a gear icon.)
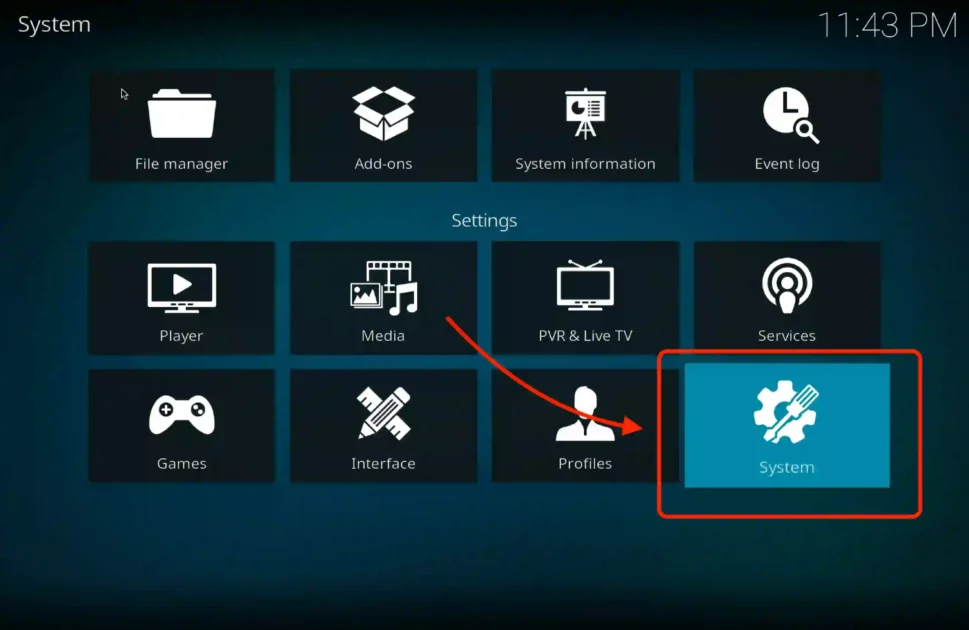
Select “System” if you’re using Kodi 17.6 or earlier, or “System Settings” if you’re using Kodi 18 or later.
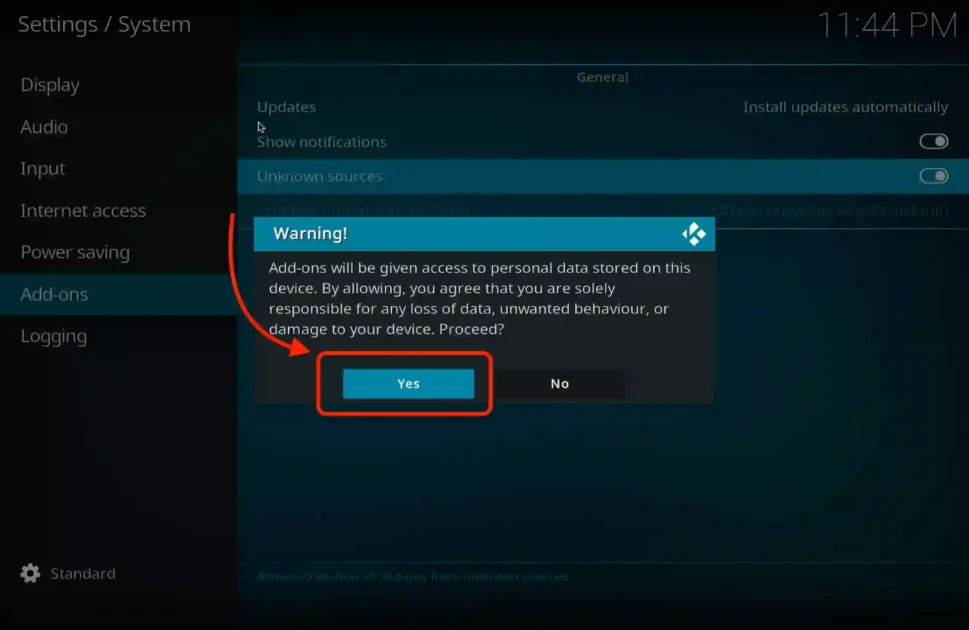
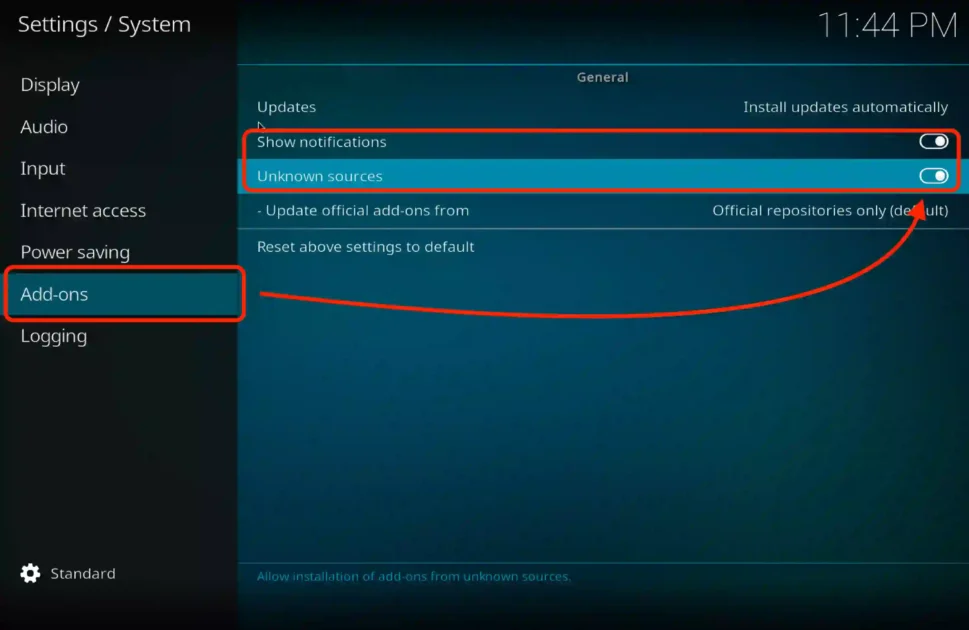
Click on “Add-ons” in the left-hand menu.
Toggle the switch next to “Unknown Sources” to enable it.

A warning pop-up will appear. Click “Yes” to confirm that you understand the risks associated with enabling Unknown Sources.
You have now successfully enabled Unknown Sources on Kodi.
[su_box title=”Get Kodi Add-Ons” box_color=”#40A7DD”]Now that you’ve turned on Unknown Sources on Kodi if you’re wondering how to add cool stuff, just visit our Add-ons section. There, you’ll find lots of things you can add to Kodi. Click the button below to check out the add-ons easily.[/su_box]
How to Disable Unknown Source on Kodi
Making changes to your Kodi is a piece of cake, and turning off Unknown Sources is a breeze too. I’ll walk you through the steps to customize your Kodi the way you want.
Open Kodi on your device.
Navigate to the Settings menu (usually represented by a gear icon).
Select “System” if you’re using Kodi 17.6 or earlier, or choose “System Settings” for Kodi 18 or later.
Click on “Add-ons” in the left-hand menu.
Toggle the switch next to “Unknown Sources” to disable it.
Unknown Sources are now disabled on Kodi.
Frequently Asked Questions (FAQ)
We’ve put together some simple answers to common questions, making your Kodi experience a breeze. Let’s get started with the basics and make your Kodi journey smooth and enjoyable!
Q1: What are Unknown Sources in Kodi?
A1: Unknown Sources are like extra places where you can get cool stuff for Kodi, but you must be careful.
Q2: Why do I need to enable Unknown Sources on Kodi?
A2: Enabling it lets you get more fun stuff for Kodi, but be cautious; some places can be a bit tricky.
Q3: How do I turn on Unknown Sources?
A3: It’s easy! We’ve got simple steps. Click around in your Kodi settings, and we’ll show you how.
Q4: Is it safe to enable Unknown Sources on Kodi?
A4: Mostly yes, but stick to trusted places. Avoid shady spots to keep your Kodi safe and sound.
Q5: Can I get in trouble for using Unknown Sources on Kodi?
A5: Not if you’re careful! Stick to well-known places and have fun, but avoid the sketchy stuff.
Q6: What if I can’t find the Unknown Sources option on Kodi?
A6: Don’t worry! Look around in your settings; it might be hiding. Check the guide or ask friends.
Q7: Why won’t Unknown Sources stay on after I enable it?
A7: Double-check your device and settings. If it keeps turning off, something else might be blocking it.
Q8: What if I get an error message when enabling Unknown Sources on Kodi?
A8: Read the message and check online for help. There’s usually a fix for these things.
Q9: Can I ask for help if something goes wrong with Unknown Sources?
A9: Absolutely! Talk to friends online or ask for Kodi’s support. They’re there to help sort things out.
Q10: Should I reinstall Kodi if things get too messy?
A10: Only if nothing else works. It’s like a last resort. Ask for help before going for the big reset!
Conclusion
Adjusting settings in Kodi, such as turning on Unknown Sources on Kodi, is a simple process. This guide has taken you through the steps to customize your Kodi experience. Now that you’re familiar with these adjustments, feel free to explore and make your Kodi setup comfortable and secure. Enjoy your personalized media streaming journey!
7 thoughts on “Enable Unknown Sources on Kodi: Step-by-Step (march 2026)”