
This tutorial will guide you through the process of unwanted Delete Addons from Kodi. Whether you’re using a FireStick, Android TV box, PC, or Smart TV, these instructions will help you easily manage and clean up your Kodi setup.
Kodi is a versatile, open-source software that grants users access to a vast array of content, including movies, TV shows, music, and videos. Originally developed by Microsoft for the Xbox in 2002, Kodi has since evolved to become compatible with nearly every major operating system.
Today, Kodi is widely used across various devices, including the FireStick. It allows FireStick users to stream content from sources that might not otherwise be accessible or supported by the device.
While Kodi is an excellent multimedia platform, its true potential is unlocked through the use of addons. These addons enhance Kodi by providing additional tools, enabling content streaming, customizing the interface, and even offering remote control options.
Why You May Need to Delete Kodi Addons
While Kodi addons are essential for enhancing your streaming experience, there are various reasons why you might need to delete them. For instance, if an addon fails to update properly, uninstalling and reinstalling it might resolve the issue.
Moreover, having too many addons installed can negatively impact the performance of the Kodi app on your FireStick. You might notice slower processing speeds or experience frustrating buffering during streaming.
Governments and ISPs worldwide actively monitor online activities. If you’re found streaming copyrighted content on your device, you could face serious legal consequences.
Currently, your IP address, 2400:adc3:12c:e600:bcd3:880f:e0ab:5a62, is visible to everyone. To protect your privacy and ensure your movie-watching experience remains safe, I highly recommend using a reliable VPN to hide your identity.
I personally use NordVPN, which is known for being one of the fastest and most secure VPNs in the industry. It’s easy to install on any device, including Amazon Fire TV Stick, smartphones, PCs, macOS, iOS, and more.
NordVPN offers a 30-day money-back guarantee, so if you’re not satisfied with their service, you can request a full refund. They also have a special offer where you can get a discount on the annual plan.
Another reason to delete addons is the limited storage space on the FireStick, which only comes with 8GB of storage. Installing numerous addons can quickly eat up this space, especially if you’re not actively using them, leading to unnecessary clutter.
Whatever your reason for wanting to Delete Addons from Kodi, this guide will walk you through the process. Additionally, you’ll learn how to delete the data and cache files left behind in the Kodi directory by the addons you uninstall.
How to Easily Delete Addons From Kodi
Delete Addons from Kodi on FireStick (or any other device) is easier than you think! Just follow these simple steps, and you’ll be done in no time.
Method 1: Quick Uninstall by Category
If you already know where your add-on is located, this method will help you remove it quickly.
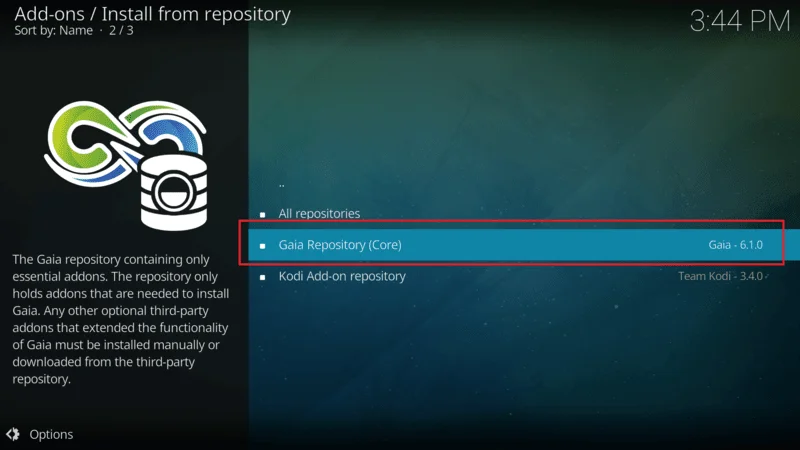
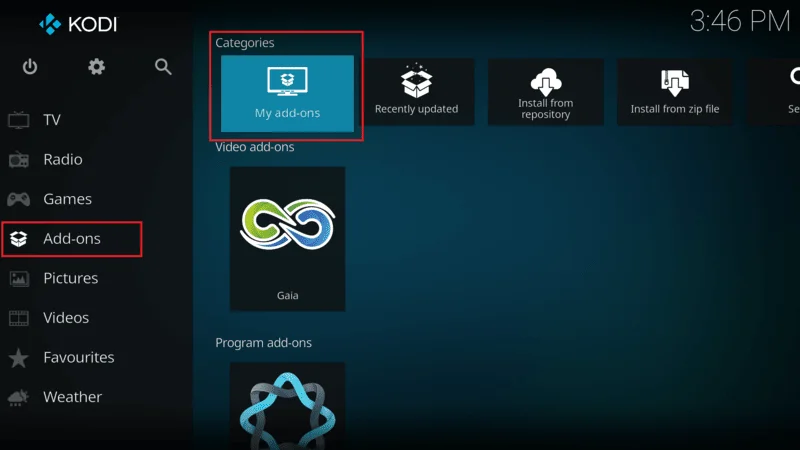
Open Kodi and go to the Add-ons section from the menu on the left you’ll see different categories for your add-ons. Choose the category where the add-on you want to remove is listed.

Once the add-ons from that category are displayed on the right, scroll to the one you want to delete.
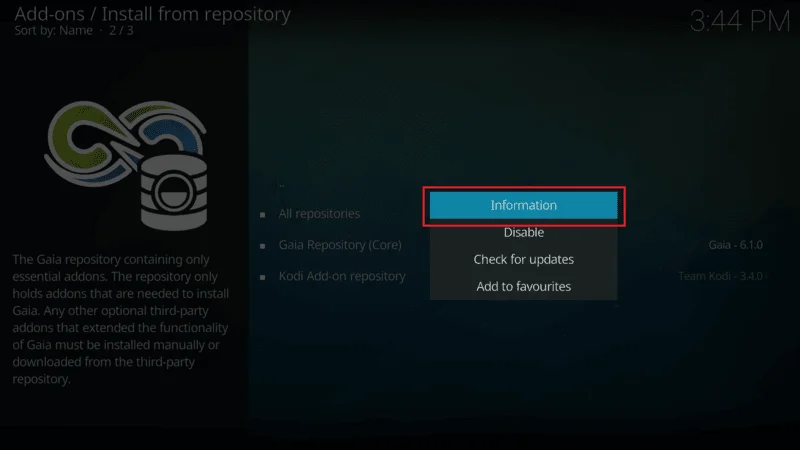
Press and hold the select button on your remote (the big round button in the middle) for about 3 seconds. Then, choose Information from the pop-up menu.
On the next screen, you’ll see the add-on details. Just click Uninstall in the bottom right.
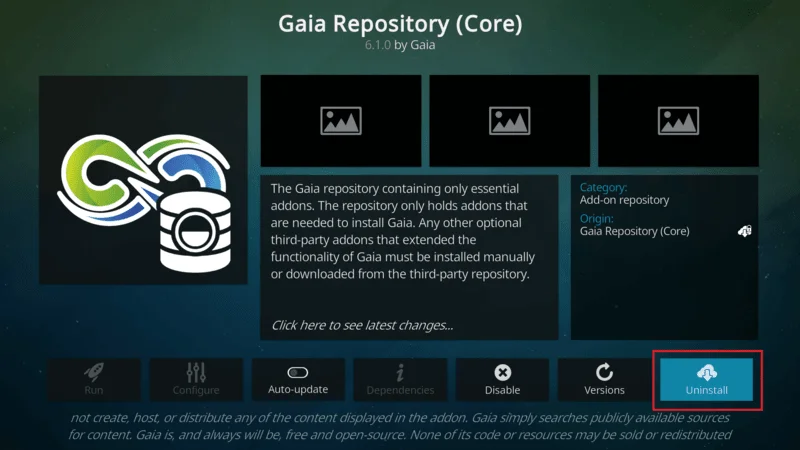
A confirmation message will pop up—simply hit Yes to finalize the removal.

And that’s it! Your Kodi add-on will now be uninstalled from your FireStick or any other device where you’re using Kodi.
Method 2: Multiple Delete Addons from Kodi in One Go
If you have several Kodi add-ons scattered across different categories and want to save time, this method is for you. It allows you to uninstall multiple add-ons without needing to go category by category. Here’s how to Delete Addons from Kodi
Open Kodi and go to Add-ons from the menu on the left In the list of categories, select My add-ons.
Next, choose All.

You’ll now see a complete list of all the add-ons installed on your Kodi app. To remove one, simply scroll to the add-on, press and hold the select button on your remote, and select Information from the menu that appears.

The add-on’s details will pop up. Just hit Uninstall in the bottom right.

Confirm the action by selecting Yes when prompted.

Repeat this process for every add-on you want to remove. This method helps you quickly clean up your Kodi app without going through each category individually.
Method 3: Clear All Kodi Add-ons at Once by Resetting Kodi Data
If you want to remove all your Kodi add-ons at once, this method is for you. It involves clearing the Kodi app data, which will wipe everything from the app, including add-ons. Here’s how to do it using a FireStick:
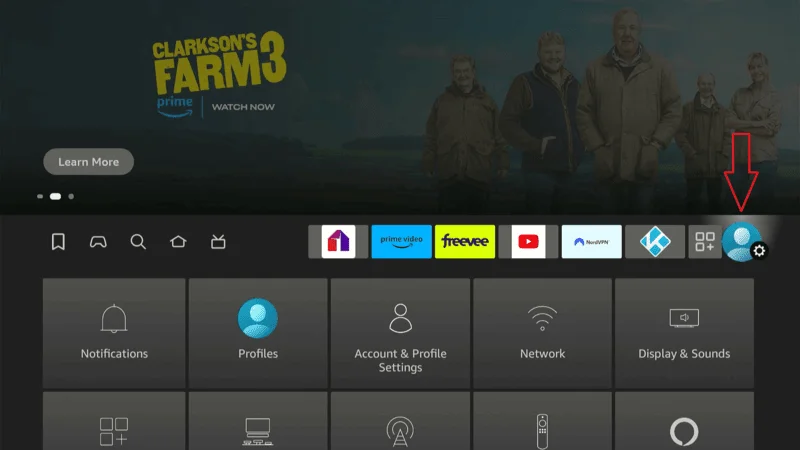
Hold the home button on your FireStick remote and select Settings.
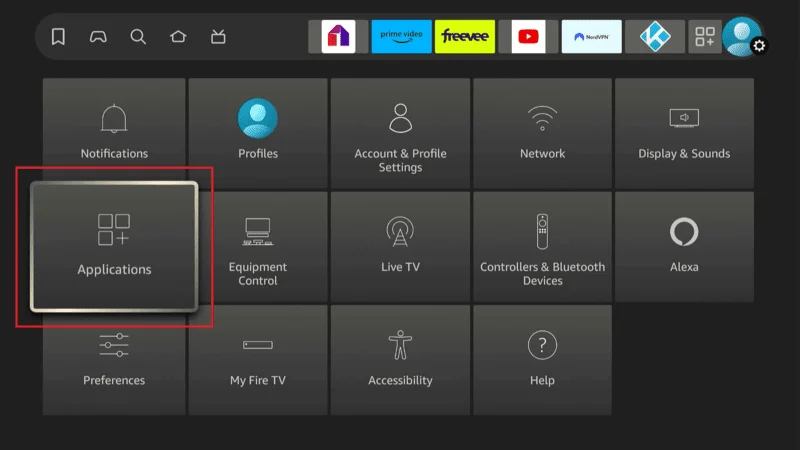
Go to Applications.
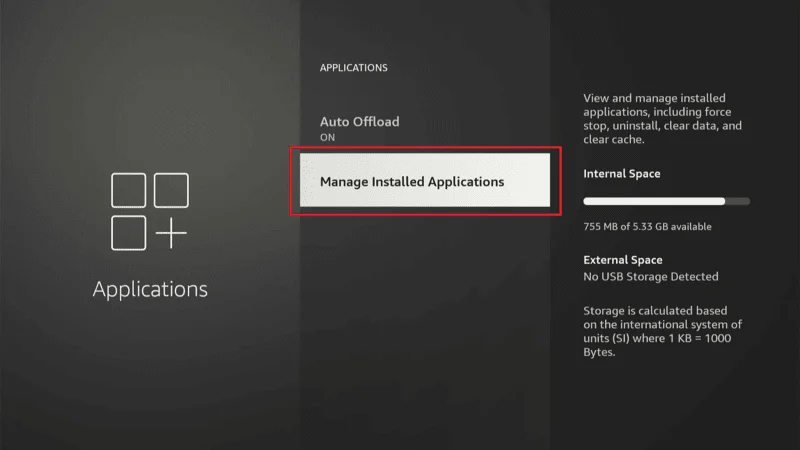
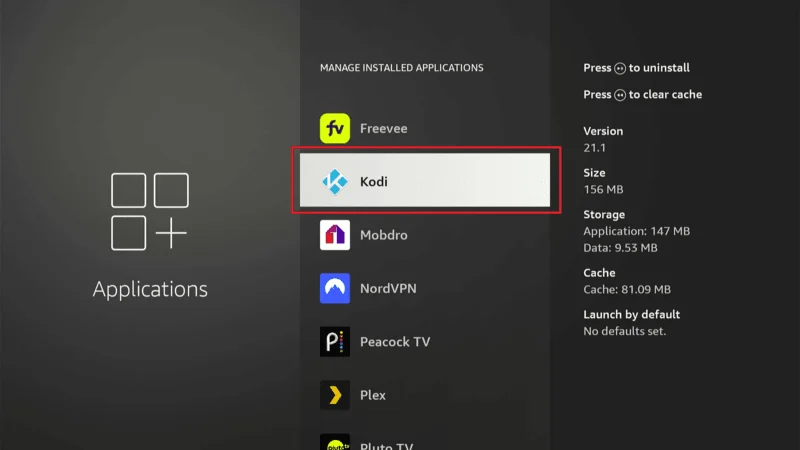
Select Manage Installed Applications.
Scroll to Kodi and select it.
Choose Clear data.
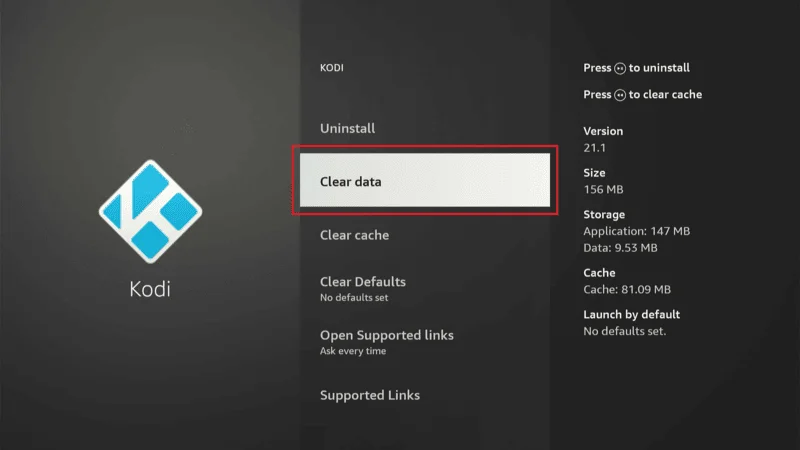
By doing this, you’ll remove all data, including all Kodi add-ons, from your FireStick.
Bonus Tip: How to Clear Kodi Addon Data
If you used Method 1 or 2 above, there might still be some leftover data from the add-ons. Although small, these files can pile up and take up unnecessary space. Here’s how to remove them:
On the Kodi home screen, go to Settings.

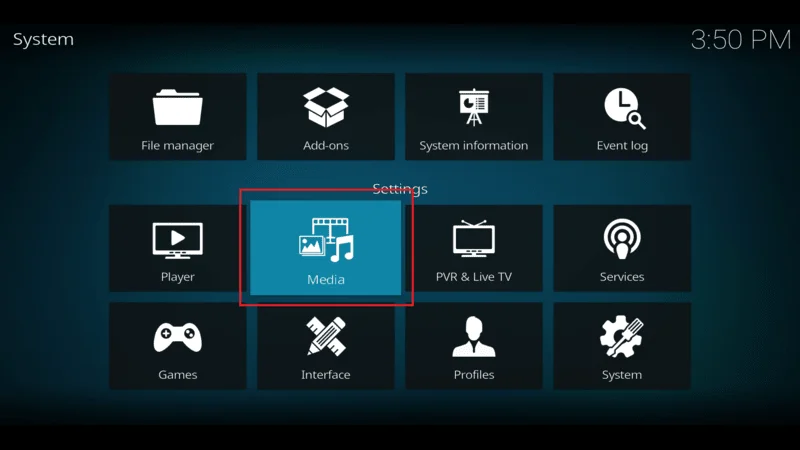
Select Media.
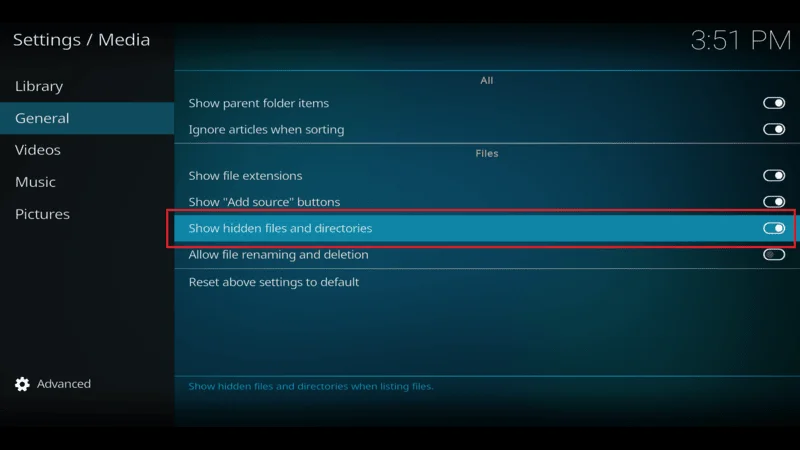
In the left-hand menu, choose General.

Turn on Show hidden files and directories or Show parent folder items, depending on your version of Kodi.
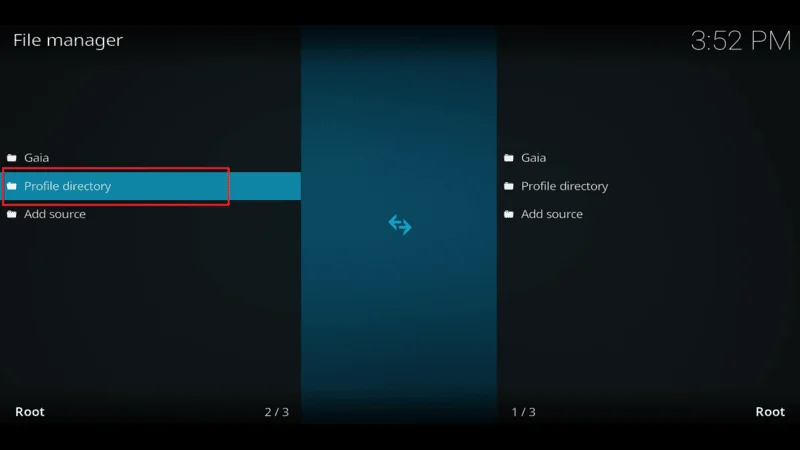
Go back to the main settings screen and select File manager.

Select Profile directory.
Choose addon_data from the list.

Navigate to the add-on data you want to remove, press and hold the select button, and then choose Delete.

A confirmation message will pop up—just select Yes to finalize the deletion.

By following these steps, you’ll be able to completely remove leftover data from any Kodi add-ons you’ve deleted.
Frequently Asked Questions (FAQs)
Kodi is a popular media platform that allows users to install various add-ons for streaming content. However, there are times when you may want to Delete Addons from Kodi to clean up your device or free up space.
Below are some frequently asked questions to help guide you through the process of Delete Addons from Kodi on FireStick and other devices.
Q: Why should I Delete Addons from Kodi?
A: You should remove Kodi add-ons if they’re no longer working, taking up too much space, or if you simply don’t use them anymore. Removing unused or broken add-ons can improve Kodi’s performance and free up storage on your device.
Q: What are the methods to uninstall Kodi add-ons?
A: There are three main methods:
- Method 1: Remove add-ons by category.
- Method 2: Delete multiple add-ons across all categories at once.
- Method 3: Clear all add-ons by resetting Kodi app data.
Q: Can I uninstall multiple Kodi add-ons at once?
A: Yes, you can. By using Method 2, you can uninstall several add-ons at once without going through each category individually.
Q: What happens if I clear Kodi’s data on my FireStick?
A: Clearing Kodi’s data will delete all installed add-ons, settings, and preferences. It essentially resets the app to its original state, but you will lose all your customizations.
Q: Is there leftover data after I remove an add-on?
A: Yes, some leftover data might remain. You can manually delete this data by accessing hidden folders in Kodi to free up more space.
Q: Will removing add-ons make Kodi run faster?
A: Yes, removing unused or malfunctioning add-ons can improve Kodi’s performance by reducing buffering and freeing up storage.
Q: Can I reinstall an add-on after I’ve removed it?
A: Absolutely! You can always reinstall an add-on by visiting the Kodi repository or installing it from other sources like zip files.
Q: Will clearing Kodi’s data delete my media files?
A: No, clearing Kodi’s data only removes add-ons and settings within the app. Your media files stored on the device will remain safe, but you’ll need to rebuild your media library in Kodi.
Final Words
And there you have it—simple and effective methods to remove unwanted add-ons from your Kodi. While add-ons are crucial for getting the most out of Kodi, having too many can slow down performance and take up valuable space on your FireStick or other devices. It’s especially important to remove outdated or unused add-ons to keep Kodi running smoothly.
In this guide, I’ve outlined the steps to uninstall Kodi add-ons from your FireStick and other Kodi-supported devices. I hope this guide has been helpful! If you have any questions or run into any issues while following these steps, feel free to leave a comment below, and we’ll be happy to assist you.
Your article helped me a lot, is there any more related content? Thanks!
Hello There
Thanks for your feed back.
Yes there are more releted guide you can read on our side,also if you want to install addons on your Firestick or any other device here is our best guide you can find > http://kodiexpert.org/category/kodi-add-ons/