

In this article, I will guide you through the process of installing the Daddylive Kodi Addon on your device. The steps provided are applicable to all Kodi-compatible devices, such as FireSticks, Linux systems, macOS systems, computers, smartphones, and more. Additionally, I’ll provide a brief overview of the Daddylive Kodi addon towards the end of this guide to give you a better understanding of its features and functionality.
What is Daddylive Kodi Addon?
If you’re a sports enthusiast, the Daddylive Kodi Addon is likely to catch your interest. This third-party addon is hosted in the Crew Repository, one of the most well-known and widely used repositories in the Kodi community. The Daddylive addon offers two primary sections: Live Sports and Live TV.
- The Live Sports section provides access to nearly every sports channel from around the globe, ensuring you won’t miss out on your favorite games or events.
- The Live TV section features a wide array of television channels from various countries, offering diverse content beyond just sports.
Daddylive is a solid addition to any Kodi user’s collection, particularly for those who enjoy streaming live sports and international TV channels.
⚠️ Attention, Kodi Users!
Kodi Addons and builds offer unlimited streaming content, but they could also get you into legal trouble if you’re caught streaming free movies, TV shows, or sports. Currently, your IP 2400:adc3:12c:e600:bcd3:880f:e0ab:5a62 is visible to everyone. Kodi users are strongly advised to always connect to a VPN while streaming online. A good Kodi VPN hides your identity, bypasses government surveillance, geo-blocked content, and ISP throttling (which also helps in buffer-free streaming).
I personally use NordVPN, which is the fastest and most secure VPN. It is very easy to install on any device including Amazon FireStick. You get 3 months free and save 49% on its annual plans. Also, it comes with a 30-day money-back guarantee. If you are not satisfied, you can always ask for a refund.
Is Daddylive Kodi Addon Safe & Legal?
Since the Daddylive Kodi Addon comes from an unofficial source, safety is a valid concern. Unfortunately, I do not have the resources to definitively determine the addon’s safety status.
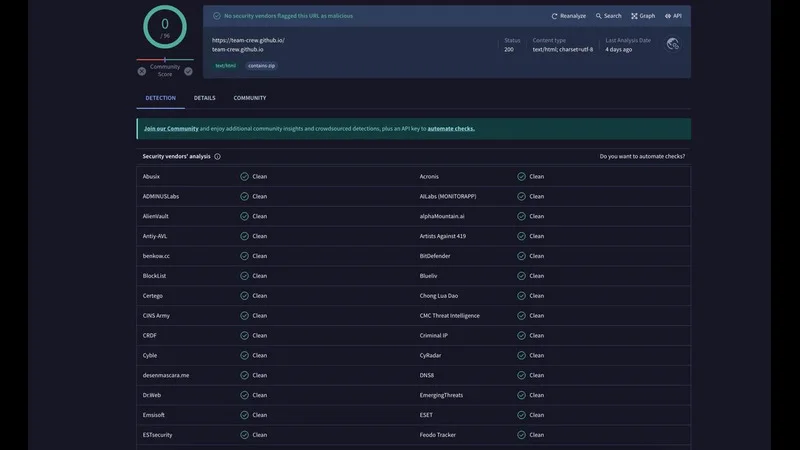
However, I did conduct a virus scan of the Crew Repository using VirusTotal, a trusted online security tool. Out of 89 security vendors, none flagged the repository as malicious, which is reassuring. The test results can be seen in the screenshot below.
Additionally, I have personally been using this addon for some time without encountering any safety issues, which suggests that it is safe to use. However, as with any third-party addon, it’s always wise to proceed with caution.
Because Daddylive is an unofficial Kodi addon, it is not legally registered, and its legal status is uncertain. I wasn’t able to find any definitive information regarding the legality of using the Daddylive Kodi Addon. It’s also worth noting that Kodi does not assume responsibility for the content you access through third-party addons like this one.
To avoid any legal complications, I recommend only streaming content that is available in the public domain. Additionally, safeguarding your privacy with a reliable VPN is a smart move. I personally rely on NordVPN to completely mask my streaming activities and maintain my online anonymity, ensuring my privacy is always protected.
Steps to Install Daddylive Kodi Addon
Installing the Daddylive Kodi addon involves four key steps:
- Enabling Unknown Sources: This step allows your Kodi to install addons from unofficial sources.
- Adding the Repository Link: You’ll need to add the URL of the repository that hosts the Daddylive addon.
- Installing the Repository: Once the repository is added, you’ll install it onto your Kodi system.
- Installing the Daddylive Kodi Addon: Finally, you’ll install the Daddylive addon from the repository.
Follow the screenshots provided with each step to ensure a smooth installation process.
Legal Disclaimer: This tutorial is intended solely for educational purposes. KodiExpert.org does not own, host, operate, resell, or distribute any streaming apps, addons, websites, IPTV services, or similar platforms. Some of the services mentioned on this page are unverified, and we cannot confirm whether they have the appropriate legal licenses to distribute the content they offer. KodiExpert.org does not verify the legality of each app or service in every region. It is your responsibility to conduct your own due diligence if you choose to use any unverified apps or services. Please ensure that you only stream content that is legally available in the public domain. The end-user is solely responsible for any media accessed.
Section 1: Allowing the Unknown sources
Since Kodi doesn’t support unofficial addons by default, we’ll need to adjust the settings before proceeding with the installation.
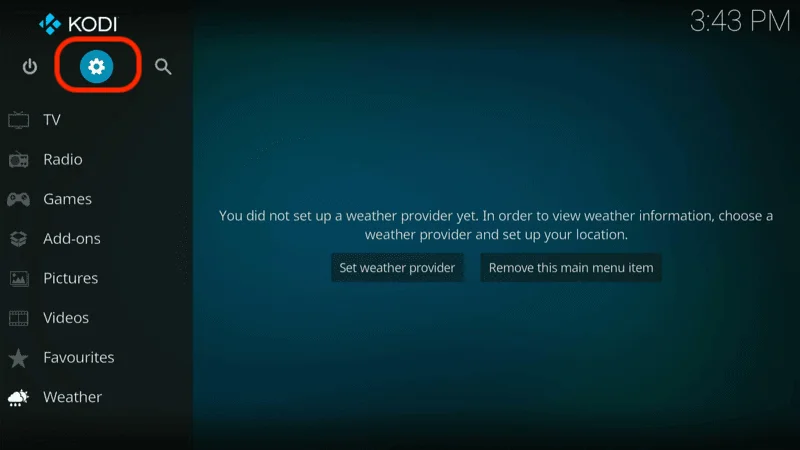
Start by clicking on the Settings Gear Icon located on Kodi’s home screen.

Select System from the options in the Settings menu.

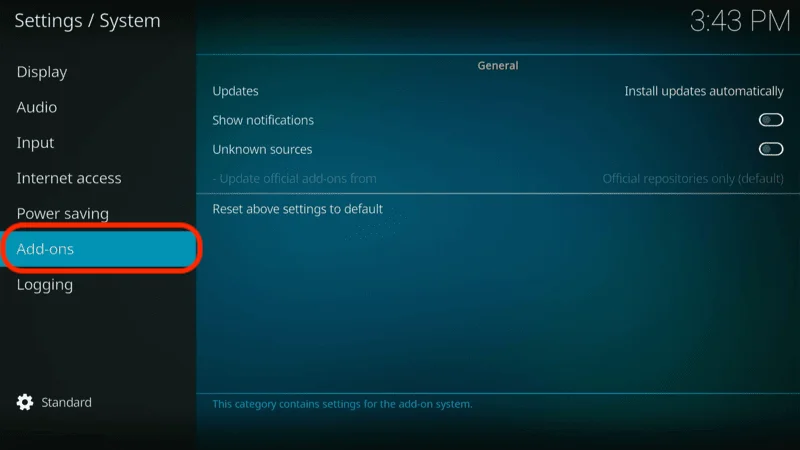
Select Add-ons from the left-hand menu, then toggle the switch to Enable Unknown Sources.
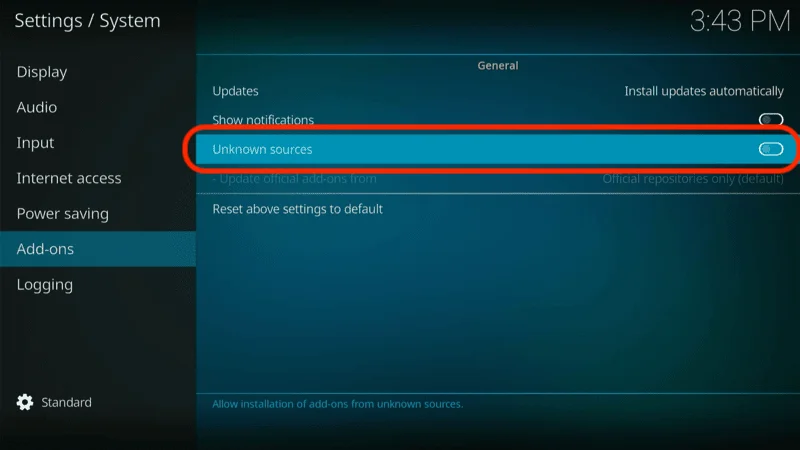
Go ahead and click on Unknown Sources. You’ll need to toggle this option ON to allow the installation of third-party add-ons.
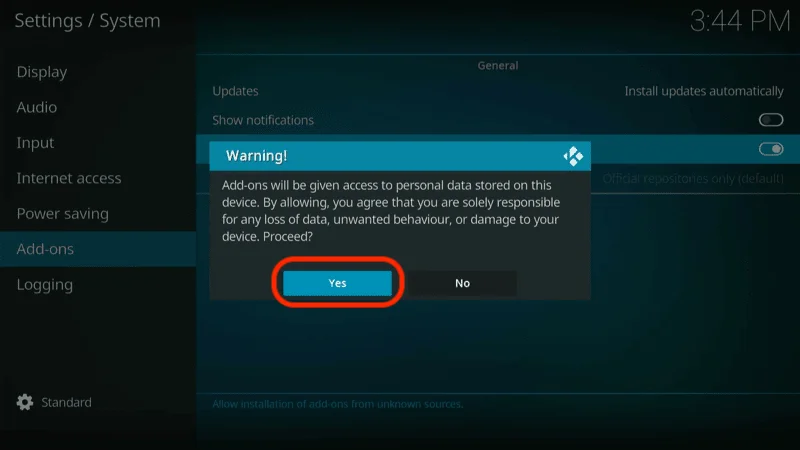
When prompted, select YES to confirm enabling unknown sources, then press the back button to return to the Kodi home screen.
Part 2: Adding the repository link
Now, let’s add the repository link to Kodi.
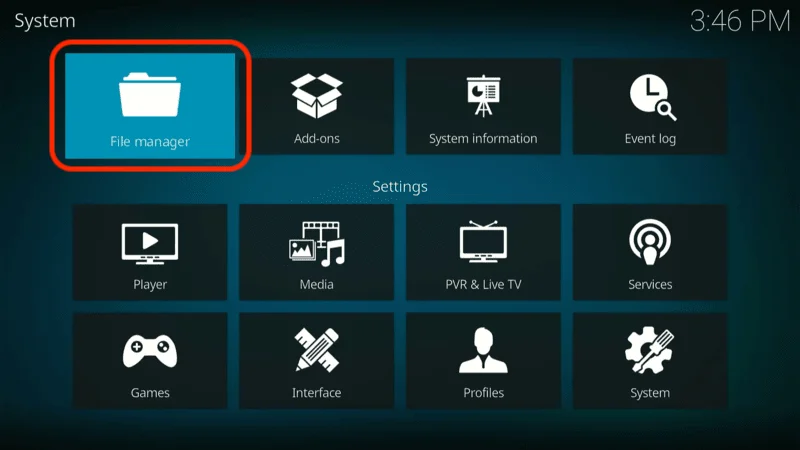
Start by clicking on the Settings icon on the Kodi home screen.
Select File Manager from the Settings menu.
Select Add source from the File Manager menu.

Click on <None> to open the field where you’ll enter the repository URL.
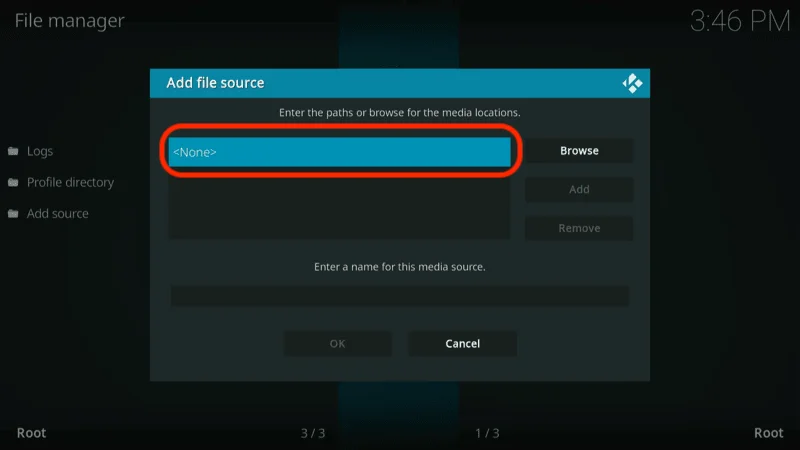
Type the following URL into the text box: https://team-crew.github.io/, and then press OK.
Note: This URL is for the Crew Repository. KodiExpert.org is not affiliated with the developers of this repository and does not own this URL.

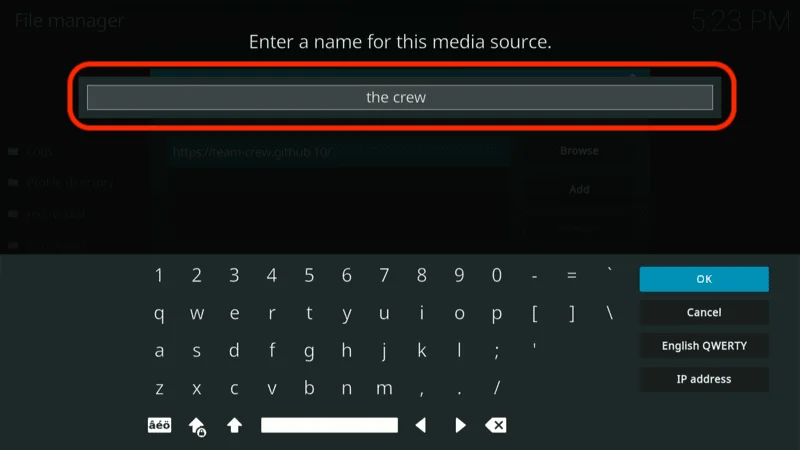
Click on the Enter a name box to name the media source.
Enter a name for the source; you can name it The Crew or choose any name you prefer. Once done, select OK. Remember this name, as you will need it later in the installation process.
After naming the source, select OK to save the repository link and name.
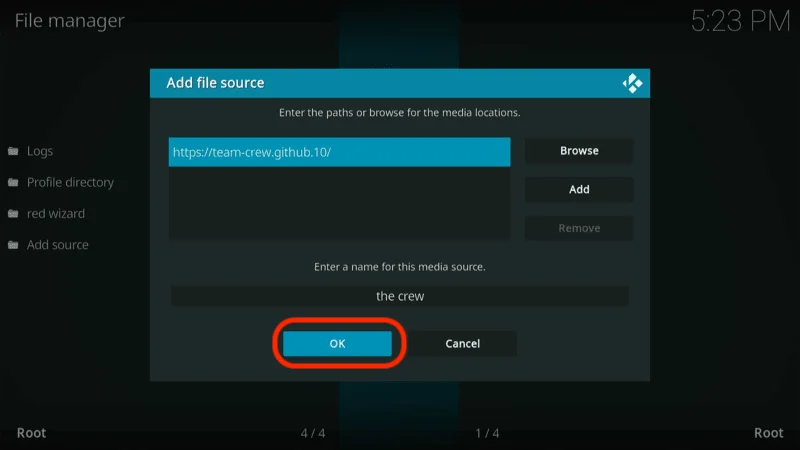
You should now see the name of the repository source displayed on the screen. Confirm that everything is correct, then press the back button to return to the Kodi home screen.
Section 3: Installation of The Crew Repository
In this section, we’ll install the Crew Repository, which hosts the Daddylive Kodi Addon.
From the Kodi home screen, click on the Settings Gear Icon.

Select Add-ons from the Settings menu.
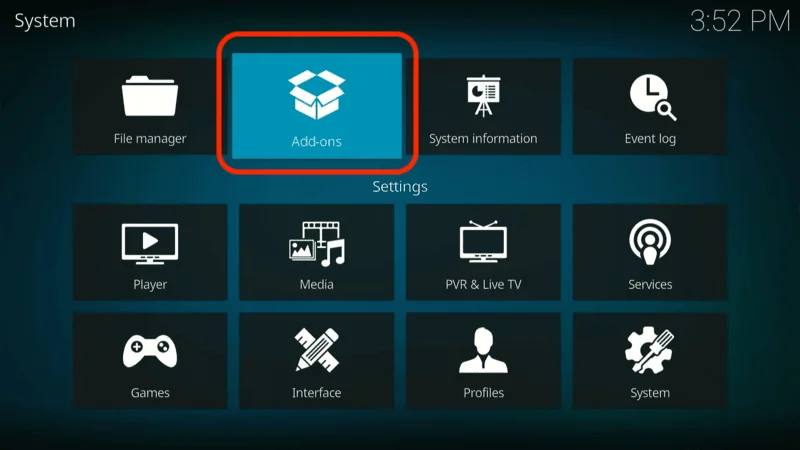
Select the option Install from zip file.
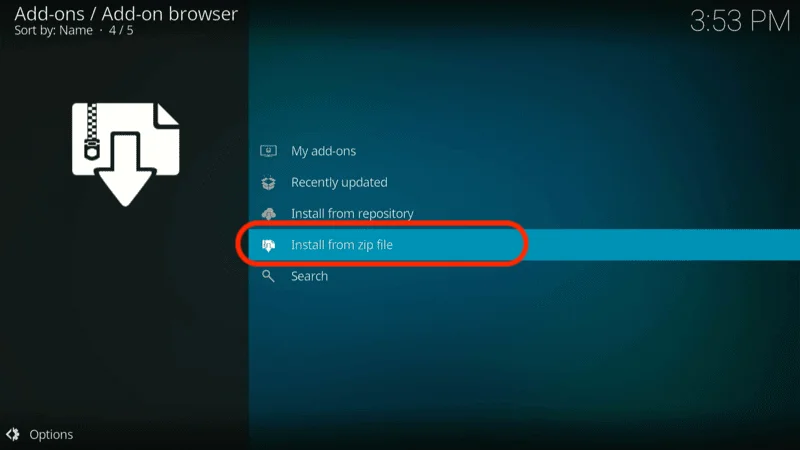
Select the repository source name you created earlier (e.g., The Crew).
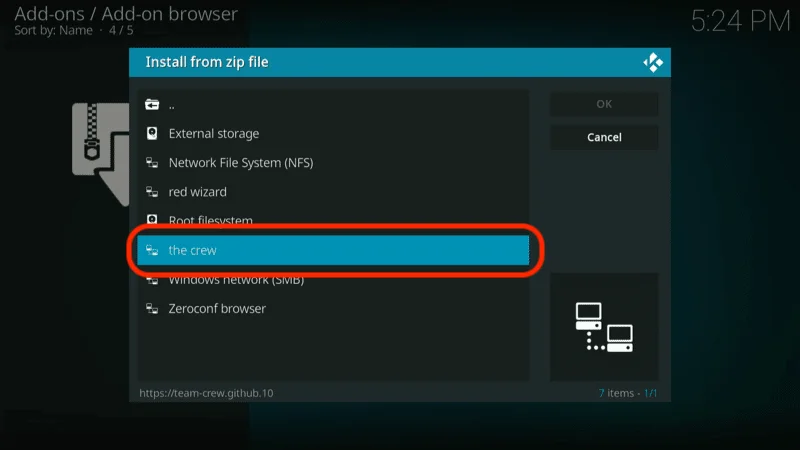
Then, click on the repository.thecrew-x.x.x.zip file to begin the installation.
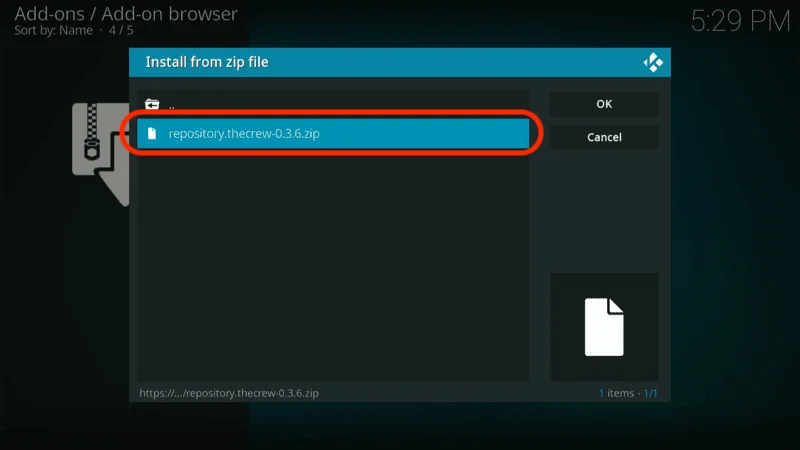
Click on the repository.thecrew-X.X.X.zip link and remain on the screen. After a few seconds, you’ll see a notification in the top-right corner confirming that The Crew Repository Add-on has been installed.

Once you see the installation success prompt, press the back button or navigate to the home screen.
Section 4: Installation of the Daddylive Kodi Addon
This part of the guide will show you how to install the Daddylive Kodi Addon. The process should take just a few minutes.
From the Kodi home screen, click on the Settings icon.
Choose Add-ons from the menu.

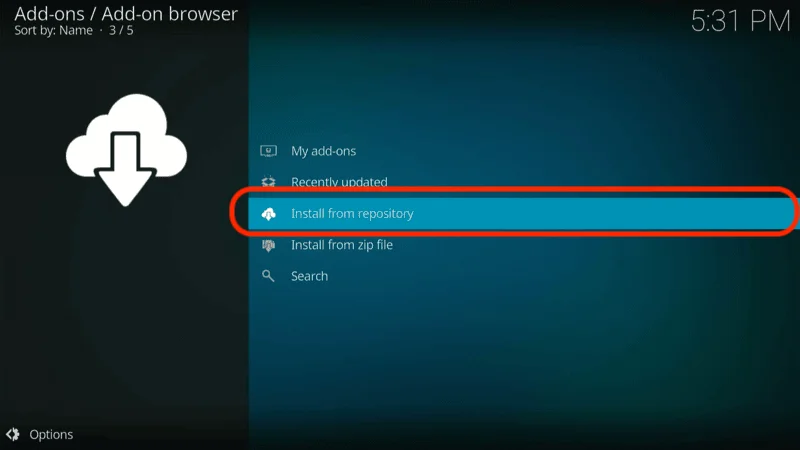
Select Install from the repository.
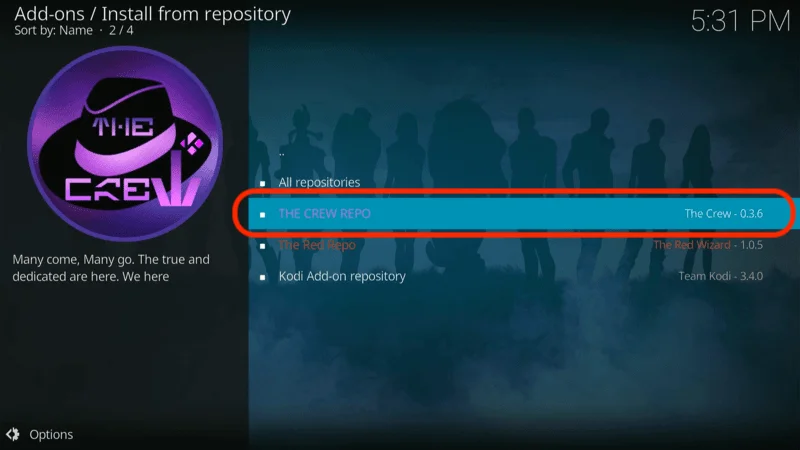
Click The Crew Repo.
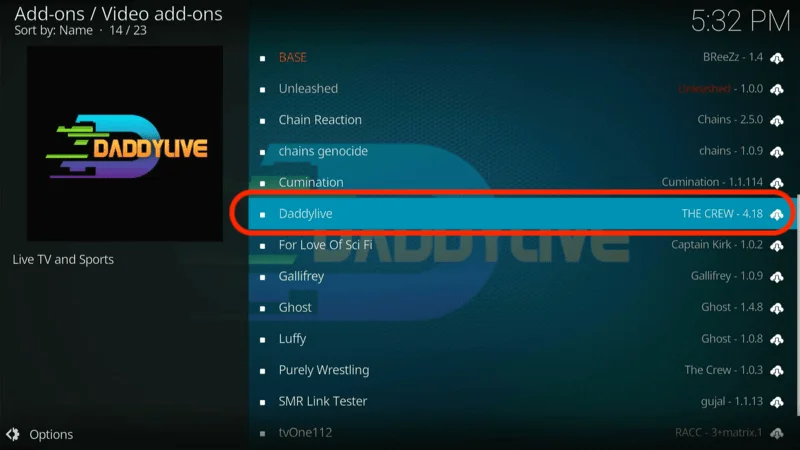
Choose Video add-ons.

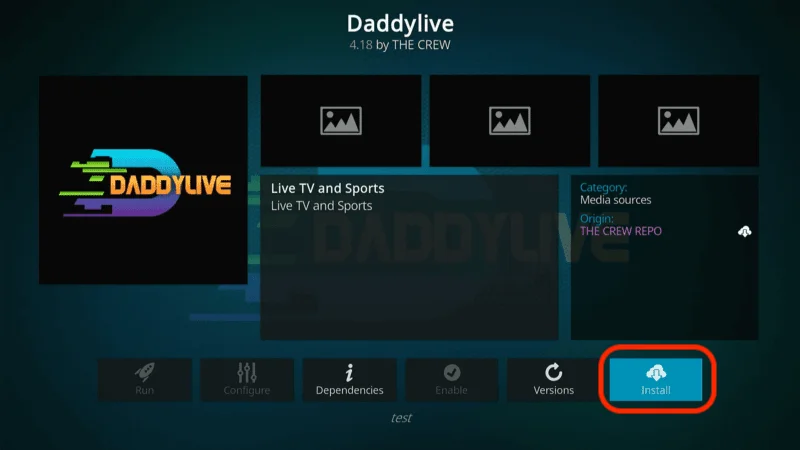
Scroll through the list and select the Daddylive addon.
Click on Install to begin the installation process.
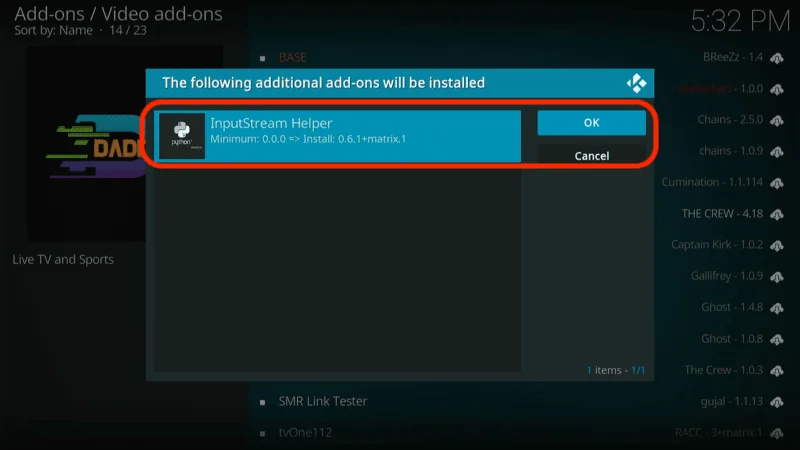
Select OK on the prompt box that appears to confirm the installation.
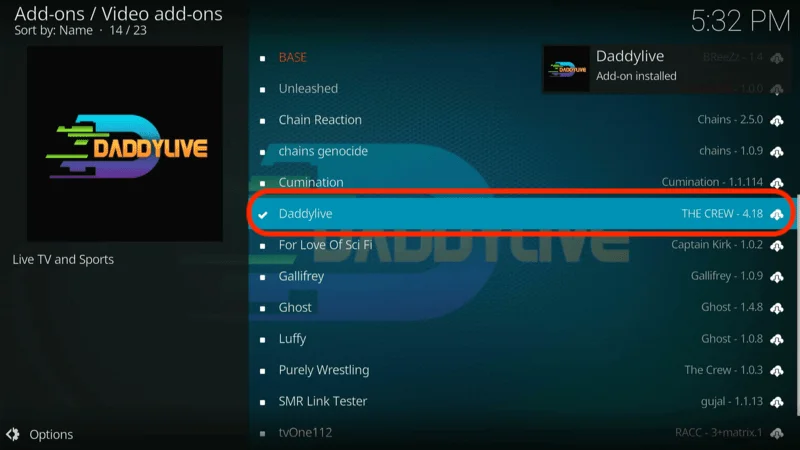
Once you see the message Daddylive Add-on installed in the top-right side of the screen, the installation process for the Daddylive Kodi Addon is complete.
With the Daddylive Kodi Addon successfully installed on your device, let’s go over how to access and use it to start streaming content.
Before you start watching with Kodi addons or builds, it’s crucial to understand that your streaming activities on Kodi are visible to your ISP and government authorities. This means that accessing copyrighted content such as free movies, TV shows, live TV, and sports could potentially lead to legal issues.
Fortunately, there is a reliable way to keep your streaming activities private. By using a good VPN for Kodi, you can ensure that your online activities are hidden from your ISP and the government. A VPN will mask your actual IP address, which is currently 2400:adc3:12c:e600:bcd3:880f:e0ab:5a62, helping you avoid online surveillance, ISP throttling, and content geo-restrictions.
I personally use and highly recommend NordVPN, which is known for being fast, secure, and compatible with all kinds of streaming apps and devices.
Before you start streaming on Kodi, it’s essential to secure your online activities with a reliable VPN. Here’s how to set up NordVPN for Kodi in three easy steps:
Step 1: Subscribe to NordVPN HERE. NordVPN offers a 30-day money-back guarantee, allowing you to try the service risk-free. If you’re not satisfied within the first 30 days, you can request a full refund.
Step 2: Click HERE to download and install the NordVPN app on your streaming device. If you’re using a FireStick, specific installation instructions are available starting with Step 4 below.
Step 3: Open the NordVPN app and click the Connect button to establish a VPN connection. Once connected, your streaming activities will be secure, providing you with privacy and access to content from around the globe.

By using NordVPN, you’ll protect your online privacy and ensure a safe and unrestricted streaming experience. Enjoy your content with peace of mind!
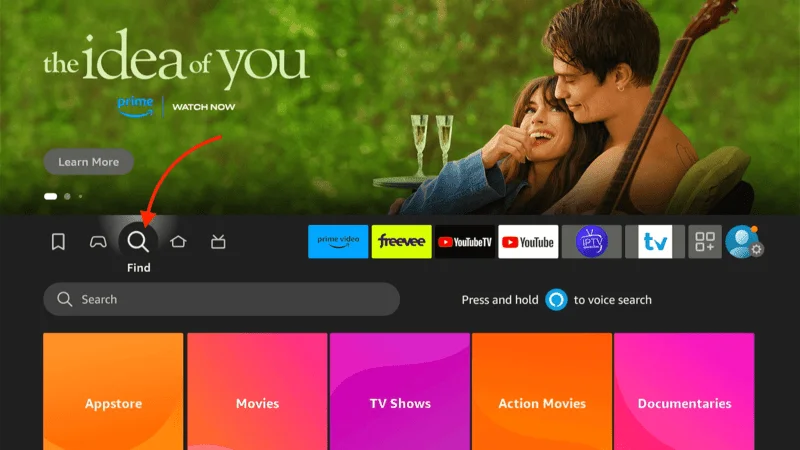
Step 4: Navigate to the home screen of your Fire TV Stick. Select “Find” from the menu.
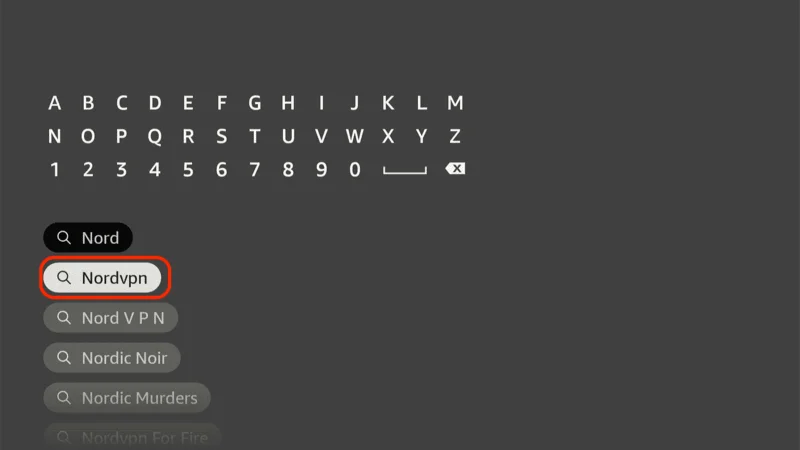
Step 5: In the search bar, type “NordVPN.”
Step 6: Click the Download or Get button

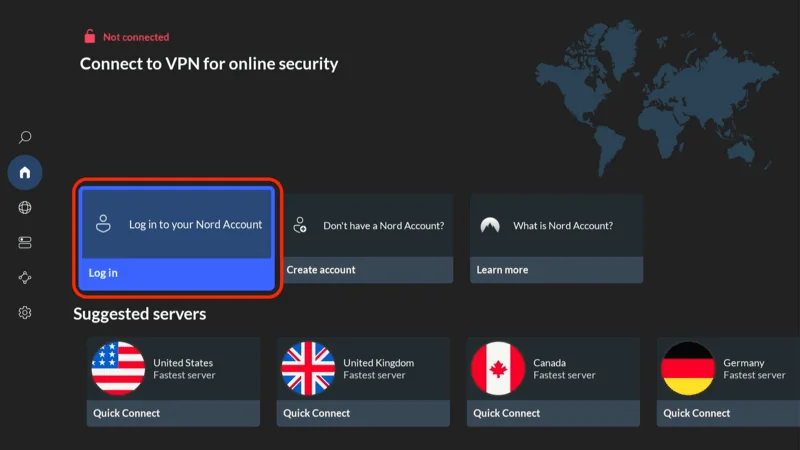
Step 7: Launch the NordVPN. Sign in using the email ID and password you used to create your NordVPN account.
Step 8: Once signed in, you can proceed to connect to a VPN server to secure your connection.

An Overview of the Daddylive Kodi Addon
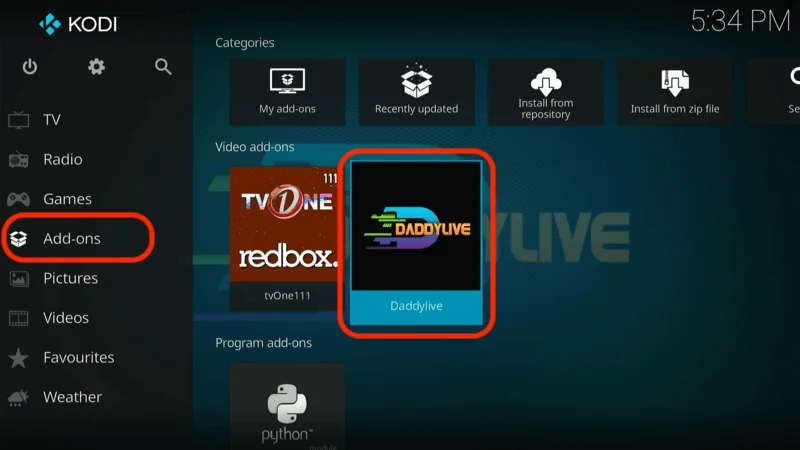
On the Kodi home screen, navigate to the left panel and select Add-ons. Click on the Daddylive thumbnail to open the addon and start exploring its content.
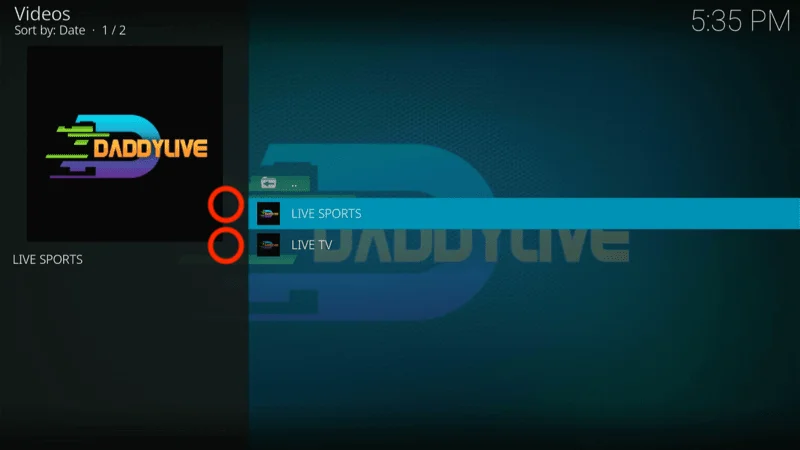
Upon opening the Daddylive Kodi Addon, you’ll be greeted with its home screen, which features two primary sections:
- LIVE SPORTS: Access a wide range of sports channels from around the world.
- LIVE TV: Explore various TV channels covering multiple genres and countries.
Within the Daddylive Kodi Addon, you can navigate through two main sections:
- LIVE SPORTS: This section provides an extensive array of sports channels, allowing you to access sports content from virtually any region worldwide.
- LIVE TV: Here, you’ll find a variety of TV channels offering diverse programming, catering to a broad spectrum of interests and genres.
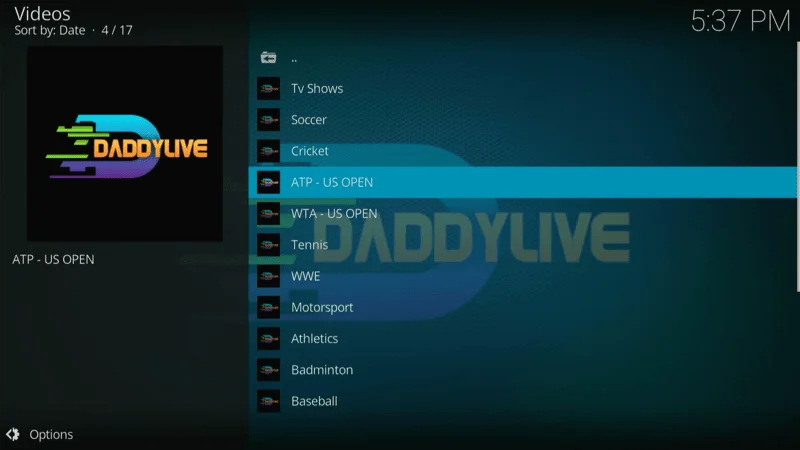
In the Live TV section of the Daddylive Kodi Addon, you can access a wide range of content including, Live Sports Watch various sports events from around the globe, Movies: Stream a selection of films, and TV Shows: Enjoy popular television series and kids’ Animation: Find cartoons and other animated content for children.

Lastly, for enhanced privacy and security while streaming, it’s crucial to use a reliable VPN service. While there are many options available, I recommend Nord VPN for its speed and robust security features.
Frequently Asked Questions (FAQs)
The Daddylive Kodi Addon is a powerful resource for streaming live sports and TV channels from around the globe. If you’re looking to enhance your Kodi experience, Daddylive is a great choice. Below are some frequently asked questions to help you get the most out of this addon.
Q: What is the Daddylive Kodi Addon?
A: Daddylive is a Kodi addon that provides access to a wide range of live sports and TV channels. It’s designed to offer a seamless streaming experience for sports enthusiasts and TV viewers.
Q: How do I install the Daddylive Kodi Addon?
A: You can install the Daddylive addon by following a simple three-part process: enabling unknown sources in Kodi, installing the JewRepo repository, and then adding the Daddylive addon. Detailed instructions are provided in the guide above.
Q: Is the Daddylive Kodi Addon safe to use?
A: While the Daddylive addon is sourced from a third-party repository, a VirusTotal scan of the repository showed no issues. For added security, it’s recommended to use a VPN, such as NordVPN, while streaming.
Q: Can I use Daddylive on any Kodi-supported device?
A: Yes, the Daddylive addon is compatible with all devices that support Kodi, including FireStick, Android TV, Windows, macOS, and more.
Q: Does Daddylive offer HD streaming?
A: The quality of streams on Daddylive can vary depending on the source. While some channels may offer HD streaming, others might be available in lower resolutions.
Q: Is Daddylive free to use?
A: Yes, Daddylive is completely free to use, giving you access to a wide variety of live sports and TV channels without any subscription fees.
Q: What content can I watch on Daddylive?
A: Daddylive offers a broad selection of live sports events and TV channels from around the world, covering everything from football and basketball to news and entertainment channels.
Q: How do I update the Daddylive addon?
A: The Daddylive addon can be updated through the JewRepo repository. As long as the repository is installed and enabled, updates should be automatically applied.
Conclusion
The Daddylive Kodi Addon is a valuable tool for accessing live sports and TV channels from around the world. By following this guide, you should now have the addon installed and ready to use on your device. If you encounter any issues or have further questions, don’t hesitate to reach out in the comments. Enjoy your streaming experience with Daddylive!
Thanks for sharing. I read many of your blog posts, cool, your blog is very good. https://accounts.binance.com/bn/register-person?ref=UM6SMJM3